Pages

Showing posts with label pasta. Show all posts

Seafood Supper In 30

This time of year I think it's easy to fall into what I like to call a "holiday food rut". Sure, we all have our holiday meal traditions, and I am in no way saying they should be ignored, changed or forgotten. They are just one of the things that make this season so special. But what I'm talking about is that most of us are so busy preparing for those holiday meals, we forget we still have to cook supper every night. So, we are either turning to leftovers from those gatherings, throwing something together at the last minute, or even eating out while we are shopping. So, today I'm sharing something that is going to change all of that.

This simple seafood supper is perfect for a busy weeknight, after a long, tiring day; but it's also pretty enough to entertain with. Maybe you've got friends coming over, or heaven forbid, you invited the boss over for a festive meal. Or, maybe you're going all Clark Griswold and your family is coming for Christmas, but staying for a week or more. Now you can feed them a delicious seafood meal without breaking the bank, or your back standing over the stove. This can be on the table in about 30 minutes and they will be so impressed!

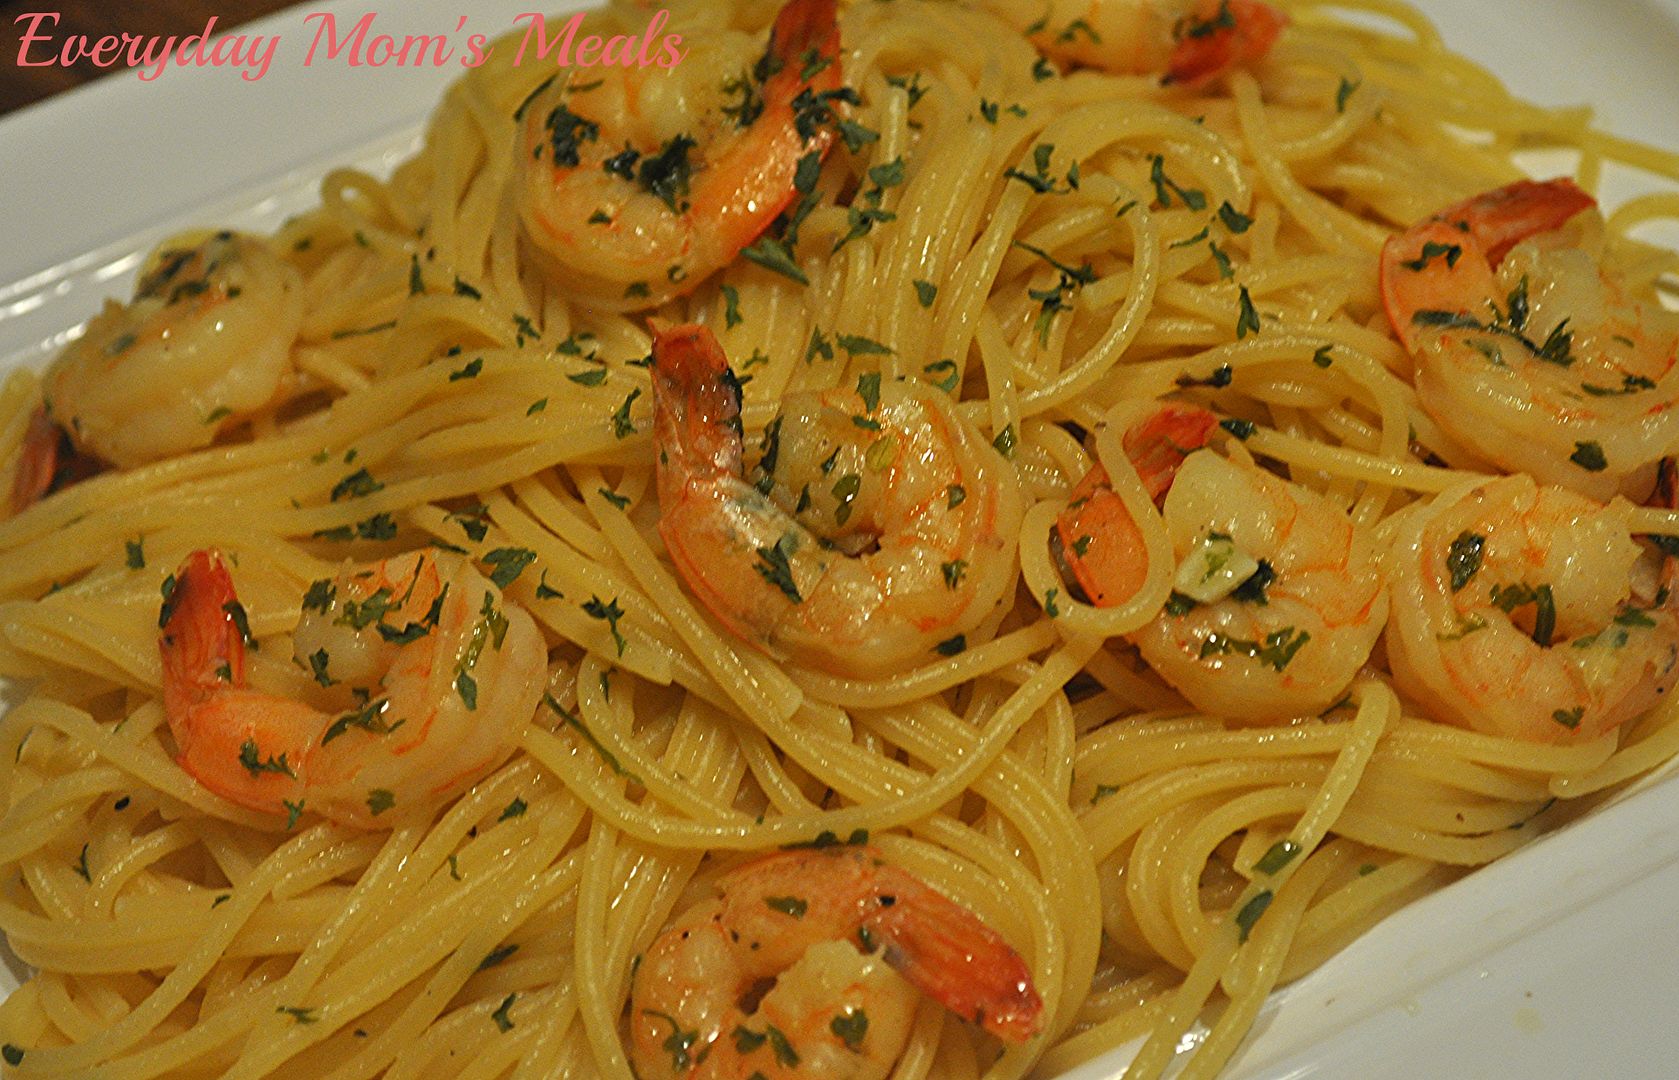
Do you use the frozen shrimp from your grocery store? Well, if you've never tried it, I strongly encourage you too. And if you're a loyal reader of EMM you've heard me talk about this before. I think it's one of the greatest bargains in stores today. Totally fresh, already cleaned, flash frozen shrimp for about $5. It's a great way to serve seafood, stretching it to feed many. Sure that 12 oz. bag wouldn't feed many if you were going to fry them up as a main dish, but taking them and using them as a component in a stir fry, or pasta, works perfectly.

So when I was thumbing through my buddy Christy Jordan's newest cookbook, I was so excited to see someone else using the frozen shrimp in a simple recipe. This pasta has intense, pleasing flavors. Tons of lemon and garlic really make the shrimp shine, and the buttery sauce clings to every inch of the pasta.

If you're trying to avoid the holiday food rut, or are simply looking to feed a crowd on a budget, this is the perfect meal for you. Impress your family, guests, and your stomach with a scrumptious seafood supper tonight!

Easy Shrimp Scampi Pasta From Come Home to Supper
1 lb. thin spaghetti or angel hair pasta
1 (12 oz.) bag frozen raw, peeled, deveined, tail on shrimp, thawed
2 tsp. lemon pepper seasoning
2-3 large cloves of garlic, minced
1 stick butter
Juice of 1 lemon, divided
2 tsp. dried parsley

Bring a large pot of water to boil. Cook pasta according to box directions. Meanwhile, in a large skillet melt butter. Add shrimp and garlic. Cook for 2 minutes until shrimp are just beginning to turn pink. Add lemon pepper seasoning. Stir. Continue to cook until shrimp are cooked through. Add half of the lemon juice. Reduce heat to low and set aside to stay warm. When pasta is cooked, drain well and transfer to a large bowl. Add parsley to shrimp sauce and stir to combine. Pour over pasta and mix well. Garnish with extra parsley.


Shared on The Country Cook Dec. 6, 2013

Shrimp at Very Good Recipes
This time of year I think it's easy to fall into what I like to call a "holiday food rut". Sure, we all have our holiday meal traditions, and I am in no way saying they should be ignored, changed or forgotten. They are just one of the things that make this season so special. But what I'm talking about is that most of us are so busy preparing for those holiday meals, we forget we still have to cook supper every night. So, we are either turning to leftovers from those gatherings, throwing something together at the last minute, or even eating out while we are shopping. So, today I'm sharing something that is going to change all of that.

This simple seafood supper is perfect for a busy weeknight, after a long, tiring day; but it's also pretty enough to entertain with. Maybe you've got friends coming over, or heaven forbid, you invited the boss over for a festive meal. Or, maybe you're going all Clark Griswold and your family is coming for Christmas, but staying for a week or more. Now you can feed them a delicious seafood meal without breaking the bank, or your back standing over the stove. This can be on the table in about 30 minutes and they will be so impressed!

Do you use the frozen shrimp from your grocery store? Well, if you've never tried it, I strongly encourage you too. And if you're a loyal reader of EMM you've heard me talk about this before. I think it's one of the greatest bargains in stores today. Totally fresh, already cleaned, flash frozen shrimp for about $5. It's a great way to serve seafood, stretching it to feed many. Sure that 12 oz. bag wouldn't feed many if you were going to fry them up as a main dish, but taking them and using them as a component in a stir fry, or pasta, works perfectly.

So when I was thumbing through my buddy Christy Jordan's newest cookbook, I was so excited to see someone else using the frozen shrimp in a simple recipe. This pasta has intense, pleasing flavors. Tons of lemon and garlic really make the shrimp shine, and the buttery sauce clings to every inch of the pasta.

If you're trying to avoid the holiday food rut, or are simply looking to feed a crowd on a budget, this is the perfect meal for you. Impress your family, guests, and your stomach with a scrumptious seafood supper tonight!

Easy Shrimp Scampi Pasta From Come Home to Supper
1 lb. thin spaghetti or angel hair pasta
1 (12 oz.) bag frozen raw, peeled, deveined, tail on shrimp, thawed
2 tsp. lemon pepper seasoning
2-3 large cloves of garlic, minced
1 stick butter
Juice of 1 lemon, divided
2 tsp. dried parsley

Bring a large pot of water to boil. Cook pasta according to box directions. Meanwhile, in a large skillet melt butter. Add shrimp and garlic. Cook for 2 minutes until shrimp are just beginning to turn pink. Add lemon pepper seasoning. Stir. Continue to cook until shrimp are cooked through. Add half of the lemon juice. Reduce heat to low and set aside to stay warm. When pasta is cooked, drain well and transfer to a large bowl. Add parsley to shrimp sauce and stir to combine. Pour over pasta and mix well. Garnish with extra parsley.

Shared on The Country Cook Dec. 6, 2013

Shrimp at Very Good Recipes
reade more... Résuméabuiyad

Soul Food Saturday #33

Good Morning! I hope ya'll had a fantastic Thanksgiving filled with family, love, memories made and yummy food! Is your fridge stuffed with leftovers? Want something to use that turkey for besides yet another sandwich? Bekki has just the answer today!


I hope that you all enjoyed your Thanksgiving and all of the wonderful things that surround us during the holidays; our families, friends, and time together. I have a huge soup addiction and the Fall and Winter are the perfect time to make big pots of the bubbly deliciousness. With all the left over turkey we all need new ways to use it up and make it stretch for a few more meals. This is just one more way. Along with my addiction to soup I have a new love for kale. It’s a peppery green leafy vegetable that is perfect in this soup. Add a few more veggies, some pasta, your remaining gobbler and voila dinner! Let’s continue our time of thanks giving, with something to warm you heart and soul. Enjoy!
 
Turkey and Kale Noodle Soup
6 c. low sodium chicken stock
3 c. carrots, sliced
1 medium onion, diced
1 orange bell pepper, chopped
3 c. cooked turkey, chopped
3 c. kale, chopped and stemmed
4 c. cooked pasta
1 tbs. olive oil
Salt and pepper to taste
 
In medium stock pot add olive oil, and onion. Cook until onions are softened. Add bell pepper, and carrots. Stir to combine. Add chicken stock and season with salt and pepper to taste. Bring to a boil and reduce to simmer. Cook until carrots are tender. Add kale, turkey and pasta. Taste for seasoning, add salt and pepper if desired. Soup is ready when kale is tender and turkey is warmed through.


Good Morning! I hope ya'll had a fantastic Thanksgiving filled with family, love, memories made and yummy food! Is your fridge stuffed with leftovers? Want something to use that turkey for besides yet another sandwich? Bekki has just the answer today!


I hope that you all enjoyed your Thanksgiving and all of the wonderful things that surround us during the holidays; our families, friends, and time together. I have a huge soup addiction and the Fall and Winter are the perfect time to make big pots of the bubbly deliciousness. With all the left over turkey we all need new ways to use it up and make it stretch for a few more meals. This is just one more way. Along with my addiction to soup I have a new love for kale. It’s a peppery green leafy vegetable that is perfect in this soup. Add a few more veggies, some pasta, your remaining gobbler and voila dinner! Let’s continue our time of thanks giving, with something to warm you heart and soul. Enjoy!
 
Turkey and Kale Noodle Soup
6 c. low sodium chicken stock
3 c. carrots, sliced
1 medium onion, diced
1 orange bell pepper, chopped
3 c. cooked turkey, chopped
3 c. kale, chopped and stemmed
4 c. cooked pasta
1 tbs. olive oil
Salt and pepper to taste
 
In medium stock pot add olive oil, and onion. Cook until onions are softened. Add bell pepper, and carrots. Stir to combine. Add chicken stock and season with salt and pepper to taste. Bring to a boil and reduce to simmer. Cook until carrots are tender. Add kale, turkey and pasta. Taste for seasoning, add salt and pepper if desired. Soup is ready when kale is tender and turkey is warmed through.


reade more... Résuméabuiyad

Shrimp Pad Thai


Pad Thai is one of my favorite things to order in a restaurant and I have put off trying to make it myself for far too long. This is a great basic recipe from Cooking Light that uses ingredients that are easy to find in any major supermarket. No tamarind here. It's also a great "basic" recipe - when I make this again (and I will!) I will amp up the veggies pretty significantly and probably reduce the amount of noodles. It will be less pad thai-y, but still super delicious thanks to the yummy sauce.

Start by cooking the noodles in a large pot of boiling water.


Rice noodles don't take as long to cook as traditional pasta - 5 to 6 minutes should be sufficient. While the noodles cook, combine the sauce ingredients in a small bowl or measuring cup. Add the brown sugar, soy sauce,


fish sauce,


lime juice and sriracha


and whisk until smooth. Now heat a large skillet or wok over medium high heat and add the oil. When the oil is hot, add the green onion and garlic


and stir fry for one minute. Toss in the shrimp,


then the egg,


and cook and stir


until the egg is completely scrambled. Add the noodles,


then the sauce,


and cook for 1-2 minutes, stirring constantly to coat all the noodles. Transfer the pad thai to a serving dish, and top with bean sprouts, peanuts and basil.


One year ago: Pumpkin Quinoa Bake
Two years ago: Pumpkin Cake Roll
Three years ago: Carrot and Potato Gratin
Four years ago: Apple Bundt Cake

Find more great ideas at Hearth and Soul, Cast Party, What's Cooking, What's Cooking #2, Full Plate Thursday, Showcase Your Talent, The Weekly Creative, Foodie Friday, Foodtastic Friday, Foodie Friday (#2), Friday Flash, Strut Your Stuff.

Shrimp Pad Thai

8 ounces uncooked flat rice noodles (pad Thai noodles)
2 Tbsp. brown sugar
2 Tbsp. soy sauce
1 1/2 Tbsp. fish sauce
1 1/2 Tbsp. lime juice
1 Tbsp. sriracha or chili garlic sauce
3 Tbsp. canola oil
1 cup (2-inch) green onion pieces
1 egg
8 ounces large cooked shrimp
5 garlic cloves, minced
1 cup fresh bean sprouts
1/4 cup chopped unsalted dry-roasted peanuts
3 Tbsp. thinly sliced fresh basil

Cook noodles according to package directions; drain.

Meanwhile, whisk together brown sugar, soy sauce, fish sauce, lime juice and chili garlic sauce in a small bowl.

Heat a large skillet or wok over medium-high heat. Add oil to pan; swirl to coat. Add onion pieces and garlic; stir-fry 2 minutes. Add egg and stir until completely scrambled. Add cooked noodles; toss to combine. Stir in sauce and shrimp; cook 1 minute, stirring constantly to combine. Arrange on a serving plate and top with bean sprouts, peanuts and basil. Serves 4.

Recipe Source: Adapted from Cooking Light


Pad Thai is one of my favorite things to order in a restaurant and I have put off trying to make it myself for far too long. This is a great basic recipe from Cooking Light that uses ingredients that are easy to find in any major supermarket. No tamarind here. It's also a great "basic" recipe - when I make this again (and I will!) I will amp up the veggies pretty significantly and probably reduce the amount of noodles. It will be less pad thai-y, but still super delicious thanks to the yummy sauce.

Start by cooking the noodles in a large pot of boiling water.


Rice noodles don't take as long to cook as traditional pasta - 5 to 6 minutes should be sufficient. While the noodles cook, combine the sauce ingredients in a small bowl or measuring cup. Add the brown sugar, soy sauce,


fish sauce,


lime juice and sriracha


and whisk until smooth. Now heat a large skillet or wok over medium high heat and add the oil. When the oil is hot, add the green onion and garlic


and stir fry for one minute. Toss in the shrimp,


then the egg,


and cook and stir


until the egg is completely scrambled. Add the noodles,


then the sauce,


and cook for 1-2 minutes, stirring constantly to coat all the noodles. Transfer the pad thai to a serving dish, and top with bean sprouts, peanuts and basil.


One year ago: Pumpkin Quinoa Bake
Two years ago: Pumpkin Cake Roll
Three years ago: Carrot and Potato Gratin
Four years ago: Apple Bundt Cake

Find more great ideas at Hearth and Soul, Cast Party, What's Cooking, What's Cooking #2, Full Plate Thursday, Showcase Your Talent, The Weekly Creative, Foodie Friday, Foodtastic Friday, Foodie Friday (#2), Friday Flash, Strut Your Stuff.

Shrimp Pad Thai

8 ounces uncooked flat rice noodles (pad Thai noodles)
2 Tbsp. brown sugar
2 Tbsp. soy sauce
1 1/2 Tbsp. fish sauce
1 1/2 Tbsp. lime juice
1 Tbsp. sriracha or chili garlic sauce
3 Tbsp. canola oil
1 cup (2-inch) green onion pieces
1 egg
8 ounces large cooked shrimp
5 garlic cloves, minced
1 cup fresh bean sprouts
1/4 cup chopped unsalted dry-roasted peanuts
3 Tbsp. thinly sliced fresh basil

Cook noodles according to package directions; drain.

Meanwhile, whisk together brown sugar, soy sauce, fish sauce, lime juice and chili garlic sauce in a small bowl.

Heat a large skillet or wok over medium-high heat. Add oil to pan; swirl to coat. Add onion pieces and garlic; stir-fry 2 minutes. Add egg and stir until completely scrambled. Add cooked noodles; toss to combine. Stir in sauce and shrimp; cook 1 minute, stirring constantly to combine. Arrange on a serving plate and top with bean sprouts, peanuts and basil. Serves 4.

Recipe Source: Adapted from Cooking Light


reade more... Résuméabuiyad

Don't Make Me Blush

Have you ever seen a word on a restaurant menu describing a dish, wondered what they meant, but were willing to try it, only to find out upon eating it "That is the most perfect way to describe this dish!" That was exactly the experience I had the first time I encountered the word "blush" on an Italian menu.

Years ago we were having dinner with friends when I was actually pregnant with Alex. Now, you have to understand the first 3 months of my pregnancy were not the most pleasant in the world. I was very ill. Morning sickness doesn't even begin to describe it. I was sick all day, every day. I lost 30 lbs and was almost hospitalized. However, when our friends invited us out for a meal at Olive Garden, I didn't want to miss out. So, I'm sitting in the booth, excited to be finally feel somewhat human, and trying to find something that I thought wouldn't bother my sensitive stomach. 

So, I'm reading along and I come across ravioli in a "blush" sauce. I had never seen that word used in food, and I was intrigued. I went on to read the actual description of the dish and discovered it was quite simple. They combined a red sauce and a cream sauce and got a pink sauce. But let's face it, "ravioli in pink sauce" does not sound appetizing. Now you have to remember, I'm not a huge red sauce fan, but love a good cream sauce. So I figured this might be the best of both worlds; and I was oh so right! I loved the flavor from combining the two, and the word "blush" was the perfect way to describe it. It looked as if a delicious cream sauce got a little embarrassed and was blushing. 

I hadn't thought about that experience in years, but during a conversation about pregnancy woes a few weeks back, it popped into my head; and I just had to recreate a version of it in my kitchen. Ya'll know how much we love a good pasta bake, and can't get enough versions. This one is great for a weeknight meal because it takes a lot of help from the store using not one, but two jarred sauces. 

Through blogging, I've learned the way you describe food is almost as important as the food itself, and that was a lesson that actually began long before EMM!

Blush Pasta Bake
1 lb. penne pasta, cooked and drained
1 (24 oz.) jar spaghetti sauce
1 (15 oz.) jar roasted garlic Alfredo sauce
2 c. shredded mozzarella cheese
1 c. shredded Parmesan cheese
1 TBS Italian Seasoning
2 tsp. dried parsley
Salt and pepper to taste

Preheat oven to 350. Once pasta is cooked and drained, transfer to a large bowl. Add spaghetti sauce and Alfredo. (See Note below.) Stir well. Season with salt and pepper. Add mozzarella cheese. Mix well. In a small bowl, combine Parmesan, Italian Seasoning and parsley. Mix well. Add half the Parmesan mixture to pasta and stir to combine. Transfer pasta to greased 9x13 pan. Bake for 20-25 minutes until heated through. Top with remaining Parmesan mixture. Bake another 5 minutes. *NOTE* Add both sauces, alternating between the two, a little at a time until the desired consistency is achieved. You don't want it too wet. I probably had about 1/4 c. of each left in the bottom of both jars. 


Shared on The Country Cook Oct. 11, 2013


Pasta at Very Good Recipes
Have you ever seen a word on a restaurant menu describing a dish, wondered what they meant, but were willing to try it, only to find out upon eating it "That is the most perfect way to describe this dish!" That was exactly the experience I had the first time I encountered the word "blush" on an Italian menu.

Years ago we were having dinner with friends when I was actually pregnant with Alex. Now, you have to understand the first 3 months of my pregnancy were not the most pleasant in the world. I was very ill. Morning sickness doesn't even begin to describe it. I was sick all day, every day. I lost 30 lbs and was almost hospitalized. However, when our friends invited us out for a meal at Olive Garden, I didn't want to miss out. So, I'm sitting in the booth, excited to be finally feel somewhat human, and trying to find something that I thought wouldn't bother my sensitive stomach. 

So, I'm reading along and I come across ravioli in a "blush" sauce. I had never seen that word used in food, and I was intrigued. I went on to read the actual description of the dish and discovered it was quite simple. They combined a red sauce and a cream sauce and got a pink sauce. But let's face it, "ravioli in pink sauce" does not sound appetizing. Now you have to remember, I'm not a huge red sauce fan, but love a good cream sauce. So I figured this might be the best of both worlds; and I was oh so right! I loved the flavor from combining the two, and the word "blush" was the perfect way to describe it. It looked as if a delicious cream sauce got a little embarrassed and was blushing. 

I hadn't thought about that experience in years, but during a conversation about pregnancy woes a few weeks back, it popped into my head; and I just had to recreate a version of it in my kitchen. Ya'll know how much we love a good pasta bake, and can't get enough versions. This one is great for a weeknight meal because it takes a lot of help from the store using not one, but two jarred sauces. 

Through blogging, I've learned the way you describe food is almost as important as the food itself, and that was a lesson that actually began long before EMM!

Blush Pasta Bake
1 lb. penne pasta, cooked and drained
1 (24 oz.) jar spaghetti sauce
1 (15 oz.) jar roasted garlic Alfredo sauce
2 c. shredded mozzarella cheese
1 c. shredded Parmesan cheese
1 TBS Italian Seasoning
2 tsp. dried parsley
Salt and pepper to taste

Preheat oven to 350. Once pasta is cooked and drained, transfer to a large bowl. Add spaghetti sauce and Alfredo. (See Note below.) Stir well. Season with salt and pepper. Add mozzarella cheese. Mix well. In a small bowl, combine Parmesan, Italian Seasoning and parsley. Mix well. Add half the Parmesan mixture to pasta and stir to combine. Transfer pasta to greased 9x13 pan. Bake for 20-25 minutes until heated through. Top with remaining Parmesan mixture. Bake another 5 minutes. *NOTE* Add both sauces, alternating between the two, a little at a time until the desired consistency is achieved. You don't want it too wet. I probably had about 1/4 c. of each left in the bottom of both jars. 


Shared on The Country Cook Oct. 11, 2013


Pasta at Very Good Recipes
reade more... Résuméabuiyad

Healthier Take Out Fake Out {A Review of San-J Sauces}

I love making our favorite take out dishes at home, using ingredients that I know exactly where they came from and exactly what is in them. And now I can do that easier, with a little help from my friends at San-J.

San-J is dedicated to manufacturing premium Tamari soy sauce and quality Asian inspired products. Their Mongolian Cooking Sauce is the perfect blend of sweet and savory, and works equally well with beef, chicken, shrimp or tofu. It's made from their Tamari sauce, containing 100% soybeans and no wheat content. Plus, it's certified gluten free and verified Non-GMO. It's great tasting and includes no guilt!


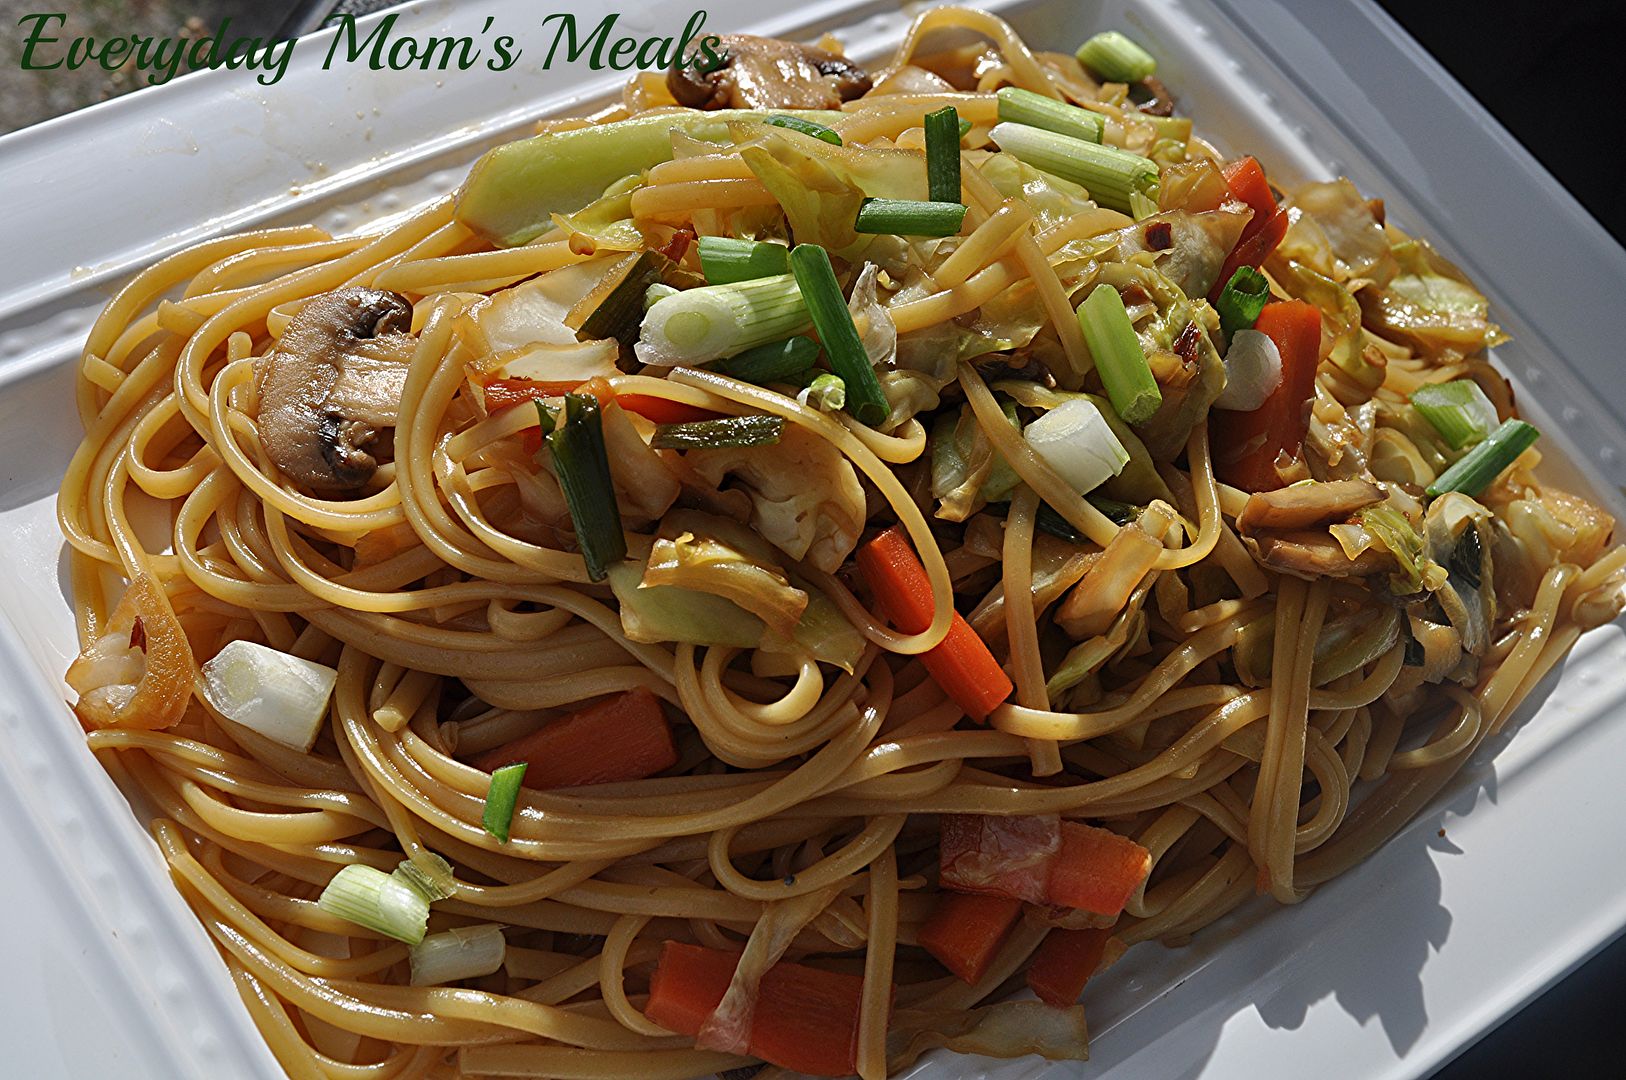
When I found this recipe on their website, I couldn't wait to try it. My favorite Asian take out treat is noodles, with meat, veggies, or both, in a sweet sauce, covering every bite! And these reminded me of those with every ingredient.

If you enjoy Asian food, and really love making it at home, you need to try San-J products today. They will give you the flavor and deliciousness you are looking for, without wondering what you are putting into your body. And if you're looking for a new side dish, try these noodles tonight!

Mongolian Noodles Adapted from San-J
1 lb. linguine, cooked and drained
8 oz. button mushrooms, sliced
1 bunch green onions, chopped, few reserved for garnish
2 medium carrots, jullienned
3 TBS vegetable oil
1 small head cabbage, sliced thin
1/2 tsp. red pepper flakes
1/2 c. San-J Mongolian Sauce

While pasta cooks, in a large skillet heat vegetable oil over medium heat. Add mushrooms and carrots. Cook for 5-7 minutes until mushrooms are brown and soft. Add red pepper flakes, cabbage and green onions. Saute for 5 minutes until cabbage begins to wilt. Add cooking sauce. Bring to a boil. Reduce heat to low and simmer for 2-3 minutes until slightly thickened. When pasta is cooked, drain well. Put in a large bowl. Add veggie and sauce mixture. Stir well to combine. Garnish with remaining green onions.


Shared on The Country Cook Oct. 4, 2013
Asian at Very Good Recipes

*Disclaimer* I was provided with free product for this review. All thoughts and opinions are my own.
I love making our favorite take out dishes at home, using ingredients that I know exactly where they came from and exactly what is in them. And now I can do that easier, with a little help from my friends at San-J.

San-J is dedicated to manufacturing premium Tamari soy sauce and quality Asian inspired products. Their Mongolian Cooking Sauce is the perfect blend of sweet and savory, and works equally well with beef, chicken, shrimp or tofu. It's made from their Tamari sauce, containing 100% soybeans and no wheat content. Plus, it's certified gluten free and verified Non-GMO. It's great tasting and includes no guilt!


When I found this recipe on their website, I couldn't wait to try it. My favorite Asian take out treat is noodles, with meat, veggies, or both, in a sweet sauce, covering every bite! And these reminded me of those with every ingredient.

If you enjoy Asian food, and really love making it at home, you need to try San-J products today. They will give you the flavor and deliciousness you are looking for, without wondering what you are putting into your body. And if you're looking for a new side dish, try these noodles tonight!

Mongolian Noodles Adapted from San-J
1 lb. linguine, cooked and drained
8 oz. button mushrooms, sliced
1 bunch green onions, chopped, few reserved for garnish
2 medium carrots, jullienned
3 TBS vegetable oil
1 small head cabbage, sliced thin
1/2 tsp. red pepper flakes
1/2 c. San-J Mongolian Sauce

While pasta cooks, in a large skillet heat vegetable oil over medium heat. Add mushrooms and carrots. Cook for 5-7 minutes until mushrooms are brown and soft. Add red pepper flakes, cabbage and green onions. Saute for 5 minutes until cabbage begins to wilt. Add cooking sauce. Bring to a boil. Reduce heat to low and simmer for 2-3 minutes until slightly thickened. When pasta is cooked, drain well. Put in a large bowl. Add veggie and sauce mixture. Stir well to combine. Garnish with remaining green onions.


Shared on The Country Cook Oct. 4, 2013
Asian at Very Good Recipes

*Disclaimer* I was provided with free product for this review. All thoughts and opinions are my own.
reade more... Résuméabuiyad

Custardy Baked Orzo with Bacon and Spinach


When I saw this recipe, I immediately knew it was something I wanted to try, and something I would like. I was right. I ate it for breakfast one day and lunch the next. A traditional egg bake is bulked up with pasta and filled with nutrient-dense spinach and crunchy bacon. This could be a really versatile dish, too - I bet Italian sausage would be a great sub, and you could add peppers, mushrooms and other vegetables and reduce the amount of pasta a bit. Lots of possibilities here from a great base recipe. And since it has eggs and cheese, it's perfect for this month's Improv Challenge!

Cook the orzo in a large pot of boiling water.


Cook the bacon - first cut it into bite sized pieces,


then cook it in a large pan over medium heat until crisp. Transfer the bacon to a paper-towel lined plate,


then remove most of the bacon grease from the pan - leave about 1 tablespoon in the pan. Add the onion and cook for a few minutes til it begins to soften. Then add the spinach to the pan


and cook and stir until it is wilted. Transfer the spinach and onion mixture into a large bowl. Drain the orzo and add it to the bowl,


along with the bacon and the feta.


In a large measuring cup, combine the yogurt, milk and eggs, and season with salt and pepper.


Whisk well, then add to the spinach and feta mixture.


Stir everything together well,


then transfer to a greased 11x7 baking dish.


Bake for 45 minutes, or until the eggs are set and the top is slightly browned.


Let the dish sit for 10 minutes after baking before you cut and serve it.


One year ago: Peach Cobbler Bars
Two years ago: Pumpkin Seed Crusted Tilapia
Three years ago: Peanut Butter Cupcakes
Four years ago: Caramel Banana Sundaes

Check out the linky below for more pasta and cheese combos. And get more inspiration at Full Plate Thursday, Showcase your Talent, Thursdays Treasures, Foodie Friday, Food on Fridays, Foodtastic Friday, Foodie Friday (#2), Friday Flash, TGIF, Friday Food Frenzy.

Custardy Baked Orzo with Bacon and Spinach

1 cup orzo
8 ounces bacon, cut into 1/2-inch pieces
1/2 cup diced onion
8 ounces baby spinach
3 ounces feta cheese, crumbled
4 large eggs
1/2 cup plain Greek yogurt
1/2 cup milk

In a large saucepan of salted boiling water, cook the orzo until al dente. Drain and transfer to a medium bowl.

In a large skillet, cook the bacon over medium heat until crispy. Remove the bacon to a paper-towel lined plate, and leave 1 tablespoon of fat in the skillet. Add the onion to the skillet and cook over medium heat until softened, 4-5 minutes. Then add the spinach to the skillet and cook until wilted. Transfer the spinach and onion mixture to a large bowl. Drain the orzo, then add it to the bowl, along with the cooked bacon and the feta.

In a large measuring cup, whisk the eggs with the yogurt and milk, season with salt and pepper and stir into the orzo. Scrape the mixture into an greased 11-by-7-inch baking dish and bake at 375 for about 45 minutes, until the eggs are set and the top is browned. Let stand for 10 minutes before cutting and serving. Makes 6-8 servings.

Recipe Source: Adapted from Food and Wine


When I saw this recipe, I immediately knew it was something I wanted to try, and something I would like. I was right. I ate it for breakfast one day and lunch the next. A traditional egg bake is bulked up with pasta and filled with nutrient-dense spinach and crunchy bacon. This could be a really versatile dish, too - I bet Italian sausage would be a great sub, and you could add peppers, mushrooms and other vegetables and reduce the amount of pasta a bit. Lots of possibilities here from a great base recipe. And since it has eggs and cheese, it's perfect for this month's Improv Challenge!

Cook the orzo in a large pot of boiling water.


Cook the bacon - first cut it into bite sized pieces,


then cook it in a large pan over medium heat until crisp. Transfer the bacon to a paper-towel lined plate,


then remove most of the bacon grease from the pan - leave about 1 tablespoon in the pan. Add the onion and cook for a few minutes til it begins to soften. Then add the spinach to the pan


and cook and stir until it is wilted. Transfer the spinach and onion mixture into a large bowl. Drain the orzo and add it to the bowl,


along with the bacon and the feta.


In a large measuring cup, combine the yogurt, milk and eggs, and season with salt and pepper.


Whisk well, then add to the spinach and feta mixture.


Stir everything together well,


then transfer to a greased 11x7 baking dish.


Bake for 45 minutes, or until the eggs are set and the top is slightly browned.


Let the dish sit for 10 minutes after baking before you cut and serve it.


One year ago: Peach Cobbler Bars
Two years ago: Pumpkin Seed Crusted Tilapia
Three years ago: Peanut Butter Cupcakes
Four years ago: Caramel Banana Sundaes

Check out the linky below for more pasta and cheese combos. And get more inspiration at Full Plate Thursday, Showcase your Talent, Thursdays Treasures, Foodie Friday, Food on Fridays, Foodtastic Friday, Foodie Friday (#2), Friday Flash, TGIF, Friday Food Frenzy.

Custardy Baked Orzo with Bacon and Spinach

1 cup orzo
8 ounces bacon, cut into 1/2-inch pieces
1/2 cup diced onion
8 ounces baby spinach
3 ounces feta cheese, crumbled
4 large eggs
1/2 cup plain Greek yogurt
1/2 cup milk

In a large saucepan of salted boiling water, cook the orzo until al dente. Drain and transfer to a medium bowl.

In a large skillet, cook the bacon over medium heat until crispy. Remove the bacon to a paper-towel lined plate, and leave 1 tablespoon of fat in the skillet. Add the onion to the skillet and cook over medium heat until softened, 4-5 minutes. Then add the spinach to the skillet and cook until wilted. Transfer the spinach and onion mixture to a large bowl. Drain the orzo, then add it to the bowl, along with the cooked bacon and the feta.

In a large measuring cup, whisk the eggs with the yogurt and milk, season with salt and pepper and stir into the orzo. Scrape the mixture into an greased 11-by-7-inch baking dish and bake at 375 for about 45 minutes, until the eggs are set and the top is browned. Let stand for 10 minutes before cutting and serving. Makes 6-8 servings.

Recipe Source: Adapted from Food and Wine


reade more... Résuméabuiyad

For The Meat Free Fans

We are meat lovin' people. I have never tried to hide that fact. In fact, we wear it as a badge of honor, as we cut into our juicy steaks, pork chops and roasts. I have said it before, and will again, as much as we love our vegetables, there is just not way we could ever give up meat entirely. But I also realize more and more people are doing just that, and making it a true lifestyle change in their life, so today I've got something just for them, or for your parents out there trying to get one more veggie into the kids.

If your kids fight you tooth and nail every time you say "you have to eat your vegetables", I feel for you. I can't say I know how you feel, because as most of you know, my son has never met a vegetable he doesn't like, but I truly do have empathy for those parents who are in the constant struggle. I have a lot of moms ask me how they can entice their kids with meals that include veggies; and I have to be honest with them. When in doubt, pair them with something they already love, or in dire times....hide 'em! And this meal accomplishes both of those in one dish!

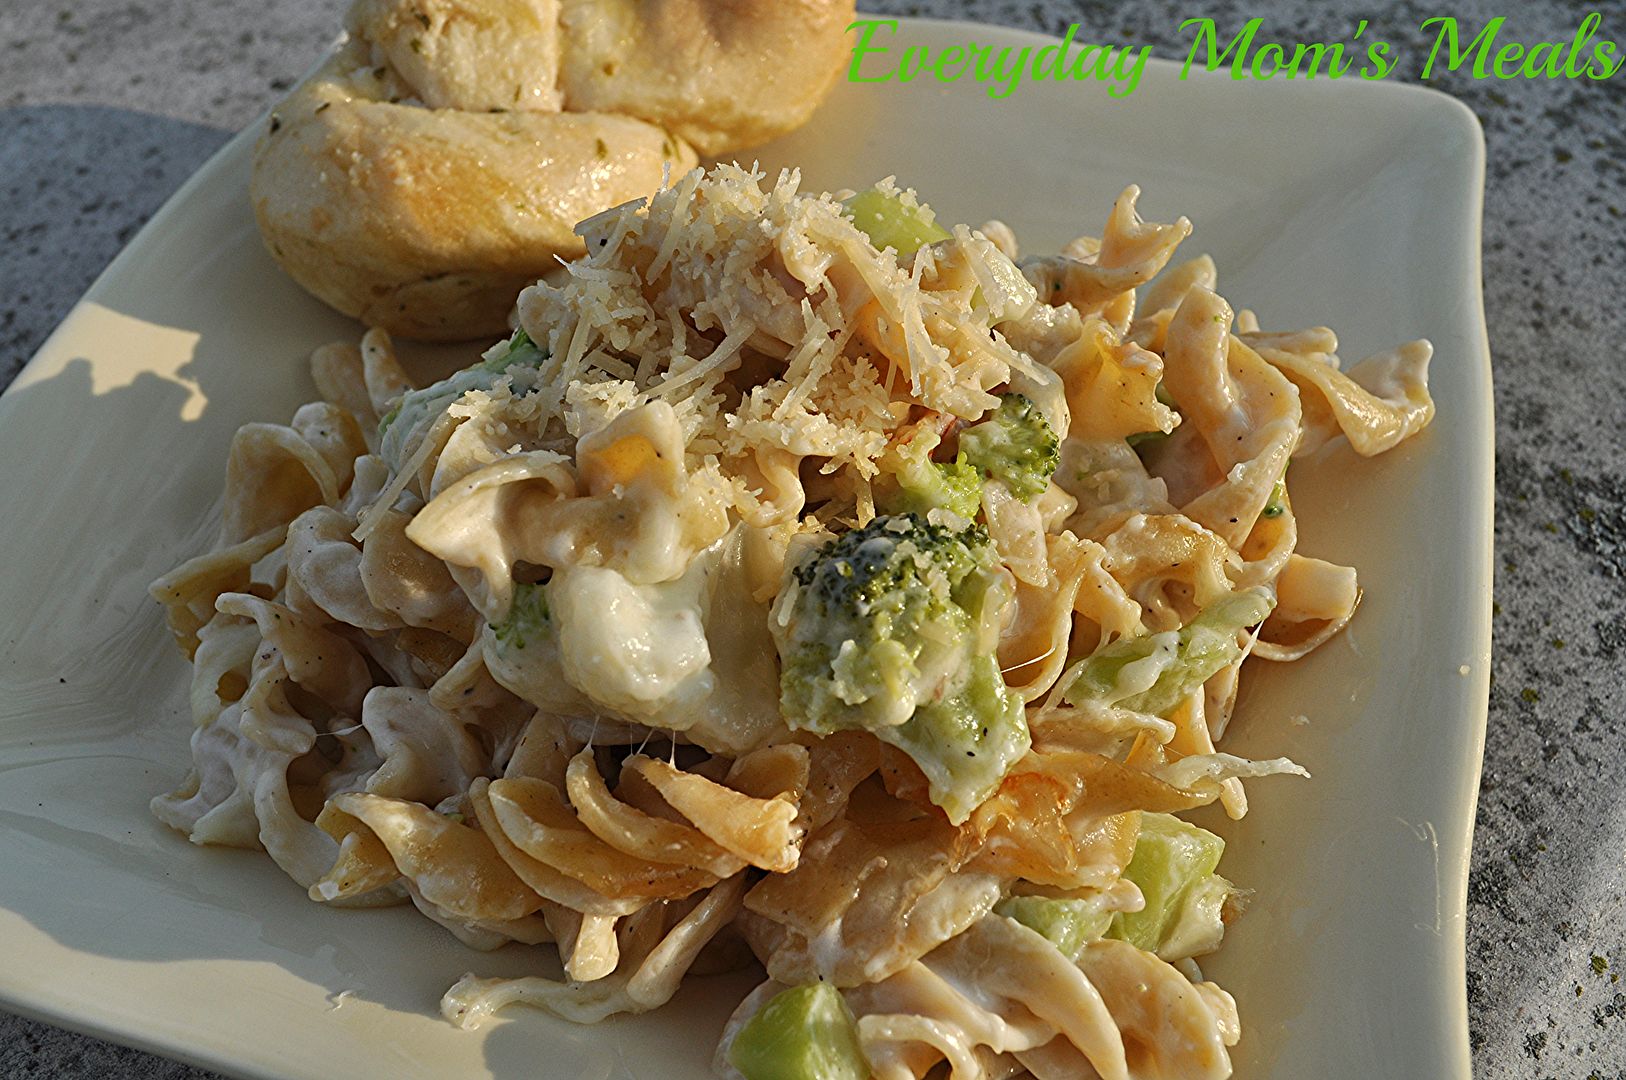
Pasta and cheese. What kid is going to turn that down? And if they happened to have some broccoli and cauliflower mixed in...even better! My family did not miss the meat one bit. In fact, when he first saw it my husband asked if there was chicken in it. (So if your kids ask the same, feel free to tell a little white lie, if it makes dinner time easier!) There is so much ooey gooey cheese, it's hard to even think about the veggies you are eating. But if you're a veggie lover, like us, you too will enjoy every single bite.

I know many who are taking the meat free option, and I respect it 100%. And with the love affair I have with veggies, at times it even sounds appealing. But then a juicy tender medium rare steak waves at me from the grill and I'm once again reminded of how much we enjoy it. But if you are looking for more meat free options, or simply trying to incorporate more veggies into your kids' diets, this meal will satisfy all!

Cheesy Veggie Pasta Bake Featured on SpacesQuarterly.com
3 c. frozen chopped broccoli, thawed
2 c. frozen cauliflower, thawed and cut into small pieces
1 (10 3/4 oz.) can cream of mushroom soup, undiluted
12 oz. egg noodles, cooked and drained
1 c. sour cream
2 c. shredded mozzarella cheese
1/2 c. shredded Parmesan cheese
1 tsp. onion powder
Salt and Pepper to taste

Preheat oven to 350. In a large bowl combine broccoli, cauliflower, soup, noodles, sour cream, onion powder, salt, pepper and ½ c. mozzarella. Pour into a greased 9×13 baking pan. Top with remaining mozzarella and Parmesan. Bake, uncovered, 30 minutes or until bubbly.


Shared on The Country Cook Sept. 20, 2013
Pasta at Very Good Recipes
We are meat lovin' people. I have never tried to hide that fact. In fact, we wear it as a badge of honor, as we cut into our juicy steaks, pork chops and roasts. I have said it before, and will again, as much as we love our vegetables, there is just not way we could ever give up meat entirely. But I also realize more and more people are doing just that, and making it a true lifestyle change in their life, so today I've got something just for them, or for your parents out there trying to get one more veggie into the kids.

If your kids fight you tooth and nail every time you say "you have to eat your vegetables", I feel for you. I can't say I know how you feel, because as most of you know, my son has never met a vegetable he doesn't like, but I truly do have empathy for those parents who are in the constant struggle. I have a lot of moms ask me how they can entice their kids with meals that include veggies; and I have to be honest with them. When in doubt, pair them with something they already love, or in dire times....hide 'em! And this meal accomplishes both of those in one dish!

Pasta and cheese. What kid is going to turn that down? And if they happened to have some broccoli and cauliflower mixed in...even better! My family did not miss the meat one bit. In fact, when he first saw it my husband asked if there was chicken in it. (So if your kids ask the same, feel free to tell a little white lie, if it makes dinner time easier!) There is so much ooey gooey cheese, it's hard to even think about the veggies you are eating. But if you're a veggie lover, like us, you too will enjoy every single bite.

I know many who are taking the meat free option, and I respect it 100%. And with the love affair I have with veggies, at times it even sounds appealing. But then a juicy tender medium rare steak waves at me from the grill and I'm once again reminded of how much we enjoy it. But if you are looking for more meat free options, or simply trying to incorporate more veggies into your kids' diets, this meal will satisfy all!

Cheesy Veggie Pasta Bake Featured on SpacesQuarterly.com
3 c. frozen chopped broccoli, thawed
2 c. frozen cauliflower, thawed and cut into small pieces
1 (10 3/4 oz.) can cream of mushroom soup, undiluted
12 oz. egg noodles, cooked and drained
1 c. sour cream
2 c. shredded mozzarella cheese
1/2 c. shredded Parmesan cheese
1 tsp. onion powder
Salt and Pepper to taste

Preheat oven to 350. In a large bowl combine broccoli, cauliflower, soup, noodles, sour cream, onion powder, salt, pepper and ½ c. mozzarella. Pour into a greased 9×13 baking pan. Top with remaining mozzarella and Parmesan. Bake, uncovered, 30 minutes or until bubbly.


Shared on The Country Cook Sept. 20, 2013
Pasta at Very Good Recipes
reade more... Résuméabuiyad

Still Time For A Picnic

We are a picnic loving family. It's one of our favorite summertime rituals. But with Labor Day behind us, and the stores filling up with pumpkins and scarecrows, I have got to face the fact autumn is well on it's way. It's knocking on the door, just waiting for us to answer.

But there is no doubt we've still got some warm, sunny days ahead of us (I love Indian Summer days!!), so why not enjoy a picnic then too? Sounds like a great idea to me; and I've got the perfect dish for you picnic basket.

My mom and grandma have been making this macaroni salad for as long as I can remember. And I must admit, while I'm happy to be continuing the tradition, no matter how many times I make it myself, it will never taste as good as theirs. Never. I've given up!

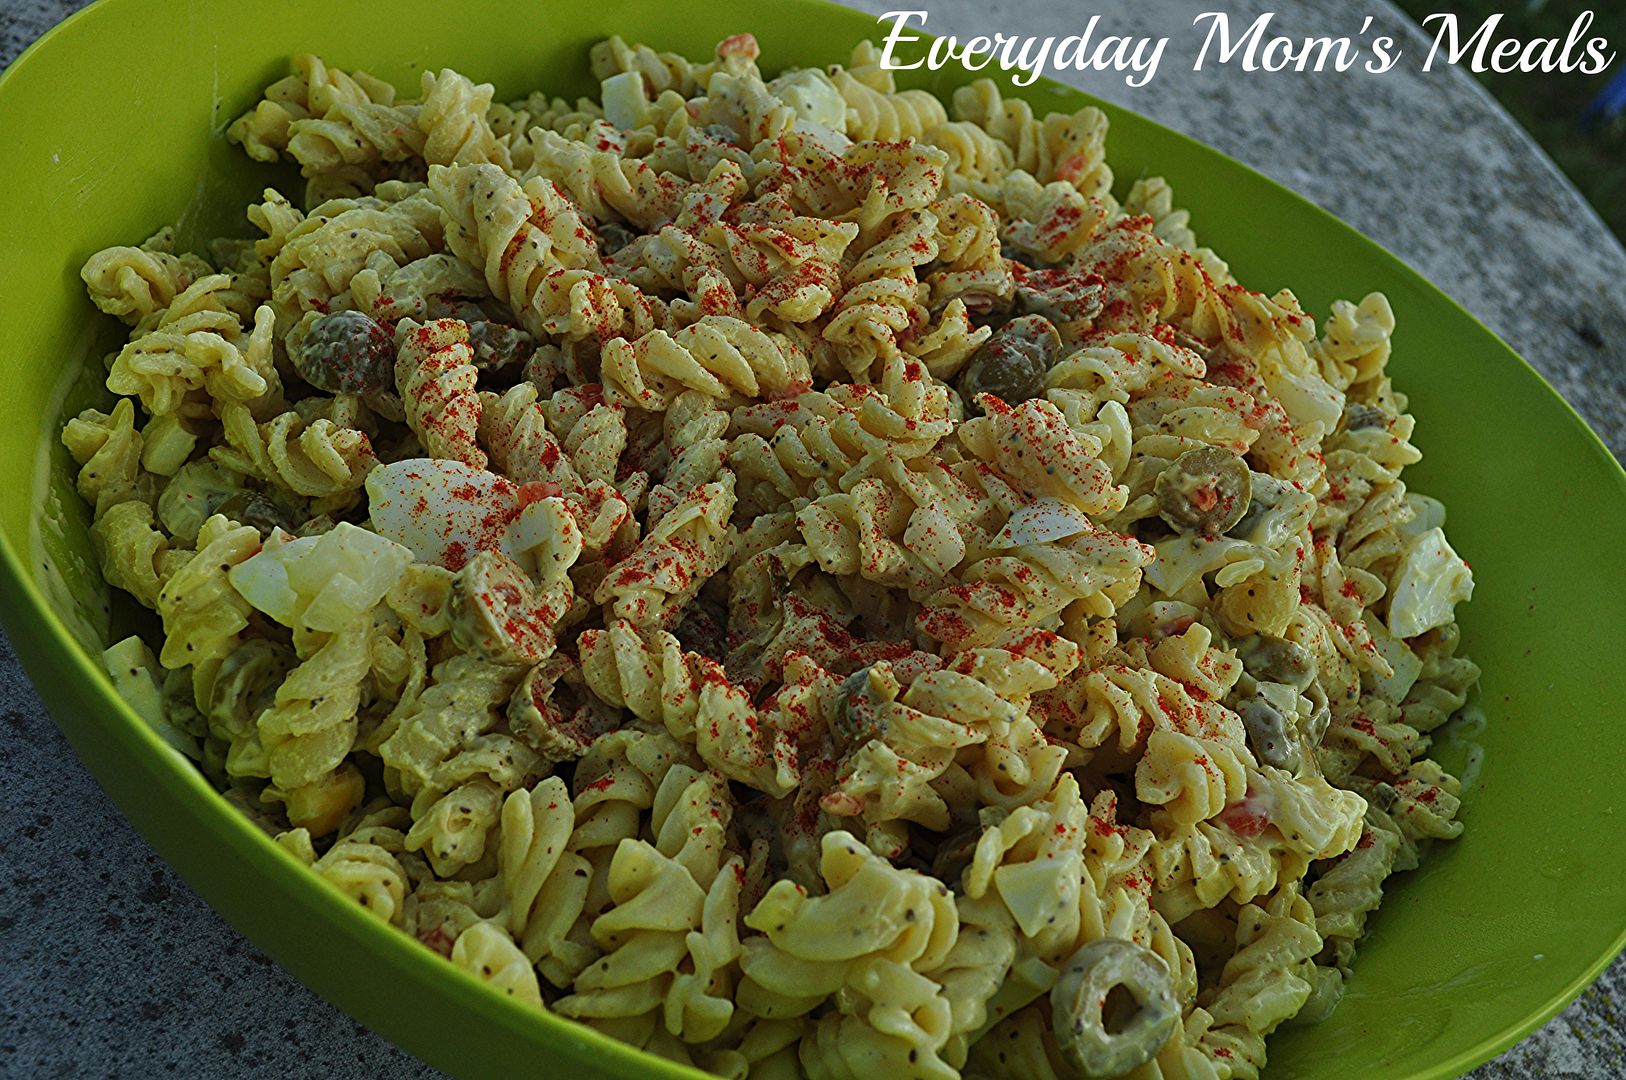
If you love hard boiled eggs, or you love green olives, this pasta salad is going to become your new favorite. They are definitely what makes it unique and stand out from others I've had before. I can tell you first hand, I've seen this sitting on a table at a pot-luck, with other pasta salads, and it is always the first to go. Everyone loves it. Simple but scrumptious, those are the two perfect words to describe it.

Now, many of you might read this and say "I don't use Miracle Whip, will mayo work." Quite frankly, no. I am a mayo lover and 99% of the time it is all I have in the house, but when I know I'm going to be making this, I have to buy the other. Why? Well, first off, it is what grandma and mom have always used, and that means I don't mess with it. But I actually have tried it with mayo before, and it just doesn't taste the same. The "whip" has a little more tangy flavor, marrying so well with the mustard and briny olives. I guess to be fair though, you won't have anything to compare it to, so if you want to use mayo, I'm sure it will still be yummy, it's just not what our family is used to; and I always want to be completely honest with you.

If you live in an area of the country where it is picnic weather year round...lucky you! You can enjoy this anytime. But if you're like us, just trying to fit in a final picnic or backyard barbecue of the season before the autumn leaves begin to fall, be sure to add this to your menu!

Mom's Macaroni Salad
1 lb. rotini pasta, cooked, rinsed and drained
1 ( 10 oz.) jar green olives, sliced
1 small onion, finely chopped
6 hard boiled eggs, chopped
1 1/2 c. Miracle Whip (mayo does NOT taste the same in this dish)
3 TBS mustard
3 TBS sweet relish
1 tsp. celery seed
Salt and Pepper to taste
Paprika, for garnish

In a large bowl combine pasta, olives,  eggs and onions. In a small bowl whisk together Miracle Whip, mustard, relish, celery seed, salt and pepper. Pour over pasta mixture. Stir well to combine. Cover and chill until serving, at least 2 hours. Before serving, stir again and sprinkle with paprika.


Shared on The Country Cook Sept. 13, 2013
Pasta Salad at Very Good Recipes
We are a picnic loving family. It's one of our favorite summertime rituals. But with Labor Day behind us, and the stores filling up with pumpkins and scarecrows, I have got to face the fact autumn is well on it's way. It's knocking on the door, just waiting for us to answer.

But there is no doubt we've still got some warm, sunny days ahead of us (I love Indian Summer days!!), so why not enjoy a picnic then too? Sounds like a great idea to me; and I've got the perfect dish for you picnic basket.

My mom and grandma have been making this macaroni salad for as long as I can remember. And I must admit, while I'm happy to be continuing the tradition, no matter how many times I make it myself, it will never taste as good as theirs. Never. I've given up!

If you love hard boiled eggs, or you love green olives, this pasta salad is going to become your new favorite. They are definitely what makes it unique and stand out from others I've had before. I can tell you first hand, I've seen this sitting on a table at a pot-luck, with other pasta salads, and it is always the first to go. Everyone loves it. Simple but scrumptious, those are the two perfect words to describe it.

Now, many of you might read this and say "I don't use Miracle Whip, will mayo work." Quite frankly, no. I am a mayo lover and 99% of the time it is all I have in the house, but when I know I'm going to be making this, I have to buy the other. Why? Well, first off, it is what grandma and mom have always used, and that means I don't mess with it. But I actually have tried it with mayo before, and it just doesn't taste the same. The "whip" has a little more tangy flavor, marrying so well with the mustard and briny olives. I guess to be fair though, you won't have anything to compare it to, so if you want to use mayo, I'm sure it will still be yummy, it's just not what our family is used to; and I always want to be completely honest with you.

If you live in an area of the country where it is picnic weather year round...lucky you! You can enjoy this anytime. But if you're like us, just trying to fit in a final picnic or backyard barbecue of the season before the autumn leaves begin to fall, be sure to add this to your menu!

Mom's Macaroni Salad
1 lb. rotini pasta, cooked, rinsed and drained
1 ( 10 oz.) jar green olives, sliced
1 small onion, finely chopped
6 hard boiled eggs, chopped
1 1/2 c. Miracle Whip (mayo does NOT taste the same in this dish)
3 TBS mustard
3 TBS sweet relish
1 tsp. celery seed
Salt and Pepper to taste
Paprika, for garnish

In a large bowl combine pasta, olives,  eggs and onions. In a small bowl whisk together Miracle Whip, mustard, relish, celery seed, salt and pepper. Pour over pasta mixture. Stir well to combine. Cover and chill until serving, at least 2 hours. Before serving, stir again and sprinkle with paprika.


Shared on The Country Cook Sept. 13, 2013
Pasta Salad at Very Good Recipes
reade more... Résuméabuiyad

My Mom, His Grandma

I'm going to start today's post off with a preface. I know many of you are going to read this recipe and say "That's not traditional goulash." I am well aware of this, and respect the fact that for those of you enjoy a more traditional version, this is nothing similar to that. Please do not fill my inbox with the differences. In fact, I'm so aware of this, there will be another recipe posted on Friday that might be a little closer to what you consider the "real thing", and I will even be discussing why the difference.

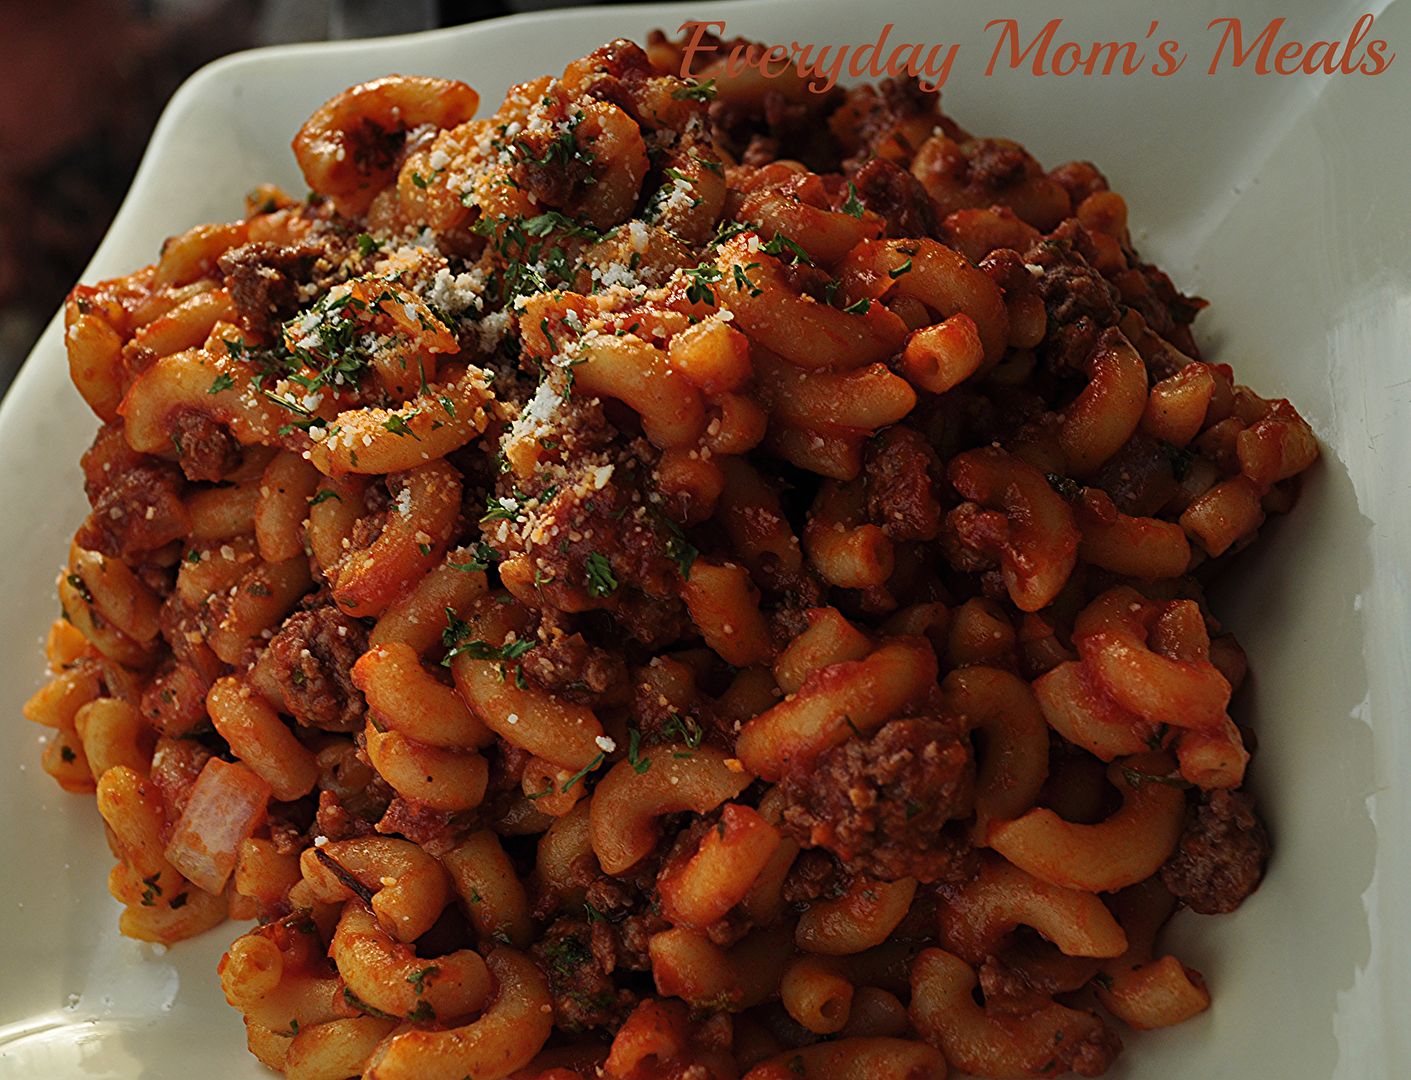
Okay, with that out of the way, let me tell you about this dish. This is something I grew up on. My mom made this at least a couple times per month. It was simple, fast and tasty, 3 things she needed after working all day and having my dad and I starving, waiting impatiently to be fed. She was taught how to make it by her mother, so it's been in our family for many, many years.

Now, here is where the story takes an ironic, but very special twist. When Adam and I were first married, and I was looking for new recipes to cook for him, he told me he loved his grandma's goulash and asked me to get her recipe. Well, I'm not going to lie, I forgot. I did however, mention to my mom I needed supper ideas and she suggested I make her goulash, so I did. Adam came home from work, sat down to dinner and was so excited. "You got Grandma's recipe??!!" Confused I looked at him and replied, "No, I made it like my mom." Yep...they were the exact same recipe!! We had both been eating the same dish for years, loving it, but from two different sources, only making it all the more special! I like to say it's a family tradition, any which way you look at it!

This is a fantastic weeknight meal for those evening your butt is really dragging and cooking is the last thing you want to do. It comes together in almost no time at all. It's also perfect for those nights when every member of the family is eating at a different time. It reheats beautifully, and almost tastes better the longer it sits.

If this is like the goulash you grew up on, welcome to the club. If yours was nothing like this, then come back on Friday to see another version I made, and read all about why they are at completely opposite ends of the food scale!

Mom's Goulash
1 lb. elbow macaroni, cooked and drained
1 lb. ground beef
1 small onion, chopped
1 tsp. garlic powder
1 (26 oz.) jar spaghetti sauce
1 TBS dried parsley, extra for garnish
Salt and Pepper to taste.
Grated Parmesan cheese

In a large skillet, brown ground beef and onion until no longer pink. Drain if necessary. Reduce heat, season with garlic powder, salt and pepper. When macaroni is cooked, add to meat mixture. Add spaghetti sauce. Stir to combine. Sprinkle with parsley and stir. Cook on low for 10-15 minutes to allow flavors to combine and thicken slightly. Serve with extra parsley and Parmesan cheese.


Shared on Lady Behind The Curtain Sept. 4, 2013
Shared on The Country Cook Sept. 6, 2013
Macaroni at Very Good Recipes
I'm going to start today's post off with a preface. I know many of you are going to read this recipe and say "That's not traditional goulash." I am well aware of this, and respect the fact that for those of you enjoy a more traditional version, this is nothing similar to that. Please do not fill my inbox with the differences. In fact, I'm so aware of this, there will be another recipe posted on Friday that might be a little closer to what you consider the "real thing", and I will even be discussing why the difference.

Okay, with that out of the way, let me tell you about this dish. This is something I grew up on. My mom made this at least a couple times per month. It was simple, fast and tasty, 3 things she needed after working all day and having my dad and I starving, waiting impatiently to be fed. She was taught how to make it by her mother, so it's been in our family for many, many years.

Now, here is where the story takes an ironic, but very special twist. When Adam and I were first married, and I was looking for new recipes to cook for him, he told me he loved his grandma's goulash and asked me to get her recipe. Well, I'm not going to lie, I forgot. I did however, mention to my mom I needed supper ideas and she suggested I make her goulash, so I did. Adam came home from work, sat down to dinner and was so excited. "You got Grandma's recipe??!!" Confused I looked at him and replied, "No, I made it like my mom." Yep...they were the exact same recipe!! We had both been eating the same dish for years, loving it, but from two different sources, only making it all the more special! I like to say it's a family tradition, any which way you look at it!

This is a fantastic weeknight meal for those evening your butt is really dragging and cooking is the last thing you want to do. It comes together in almost no time at all. It's also perfect for those nights when every member of the family is eating at a different time. It reheats beautifully, and almost tastes better the longer it sits.

If this is like the goulash you grew up on, welcome to the club. If yours was nothing like this, then come back on Friday to see another version I made, and read all about why they are at completely opposite ends of the food scale!

Mom's Goulash
1 lb. elbow macaroni, cooked and drained
1 lb. ground beef
1 small onion, chopped
1 tsp. garlic powder
1 (26 oz.) jar spaghetti sauce
1 TBS dried parsley, extra for garnish
Salt and Pepper to taste.
Grated Parmesan cheese

In a large skillet, brown ground beef and onion until no longer pink. Drain if necessary. Reduce heat, season with garlic powder, salt and pepper. When macaroni is cooked, add to meat mixture. Add spaghetti sauce. Stir to combine. Sprinkle with parsley and stir. Cook on low for 10-15 minutes to allow flavors to combine and thicken slightly. Serve with extra parsley and Parmesan cheese.


Shared on Lady Behind The Curtain Sept. 4, 2013
Shared on The Country Cook Sept. 6, 2013
Macaroni at Very Good Recipes
reade more... Résuméabuiyad

A Hand In The Kitchen Part 1 {A Review of Cooking Planit}

Have you ever said to yourself "Cooking would be so much easier, if I just had a little help. Another set of hands to make sure everything is getting done at once."? Well, if you have, you are not alone. Anyone who spends any amount of time in the kitchen at some point has wished for a little assistance to make everything run smoothly. And today I have the answer to those wishes...in the form of not only a website, but also an app you can run on your iPad or iPhone! 

Let me introduce you to Cooking Planit, the site that takes the guesswork out of the kitchen. From your grocery list to the final product, they are there every step of the way, making sure your meal goes off without a hitch. 

From their website: 
• Simplified Meal Planning – Thoughtful and tested meal plans that your family and friends will love.
  • • Organized Shopping – No more headaches while getting your list together. We build your shopping list just like you would.
  • • Guided Cooking Steps – It's like G.P.S. for cooking! We'll do all the organization and lead you through each recipe's steps so that the entire meal is ready at the same time.
  • • Cloud Sync – Sync your account across the web, your iPhone and iPad
That's right, every single detail is not only thought of, but executed with ease and simplicity. When you find a recipe you want to make, just save it to your cookbook. Then when you are ready, it's waiting on you. Step by step instructions, all leading to a delicious meal, where all dishes are done at the same time! 

Let's start at the beginning. Here is this recipe, on my iPhone using the Cooking Planit app. It starts by telling me everything I should gather in the kitchen, so my ingredients are waiting on me, not the other way around. 


Next up, it tells me what equipment I'll need throughout the entire cooking process. No searching for a gadget at the last minute this way!


Now here is one of my favorite parts. Before you even start, it asks how many servings you are cooking for, adapted the recipe accordingly. Only have 2 in your house? Not a problem. No more guessing how much to make. It's so user friendly for cooks of all walks of life, from the small household to the ones cooking for a small army.


And this...well, this is my absolute favorite part. The timing aspect. It talks to you and tells you how much time you have before the next step needs to be completed. It even has a timer so you know exactly where you are in the process. Plus...if you get ahead of schedule...it even tells you that. And suggests you have a seat and enjoy a glass of wine while you wait! It truly is like having a friend in the kitchen with you!

Cooking Planit is the perfect site/app for everyone who enjoys cooking, but can always use a little help. I think it would be a great idea for college kids, living on their own for the first time, or maybe a new bride who isn't quite comfortable in the kitchen yet. But I also love that the more experienced home cook can adapt the recipes to fit their tastes (which is exactly what I did for this one) and even "skip" steps to better fit their time frame. Cooking Planit is easy to use, fun, and a home cook's best friend! 

Plus, they are very generous! They are giving EMM readers a chance to win a 12-piece T-Fal Cookware Set! It is GORGEOUS! And all you have to do to enter, is follow the directions in the Rafflecopter widget below! 

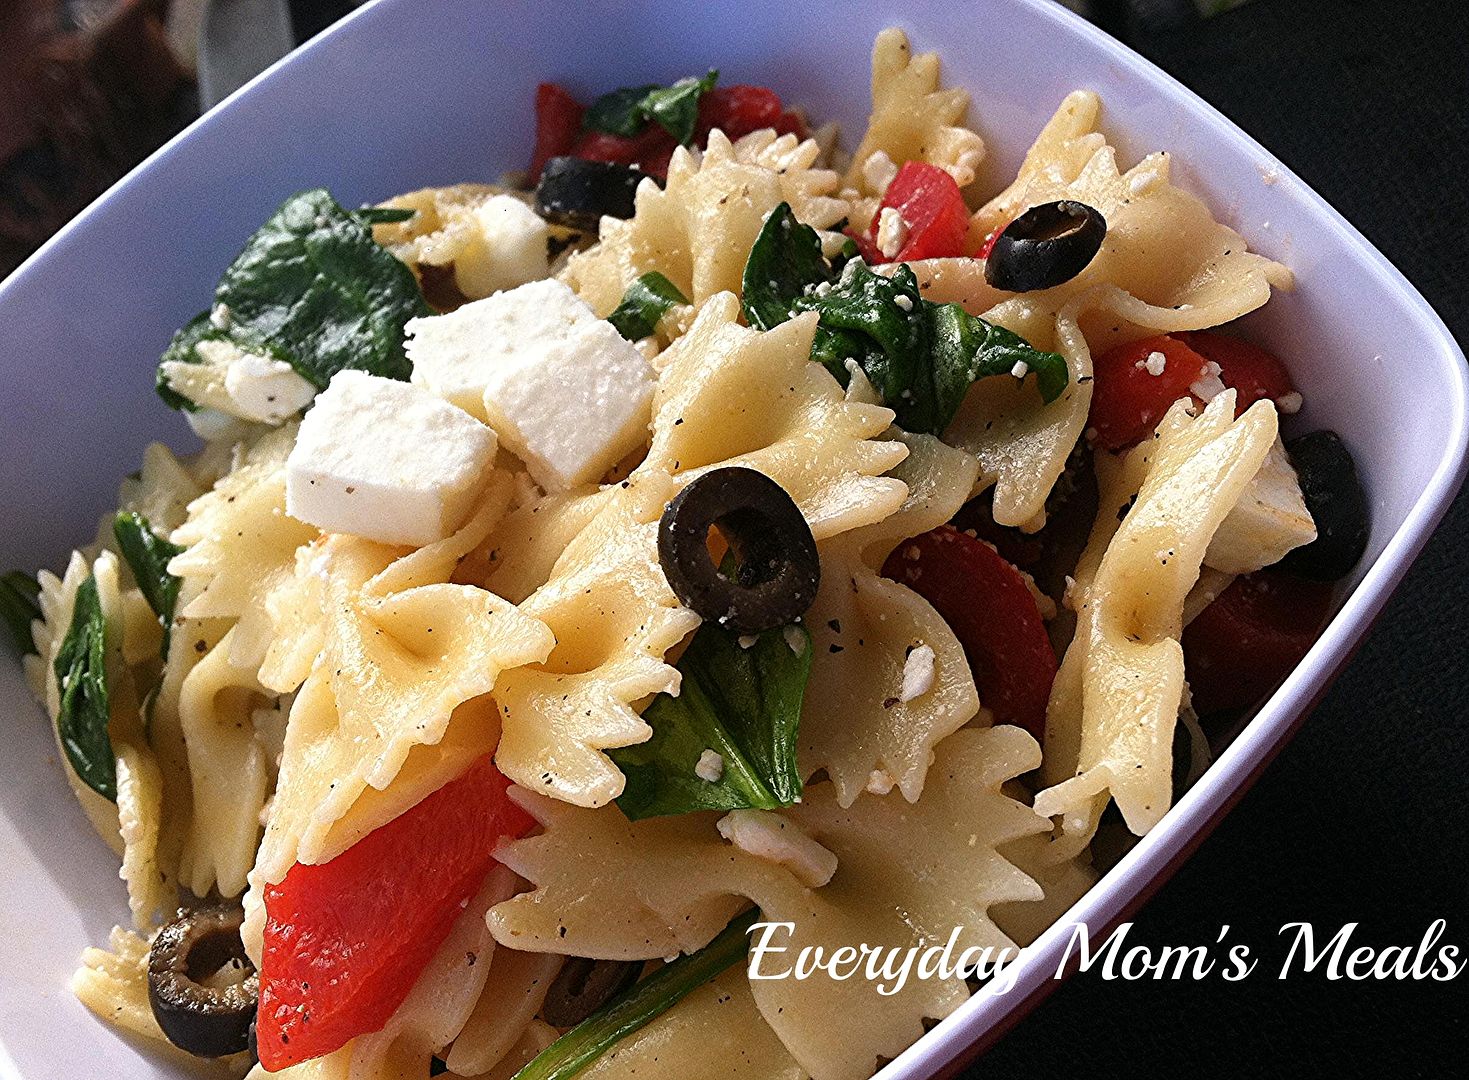
Now, for this recipe, I took one on their site, and adapted it to satisfy our family a little better. If you want to see the original, click here. This would make a great addition to your Labor Day picnic or backyard party...NO mayo! The light dressing makes it delicious without being too heavy. And I love the combination of spinach and feta! 

If you are looking for a little help in the kitchen, look no further than Cooking Planit. And be sure to check out the giveaway below, and come back on Wednesday to see the sandwich I made to go with this salad too!

Bow-Tie Pasta Salad with Spinach and Feta Adapted from Cooking Planit
12 oz. bow-tie pasta
1/2 c. sliced black olives
1 c. fresh baby spinach, chopped
1 (12 oz.) jar roasted red peppers, drained and rough chopped
1 c. feta cheese crumbles
1 clove garlic, minced
1 TBS olive oil
1 TBS lemon juice
Salt and Pepper to taste

Bring a large pot of water to a boil. Cook pasta to al dente, about 10 minutes. While pasta is cooking, add garlic, spinach, peppers and olives to a large bowl. Stir to combine. When pasta is done, drain well. Add directly to bowl. In a small bowl combine olive oil and lemon juice. Whisk to combine. Pour over pasta while warm. Season with salt and pepper. Stir to combine. Place in fridge at least 10 minutes to chill. Just before serving add feta and toss to combine. 


Shared on Mandy's Recipe Box Aug. 27, 2013
Shared on Lady Behind The Curtain Aug. 28, 2013
Shared on The Country Cook Aug. 30, 2013
Salad at Very Good Recipes

For More Info: 
CookingPlanit
 Website: http://www.cookingplanit.com/browse
 iOS'Apps: https://itunes.apple.com/us/artist/cooking.planit/id544421990

 Social Media:
 Blog: http://blog.cookingplanit.com/
 Facebook:' https://www.facebook.com/cookingplanit
 Twitter: https://twitter.com/cookingplanit
 Pinterest:'' http://pinterest.com/cookingplanit
 YouTube:' http://www.youtube.com/cookingplanit
 Instagram: http://instagram.com/cookingplanit

a Rafflecopter giveaway
Have you ever said to yourself "Cooking would be so much easier, if I just had a little help. Another set of hands to make sure everything is getting done at once."? Well, if you have, you are not alone. Anyone who spends any amount of time in the kitchen at some point has wished for a little assistance to make everything run smoothly. And today I have the answer to those wishes...in the form of not only a website, but also an app you can run on your iPad or iPhone! 

Let me introduce you to Cooking Planit, the site that takes the guesswork out of the kitchen. From your grocery list to the final product, they are there every step of the way, making sure your meal goes off without a hitch. 

From their website: 
• Simplified Meal Planning – Thoughtful and tested meal plans that your family and friends will love.
  • • Organized Shopping – No more headaches while getting your list together. We build your shopping list just like you would.
  • • Guided Cooking Steps – It's like G.P.S. for cooking! We'll do all the organization and lead you through each recipe's steps so that the entire meal is ready at the same time.
  • • Cloud Sync – Sync your account across the web, your iPhone and iPad
That's right, every single detail is not only thought of, but executed with ease and simplicity. When you find a recipe you want to make, just save it to your cookbook. Then when you are ready, it's waiting on you. Step by step instructions, all leading to a delicious meal, where all dishes are done at the same time! 

Let's start at the beginning. Here is this recipe, on my iPhone using the Cooking Planit app. It starts by telling me everything I should gather in the kitchen, so my ingredients are waiting on me, not the other way around. 


Next up, it tells me what equipment I'll need throughout the entire cooking process. No searching for a gadget at the last minute this way!


Now here is one of my favorite parts. Before you even start, it asks how many servings you are cooking for, adapted the recipe accordingly. Only have 2 in your house? Not a problem. No more guessing how much to make. It's so user friendly for cooks of all walks of life, from the small household to the ones cooking for a small army.


And this...well, this is my absolute favorite part. The timing aspect. It talks to you and tells you how much time you have before the next step needs to be completed. It even has a timer so you know exactly where you are in the process. Plus...if you get ahead of schedule...it even tells you that. And suggests you have a seat and enjoy a glass of wine while you wait! It truly is like having a friend in the kitchen with you!

Cooking Planit is the perfect site/app for everyone who enjoys cooking, but can always use a little help. I think it would be a great idea for college kids, living on their own for the first time, or maybe a new bride who isn't quite comfortable in the kitchen yet. But I also love that the more experienced home cook can adapt the recipes to fit their tastes (which is exactly what I did for this one) and even "skip" steps to better fit their time frame. Cooking Planit is easy to use, fun, and a home cook's best friend! 

Plus, they are very generous! They are giving EMM readers a chance to win a 12-piece T-Fal Cookware Set! It is GORGEOUS! And all you have to do to enter, is follow the directions in the Rafflecopter widget below! 

Now, for this recipe, I took one on their site, and adapted it to satisfy our family a little better. If you want to see the original, click here. This would make a great addition to your Labor Day picnic or backyard party...NO mayo! The light dressing makes it delicious without being too heavy. And I love the combination of spinach and feta! 

If you are looking for a little help in the kitchen, look no further than Cooking Planit. And be sure to check out the giveaway below, and come back on Wednesday to see the sandwich I made to go with this salad too!

Bow-Tie Pasta Salad with Spinach and Feta Adapted from Cooking Planit
12 oz. bow-tie pasta
1/2 c. sliced black olives
1 c. fresh baby spinach, chopped
1 (12 oz.) jar roasted red peppers, drained and rough chopped
1 c. feta cheese crumbles
1 clove garlic, minced
1 TBS olive oil
1 TBS lemon juice
Salt and Pepper to taste

Bring a large pot of water to a boil. Cook pasta to al dente, about 10 minutes. While pasta is cooking, add garlic, spinach, peppers and olives to a large bowl. Stir to combine. When pasta is done, drain well. Add directly to bowl. In a small bowl combine olive oil and lemon juice. Whisk to combine. Pour over pasta while warm. Season with salt and pepper. Stir to combine. Place in fridge at least 10 minutes to chill. Just before serving add feta and toss to combine. 


Shared on Mandy's Recipe Box Aug. 27, 2013
Shared on Lady Behind The Curtain Aug. 28, 2013
Shared on The Country Cook Aug. 30, 2013
Salad at Very Good Recipes

For More Info: 
CookingPlanit
 Website: http://www.cookingplanit.com/browse
 iOS'Apps: https://itunes.apple.com/us/artist/cooking.planit/id544421990

 Social Media:
 Blog: http://blog.cookingplanit.com/
 Facebook:' https://www.facebook.com/cookingplanit
 Twitter: https://twitter.com/cookingplanit
 Pinterest:'' http://pinterest.com/cookingplanit
 YouTube:' http://www.youtube.com/cookingplanit
 Instagram: http://instagram.com/cookingplanit

a Rafflecopter giveaway
reade more... Résuméabuiyad

Yeah, It's Still Broke

As most of you know already, I am usually about "two weeks out on the blog" as I like to say. This means that when I post something for you, I made it approximately 2 weeks ago in my kitchen. I really like this time frame, I've found it's what works best for me, allows me to be the most flexible with my blogging schedule, and still leave me time for my family too. For instance, when we were in Florida for 3 weeks, I had planned ahead and was actually a month ahead, so I could relax and enjoy our time on the beach without stressing about making sure there were new recipes to share with all of you. But for the most part, it's about a two week turn around from my table to your screen.

But as it is usually in life, there is always a down side. See that title? Yep...if I didn't take the time to explain, it would totally be making me out to be a liar. As I'm typing this, it's been one week since I cooked this yummy dish, and it will be another week before you read it. Well, the night I made this, I came up with that title, so I typed it up really quick, knowing I could come back to do the "main part" of the post later. Well, tonight as I sat down to do so, I reread it thought "oh great, now I have to change it." Let me explain...

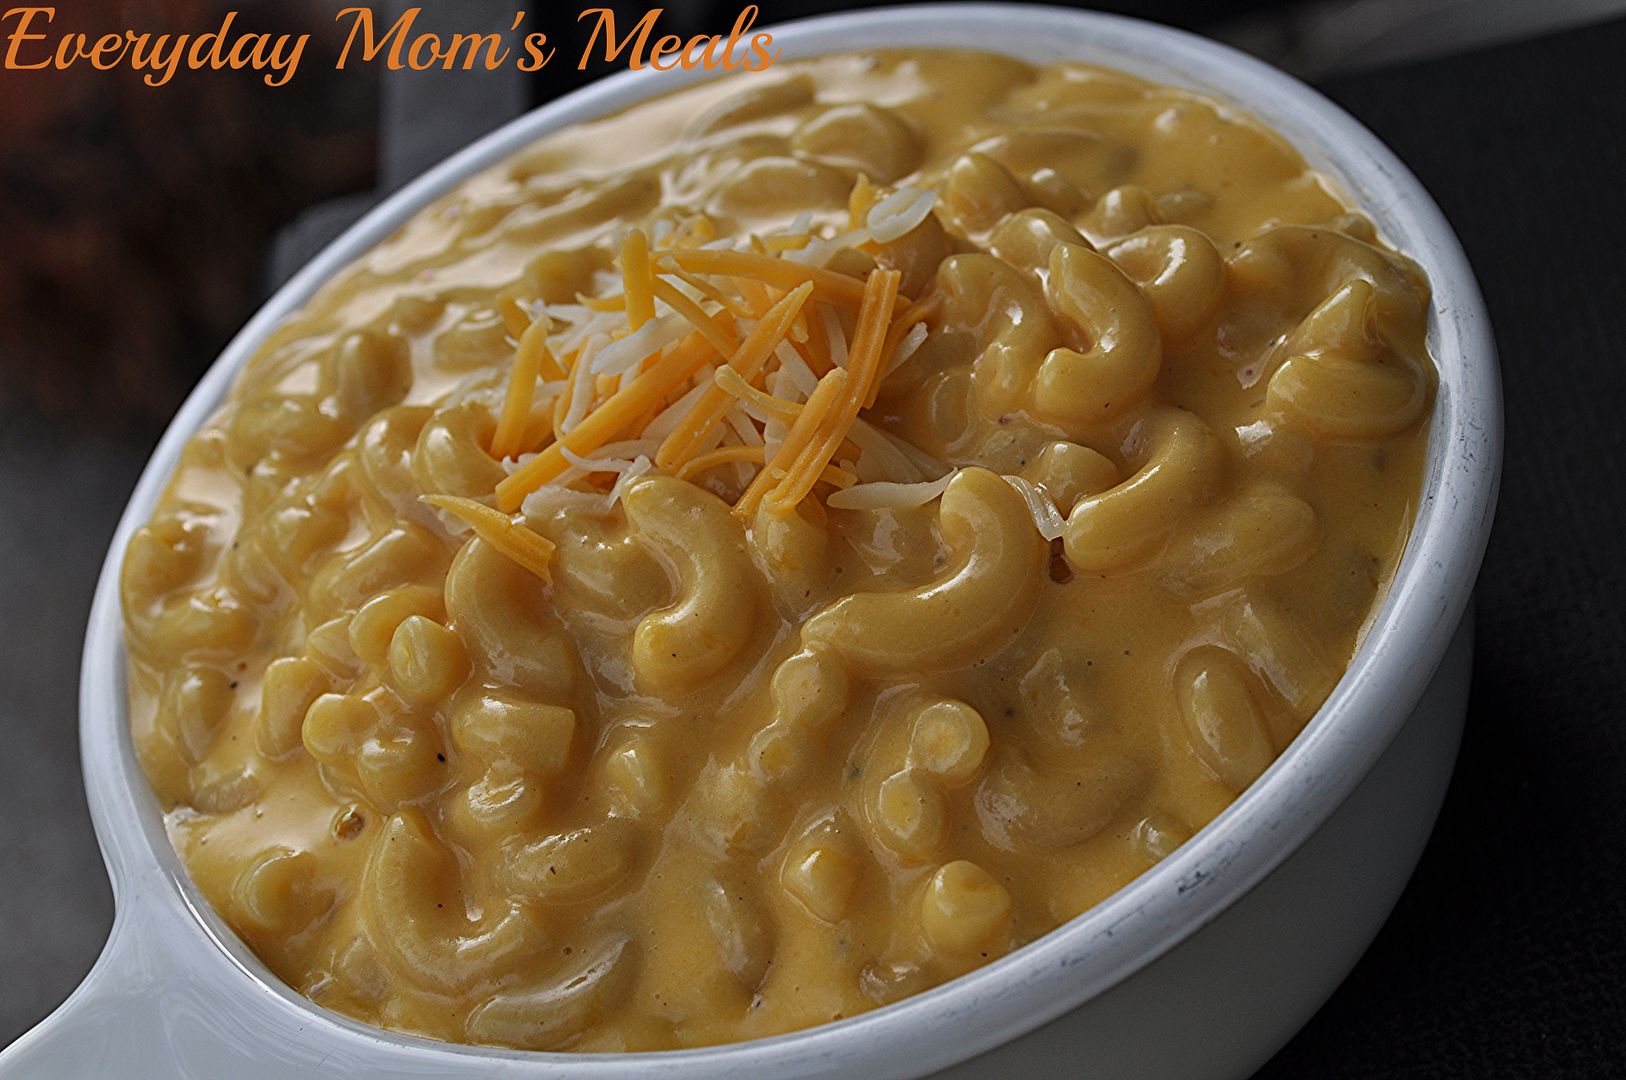
As of last week my oven was still broke. Yep, going on 4 months without a working oven, and this food blogger was going a little stir crazy. Now, to be fair, it was better to have it happen in the warm, grilling, months than the winter time, but believe me, there wasn't a day that I didn't wish it was back in commission. So when I found this recipe for a stove top version of  one of Monkey's favorite foods, I was super excited. He had been asking over and over for my Baked Mac n Cheese, and I kept having to remind him why that wasn't possible. So I was going to talk about that and why having this "back- up" was so nice.

But miracles do happen, and wonders never cease. After almost four months, and 3 incorrect parts later, we finally got the ignitor switch we needed to fix my oven, and as of this past Saturday, Mr. Everyday had it back up and running! I was so excited. I was like a little kid on Christmas with a new toy. The next morning I had to get up and bake something just because I knew I could.

So while this recipe started out as a substitution with a funny store about my poor oven, it is ending on a happy note with me being able to bake and roast once again, plus a great new, simple recipe perfect for a easy weeknight dinner that the kids will love. And anyways, anything that can be cooked completely on the stove top, in one pot is a great idea, no matter what the circumstances surrounding it are!

Stove Top Creamy Mac n Cheese Adapted from Food Network
1 lb. elbow macaroni
1 stick butter
4 large eggs
4 c. shredded sharp cheddar cheese
1/2 c. shredded Monterrey Jack cheese
1 1/2 tsp. ground mustard
1 (12 oz.) can evaporated milk
Salt and Pepper to taste

Cook macaroni until al dente. Drain. While it's cooking, mix eggs, milk, mustard, salt and pepper. Whisk well. When macaroni is done, return to hot pot. Turn heat to LOW. Add butter. Toss and stir to coat. Add in egg mixture. Mix well. Add cheese in several batches, stirring constantly until cheese is melted and creamy, about 3-4 minutes.


Shared on Mandy's Recipe Box Aug. 13, 2013
Pasta at Very Good Recipes
As most of you know already, I am usually about "two weeks out on the blog" as I like to say. This means that when I post something for you, I made it approximately 2 weeks ago in my kitchen. I really like this time frame, I've found it's what works best for me, allows me to be the most flexible with my blogging schedule, and still leave me time for my family too. For instance, when we were in Florida for 3 weeks, I had planned ahead and was actually a month ahead, so I could relax and enjoy our time on the beach without stressing about making sure there were new recipes to share with all of you. But for the most part, it's about a two week turn around from my table to your screen.

But as it is usually in life, there is always a down side. See that title? Yep...if I didn't take the time to explain, it would totally be making me out to be a liar. As I'm typing this, it's been one week since I cooked this yummy dish, and it will be another week before you read it. Well, the night I made this, I came up with that title, so I typed it up really quick, knowing I could come back to do the "main part" of the post later. Well, tonight as I sat down to do so, I reread it thought "oh great, now I have to change it." Let me explain...

As of last week my oven was still broke. Yep, going on 4 months without a working oven, and this food blogger was going a little stir crazy. Now, to be fair, it was better to have it happen in the warm, grilling, months than the winter time, but believe me, there wasn't a day that I didn't wish it was back in commission. So when I found this recipe for a stove top version of  one of Monkey's favorite foods, I was super excited. He had been asking over and over for my Baked Mac n Cheese, and I kept having to remind him why that wasn't possible. So I was going to talk about that and why having this "back- up" was so nice.

But miracles do happen, and wonders never cease. After almost four months, and 3 incorrect parts later, we finally got the ignitor switch we needed to fix my oven, and as of this past Saturday, Mr. Everyday had it back up and running! I was so excited. I was like a little kid on Christmas with a new toy. The next morning I had to get up and bake something just because I knew I could.

So while this recipe started out as a substitution with a funny store about my poor oven, it is ending on a happy note with me being able to bake and roast once again, plus a great new, simple recipe perfect for a easy weeknight dinner that the kids will love. And anyways, anything that can be cooked completely on the stove top, in one pot is a great idea, no matter what the circumstances surrounding it are!

Stove Top Creamy Mac n Cheese Adapted from Food Network
1 lb. elbow macaroni
1 stick butter
4 large eggs
4 c. shredded sharp cheddar cheese
1/2 c. shredded Monterrey Jack cheese
1 1/2 tsp. ground mustard
1 (12 oz.) can evaporated milk
Salt and Pepper to taste

Cook macaroni until al dente. Drain. While it's cooking, mix eggs, milk, mustard, salt and pepper. Whisk well. When macaroni is done, return to hot pot. Turn heat to LOW. Add butter. Toss and stir to coat. Add in egg mixture. Mix well. Add cheese in several batches, stirring constantly until cheese is melted and creamy, about 3-4 minutes.


Shared on Mandy's Recipe Box Aug. 13, 2013
Pasta at Very Good Recipes
reade more... Résuméabuiyad

100% Stovetop

An entire cookbook of nothing but stovetop meals. Sound too good to be true? Well, it's not! Put away those oven mitts ladies and gents, because you won't be needing them for this recipe, or any of  those in Gooseberry Patch's 101 Stovetop Suppers

Ya'll know my love of all things Gooseberry Patch, and most of you probably already know why I'm especially fond of this cookbook. Yep, because I am in it!! That's right! Another one of my recipes made it's way into my favorite line of cookbooks. I couldn't be more excited or proud. (In case you're wondering, it is Beef and Bean Tostadas...and they are super yummy!) And one of the greatest things about GP choosing to use your recipe is that you receive a free copy of the book too! 

So you can imagine how excited I was to come home from vacation at the beginning of July and find not one, not two, but three Gooseberry Patch books waiting for me...because indeed I have recipes in all three! (The other two are harvest and holiday...so there will be recipes coming from them in the near future!) I couldn't wait to start thumbing through the pages! First because I love seeing my name in print next to food I created. It's like showing of a child to the world. Secondly, I knew there were other delicious recipes just waiting for me to try.

This is one of those I found and couldn't wait to make for my family. You know how much we love pasta, but probably about 90% of the recipes I have are for baked versions. I have others too, but looking through my collection, most come out of the oven. Sure, they start stovetop but eventually find their way into the oven to finish. So I was super excited to have this one cook entirely on the stove, especially since the day I made it the thermometer was reading about 95 with what I think was 400% humidity.

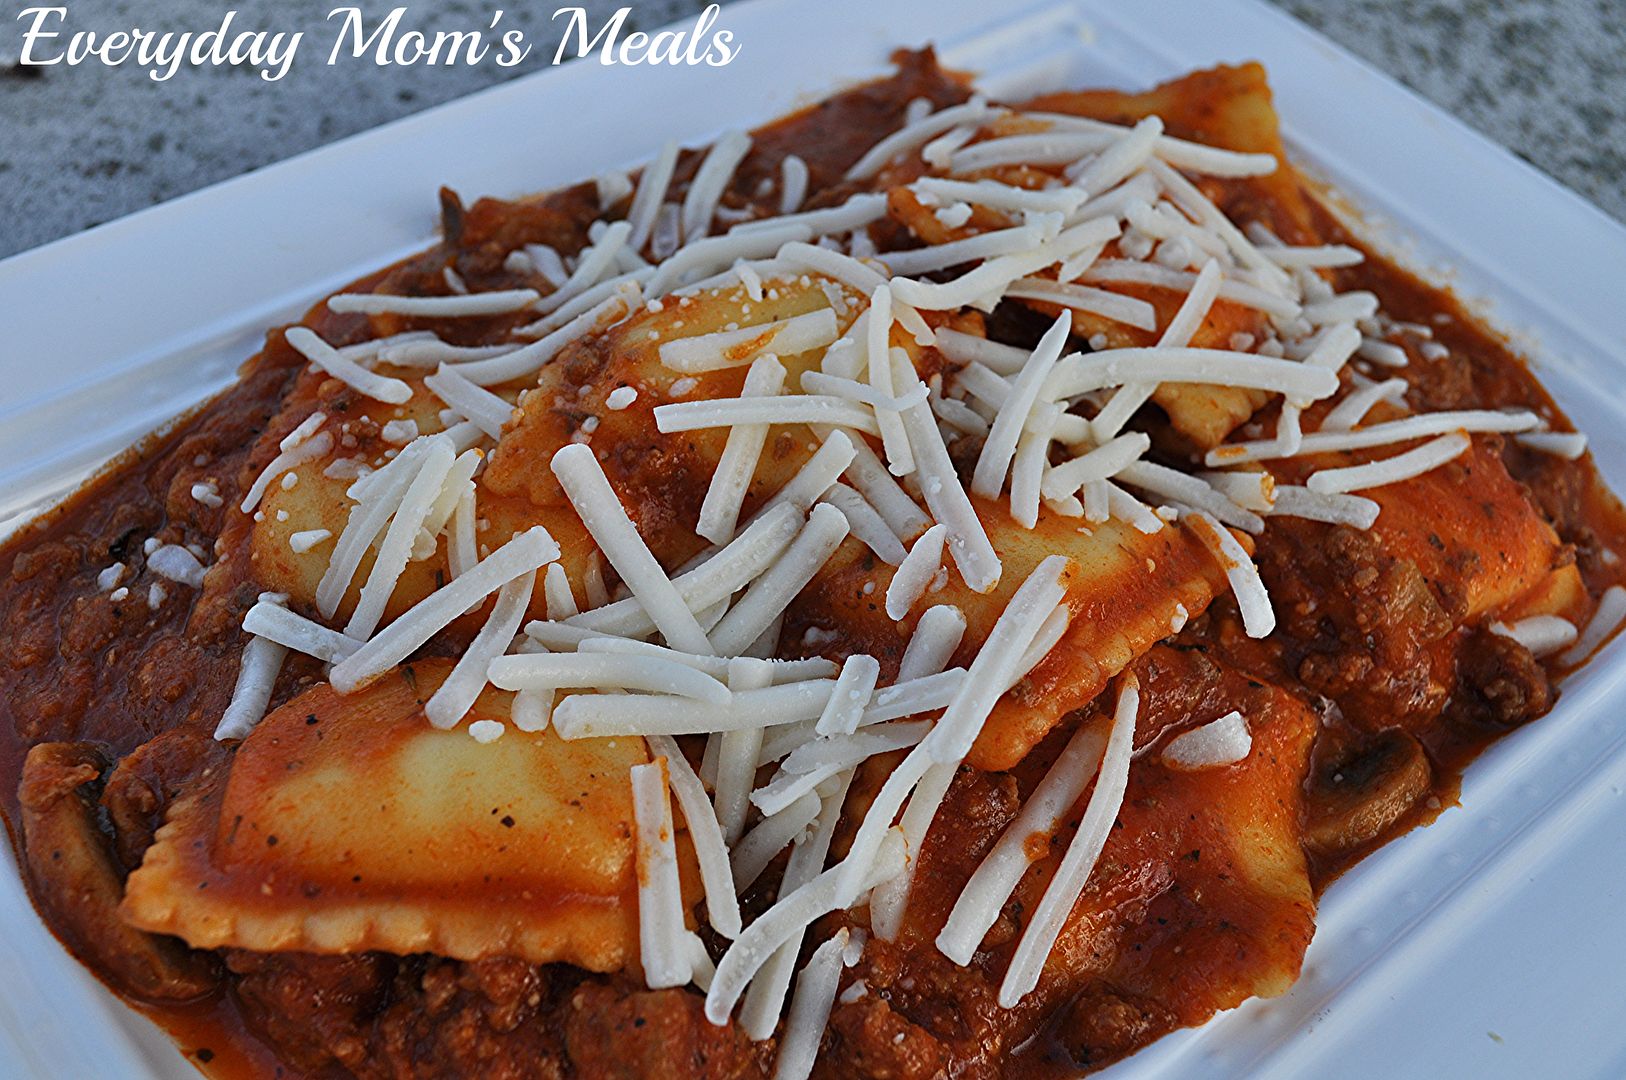
This recipe could not be easier, and it even takes a little help from the store using frozen ravioli. (The original called for refrigerated, but my store doesn't carry it, so I adapted.) Plus, it cooks right in the sauce, allowing each piece to wrap itself in the flavorful sauce. It is a simply yet delicious Italian supper you can have on the table in no time.

If you are looking for more recipes that don't include the oven, this is just for you. And if you love it, maybe you can get a copy of 101 Stovetop Suppers for yourself. And be sure to check out that tostada recipe from that woman in Indiana....it's pretty tasty and I hear she's a real sweetie too!

Stovetop Ravioli Adapted from Gooseberry Patch
1 (23 oz.) bag frozen four cheese ravioli, thawed
2 (24 oz.) jars Garlic and Herb spaghetti sauce
1 1/4 c. water
1 lb. ground beef
2 TBS olive oil
8 oz. button mushrooms, sliced
1/2 tsp. garlic powder
1 TBS Italian Seasoning
1/4. tsp. red pepper flakes, crushed
Salt and pepper, to taste
3/4 c. grated Parmesan cheese
1 c. mozzarella cheese

In a large pot over medium heat add olive oil. When warm, add ground beef. Break apart and brown until almost fully cooked. Add salt, pepper, garlic powder, Italian seasoning and red pepper flakes. Stir and continue to brown until no longer pink. Add mushrooms and cook about 5 minutes, stirring often until mushrooms begin to brown. Add sauce, water and ravioli. Stir to combine. Increase heat to high and bring to a boil. Add Parmesan cheese and then reduce heat to simmer. Cook for 15-20 minutes, stirring often, until ravioli is cooked through. Remove ravioli from pot to individual plates using a slotted spoon. Ladle sauce over each one. Sprinkle with mozzarella cheese.


Shared on The Country Cook Aug. 2, 2013
Shared on Mandy's Recipe Box Aug. 6, 2013
Shared on Lady Behind The Curtain Aug. 7, 2013
Pasta at Very Good Recipes
An entire cookbook of nothing but stovetop meals. Sound too good to be true? Well, it's not! Put away those oven mitts ladies and gents, because you won't be needing them for this recipe, or any of  those in Gooseberry Patch's 101 Stovetop Suppers

Ya'll know my love of all things Gooseberry Patch, and most of you probably already know why I'm especially fond of this cookbook. Yep, because I am in it!! That's right! Another one of my recipes made it's way into my favorite line of cookbooks. I couldn't be more excited or proud. (In case you're wondering, it is Beef and Bean Tostadas...and they are super yummy!) And one of the greatest things about GP choosing to use your recipe is that you receive a free copy of the book too! 
So you can imagine how excited I was to come home from vacation at the beginning of July and find not one, not two, but three Gooseberry Patch books waiting for me...because indeed I have recipes in all three! (The other two are harvest and holiday...so there will be recipes coming from them in the near future!) I couldn't wait to start thumbing through the pages! First because I love seeing my name in print next to food I created. It's like showing of a child to the world. Secondly, I knew there were other delicious recipes just waiting for me to try.
This is one of those I found and couldn't wait to make for my family. You know how much we love pasta, but probably about 90% of the recipes I have are for baked versions. I have others too, but looking through my collection, most come out of the oven. Sure, they start stovetop but eventually find their way into the oven to finish. So I was super excited to have this one cook entirely on the stove, especially since the day I made it the thermometer was reading about 95 with what I think was 400% humidity.

This recipe could not be easier, and it even takes a little help from the store using frozen ravioli. (The original called for refrigerated, but my store doesn't carry it, so I adapted.) Plus, it cooks right in the sauce, allowing each piece to wrap itself in the flavorful sauce. It is a simply yet delicious Italian supper you can have on the table in no time.

If you are looking for more recipes that don't include the oven, this is just for you. And if you love it, maybe you can get a copy of 101 Stovetop Suppers for yourself. And be sure to check out that tostada recipe from that woman in Indiana....it's pretty tasty and I hear she's a real sweetie too!

Stovetop Ravioli Adapted from Gooseberry Patch
1 (23 oz.) bag frozen four cheese ravioli, thawed
2 (24 oz.) jars Garlic and Herb spaghetti sauce
1 1/4 c. water
1 lb. ground beef
2 TBS olive oil
8 oz. button mushrooms, sliced
1/2 tsp. garlic powder
1 TBS Italian Seasoning
1/4. tsp. red pepper flakes, crushed
Salt and pepper, to taste
3/4 c. grated Parmesan cheese
1 c. mozzarella cheese

In a large pot over medium heat add olive oil. When warm, add ground beef. Break apart and brown until almost fully cooked. Add salt, pepper, garlic powder, Italian seasoning and red pepper flakes. Stir and continue to brown until no longer pink. Add mushrooms and cook about 5 minutes, stirring often until mushrooms begin to brown. Add sauce, water and ravioli. Stir to combine. Increase heat to high and bring to a boil. Add Parmesan cheese and then reduce heat to simmer. Cook for 15-20 minutes, stirring often, until ravioli is cooked through. Remove ravioli from pot to individual plates using a slotted spoon. Ladle sauce over each one. Sprinkle with mozzarella cheese.


Shared on The Country Cook Aug. 2, 2013
Shared on Mandy's Recipe Box Aug. 6, 2013
Shared on Lady Behind The Curtain Aug. 7, 2013
Pasta at Very Good Recipes
reade more... Résuméabuiyad

Soul Food Saturday #15

Welcome to another weekend! I hope you had a nice week, and some beautiful weather to go along with it. The heat and humidity subsided here in Northern Indiana, and it was sunny and pleasant, perfect for enjoying some time outside! Bekki has a great, simple meal idea for you today that I think the little ones will love!


Interesting thing happened last time we visited my niece and nephews. My oldest nephew Kyle, has a huge love for something he calls Chili Mac. Yes, I said it. I had no clue what this was until I was part of this family. I have made Cheeseburger Macaroni many times and loved it, from childhood. After hearing about this Chili Mac for some time I decided I’d try it. Wow, I was definitely missing out. To combine the taste of a chili dog and Mac in cheese in a bowl, how could I have gone so long without knowing about this? Who knows…? All I know is I am keeping this one in the box, for a rainy day. And, who says they don’t need one more great way to have fun with that little blue box? Not anyone I know. So watch out, if you blink you may miss this one. It’s done in no time flat. Enjoy!
Chili Mac-Stat!
1 (7.25 oz.) box Mac and Cheese Dinner {we’ll let the one you choose be a secret}
6 c. water
¼ c. butter
¼ c. milk
1(15 oz.) can Thick Chili with beans
 In a large saucepan heat water to boiling and add macaroni. Let cook for 7-10 minutes until macaroni is tender. Drain. Add butter, and mix to combine. Add milk and sauce packet, and mix well. Add chili with beans and mix to combine. Serve hot. Serves 4


Pin It
Welcome to another weekend! I hope you had a nice week, and some beautiful weather to go along with it. The heat and humidity subsided here in Northern Indiana, and it was sunny and pleasant, perfect for enjoying some time outside! Bekki has a great, simple meal idea for you today that I think the little ones will love!


Interesting thing happened last time we visited my niece and nephews. My oldest nephew Kyle, has a huge love for something he calls Chili Mac. Yes, I said it. I had no clue what this was until I was part of this family. I have made Cheeseburger Macaroni many times and loved it, from childhood. After hearing about this Chili Mac for some time I decided I’d try it. Wow, I was definitely missing out. To combine the taste of a chili dog and Mac in cheese in a bowl, how could I have gone so long without knowing about this? Who knows…? All I know is I am keeping this one in the box, for a rainy day. And, who says they don’t need one more great way to have fun with that little blue box? Not anyone I know. So watch out, if you blink you may miss this one. It’s done in no time flat. Enjoy!
Chili Mac-Stat!
1 (7.25 oz.) box Mac and Cheese Dinner {we’ll let the one you choose be a secret}
6 c. water
¼ c. butter
¼ c. milk
1(15 oz.) can Thick Chili with beans
 In a large saucepan heat water to boiling and add macaroni. Let cook for 7-10 minutes until macaroni is tender. Drain. Add butter, and mix to combine. Add milk and sauce packet, and mix well. Add chili with beans and mix to combine. Serve hot. Serves 4


Pin It
reade more... Résuméabuiyad

Soul Food Saturday #14

Good Morning, Bekki is in the kitchen today whipping up a salad that eats like a meal. Perfect for these hot nights when supper needs to be light yet filling. Or a wonderful lunch idea any time of the year!


In this house salads are not always frequent. But when they grace our table my husband requests them to be packed, hearty and filling. This salad doesn't disappoint. It has plenty to fill you up but
not leave you feeling so full you can’t enjoy the rest of your afternoon out.  It has a few simple ingredients that come together for that quick meal before the next event or even great to travel with. I know some are squeamish of mayo in the summer and heat, but if you keep it in the cooler it will be just fine.

Bowtie Chicken Caesar Salad
1 lb. cooked bow tie pasta, drained
1 c. shredded Parmesan cheese
½ c. creamy Italian dressing
1 c. real mayo
2 cans water packed chicken breast, drained
2 c. romaine hearts, chopped
Salt and pepper to taste
In a small bowl add mayo, dressing, cheese, and mix to combine. Set aside. In a large bowl add pasta, drained chicken, and chopped romaine. Toss to combine. Add dressing mixture and toss until evenly distributed. Add salt and pepper to taste.


Pin It
Good Morning, Bekki is in the kitchen today whipping up a salad that eats like a meal. Perfect for these hot nights when supper needs to be light yet filling. Or a wonderful lunch idea any time of the year!


In this house salads are not always frequent. But when they grace our table my husband requests them to be packed, hearty and filling. This salad doesn't disappoint. It has plenty to fill you up but
not leave you feeling so full you can’t enjoy the rest of your afternoon out.  It has a few simple ingredients that come together for that quick meal before the next event or even great to travel with. I know some are squeamish of mayo in the summer and heat, but if you keep it in the cooler it will be just fine.

Bowtie Chicken Caesar Salad
1 lb. cooked bow tie pasta, drained
1 c. shredded Parmesan cheese
½ c. creamy Italian dressing
1 c. real mayo
2 cans water packed chicken breast, drained
2 c. romaine hearts, chopped
Salt and pepper to taste
In a small bowl add mayo, dressing, cheese, and mix to combine. Set aside. In a large bowl add pasta, drained chicken, and chopped romaine. Toss to combine. Add dressing mixture and toss until evenly distributed. Add salt and pepper to taste.


Pin It
reade more... Résuméabuiyad

Yet Another Restaurant Favorite

You know how much I love taking favorite restaurant recipes of mine (or my boys) and making them at home so we can enjoy them any time we want. I've done too many to count, and the most recent on the list is a super star!

I will be the first person to admit my weakness. It's not chocolate like so many. It's not even sweets in general. My weakness? Pasta. I've said it before and I'll say it again, there is a good chance I was an Italian grandmother in another life, always standing over a big pot of "Sunday Gravy", happy as I can be feeding my family dish after dish.

Baked, boiled, with meat, without, white sauce, red sauce... (Yes, for those who know me and my lesser love for the red sauce, it is growing on me) I don't care. I crave the stuff. I have dreams about ziti, penne and fettuccine. If there were addict meetings for the stuff, I'd be the chapter president. 

This dish was something I heard of for years, but had never tried until this past winter, at our favorite local Italian restaurant. I can still remember the first bite and how it melted in my mouth. Now you might be wondering if I had been "eyeing" it, why it took me so long to finally order it. Well, it's simple. The raw egg aspect frightened me. Not because they were raw. I knew enough to know mixing them with hot pasta essentially cooked them, making it safe to eat. No, they scared me because I love pasta so much, I was afraid the flavor would be that of scrambled eggs mixed with noodles, and I didn't want to ruin a good pasta experience! 

But one night I was feeling extra brave and decided to give it a try...and it was love at first bite! The creamy sauce, the salty meat, the delicate pasta...they all combined to make the perfect tasty dish! So I immediately knew I would have to make a version at home to satisfy my new favorite any time I wanted. 

This recipe could not be easier, but it's pretty enough to entertain with if you choose. The egg mixture sticks to every inch of the pasta, coating it in creamy, flavorful goodness and the pancetta adds an unique flavor that still allows the pasta to shine.

Recreating restaurant favorites at home is one of the most fun things I do in the kitchen, and I'm so excited to share this most recent one with you!

Spaghetti Carbonara Adapted from Simply Recipes
1 lb. spaghetti, cooked to al dente and drained
1/2 lb. pancetta, diced (bacon makes a great substitute)
4 eggs
1 c. grated Parmesan cheese
1 TBS butter
2 cloves garlic, finely chopped
Heavy on black pepper

While spaghetti is cooking, in a medium skillet, melt butter and add pancetta. Cook over medium until crisp, about 10 minutes. Stir often and lower heat if start to burn around edges. Add garlic. Stir. Cook another minute. Remove from pan with slotted spoon and add to large bowl. In a small bowl, whisk eggs and 1/2 c. cheese together. When pasta is drained, add to bowl with pancetta. Toss to combine. Immediately add egg mixture and toss again to coat. Add other 1/2 c. cheese and lots of black pepper. Stir once more. Garnish with extra cheese and pepper, if desired.
*NOTE* Be sure to add the egg mixture as soon as the pasta comes out and is mixed with pancetta. The HOT pasta is what essentially cooks the egg, developing the creamy sauce! 


Shared on Lady Behind The Curtain July 17, 2013
Shared on The Country Cook July 19, 2013

Pasta at Very Good Recipes
Pin It
You know how much I love taking favorite restaurant recipes of mine (or my boys) and making them at home so we can enjoy them any time we want. I've done too many to count, and the most recent on the list is a super star!

I will be the first person to admit my weakness. It's not chocolate like so many. It's not even sweets in general. My weakness? Pasta. I've said it before and I'll say it again, there is a good chance I was an Italian grandmother in another life, always standing over a big pot of "Sunday Gravy", happy as I can be feeding my family dish after dish.

Baked, boiled, with meat, without, white sauce, red sauce... (Yes, for those who know me and my lesser love for the red sauce, it is growing on me) I don't care. I crave the stuff. I have dreams about ziti, penne and fettuccine. If there were addict meetings for the stuff, I'd be the chapter president. 

This dish was something I heard of for years, but had never tried until this past winter, at our favorite local Italian restaurant. I can still remember the first bite and how it melted in my mouth. Now you might be wondering if I had been "eyeing" it, why it took me so long to finally order it. Well, it's simple. The raw egg aspect frightened me. Not because they were raw. I knew enough to know mixing them with hot pasta essentially cooked them, making it safe to eat. No, they scared me because I love pasta so much, I was afraid the flavor would be that of scrambled eggs mixed with noodles, and I didn't want to ruin a good pasta experience! 

But one night I was feeling extra brave and decided to give it a try...and it was love at first bite! The creamy sauce, the salty meat, the delicate pasta...they all combined to make the perfect tasty dish! So I immediately knew I would have to make a version at home to satisfy my new favorite any time I wanted. 

This recipe could not be easier, but it's pretty enough to entertain with if you choose. The egg mixture sticks to every inch of the pasta, coating it in creamy, flavorful goodness and the pancetta adds an unique flavor that still allows the pasta to shine.

Recreating restaurant favorites at home is one of the most fun things I do in the kitchen, and I'm so excited to share this most recent one with you!

Spaghetti Carbonara Adapted from Simply Recipes
1 lb. spaghetti, cooked to al dente and drained
1/2 lb. pancetta, diced (bacon makes a great substitute)
4 eggs
1 c. grated Parmesan cheese
1 TBS butter
2 cloves garlic, finely chopped
Heavy on black pepper

While spaghetti is cooking, in a medium skillet, melt butter and add pancetta. Cook over medium until crisp, about 10 minutes. Stir often and lower heat if start to burn around edges. Add garlic. Stir. Cook another minute. Remove from pan with slotted spoon and add to large bowl. In a small bowl, whisk eggs and 1/2 c. cheese together. When pasta is drained, add to bowl with pancetta. Toss to combine. Immediately add egg mixture and toss again to coat. Add other 1/2 c. cheese and lots of black pepper. Stir once more. Garnish with extra cheese and pepper, if desired.
*NOTE* Be sure to add the egg mixture as soon as the pasta comes out and is mixed with pancetta. The HOT pasta is what essentially cooks the egg, developing the creamy sauce! 


Shared on Lady Behind The Curtain July 17, 2013
Shared on The Country Cook July 19, 2013

Pasta at Very Good Recipes
Pin It
reade more... Résuméabuiyad