Pages

Showing posts with label Side Dish. Show all posts

Crock Pot Cornbread Dressing

The traditional fare for many holiday times is turkey, and that was the choice for my family this year at Thanksgiving. I also sometimes serve turkey at Christmas or other occasions when I am cooking for a group. An essential side dish for turkey at my house is the cornbread dressing. I know there is a debated "dressing or stuffing" issue, but I'll let someone else argue the points, I'll just say that this cornbread dressing is what my family prefers.

This dish is so easy because all the prep work can be done ahead, and all there is left to do on the big day is stir it together and turn on the crock pot. On a day when you need the services of an air traffic controller to get everything in and out of the oven efficiently, using the crock pot for a side just saves a bit of sanity for the cook.

This recipe has been around for a long time, and I'm not sure of its origin, but whoever the bright chef was that thought of using the crock pot for this dish has my applause.


Print Recipe

Crockpot Cornbread Dressing

1 (9-inch) pan baked cornbread
8 slices day old bread
1 teaspoon salt
1/4 teaspoon black pepper
1/2 large onion, chopped
1/4 cup chopped celery
1 1/2 teaspoon sage
2 (10.75 oz.) cans cream of chicken soup
2 (14.5 oz.) cans chicken broth
4 eggs
2 tablespoons butter

In a large bowl, break up and crumble breads together. Add salt, pepper, onion, celery, and sage, mix well. In a separate bowl, mix soup, broth, and eggs together. Add the liquid ingredients to the dry ingredients, mix well. Pour mixture into a crock pot that has been prepared with nonstick cooking spray. Dot the top of the mixture with the butter. Cook on LOW for 4 hours or on HIGH for 2 hours.

If desired, this recipe can be halved and baked in the oven at 350 degrees F for 45 minutes.

Quick prep tip:
Bake the cornbread a few days in advance. Prepare the dry ingredients together the day before you plan to cook the dressing and refrigerate. When needed, mix together the soup, chicken broth, and eggs to add to the already prepared dry ingredients, then dot with butter.

Cornbread recipe can be found here.


The traditional fare for many holiday times is turkey, and that was the choice for my family this year at Thanksgiving. I also sometimes serve turkey at Christmas or other occasions when I am cooking for a group. An essential side dish for turkey at my house is the cornbread dressing. I know there is a debated "dressing or stuffing" issue, but I'll let someone else argue the points, I'll just say that this cornbread dressing is what my family prefers.

This dish is so easy because all the prep work can be done ahead, and all there is left to do on the big day is stir it together and turn on the crock pot. On a day when you need the services of an air traffic controller to get everything in and out of the oven efficiently, using the crock pot for a side just saves a bit of sanity for the cook.

This recipe has been around for a long time, and I'm not sure of its origin, but whoever the bright chef was that thought of using the crock pot for this dish has my applause.


Print Recipe

Crockpot Cornbread Dressing

1 (9-inch) pan baked cornbread
8 slices day old bread
1 teaspoon salt
1/4 teaspoon black pepper
1/2 large onion, chopped
1/4 cup chopped celery
1 1/2 teaspoon sage
2 (10.75 oz.) cans cream of chicken soup
2 (14.5 oz.) cans chicken broth
4 eggs
2 tablespoons butter

In a large bowl, break up and crumble breads together. Add salt, pepper, onion, celery, and sage, mix well. In a separate bowl, mix soup, broth, and eggs together. Add the liquid ingredients to the dry ingredients, mix well. Pour mixture into a crock pot that has been prepared with nonstick cooking spray. Dot the top of the mixture with the butter. Cook on LOW for 4 hours or on HIGH for 2 hours.

If desired, this recipe can be halved and baked in the oven at 350 degrees F for 45 minutes.

Quick prep tip:
Bake the cornbread a few days in advance. Prepare the dry ingredients together the day before you plan to cook the dressing and refrigerate. When needed, mix together the soup, chicken broth, and eggs to add to the already prepared dry ingredients, then dot with butter.

Cornbread recipe can be found here.


reade more... Résuméabuiyad

Soul Food Saturday #34

Good Morning! Welcome to the first full weekend in December. Are you venturing out to do some Christmas shopping today? Or maybe headed to the local tree lot/farm to pick out the family Christmas tree for the family to decorate? Doing some baking perhaps? I love this time of year; and I'm so happy it's here again. However you are spending the weekend I hope it includes some holiday cheer!

Bekki is sharing one of my favorite restaurant recipes today! I'm so excited to have a make-at-home version that I can enjoy any time I want!


After my first visit to the south I found there were foods I couldn't go without. Because I couldn't buy a Cracker Barrel franchise and bring it to California I had to do the next best thing. Yep, make my own. I looked all over the internet for a recipe and was not particularly happy with the ones I found. But after chatting with a few family members I was given an insider tip and “His” recipe. I’ll tell you what, this was my first EVER attempt at this recipe. It was an amazing hit! My hubby and I couldn't get enough! The serving bowls were too small for the portion our bellies thought we needed. So I was reminded of my trip one more time, and full! Whether you make this for a weeknight meal or add it to your holiday table, I hope your family enjoys it as much as we have. 
 
 
Collard Greens with Smoked Ham Hocks
1 large onion, chopped
Salt to taste
2 tsp granulated garlic
2 tsp. red pepper flakes
4 c. water
4 large smoked ham hocks
1 tbs. chicken bouillon
8 c. collard greens, washed, stemmed and sliced
Heaping TBS Bacon fat
½ tsp. baking soda (optional*cuts bitterness* my preference)
 
In a medium pot add bacon fat and allow it to melt. Add onion, and stir to combine with fat. Cook until onions are clear. Add greens, tossing to allow fat to coat leaves. Add a pinch of salt and pepper flakes. Cook until greens turn bright and then add water with bouillon. Add ham hocks and nestle them in under the greens. Cover and cook until greens are tender, stirring occasionally. Before serving add soda if you’d like and check for seasoning adjustments.
 
**Note: With smoked meats, bacon fat, and bouillon they have salt on their own. So you may need more or less depending on your personal tastes. Enjoy!


Good Morning! Welcome to the first full weekend in December. Are you venturing out to do some Christmas shopping today? Or maybe headed to the local tree lot/farm to pick out the family Christmas tree for the family to decorate? Doing some baking perhaps? I love this time of year; and I'm so happy it's here again. However you are spending the weekend I hope it includes some holiday cheer!

Bekki is sharing one of my favorite restaurant recipes today! I'm so excited to have a make-at-home version that I can enjoy any time I want!


After my first visit to the south I found there were foods I couldn't go without. Because I couldn't buy a Cracker Barrel franchise and bring it to California I had to do the next best thing. Yep, make my own. I looked all over the internet for a recipe and was not particularly happy with the ones I found. But after chatting with a few family members I was given an insider tip and “His” recipe. I’ll tell you what, this was my first EVER attempt at this recipe. It was an amazing hit! My hubby and I couldn't get enough! The serving bowls were too small for the portion our bellies thought we needed. So I was reminded of my trip one more time, and full! Whether you make this for a weeknight meal or add it to your holiday table, I hope your family enjoys it as much as we have. 
 
 
Collard Greens with Smoked Ham Hocks
1 large onion, chopped
Salt to taste
2 tsp granulated garlic
2 tsp. red pepper flakes
4 c. water
4 large smoked ham hocks
1 tbs. chicken bouillon
8 c. collard greens, washed, stemmed and sliced
Heaping TBS Bacon fat
½ tsp. baking soda (optional*cuts bitterness* my preference)
 
In a medium pot add bacon fat and allow it to melt. Add onion, and stir to combine with fat. Cook until onions are clear. Add greens, tossing to allow fat to coat leaves. Add a pinch of salt and pepper flakes. Cook until greens turn bright and then add water with bouillon. Add ham hocks and nestle them in under the greens. Cover and cook until greens are tender, stirring occasionally. Before serving add soda if you’d like and check for seasoning adjustments.
 
**Note: With smoked meats, bacon fat, and bouillon they have salt on their own. So you may need more or less depending on your personal tastes. Enjoy!


reade more... Résuméabuiyad

Hometown Christmas {A Gooseberry Patch Review and Giveaway}

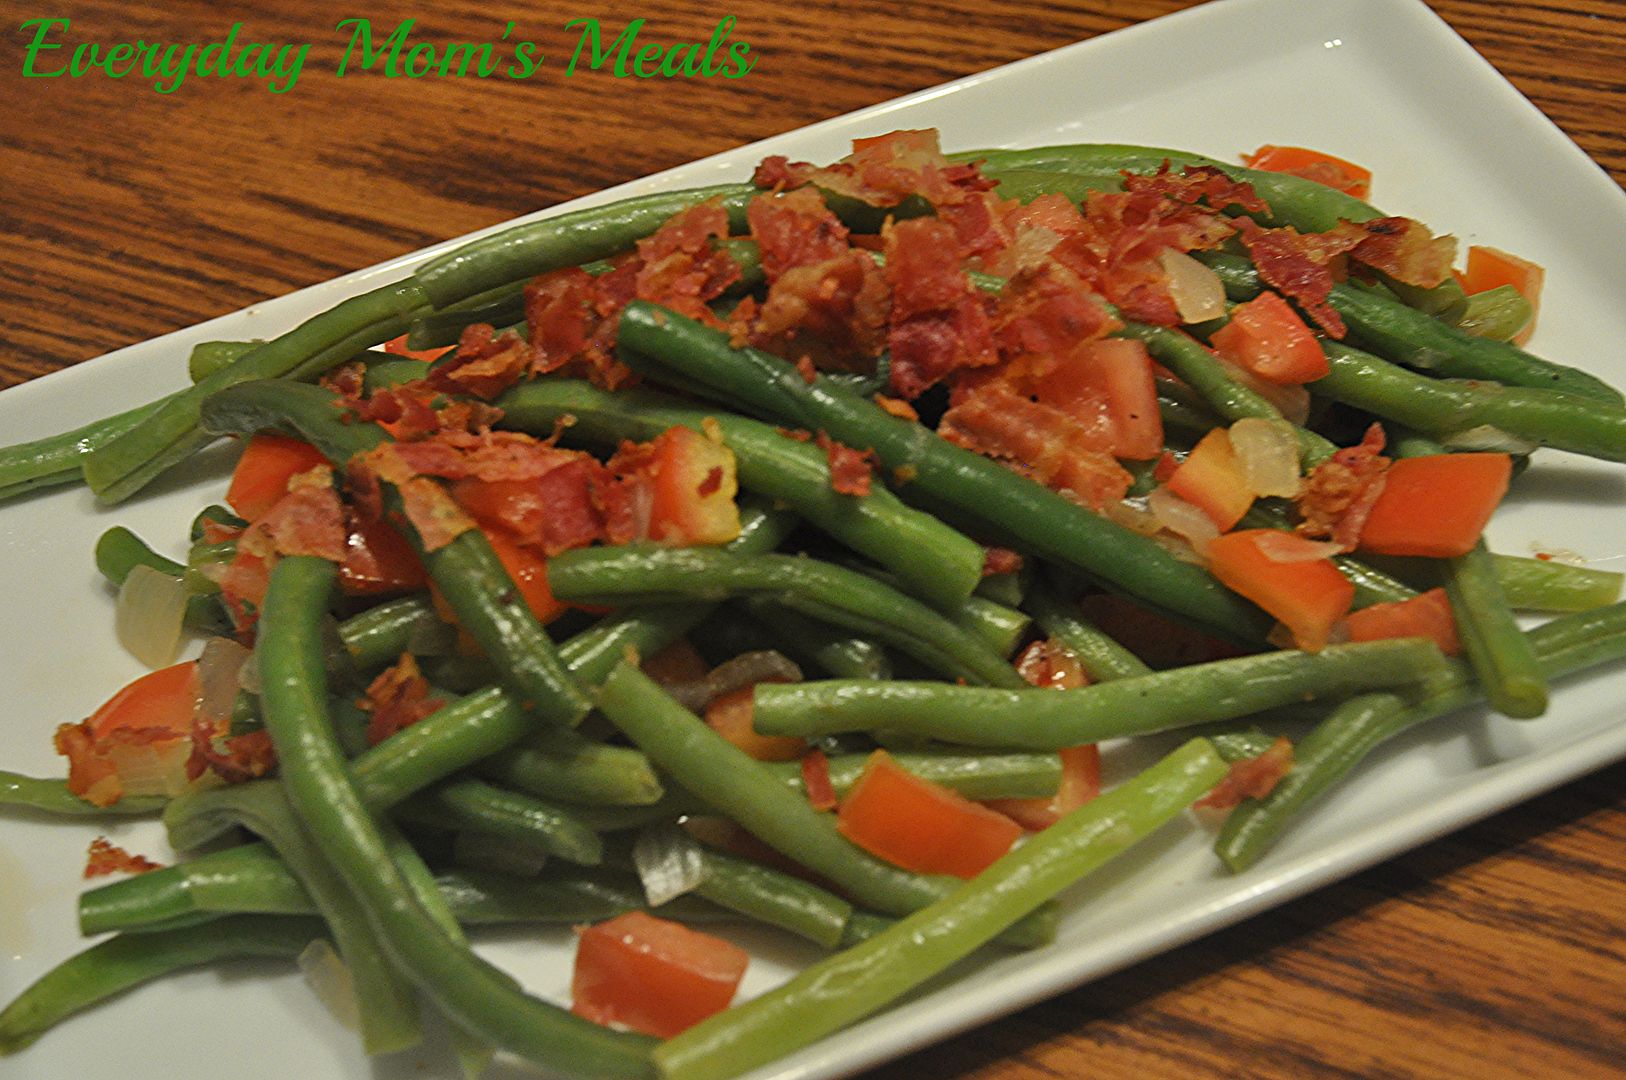
I'm very excited for today's post. One, it is a tasty recipe that is super simple, and oh so pretty on the plate (the perfect holiday colors too). And two, because it comes with a great cookbook I can't wait to introduce you to, and a giveaway so one of you can win it too!


Ya'll know how much I love Gooseberry Patch and their wonderful cookbooks filled with simple, yummy, down home recipes by every day cooks like you and me. Well, this year they have a new holiday one, Hometown Christmas and I'm so honored to be published in it! Yep, that's right check out the dessert section for my Mint Chocolate Chip Mousse! A delicious, simple dessert perfect for this holiday season.

But today isn't about my recipe. It's about a great side dish that could not be easier, but turns out both beautiful to the eye and satisfying to the palate. Not to mention the perfect colors for your Christmas table! 

Are you looking for a new veggie side dish to include in your holiday meal? How about one that can be done in almost no time at all, but still uses fresh produce, easily found even in these cold winter months? Oh, and did I mention it includes bacon too? That should enough to entice your taste buds right there!

These have a "cooked all day" flavor with the ease of knowing you can have them ready quickly, something we can all appreciate this time of year. I don't know about you, but I want to enjoy time with my family, not have them playing and enjoying one another, with me stuck in the kitchen the whole time missing out on the festivities. 

If you're looking for something new to add to your holiday menu, I think you've found it. Or if you're simply looking for a simple side dish to use any night of the week, you've found that too. And don't forget to scroll down after the recipe for your chance to win a copy of Hometown Christmas for yourself, or give it away to the special foodie in your life!

Skillet Green Beans From Hometown Christmas
Submitted by Jen Thomas, Santa Rosa, CA Page 89
1 lb. green beans, trimmed and cut into 2 inch pieces
4 Roma tomatoes, chopped
1 small onion, chopped
3 slices bacon
1/2 c. chicken broth

In a large skillet, cook bacon until crisp. Remove, but leave drippings. Add onion and cook until crisp-tender. Add beans, pepper and broth. Stir. Bring to a boil. Reduce heat to medium-low, cover and cook for 4-6 minutes. Stir in tomatoes and heat through. Top with crumbled bacon.


Shared on The Country Cook Dec. 6, 2013

Green Beans at Very Good Recipes


********Giveaway********
Rules:
1. This contest is open to US Residents 18 and older ONLY.

2. The winner will be chosen by Random.org 

3. The winner will be notified by email and Facebook. He/she will have 48 hours to respond or another winner will be chosen. 

4. When leaving comments for entries, they MUST BE SEPARATE ones AND include an email address so it's easy for me to find the winner. If entries are together, it will only count as (1) and if no email, entry will not be considered.

5. If any of the extra entries are items you are already doing, please just remind me!


6. Contest Ends: Friday Dec. 13, 2013


(1) Lucky Winner will receive Hometown Christmas


Mandatory Entry:
1.Leave a comment telling me your favorite Christmas side dish!

Extra Entry:
1. Become a Gooseberry Patch fan on Facebook. Leave me a comment when you have. 

2.  Follow Gooseberry Patch on Twitter. Leave a comment saying you've done so.

GOOD LUCK!


And if you would like to purchase this fabulous cookbook (maybe for a foodie on your shopping list) check out Gooseberry Patch online or on Amazon.

Disclaimer: I was given a free cookbook to give away to a fan for this review. All thoughts and opinions are my own.


I'm very excited for today's post. One, it is a tasty recipe that is super simple, and oh so pretty on the plate (the perfect holiday colors too). And two, because it comes with a great cookbook I can't wait to introduce you to, and a giveaway so one of you can win it too!


Ya'll know how much I love Gooseberry Patch and their wonderful cookbooks filled with simple, yummy, down home recipes by every day cooks like you and me. Well, this year they have a new holiday one, Hometown Christmas and I'm so honored to be published in it! Yep, that's right check out the dessert section for my Mint Chocolate Chip Mousse! A delicious, simple dessert perfect for this holiday season.

But today isn't about my recipe. It's about a great side dish that could not be easier, but turns out both beautiful to the eye and satisfying to the palate. Not to mention the perfect colors for your Christmas table! 

Are you looking for a new veggie side dish to include in your holiday meal? How about one that can be done in almost no time at all, but still uses fresh produce, easily found even in these cold winter months? Oh, and did I mention it includes bacon too? That should enough to entice your taste buds right there!

These have a "cooked all day" flavor with the ease of knowing you can have them ready quickly, something we can all appreciate this time of year. I don't know about you, but I want to enjoy time with my family, not have them playing and enjoying one another, with me stuck in the kitchen the whole time missing out on the festivities. 

If you're looking for something new to add to your holiday menu, I think you've found it. Or if you're simply looking for a simple side dish to use any night of the week, you've found that too. And don't forget to scroll down after the recipe for your chance to win a copy of Hometown Christmas for yourself, or give it away to the special foodie in your life!

Skillet Green Beans From Hometown Christmas
Submitted by Jen Thomas, Santa Rosa, CA Page 89
1 lb. green beans, trimmed and cut into 2 inch pieces
4 Roma tomatoes, chopped
1 small onion, chopped
3 slices bacon
1/2 c. chicken broth

In a large skillet, cook bacon until crisp. Remove, but leave drippings. Add onion and cook until crisp-tender. Add beans, pepper and broth. Stir. Bring to a boil. Reduce heat to medium-low, cover and cook for 4-6 minutes. Stir in tomatoes and heat through. Top with crumbled bacon.


Shared on The Country Cook Dec. 6, 2013

Green Beans at Very Good Recipes


********Giveaway********
Rules:
1. This contest is open to US Residents 18 and older ONLY.

2. The winner will be chosen by Random.org 

3. The winner will be notified by email and Facebook. He/she will have 48 hours to respond or another winner will be chosen. 

4. When leaving comments for entries, they MUST BE SEPARATE ones AND include an email address so it's easy for me to find the winner. If entries are together, it will only count as (1) and if no email, entry will not be considered.

5. If any of the extra entries are items you are already doing, please just remind me!


6. Contest Ends: Friday Dec. 13, 2013


(1) Lucky Winner will receive Hometown Christmas


Mandatory Entry:
1.Leave a comment telling me your favorite Christmas side dish!

Extra Entry:
1. Become a Gooseberry Patch fan on Facebook. Leave me a comment when you have. 

2.  Follow Gooseberry Patch on Twitter. Leave a comment saying you've done so.

GOOD LUCK!


And if you would like to purchase this fabulous cookbook (maybe for a foodie on your shopping list) check out Gooseberry Patch online or on Amazon.

Disclaimer: I was given a free cookbook to give away to a fan for this review. All thoughts and opinions are my own.


reade more... Résuméabuiyad

Downeast Seafarer's Sauce aka Blueberry Salad

This colorful side dish is one that I served at my Thanksgiving meal this year, but anytime is good time for a Blueberry Salad. I started making this for Thanksgiving several years ago at the suggestion of Dianna, the building principal at the school where I worked, because most of my family refused to eat any version of cranberry sauce. She gave me the recipe, and I have been making it ever since.


Print Recipe

Downeast Seafarer's Sauce aka Blueberry Salad

2 cups blueberries
1 cup water
1/3 cup sugar
In a saucepan combine blueberries, water, and sugar. Cook over medium-high heat and bring to a boil.
Add:
1 heaping tablespoon cornstarch dissolved in 1/3 cup water
Cook over medium heat until thickened.
Remove from heat and add:
1 (20 oz.) can crushed pineapple, undrained
1 (6 oz.) package raspberry gelatin dissolved in 1 cup boiling water
Mix all ingredients and pour into mold or serving dish. (Can also be made in a 9 x 13-inch pan). Refrigerate until set.

Topping
1 (8 oz.) package cream cheese
1/3 cup sour cream or plain yogurt
1/3 cup powdered sugar

Combine cream cheese and sour cream (or yogurt) in a mixing bowl. Beat together until combined and creamy. Beat in powdered sugar until smooth. Spread over blueberry sauce as desired.


This recipe makes a lot, so it can be cut in half if you don't need to serve a crowd. The topping can be spread over the top like a frosting, but I'll bet you'll tempt more guests into trying this dish if you don't completely hide those colorful blueberries. Let some of those pretty blueberries show through and entice some of the picky eaters at your house to try a taste. My cranberry sauce haters are all converts of this appealing blueberry dish.


This post was shared with:
The Shady Porch Holiday Party
This colorful side dish is one that I served at my Thanksgiving meal this year, but anytime is good time for a Blueberry Salad. I started making this for Thanksgiving several years ago at the suggestion of Dianna, the building principal at the school where I worked, because most of my family refused to eat any version of cranberry sauce. She gave me the recipe, and I have been making it ever since.


Print Recipe

Downeast Seafarer's Sauce aka Blueberry Salad

2 cups blueberries
1 cup water
1/3 cup sugar
In a saucepan combine blueberries, water, and sugar. Cook over medium-high heat and bring to a boil.
Add:
1 heaping tablespoon cornstarch dissolved in 1/3 cup water
Cook over medium heat until thickened.
Remove from heat and add:
1 (20 oz.) can crushed pineapple, undrained
1 (6 oz.) package raspberry gelatin dissolved in 1 cup boiling water
Mix all ingredients and pour into mold or serving dish. (Can also be made in a 9 x 13-inch pan). Refrigerate until set.

Topping
1 (8 oz.) package cream cheese
1/3 cup sour cream or plain yogurt
1/3 cup powdered sugar

Combine cream cheese and sour cream (or yogurt) in a mixing bowl. Beat together until combined and creamy. Beat in powdered sugar until smooth. Spread over blueberry sauce as desired.


This recipe makes a lot, so it can be cut in half if you don't need to serve a crowd. The topping can be spread over the top like a frosting, but I'll bet you'll tempt more guests into trying this dish if you don't completely hide those colorful blueberries. Let some of those pretty blueberries show through and entice some of the picky eaters at your house to try a taste. My cranberry sauce haters are all converts of this appealing blueberry dish.


This post was shared with:
The Shady Porch Holiday Party
reade more... Résuméabuiyad

Soul Food Saturday #32

Happy (early) Thanksgiving! Since this is the last weekend before we all gather around our huge tables, surrounded by those who we love most, eating until we can't move, Bekki and I wanted to make sure to share something that might just be the perfect last minute addition to your menu!


I found a new favorite salad in my grocery store deli not too long ago, that I call quinoa made AMAZING! It has dried fruits and walnuts with a sweet almost glaze type of dressing. With no recipe, just an idea that I wanted this more often, than having to drive over and hope they have some left for me. I decided to reconstruct it and dress it up for the holiday table. Yes! It has cranberries! Perfect for any dressed up occasion or time you want a beautiful simple salad. Hope you enjoy this as much as I did.
 
Quinoa Cranberry Salad
1 c. dried quinoa
4 tbs. Maple syrup
½ c. dried cranberries
½ c. dried apricots
1 tbs. orange juice
½ c. cashews, chopped
 
Cook quinoa according to package directions. In small bowl mix syrup, juice and set aside. Fluff cooked quinoa with a fork and add to a large bowl with fruit and nuts. Stir to combine. Pour dressing over and mix well. Chill in fridge until ready to serve.


Happy (early) Thanksgiving! Since this is the last weekend before we all gather around our huge tables, surrounded by those who we love most, eating until we can't move, Bekki and I wanted to make sure to share something that might just be the perfect last minute addition to your menu!


I found a new favorite salad in my grocery store deli not too long ago, that I call quinoa made AMAZING! It has dried fruits and walnuts with a sweet almost glaze type of dressing. With no recipe, just an idea that I wanted this more often, than having to drive over and hope they have some left for me. I decided to reconstruct it and dress it up for the holiday table. Yes! It has cranberries! Perfect for any dressed up occasion or time you want a beautiful simple salad. Hope you enjoy this as much as I did.
 
Quinoa Cranberry Salad
1 c. dried quinoa
4 tbs. Maple syrup
½ c. dried cranberries
½ c. dried apricots
1 tbs. orange juice
½ c. cashews, chopped
 
Cook quinoa according to package directions. In small bowl mix syrup, juice and set aside. Fluff cooked quinoa with a fork and add to a large bowl with fruit and nuts. Stir to combine. Pour dressing over and mix well. Chill in fridge until ready to serve.


reade more... Résuméabuiyad

A Forgotten Veggie

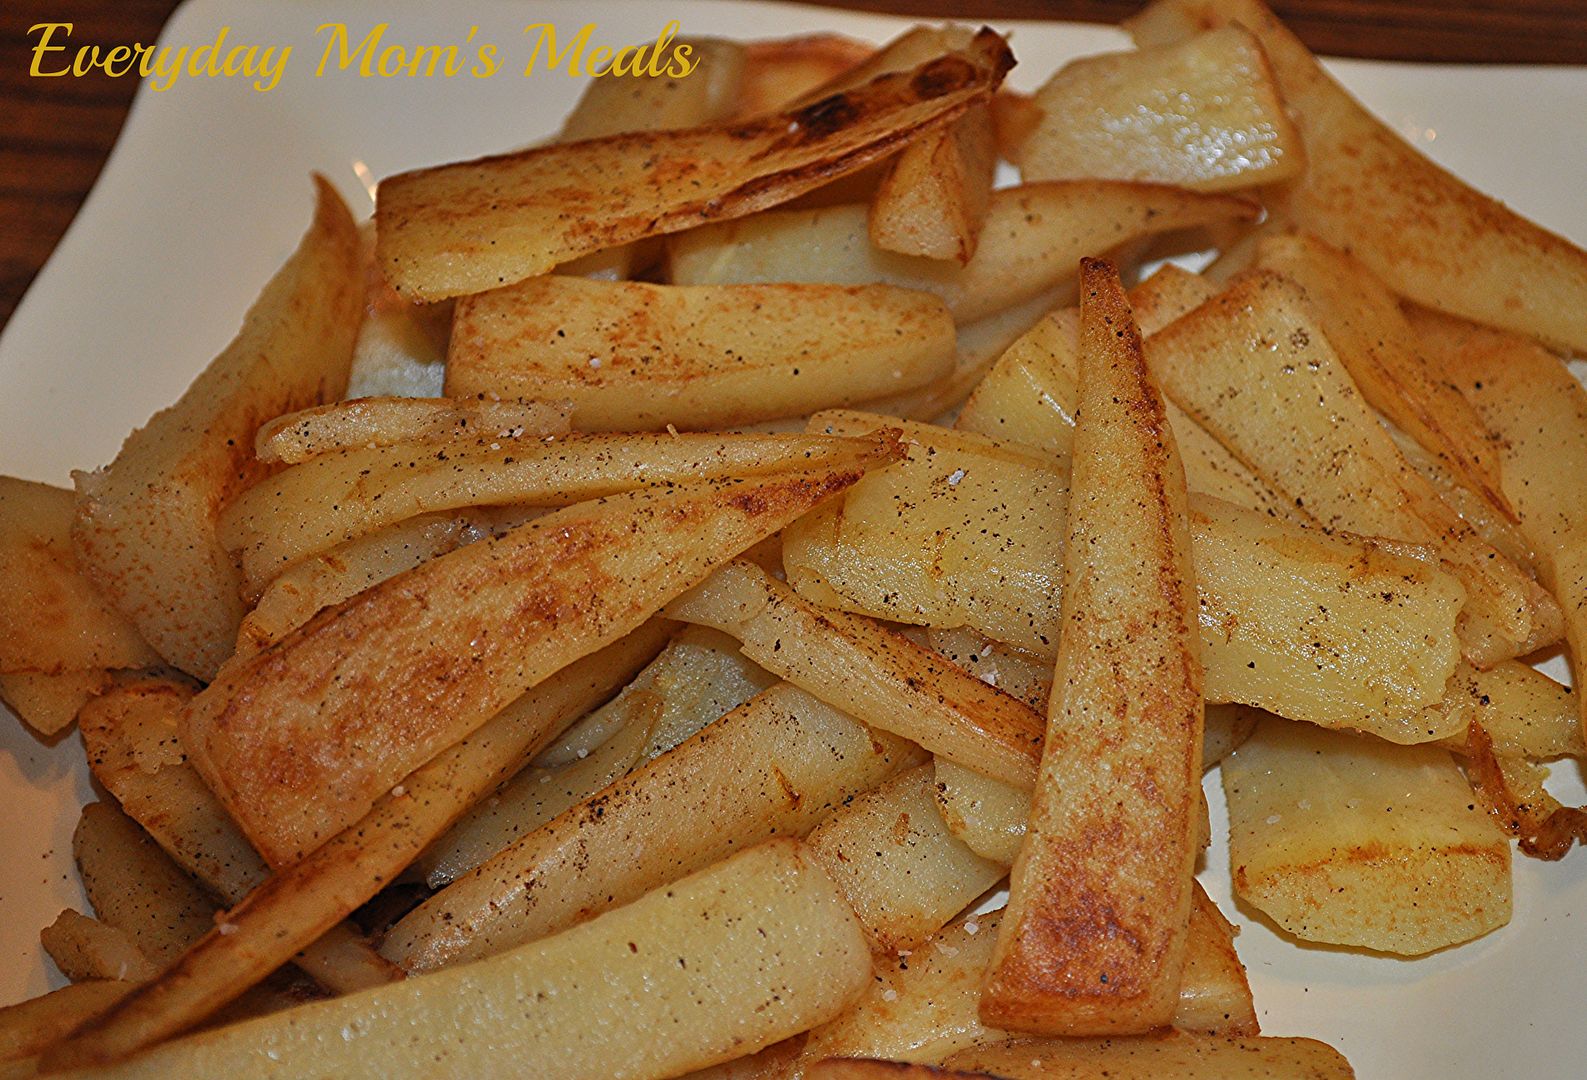
Are you looking for a new vegetable for your Thanksgiving table? Or maybe you're just trying to introduce your family to new things besides the staples of green beans and corn. Well, today I've got a recipe using one of my family's absolute favorite veggies, and it might just be one you've never tried, and for some, never even heard of.

The parsnip. Now, I will tell you right now, I truly believe your exposure to these root veggies might depend on the area of the country you live in. Growing up, I was well aware of them, but that was because of my family in Pennsylvania. See, they are very popular out there; and my "Popeye" (grandpa) grew the biggest ones around! I wish I had a photo to share, but I'm not kidding you when I say the ones he got out of the garden each year were gigantic! We're talking like something that could have taken a blue ribbon at the state fair, had he entered. And learning from him, my dad started growing them in his garden too, but something about the Indiana soil, they never did get as big as his dad's. And at that time, we couldn't even find them in our grocery stores. Nowadays, I can find them at a few stores around town, so I'm thankful.

One unique thing about getting the best tasting parsnips possible? You have to leave them in the ground until after a good hard freeze, and then dig them up! No joke, there were many Thanksgiving mornings in PA my grandpa would be out digging them up, fresh for Grammy to fix for dinner! It's the key to making sure the have just the right flavor. And what might that flavor be, you ask? Well, I once heard them described as a "carrot with a kick" and I think it's perfect. They have a little bit of a "spice" to them (think ginger) but when cooked, can be sweet like carrots.

This preparation is the only way our family has eaten them for 3 generations now! Grammy taught my dad. He taught me. And now I'm passing it down to my son. They couldn't be easier and would make a great addition to your Turkey Day table! Your family will be so pleased with something new to try, especially after they taste how delicious they are!

Sauteed Parsnips
4-5 large parsnips, peeled and sliced (see note below)
1/4 c. margarine or butter
Salt and Pepper to taste

Place sliced parsnips in medium saucepan. Cover with cold water. Bring to a boil. Cook for 3-5 minutes just until fork tender. Drain well. Melt margarine in large skillet over medium-high heat. Add parsnips. Season with salt and pepper. Saute until golden and browned, about 10 minutes. Transfer to serving bowl and adjust seasoning.

*NOTE* To slice parsnips, stand them up. Looking down on the top. you will be able to see a circle in the center. This is the core. Slice down each side of the parsnip, around that core and then julienne.


Shared on The Country Cook Nov. 22, 2013

Parsnips at Very Good Recipes
Are you looking for a new vegetable for your Thanksgiving table? Or maybe you're just trying to introduce your family to new things besides the staples of green beans and corn. Well, today I've got a recipe using one of my family's absolute favorite veggies, and it might just be one you've never tried, and for some, never even heard of.

The parsnip. Now, I will tell you right now, I truly believe your exposure to these root veggies might depend on the area of the country you live in. Growing up, I was well aware of them, but that was because of my family in Pennsylvania. See, they are very popular out there; and my "Popeye" (grandpa) grew the biggest ones around! I wish I had a photo to share, but I'm not kidding you when I say the ones he got out of the garden each year were gigantic! We're talking like something that could have taken a blue ribbon at the state fair, had he entered. And learning from him, my dad started growing them in his garden too, but something about the Indiana soil, they never did get as big as his dad's. And at that time, we couldn't even find them in our grocery stores. Nowadays, I can find them at a few stores around town, so I'm thankful.

One unique thing about getting the best tasting parsnips possible? You have to leave them in the ground until after a good hard freeze, and then dig them up! No joke, there were many Thanksgiving mornings in PA my grandpa would be out digging them up, fresh for Grammy to fix for dinner! It's the key to making sure the have just the right flavor. And what might that flavor be, you ask? Well, I once heard them described as a "carrot with a kick" and I think it's perfect. They have a little bit of a "spice" to them (think ginger) but when cooked, can be sweet like carrots.

This preparation is the only way our family has eaten them for 3 generations now! Grammy taught my dad. He taught me. And now I'm passing it down to my son. They couldn't be easier and would make a great addition to your Turkey Day table! Your family will be so pleased with something new to try, especially after they taste how delicious they are!

Sauteed Parsnips
4-5 large parsnips, peeled and sliced (see note below)
1/4 c. margarine or butter
Salt and Pepper to taste

Place sliced parsnips in medium saucepan. Cover with cold water. Bring to a boil. Cook for 3-5 minutes just until fork tender. Drain well. Melt margarine in large skillet over medium-high heat. Add parsnips. Season with salt and pepper. Saute until golden and browned, about 10 minutes. Transfer to serving bowl and adjust seasoning.

*NOTE* To slice parsnips, stand them up. Looking down on the top. you will be able to see a circle in the center. This is the core. Slice down each side of the parsnip, around that core and then julienne.


Shared on The Country Cook Nov. 22, 2013

Parsnips at Very Good Recipes
reade more... Résuméabuiyad

Yep, It's From a Box

I love stuffing. In fact it's one of the things I love most about holiday meals. But I can't even lie, we eat stuffing year round. For any of you that read my meal plans on a weekly basis, you know many times if I serve pork chops or ham steaks, stuffing is one of the side dishes included.

Now, here is something you might not know. Every single time I make stuffing, it's from a box! Yep, it's one of the few things I don't even attempt to make from scratch. And if I'm being completely honest, I actually prefer the boxed variety to any homemade I've ever had! I'm certain it's because what I grew up with both from my mom, and her mom. My other grandma always made homemade, but on my mom's side, it always came from a box, and that was okay with us.

I'm sure many of you enjoy making your own, or maybe you have a tried and true family recipe; and I have all the respect in the world for that. There are so many kinds of stuffing, or dressing, out there, who am I to say which is the best? I just know what our family enjoys the most, and it's what we stick to.

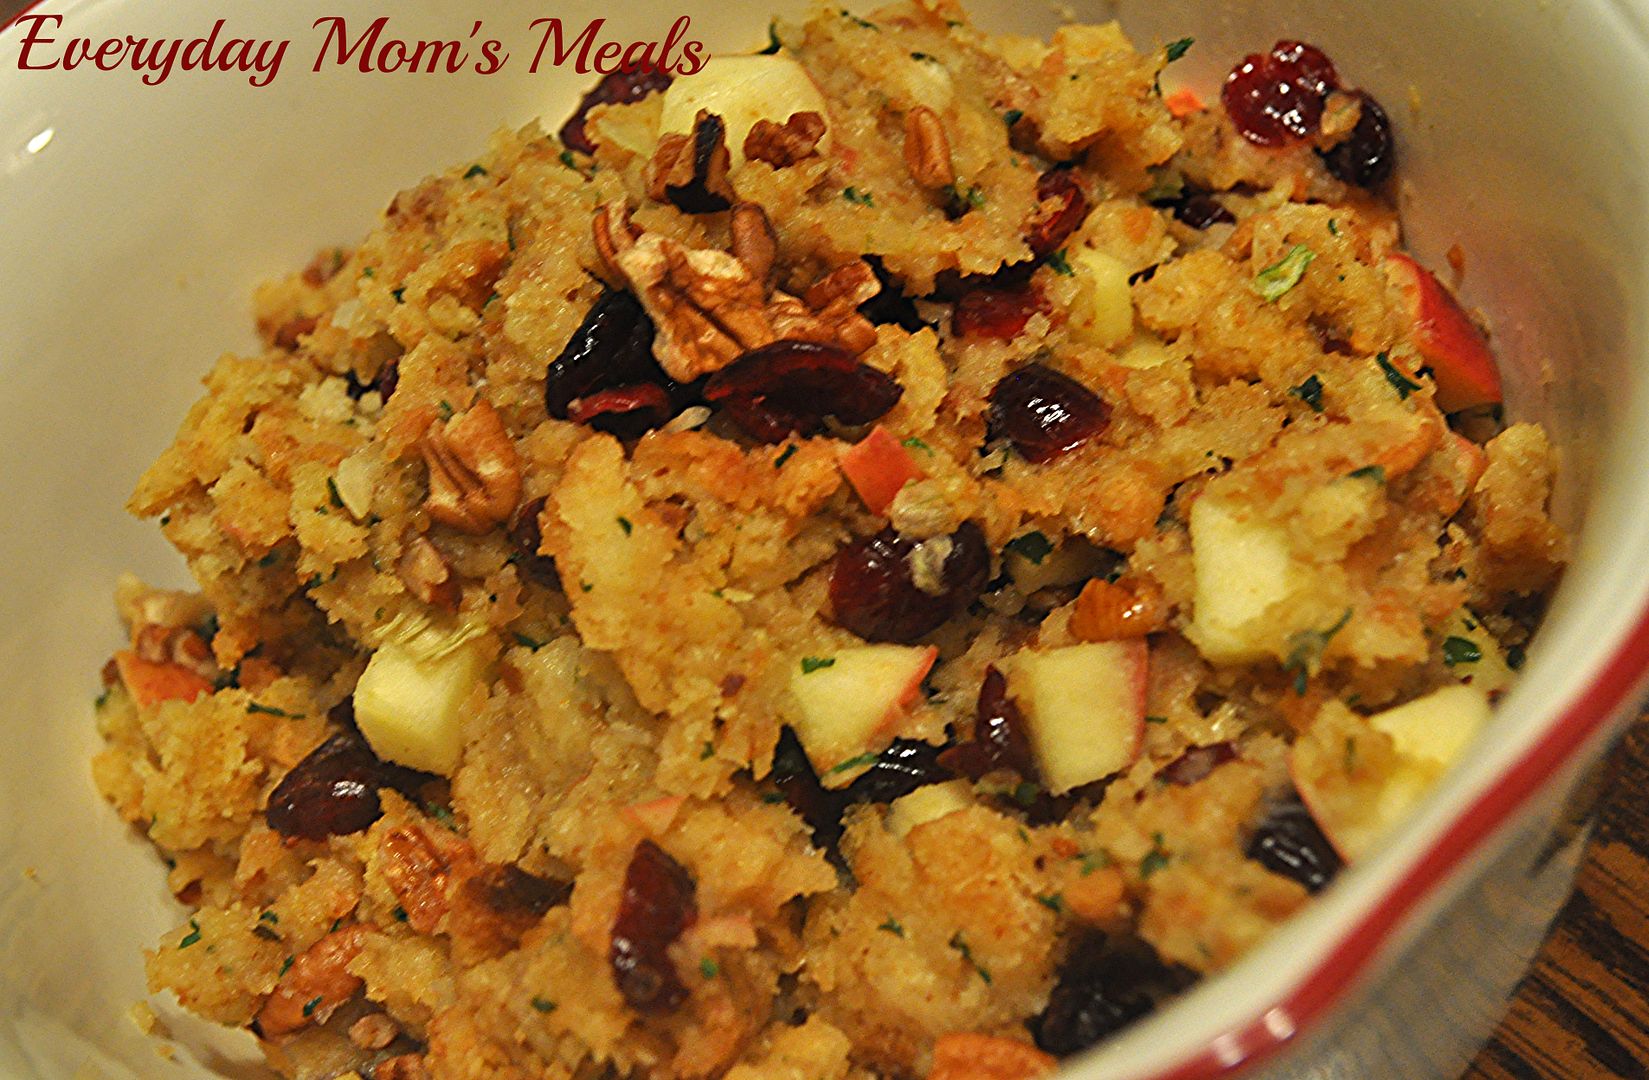
But that doesn't mean we can't make it a little better. Jazz it up a little so to speak. Add some fresh, yummy things, and that dried stuffing mix is brought back to life in a whole new way. And nothing says holiday more than apples and cranberries! The flavor of this version is like nothing I've ever made before, and it really tasted like homemade!

This recipe fantastic because you can take a little help from the store, making one thing on your menu a little easier, and easily adapt it to feed a few or a crowd. Not to mention, it's pretty economical too. This time of year you can usually find the boxed mixes for $1 or less!

If you have a great stuffing recipe and don't really groove on the boxed kind, that's okay. Maybe you can incorporate parts of this recipe into your favorite version and still come up with something new. But if you're like me and willing to take a little pre-made assistance, here is one way to make it just a little more special!

Cran-Apple Pecan Stuffing From Kraft
1 box stuffing mix for turkey
1 1/2 c. apple juice
2 TBS butter
1 small apple, finely chopped
1/2 c. dried cranberries, extra for garnish
1/4 c. chopped pecans, extra for garnish

In a medium saucepan bring apple juice and butter to a boil. Add stuffing mix, apples and cranberries. Stir. Remove from heat. Cover. Let sit 5 minutes. Fluff with a fork. Add pecans. Stir well. Transfer to serving dish. Garnish with extra cranberries and pecans.


Shared on The Country Cook Nov. 22, 2013

Stuffing at Very Good Recipes
I love stuffing. In fact it's one of the things I love most about holiday meals. But I can't even lie, we eat stuffing year round. For any of you that read my meal plans on a weekly basis, you know many times if I serve pork chops or ham steaks, stuffing is one of the side dishes included.

Now, here is something you might not know. Every single time I make stuffing, it's from a box! Yep, it's one of the few things I don't even attempt to make from scratch. And if I'm being completely honest, I actually prefer the boxed variety to any homemade I've ever had! I'm certain it's because what I grew up with both from my mom, and her mom. My other grandma always made homemade, but on my mom's side, it always came from a box, and that was okay with us.

I'm sure many of you enjoy making your own, or maybe you have a tried and true family recipe; and I have all the respect in the world for that. There are so many kinds of stuffing, or dressing, out there, who am I to say which is the best? I just know what our family enjoys the most, and it's what we stick to.

But that doesn't mean we can't make it a little better. Jazz it up a little so to speak. Add some fresh, yummy things, and that dried stuffing mix is brought back to life in a whole new way. And nothing says holiday more than apples and cranberries! The flavor of this version is like nothing I've ever made before, and it really tasted like homemade!

This recipe fantastic because you can take a little help from the store, making one thing on your menu a little easier, and easily adapt it to feed a few or a crowd. Not to mention, it's pretty economical too. This time of year you can usually find the boxed mixes for $1 or less!

If you have a great stuffing recipe and don't really groove on the boxed kind, that's okay. Maybe you can incorporate parts of this recipe into your favorite version and still come up with something new. But if you're like me and willing to take a little pre-made assistance, here is one way to make it just a little more special!

Cran-Apple Pecan Stuffing From Kraft
1 box stuffing mix for turkey
1 1/2 c. apple juice
2 TBS butter
1 small apple, finely chopped
1/2 c. dried cranberries, extra for garnish
1/4 c. chopped pecans, extra for garnish

In a medium saucepan bring apple juice and butter to a boil. Add stuffing mix, apples and cranberries. Stir. Remove from heat. Cover. Let sit 5 minutes. Fluff with a fork. Add pecans. Stir well. Transfer to serving dish. Garnish with extra cranberries and pecans.


Shared on The Country Cook Nov. 22, 2013

Stuffing at Very Good Recipes
reade more... Résuméabuiyad

Soul Food Saturday #31

We have officially made it to the middle of the month! Thanksgiving is less than 2 weeks away, and the days are flying by. Today Bekki is sharing a great twist on that traditional corn side dish for your holiday table.


As the weather gets cooler the thoughts of this past summer’s bounty comes to mind. Visions of fresh corn on the cob with butter, comes dancing through my head. You can almost smell it can’t you? So why not bring that memory into right now, and make it part of your Thanksgiving table? Or part of that pot luck you were invited to? Whether it’s a celebration with your family or get togethers with friends, your going to need this printed a few times its sure to be one more tradition on your table! Enjoy!
 
Fried Corn with Tomatoes and Onions
1 tbs. unsalted butter
1 medium onion sliced
3 c. frozen corn kernels
1 10oz. can Hot Rotel tomatoes
1 tsp granulated garlic
½ tsp. salt
 
Add butter to a medium sized pan and allow to melt. Add sliced onions, cook until clear. Add corn kernels and tomatoes with their juice, salt and garlic. Stir to combine, and cook 15-20 minutes or until juices are nearly gone and corn is cooked through. Stir occasionally. Serve hot with your favorite holiday meal or on a busy weeknight. Either way you choose, it’s sure to be a hit.


We have officially made it to the middle of the month! Thanksgiving is less than 2 weeks away, and the days are flying by. Today Bekki is sharing a great twist on that traditional corn side dish for your holiday table.


As the weather gets cooler the thoughts of this past summer’s bounty comes to mind. Visions of fresh corn on the cob with butter, comes dancing through my head. You can almost smell it can’t you? So why not bring that memory into right now, and make it part of your Thanksgiving table? Or part of that pot luck you were invited to? Whether it’s a celebration with your family or get togethers with friends, your going to need this printed a few times its sure to be one more tradition on your table! Enjoy!
 
Fried Corn with Tomatoes and Onions
1 tbs. unsalted butter
1 medium onion sliced
3 c. frozen corn kernels
1 10oz. can Hot Rotel tomatoes
1 tsp granulated garlic
½ tsp. salt
 
Add butter to a medium sized pan and allow to melt. Add sliced onions, cook until clear. Add corn kernels and tomatoes with their juice, salt and garlic. Stir to combine, and cook 15-20 minutes or until juices are nearly gone and corn is cooked through. Stir occasionally. Serve hot with your favorite holiday meal or on a busy weeknight. Either way you choose, it’s sure to be a hit.


reade more... Résuméabuiyad

Make Ahead Holiday

Sweet Potatoes. It seems folks either love 'em or hate 'em. There doesn't seem to be much wiggle room, or gray area. For our family, they are definitely a love. Any way we can get them! Mashed, baked, roasted, fries, it doesn't matter, we gobble them up.

But one thing we can't stand? The traditional addition of marshmallows to the top! Yep, what most Americans consider the norm, is not allowed on ours. And I when I say I don't enjoy the marshmallows, it's minor to the hatred my husband feels for them. Any time he sees those white clouds sitting atop, he says "Great, now they are ruined." Yeah, he's not really one to mince words. But we realize for many, they are a must, and we respect that, we just can't join in.

So I'm always on the lookout for new ways to serve sweet potatoes, especially around the holidays, and when I can also ease the stress of holiday cooking, it's an added bonus. See, these can actually be made a day or two ahead, refrigerated and then reheated in the oven, right alongside the bird! If you can check a few items off the list before the big day, why not make it a little easier on yourself?

Sweet, buttery and full of flavor, these sweet potatoes are sure to be a star at any holiday table. And if your family digs the marshmallows, by all means, add some on top. Just don't offer them to my husband.

Maple Mashed Sweet Potatoes
6 lbs. sweet potatoes, peeled
1/2 c. maple syrup
1/2 c. brown sugar
1/2 c. butter, diced
1/2 tsp. cinnamon, extra for garnish
1/2 c. chopped pecans

Preheat oven to 375. Lay potatoes on baking sheet, or 2 depending on size. Spray lightly with cooking spray. Roast for 1 hour, stirring occasionally, until tender. Remove to a large bowl. In a small sauce pan combine syrup, sugar, butter and cinnamon. Bring to a boil, stirring constantly. Allow to slightly thicken. Add syrup mixture to potatoes. Mash with potato masher, or whip with electric mixer until desired consistency. (We likes our to have a few small chunks.) Transfer to serving bowl. Top with pecans and extra cinnamon.

*NOTE* To make ahead, prepare through mashing. Put in an air tight container with lid and store in fridge for up to 2 days. When ready, preheat oven to 325. Put potatoes in casserole dish. Bake uncovered for 1 hour until warmed through. Remove and garnish as recipe states.


Shared on The Country Cook Nov. 15, 2013

Sweet Potatoes at Very Good Recipes
Sweet Potatoes. It seems folks either love 'em or hate 'em. There doesn't seem to be much wiggle room, or gray area. For our family, they are definitely a love. Any way we can get them! Mashed, baked, roasted, fries, it doesn't matter, we gobble them up.

But one thing we can't stand? The traditional addition of marshmallows to the top! Yep, what most Americans consider the norm, is not allowed on ours. And I when I say I don't enjoy the marshmallows, it's minor to the hatred my husband feels for them. Any time he sees those white clouds sitting atop, he says "Great, now they are ruined." Yeah, he's not really one to mince words. But we realize for many, they are a must, and we respect that, we just can't join in.

So I'm always on the lookout for new ways to serve sweet potatoes, especially around the holidays, and when I can also ease the stress of holiday cooking, it's an added bonus. See, these can actually be made a day or two ahead, refrigerated and then reheated in the oven, right alongside the bird! If you can check a few items off the list before the big day, why not make it a little easier on yourself?

Sweet, buttery and full of flavor, these sweet potatoes are sure to be a star at any holiday table. And if your family digs the marshmallows, by all means, add some on top. Just don't offer them to my husband.

Maple Mashed Sweet Potatoes
6 lbs. sweet potatoes, peeled
1/2 c. maple syrup
1/2 c. brown sugar
1/2 c. butter, diced
1/2 tsp. cinnamon, extra for garnish
1/2 c. chopped pecans

Preheat oven to 375. Lay potatoes on baking sheet, or 2 depending on size. Spray lightly with cooking spray. Roast for 1 hour, stirring occasionally, until tender. Remove to a large bowl. In a small sauce pan combine syrup, sugar, butter and cinnamon. Bring to a boil, stirring constantly. Allow to slightly thicken. Add syrup mixture to potatoes. Mash with potato masher, or whip with electric mixer until desired consistency. (We likes our to have a few small chunks.) Transfer to serving bowl. Top with pecans and extra cinnamon.

*NOTE* To make ahead, prepare through mashing. Put in an air tight container with lid and store in fridge for up to 2 days. When ready, preheat oven to 325. Put potatoes in casserole dish. Bake uncovered for 1 hour until warmed through. Remove and garnish as recipe states.


Shared on The Country Cook Nov. 15, 2013

Sweet Potatoes at Very Good Recipes
reade more... Résuméabuiyad

Another One For Holiday Planning

So, I might have a new addiction. I can't seem to walk past the acorn squash at the grocery store without bringing a couple home. Now, to be fair, I have always been a squash fan, and so has every one else in my house.

In fact, when Alex was a baby, his favorite baby food, hands down, was the squash. Not the sweet bananas, like so many other kids. Sure, he liked those too, but if you really wanted to bring a smile to his face, a jar of squash was a guarantee. I can remember holding him while getting the jars out of the cupboard when lunch or dinner time rolled around, and he would stretch his little neck to see if there was any squash.

Anyway, I'm a squash fan from way back. My dad used to grow them in his garden, roast them and freeze it for the winter. But his favorite variety was buttercup, and to this today that is still what I associate with "winter squash" in my head. And if you've ever bought the frozen boxed squash in the grocery store, it was more than likely buttercup, with that bright orange color. And many times, that is exactly what I do when I want squash on my table. A couple boxes of it, some butter, salt and pepper...it's quick, easy and yummy.

But every since I made the stuffed squash recipe last month, I've been on this acorn squash kick. I can't get enough. And since making it fresh isn't something I've done a lot of, it's always a treat to my "boys" too.

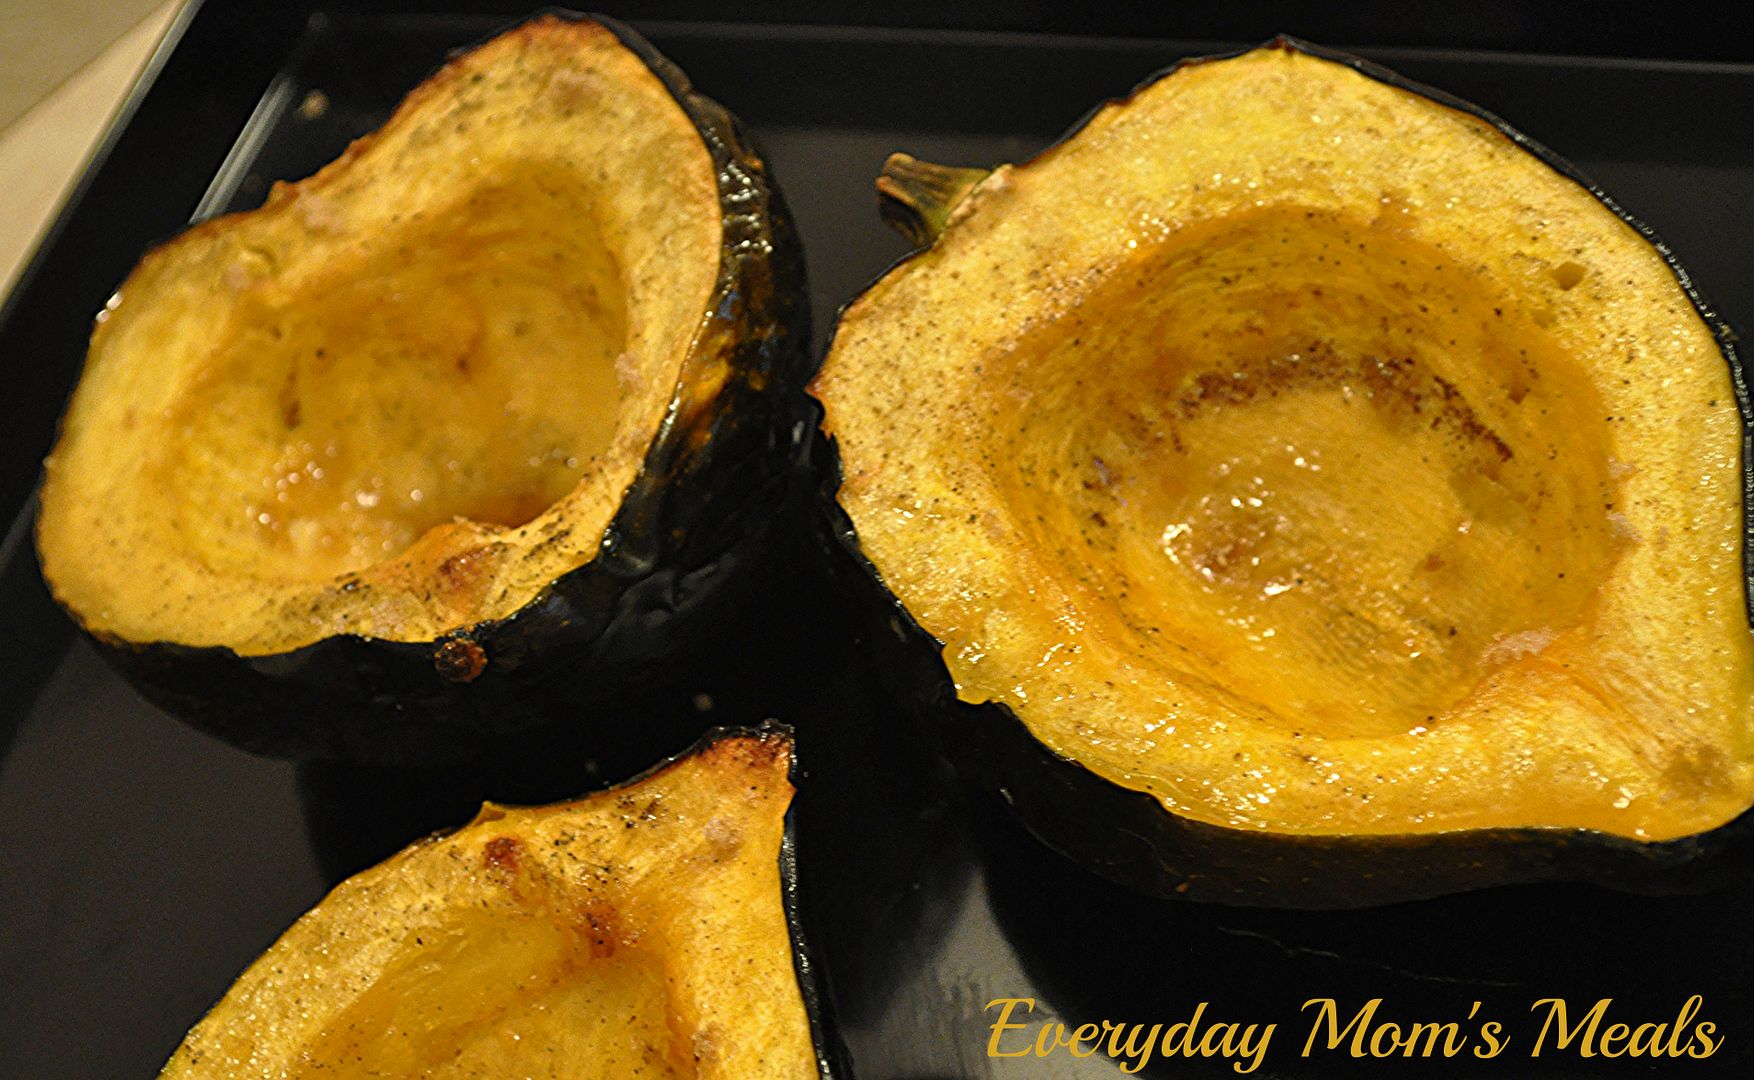
These would make a beautiful, simple, and tasty side dish for your Thanksgiving meal. And depending on how many people you are serving, you have a couple options to make sure you get the most "bang for your buck". (Just see the note below for serving options.) Sweet and savory, the glaze only enhances the flavor of the squash, not over powering it. It really allows the squash to shine, not to mention makes it gorgeous on a plate.

If you are a squash lover too, you are going to want to make this asap. And if you are in the midst of holiday meal planning, I think this would make the perfect addition!

Maple and Brown Sugar Roasted Acorn Squash
2 medium acorn squash, cut in half and seeded
4 TBS butter, melted
4 TBS brown sugar
4 TBS maple syrup
Salt and Pepper to taste

Preheat oven to 400. Line a rimmed baking sheet with foil. In a small bowl combine melted butter, sugar and syrup. Whisk well to combine. It will be thick and resemble caramel! Brush cavity of squash liberally with butter mixture. Leave a little extra in each "hole". Sprinkle with salt and pepper. Roast for 1 hour or until squash is fork tender. Sprinkle with extra brown sugar before serving.

*NOTE* To serve you have a couple options. If you're feeding a big crowd, scrape the squash from the skin into a casserole dish. Adjust seasoning and cover. If need be, you can put back in the oven to reheat. If there are only a few people, I think these are very pretty to serve on individual plates, as is, letting each person season their own.


Shared on The Country Cook Nov. 8, 2013

Squash at Very Good Recipes

So, I might have a new addiction. I can't seem to walk past the acorn squash at the grocery store without bringing a couple home. Now, to be fair, I have always been a squash fan, and so has every one else in my house.

In fact, when Alex was a baby, his favorite baby food, hands down, was the squash. Not the sweet bananas, like so many other kids. Sure, he liked those too, but if you really wanted to bring a smile to his face, a jar of squash was a guarantee. I can remember holding him while getting the jars out of the cupboard when lunch or dinner time rolled around, and he would stretch his little neck to see if there was any squash.

Anyway, I'm a squash fan from way back. My dad used to grow them in his garden, roast them and freeze it for the winter. But his favorite variety was buttercup, and to this today that is still what I associate with "winter squash" in my head. And if you've ever bought the frozen boxed squash in the grocery store, it was more than likely buttercup, with that bright orange color. And many times, that is exactly what I do when I want squash on my table. A couple boxes of it, some butter, salt and pepper...it's quick, easy and yummy.

But every since I made the stuffed squash recipe last month, I've been on this acorn squash kick. I can't get enough. And since making it fresh isn't something I've done a lot of, it's always a treat to my "boys" too.

These would make a beautiful, simple, and tasty side dish for your Thanksgiving meal. And depending on how many people you are serving, you have a couple options to make sure you get the most "bang for your buck". (Just see the note below for serving options.) Sweet and savory, the glaze only enhances the flavor of the squash, not over powering it. It really allows the squash to shine, not to mention makes it gorgeous on a plate.

If you are a squash lover too, you are going to want to make this asap. And if you are in the midst of holiday meal planning, I think this would make the perfect addition!

Maple and Brown Sugar Roasted Acorn Squash
2 medium acorn squash, cut in half and seeded
4 TBS butter, melted
4 TBS brown sugar
4 TBS maple syrup
Salt and Pepper to taste

Preheat oven to 400. Line a rimmed baking sheet with foil. In a small bowl combine melted butter, sugar and syrup. Whisk well to combine. It will be thick and resemble caramel! Brush cavity of squash liberally with butter mixture. Leave a little extra in each "hole". Sprinkle with salt and pepper. Roast for 1 hour or until squash is fork tender. Sprinkle with extra brown sugar before serving.

*NOTE* To serve you have a couple options. If you're feeding a big crowd, scrape the squash from the skin into a casserole dish. Adjust seasoning and cover. If need be, you can put back in the oven to reheat. If there are only a few people, I think these are very pretty to serve on individual plates, as is, letting each person season their own.


Shared on The Country Cook Nov. 8, 2013

Squash at Very Good Recipes

reade more... Résuméabuiyad

Make It...Save It...or Both

Thanksgiving is just a little over a month away; and Christmas only about a month after that. I realize some of you out there don't even want to think about it, and I respect that. But I also know there are many out there, who like me, are planners extraordinaire and are already making meal plans, shopping lists, and are determined to be fully prepared when the holidays descend upon us. So, for those in that category, I offer a fantastic side dish idea that is easy and free of stress, delicious and something your guests will flip for! 

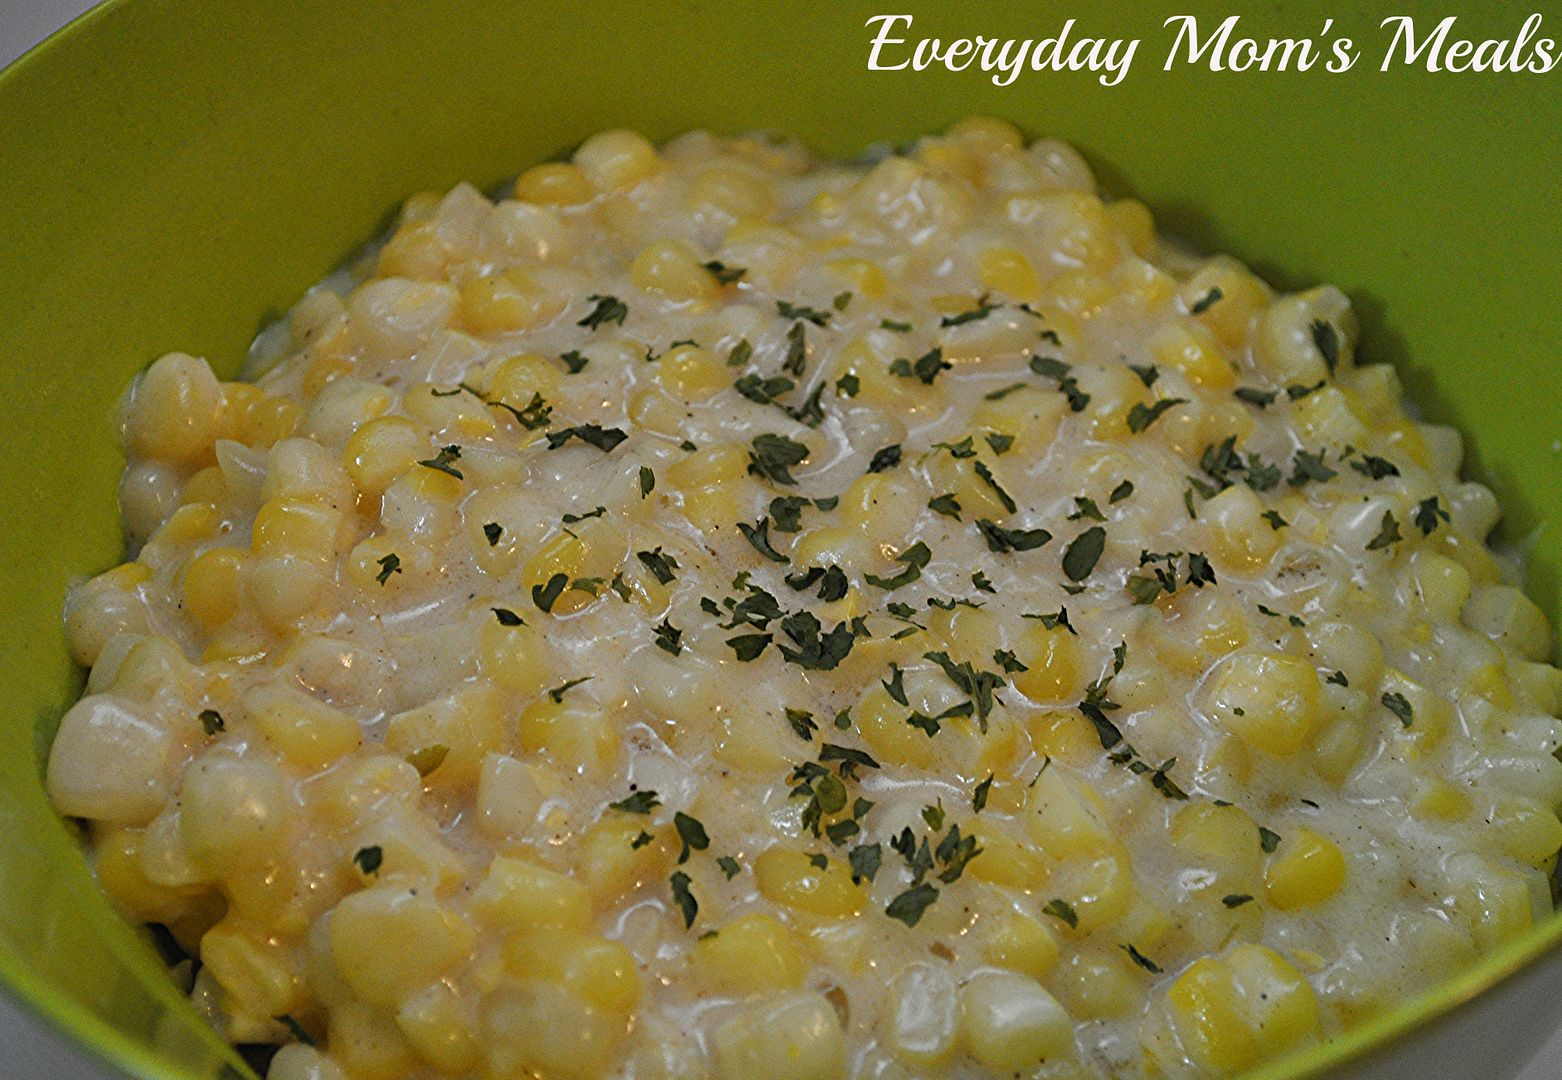
I actually made this back when we got our fresh veggie bin from Green BEAN Delivery, because I was lucky enough to have some late season fresh Indiana sweet corn included. Sure, I we could have just eaten it slathered in butter and salt, straight from the cob, but I thought it was a good time to test this recipe I had found a while back in an old church cookbook. I really thought it screamed holiday meal. Sure, fresh corn might not be in season by then, but I've noticed most stores have prepackaged corn on the cob (usually 4 ears per pack) year round now. So it's a great way to get some freshness into your meal, and stretch a buck because only a few ears will feed a crowd. 

We love canned creamed corn, but this takes that to a whole new level. The sweetness, the creaminess, the silky texture, all of these lead to the most scrumptious corn side dish I've ever made. We couldn't stop eating it! I think this would compliment any protein that is hitting your Thanksgiving or Christmas table. 

If you're planning your holiday meals already, write this one down! If you're just looking for a new veggie for your weeknight meals, write this down. Or better yet, make it now to "test-run" and then make it again at the holidays. Your family will love every bite, and you will love how simple and fresh it is. 

Skillet Creamed Corn 
4 ears of corn, kernels removed and "milked" (See note below)
1/4 c. butter
1/2 c. half-and-half
1 TBS cornstarch
1 TBS sugar
Salt and Pepper to taste
Dried parsley for garnish

In a large skillet, melt butter over medium heat. Add corn kernels and half-and-half. Stir well. Sprinkle with cornstarch, sugar, salt and pepper. Bring to a boil, stirring constantly. Reduce heat and simmer, stirring occasionally for about 12 minutes, until thickened. Transfer to serving dish and garnish. *NOTE* To get the most flavor from your corn, after the kernels are cut off, slide the back of your knife down "milking" the corn. This is a very starchy liquid that will enhance the corn flavor. 


Shared on The Country Cook Oct. 25, 2013


Corn at Very Good Recipes
Thanksgiving is just a little over a month away; and Christmas only about a month after that. I realize some of you out there don't even want to think about it, and I respect that. But I also know there are many out there, who like me, are planners extraordinaire and are already making meal plans, shopping lists, and are determined to be fully prepared when the holidays descend upon us. So, for those in that category, I offer a fantastic side dish idea that is easy and free of stress, delicious and something your guests will flip for! 

I actually made this back when we got our fresh veggie bin from Green BEAN Delivery, because I was lucky enough to have some late season fresh Indiana sweet corn included. Sure, I we could have just eaten it slathered in butter and salt, straight from the cob, but I thought it was a good time to test this recipe I had found a while back in an old church cookbook. I really thought it screamed holiday meal. Sure, fresh corn might not be in season by then, but I've noticed most stores have prepackaged corn on the cob (usually 4 ears per pack) year round now. So it's a great way to get some freshness into your meal, and stretch a buck because only a few ears will feed a crowd. 

We love canned creamed corn, but this takes that to a whole new level. The sweetness, the creaminess, the silky texture, all of these lead to the most scrumptious corn side dish I've ever made. We couldn't stop eating it! I think this would compliment any protein that is hitting your Thanksgiving or Christmas table. 

If you're planning your holiday meals already, write this one down! If you're just looking for a new veggie for your weeknight meals, write this down. Or better yet, make it now to "test-run" and then make it again at the holidays. Your family will love every bite, and you will love how simple and fresh it is. 

Skillet Creamed Corn 
4 ears of corn, kernels removed and "milked" (See note below)
1/4 c. butter
1/2 c. half-and-half
1 TBS cornstarch
1 TBS sugar
Salt and Pepper to taste
Dried parsley for garnish

In a large skillet, melt butter over medium heat. Add corn kernels and half-and-half. Stir well. Sprinkle with cornstarch, sugar, salt and pepper. Bring to a boil, stirring constantly. Reduce heat and simmer, stirring occasionally for about 12 minutes, until thickened. Transfer to serving dish and garnish. *NOTE* To get the most flavor from your corn, after the kernels are cut off, slide the back of your knife down "milking" the corn. This is a very starchy liquid that will enhance the corn flavor. 


Shared on The Country Cook Oct. 25, 2013


Corn at Very Good Recipes
reade more... Résuméabuiyad

Check The Pantry

Right about now, after reading that ^^^ title, I bet you are asking yourself "Why?" Why does she want me to check my pantry? Well, for a few reasons actually. 

First off, I want to check your pantry because I'm guessing you currently have everything on hand to make this amazingly tasty side dish; and for me, that's always a nice thing. I love finding recipes that I can make "on the fly" with things I already have sitting in the cupboard without adding a single item to my grocery list. It not only helps the weekly budget, but it means I can make it any time I want when I'm desperate to put supper on the table. 

Secondly, I want you to check because I'm hoping at least a few of you are in the same boat I was when I went to make this and you find things you weren't even aware you had, and this is obviously because you have multiples of them. Let me explain. I knew I had bagged rice. I knew I had probably half the bag left. What I didn't realize was evidently there were a few times I forgot about said bag, bought a new bag, and only used half of it too. See, I had not one, not two, but three half used bags of rice. So apparently, there were a couple times I didn't bother to check the rice situation before adding it to my grocery list. Hence why when I did find them, rice immediately went on the menu. 

Third, I want you to check the herbs and spices in your pantry. For when I discovered the plethora of rice I was hoarding, it caused a mini clean out of my pantry, which is when I discovered it was time to get some new bottles of dried spices. Why? Well, let's just say their "best used by" dates were long in the past. I'm not going to tell you just how long ago, frankly, it's embarrassing, but rest assured, they were replaced promptly. In case you didn't know, that stuff does have a shelf life, and eventually it does lose flavor, so it's best to switch them out now and again.

Now, all of that being said, this side dish could not be more simple, and every bite it is delicious. It goes well with chicken, fish, beef, or maybe add some veggies for a complete one pot meal. However you decide to serve it, you will be glad to have the recipe to fall back on for those nights the family is starving and your creativity with supper just isn't up to par. Check the pantry, and in about 30 minutes you can have this sitting on the table. They will think you planned it all along!

Parmesan Rice Pilaf From McCormick
2 TBS butter
1 c. rice
2 c. chicken broth
1/2 tsp. garlic powder
1/2 tsp. dried parsley
2 TBS sliced almonds, plus more for garnish
2 TBS shredded Parmesan cheese, plus more for garnish
Salt and Pepper to taste

In medium sauce pan melt butter over medium-high heat. Add rice and cook, stirring constantly for 3 minutes until lightly toasted. Stir in broth, garlic powder, parsley, salt and pepper. Bring to a boil. Reduce heat, cover and simmer for 15-20 minutes until rice is tender. Remove from meat, stir in almonds and cheese. Transfer to a serving bowl. Garnish with extra almonds and cheese.


Shared on The Country Cook Oct. 18, 2013


Rice at Very Good Recipes
Right about now, after reading that ^^^ title, I bet you are asking yourself "Why?" Why does she want me to check my pantry? Well, for a few reasons actually. 

First off, I want to check your pantry because I'm guessing you currently have everything on hand to make this amazingly tasty side dish; and for me, that's always a nice thing. I love finding recipes that I can make "on the fly" with things I already have sitting in the cupboard without adding a single item to my grocery list. It not only helps the weekly budget, but it means I can make it any time I want when I'm desperate to put supper on the table. 

Secondly, I want you to check because I'm hoping at least a few of you are in the same boat I was when I went to make this and you find things you weren't even aware you had, and this is obviously because you have multiples of them. Let me explain. I knew I had bagged rice. I knew I had probably half the bag left. What I didn't realize was evidently there were a few times I forgot about said bag, bought a new bag, and only used half of it too. See, I had not one, not two, but three half used bags of rice. So apparently, there were a couple times I didn't bother to check the rice situation before adding it to my grocery list. Hence why when I did find them, rice immediately went on the menu. 

Third, I want you to check the herbs and spices in your pantry. For when I discovered the plethora of rice I was hoarding, it caused a mini clean out of my pantry, which is when I discovered it was time to get some new bottles of dried spices. Why? Well, let's just say their "best used by" dates were long in the past. I'm not going to tell you just how long ago, frankly, it's embarrassing, but rest assured, they were replaced promptly. In case you didn't know, that stuff does have a shelf life, and eventually it does lose flavor, so it's best to switch them out now and again.

Now, all of that being said, this side dish could not be more simple, and every bite it is delicious. It goes well with chicken, fish, beef, or maybe add some veggies for a complete one pot meal. However you decide to serve it, you will be glad to have the recipe to fall back on for those nights the family is starving and your creativity with supper just isn't up to par. Check the pantry, and in about 30 minutes you can have this sitting on the table. They will think you planned it all along!

Parmesan Rice Pilaf From McCormick
2 TBS butter
1 c. rice
2 c. chicken broth
1/2 tsp. garlic powder
1/2 tsp. dried parsley
2 TBS sliced almonds, plus more for garnish
2 TBS shredded Parmesan cheese, plus more for garnish
Salt and Pepper to taste

In medium sauce pan melt butter over medium-high heat. Add rice and cook, stirring constantly for 3 minutes until lightly toasted. Stir in broth, garlic powder, parsley, salt and pepper. Bring to a boil. Reduce heat, cover and simmer for 15-20 minutes until rice is tender. Remove from meat, stir in almonds and cheese. Transfer to a serving bowl. Garnish with extra almonds and cheese.


Shared on The Country Cook Oct. 18, 2013


Rice at Very Good Recipes
reade more... Résuméabuiyad

Our First Time

Last month over Alex's birthday weekend (Ironically enough exactly 1 month ago today), we were able to experience something we never had before. See, he had made a request back in the summer that he wanted to go to an apple orchard and pick his very own. Now, we have a fantastic U-Pick place we visit in the spring and summer for berries galore (I'm sure you've seen the pictures) but I didn't even know if we had an orchard like that around here. Well, lucky for me, I mentioned my conundrum to a friend, and she told me about a farm, only about 25 minutes from our house, that was exactly what I was looking for.

Advanced Tree Technology in New Haven, Indiana specializes in their U-Pick apple orchard. They have dwarf trees, so it makes it easy and fun for kids to pick, and they have many varieties to choose from. Plus, it's really nice because they let you know the date each variety is ready to pick, so you know when your favorites will be ripe! 

Well, little man decided this was something he wanted to do for his birthday, but with it being in the middle of September, I wasn't even sure if that was possible. But as luck would have it, there were indeed some ready, and just waiting for his little hands to grab them.


We had so much fun! It was a great family experience, and he was super excited to bring home a half bushel of apples for us to snack on, and of course for Mommy to cook with! Let me tell you, it's a lot of apples! So I was happy when I found this recipe in a church cookbook! 

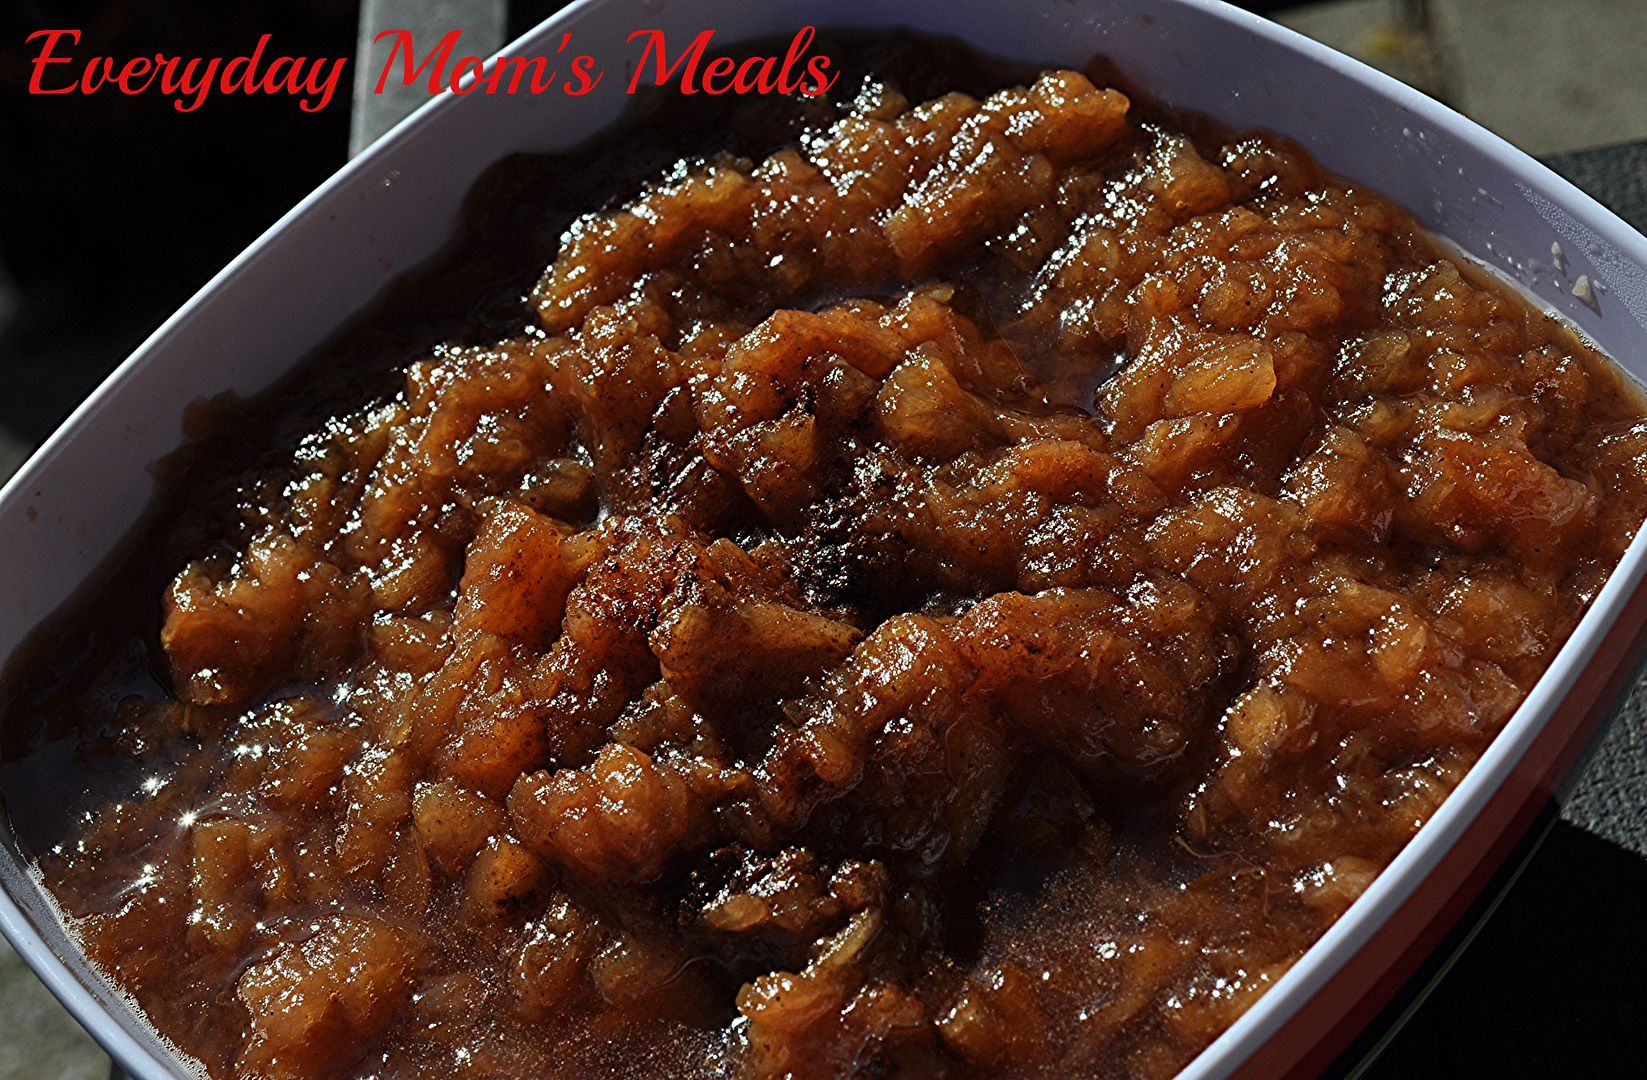
I will be honest, I wasn't sure about the addition of brown sugar, but I figured if the "little old church ladies" made it, it had to be yummy. Oh, was I right! I had nothing to worry about. This is the best applesauce I've ever had in my life! And the best part? You can start it in the morning before work, and it will be ready in time for supper. All you have to do is stir, and mash! 

If you have never picked your own apples, I encourage you to find out if you have an orchard close and get out there with the little ones and experience a true fall blessing!

Crock Pot Applesauce
8-10 Fuji apples peeled, cored and cut into chunks
1/3 c. apple juice
1/2 c. packed brown sugar
1 tsp. cinnamon

Combine all in Crock Pot. Cook on LOW 7-9 hours. Mash with a potato masher. Garnish with more cinnamon. 


Shared on The Country Cook Oct. 18, 2013


Apples at Very Good Recipes
Last month over Alex's birthday weekend (Ironically enough exactly 1 month ago today), we were able to experience something we never had before. See, he had made a request back in the summer that he wanted to go to an apple orchard and pick his very own. Now, we have a fantastic U-Pick place we visit in the spring and summer for berries galore (I'm sure you've seen the pictures) but I didn't even know if we had an orchard like that around here. Well, lucky for me, I mentioned my conundrum to a friend, and she told me about a farm, only about 25 minutes from our house, that was exactly what I was looking for.

Advanced Tree Technology in New Haven, Indiana specializes in their U-Pick apple orchard. They have dwarf trees, so it makes it easy and fun for kids to pick, and they have many varieties to choose from. Plus, it's really nice because they let you know the date each variety is ready to pick, so you know when your favorites will be ripe! 

Well, little man decided this was something he wanted to do for his birthday, but with it being in the middle of September, I wasn't even sure if that was possible. But as luck would have it, there were indeed some ready, and just waiting for his little hands to grab them.


We had so much fun! It was a great family experience, and he was super excited to bring home a half bushel of apples for us to snack on, and of course for Mommy to cook with! Let me tell you, it's a lot of apples! So I was happy when I found this recipe in a church cookbook! 

I will be honest, I wasn't sure about the addition of brown sugar, but I figured if the "little old church ladies" made it, it had to be yummy. Oh, was I right! I had nothing to worry about. This is the best applesauce I've ever had in my life! And the best part? You can start it in the morning before work, and it will be ready in time for supper. All you have to do is stir, and mash! 

If you have never picked your own apples, I encourage you to find out if you have an orchard close and get out there with the little ones and experience a true fall blessing!

Crock Pot Applesauce
8-10 Fuji apples peeled, cored and cut into chunks
1/3 c. apple juice
1/2 c. packed brown sugar
1 tsp. cinnamon

Combine all in Crock Pot. Cook on LOW 7-9 hours. Mash with a potato masher. Garnish with more cinnamon. 


Shared on The Country Cook Oct. 18, 2013


Apples at Very Good Recipes
reade more... Résuméabuiyad

Soul Food Saturday #26

Good Morning! Thanks for taking a minute out of your weekend and stopping by the EMM kitchen. Today Bekki has taken one of our favorite side dishes and jazzed it up a little, for a whole new flavor. Have a great day, and eat something yummy for us!


Just about a year ago I was introduced to a recipe done by Mrs. Everyday, Fried Cabbage and Noodles. We love cabbage so much we make it often. But in the fall it seems to show its face much more often. I have added crab and made it into a full meal, and left out the noodles and made it as just a basic side. This time I added bacon and mushrooms. Boy was it good. Along side a grilled steak or a piece of fried chicken. This one is going to be a winner.
Fried Cabbage with Bacon and Mushrooms
1 small head of cabbage, chopped
6 slices thick cut bacon, chopped
1 small onion, chopped
2 c. sliced mushrooms
1 jalapeno, diced
1 tbs. olive oil
1 tsp granulated garlic
Salt and pepper to taste
In a medium sauté pan, heat olive oil. Add onion, jalapeno, mushrooms, and bacon. Cook until onions are clear and bacon is cooked through. Add cabbage, garlic and salt and pepper. Cover and cook for 10-12 minutes. Stirring occasionally, until cabbage is tender. Serve hot with your favorite meat or fish. Enjoy!


Good Morning! Thanks for taking a minute out of your weekend and stopping by the EMM kitchen. Today Bekki has taken one of our favorite side dishes and jazzed it up a little, for a whole new flavor. Have a great day, and eat something yummy for us!


Just about a year ago I was introduced to a recipe done by Mrs. Everyday, Fried Cabbage and Noodles. We love cabbage so much we make it often. But in the fall it seems to show its face much more often. I have added crab and made it into a full meal, and left out the noodles and made it as just a basic side. This time I added bacon and mushrooms. Boy was it good. Along side a grilled steak or a piece of fried chicken. This one is going to be a winner.
Fried Cabbage with Bacon and Mushrooms
1 small head of cabbage, chopped
6 slices thick cut bacon, chopped
1 small onion, chopped
2 c. sliced mushrooms
1 jalapeno, diced
1 tbs. olive oil
1 tsp granulated garlic
Salt and pepper to taste
In a medium sauté pan, heat olive oil. Add onion, jalapeno, mushrooms, and bacon. Cook until onions are clear and bacon is cooked through. Add cabbage, garlic and salt and pepper. Cover and cook for 10-12 minutes. Stirring occasionally, until cabbage is tender. Serve hot with your favorite meat or fish. Enjoy!


reade more... Résuméabuiyad

Healthier Take Out Fake Out {A Review of San-J Sauces}

I love making our favorite take out dishes at home, using ingredients that I know exactly where they came from and exactly what is in them. And now I can do that easier, with a little help from my friends at San-J.

San-J is dedicated to manufacturing premium Tamari soy sauce and quality Asian inspired products. Their Mongolian Cooking Sauce is the perfect blend of sweet and savory, and works equally well with beef, chicken, shrimp or tofu. It's made from their Tamari sauce, containing 100% soybeans and no wheat content. Plus, it's certified gluten free and verified Non-GMO. It's great tasting and includes no guilt!


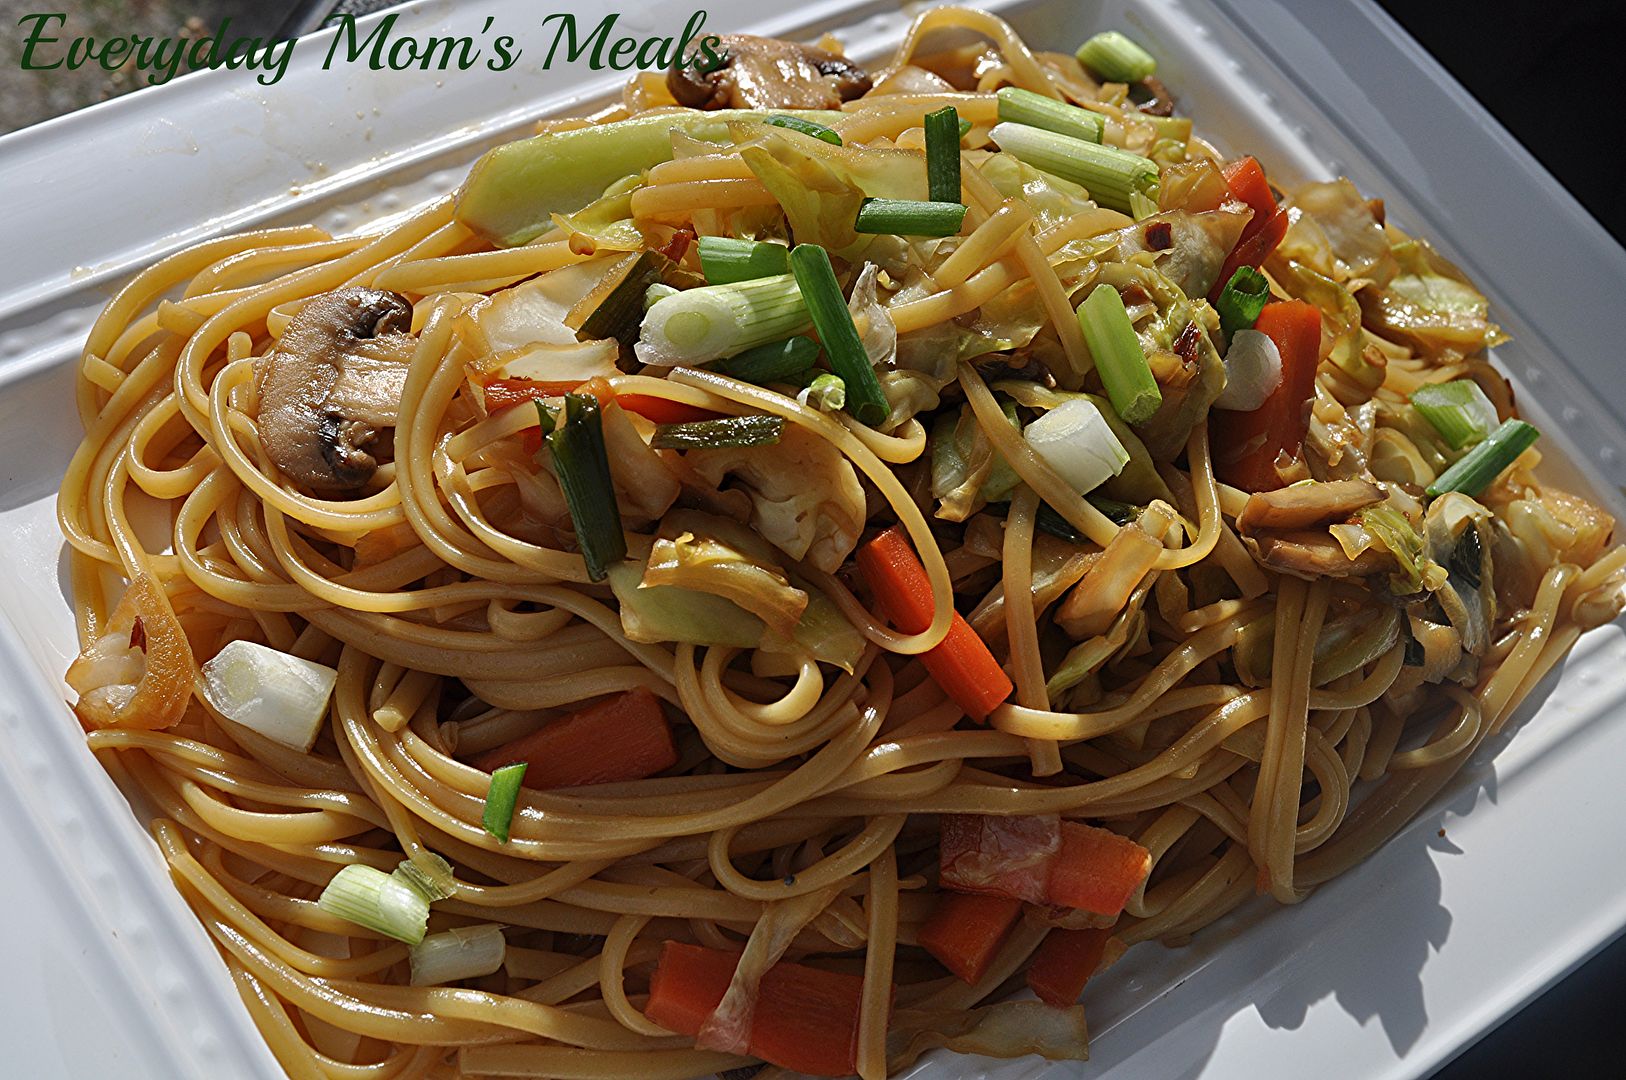
When I found this recipe on their website, I couldn't wait to try it. My favorite Asian take out treat is noodles, with meat, veggies, or both, in a sweet sauce, covering every bite! And these reminded me of those with every ingredient.

If you enjoy Asian food, and really love making it at home, you need to try San-J products today. They will give you the flavor and deliciousness you are looking for, without wondering what you are putting into your body. And if you're looking for a new side dish, try these noodles tonight!

Mongolian Noodles Adapted from San-J
1 lb. linguine, cooked and drained
8 oz. button mushrooms, sliced
1 bunch green onions, chopped, few reserved for garnish
2 medium carrots, jullienned
3 TBS vegetable oil
1 small head cabbage, sliced thin
1/2 tsp. red pepper flakes
1/2 c. San-J Mongolian Sauce

While pasta cooks, in a large skillet heat vegetable oil over medium heat. Add mushrooms and carrots. Cook for 5-7 minutes until mushrooms are brown and soft. Add red pepper flakes, cabbage and green onions. Saute for 5 minutes until cabbage begins to wilt. Add cooking sauce. Bring to a boil. Reduce heat to low and simmer for 2-3 minutes until slightly thickened. When pasta is cooked, drain well. Put in a large bowl. Add veggie and sauce mixture. Stir well to combine. Garnish with remaining green onions.


Shared on The Country Cook Oct. 4, 2013
Asian at Very Good Recipes

*Disclaimer* I was provided with free product for this review. All thoughts and opinions are my own.
I love making our favorite take out dishes at home, using ingredients that I know exactly where they came from and exactly what is in them. And now I can do that easier, with a little help from my friends at San-J.

San-J is dedicated to manufacturing premium Tamari soy sauce and quality Asian inspired products. Their Mongolian Cooking Sauce is the perfect blend of sweet and savory, and works equally well with beef, chicken, shrimp or tofu. It's made from their Tamari sauce, containing 100% soybeans and no wheat content. Plus, it's certified gluten free and verified Non-GMO. It's great tasting and includes no guilt!


When I found this recipe on their website, I couldn't wait to try it. My favorite Asian take out treat is noodles, with meat, veggies, or both, in a sweet sauce, covering every bite! And these reminded me of those with every ingredient.

If you enjoy Asian food, and really love making it at home, you need to try San-J products today. They will give you the flavor and deliciousness you are looking for, without wondering what you are putting into your body. And if you're looking for a new side dish, try these noodles tonight!

Mongolian Noodles Adapted from San-J
1 lb. linguine, cooked and drained
8 oz. button mushrooms, sliced
1 bunch green onions, chopped, few reserved for garnish
2 medium carrots, jullienned
3 TBS vegetable oil
1 small head cabbage, sliced thin
1/2 tsp. red pepper flakes
1/2 c. San-J Mongolian Sauce

While pasta cooks, in a large skillet heat vegetable oil over medium heat. Add mushrooms and carrots. Cook for 5-7 minutes until mushrooms are brown and soft. Add red pepper flakes, cabbage and green onions. Saute for 5 minutes until cabbage begins to wilt. Add cooking sauce. Bring to a boil. Reduce heat to low and simmer for 2-3 minutes until slightly thickened. When pasta is cooked, drain well. Put in a large bowl. Add veggie and sauce mixture. Stir well to combine. Garnish with remaining green onions.


Shared on The Country Cook Oct. 4, 2013
Asian at Very Good Recipes

*Disclaimer* I was provided with free product for this review. All thoughts and opinions are my own.
reade more... Résuméabuiyad

Still Time For A Picnic

We are a picnic loving family. It's one of our favorite summertime rituals. But with Labor Day behind us, and the stores filling up with pumpkins and scarecrows, I have got to face the fact autumn is well on it's way. It's knocking on the door, just waiting for us to answer.

But there is no doubt we've still got some warm, sunny days ahead of us (I love Indian Summer days!!), so why not enjoy a picnic then too? Sounds like a great idea to me; and I've got the perfect dish for you picnic basket.

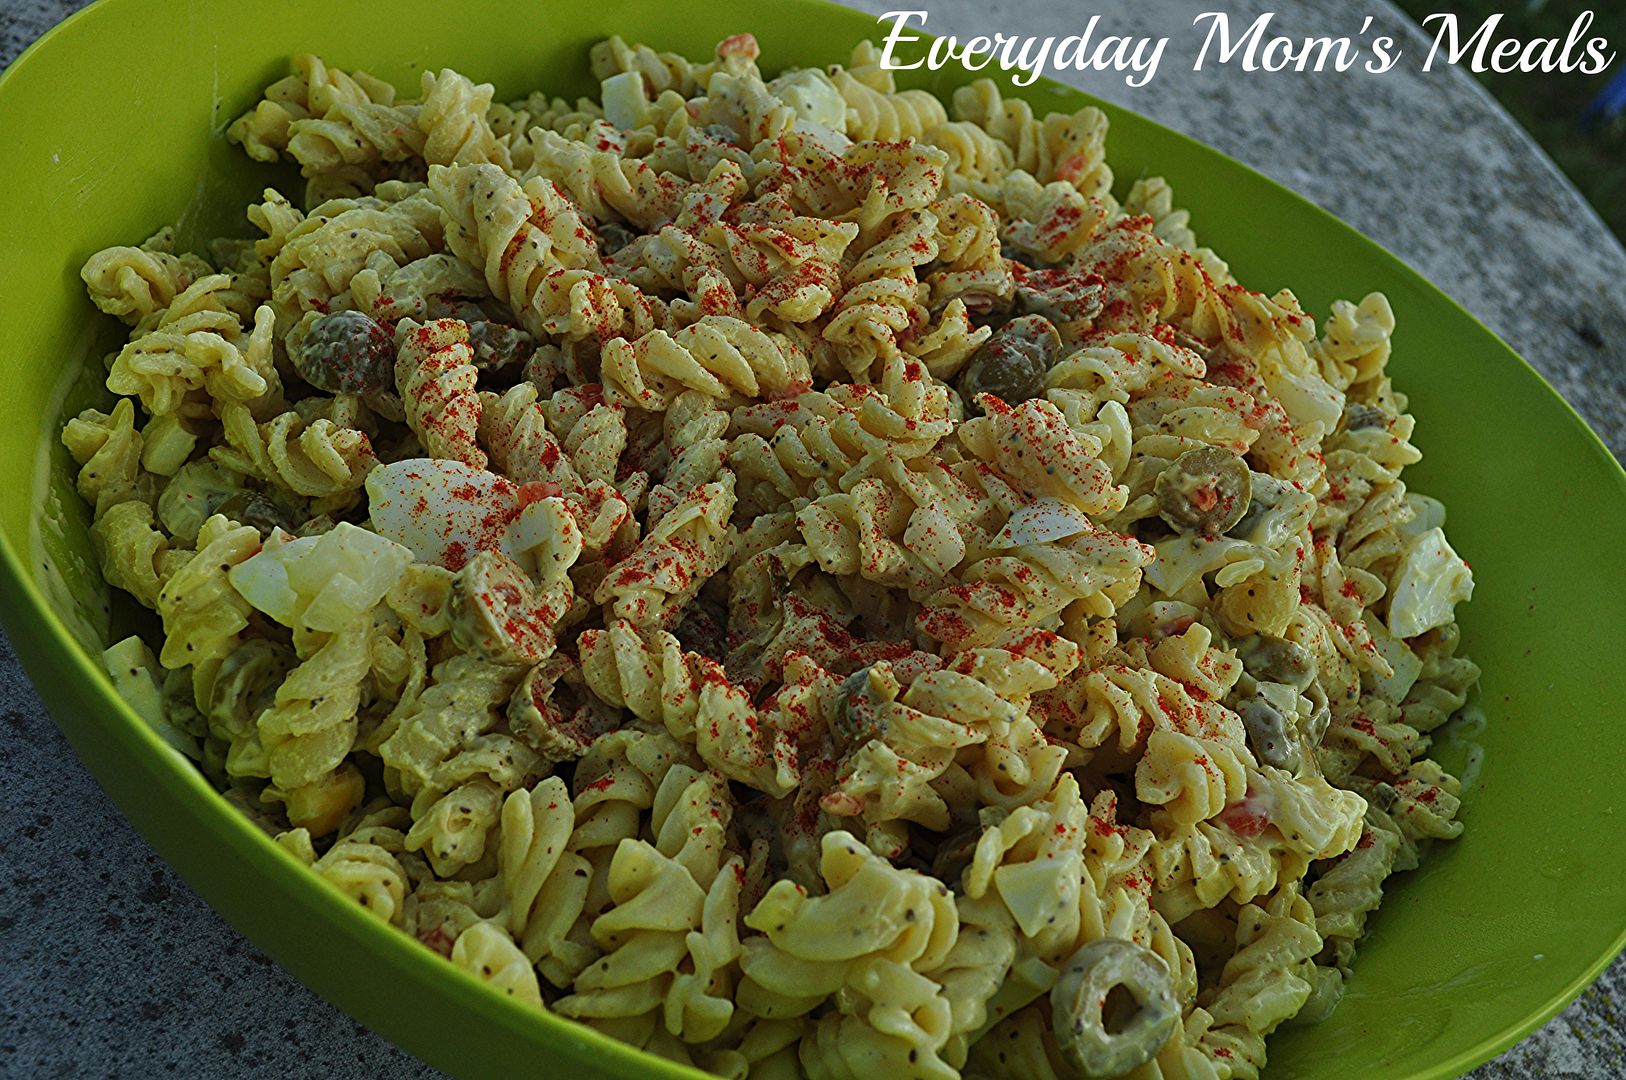
My mom and grandma have been making this macaroni salad for as long as I can remember. And I must admit, while I'm happy to be continuing the tradition, no matter how many times I make it myself, it will never taste as good as theirs. Never. I've given up!

If you love hard boiled eggs, or you love green olives, this pasta salad is going to become your new favorite. They are definitely what makes it unique and stand out from others I've had before. I can tell you first hand, I've seen this sitting on a table at a pot-luck, with other pasta salads, and it is always the first to go. Everyone loves it. Simple but scrumptious, those are the two perfect words to describe it.

Now, many of you might read this and say "I don't use Miracle Whip, will mayo work." Quite frankly, no. I am a mayo lover and 99% of the time it is all I have in the house, but when I know I'm going to be making this, I have to buy the other. Why? Well, first off, it is what grandma and mom have always used, and that means I don't mess with it. But I actually have tried it with mayo before, and it just doesn't taste the same. The "whip" has a little more tangy flavor, marrying so well with the mustard and briny olives. I guess to be fair though, you won't have anything to compare it to, so if you want to use mayo, I'm sure it will still be yummy, it's just not what our family is used to; and I always want to be completely honest with you.

If you live in an area of the country where it is picnic weather year round...lucky you! You can enjoy this anytime. But if you're like us, just trying to fit in a final picnic or backyard barbecue of the season before the autumn leaves begin to fall, be sure to add this to your menu!

Mom's Macaroni Salad
1 lb. rotini pasta, cooked, rinsed and drained
1 ( 10 oz.) jar green olives, sliced
1 small onion, finely chopped
6 hard boiled eggs, chopped
1 1/2 c. Miracle Whip (mayo does NOT taste the same in this dish)
3 TBS mustard
3 TBS sweet relish
1 tsp. celery seed
Salt and Pepper to taste
Paprika, for garnish

In a large bowl combine pasta, olives,  eggs and onions. In a small bowl whisk together Miracle Whip, mustard, relish, celery seed, salt and pepper. Pour over pasta mixture. Stir well to combine. Cover and chill until serving, at least 2 hours. Before serving, stir again and sprinkle with paprika.


Shared on The Country Cook Sept. 13, 2013
Pasta Salad at Very Good Recipes
We are a picnic loving family. It's one of our favorite summertime rituals. But with Labor Day behind us, and the stores filling up with pumpkins and scarecrows, I have got to face the fact autumn is well on it's way. It's knocking on the door, just waiting for us to answer.

But there is no doubt we've still got some warm, sunny days ahead of us (I love Indian Summer days!!), so why not enjoy a picnic then too? Sounds like a great idea to me; and I've got the perfect dish for you picnic basket.

My mom and grandma have been making this macaroni salad for as long as I can remember. And I must admit, while I'm happy to be continuing the tradition, no matter how many times I make it myself, it will never taste as good as theirs. Never. I've given up!

If you love hard boiled eggs, or you love green olives, this pasta salad is going to become your new favorite. They are definitely what makes it unique and stand out from others I've had before. I can tell you first hand, I've seen this sitting on a table at a pot-luck, with other pasta salads, and it is always the first to go. Everyone loves it. Simple but scrumptious, those are the two perfect words to describe it.

Now, many of you might read this and say "I don't use Miracle Whip, will mayo work." Quite frankly, no. I am a mayo lover and 99% of the time it is all I have in the house, but when I know I'm going to be making this, I have to buy the other. Why? Well, first off, it is what grandma and mom have always used, and that means I don't mess with it. But I actually have tried it with mayo before, and it just doesn't taste the same. The "whip" has a little more tangy flavor, marrying so well with the mustard and briny olives. I guess to be fair though, you won't have anything to compare it to, so if you want to use mayo, I'm sure it will still be yummy, it's just not what our family is used to; and I always want to be completely honest with you.

If you live in an area of the country where it is picnic weather year round...lucky you! You can enjoy this anytime. But if you're like us, just trying to fit in a final picnic or backyard barbecue of the season before the autumn leaves begin to fall, be sure to add this to your menu!

Mom's Macaroni Salad
1 lb. rotini pasta, cooked, rinsed and drained
1 ( 10 oz.) jar green olives, sliced
1 small onion, finely chopped
6 hard boiled eggs, chopped
1 1/2 c. Miracle Whip (mayo does NOT taste the same in this dish)
3 TBS mustard
3 TBS sweet relish
1 tsp. celery seed
Salt and Pepper to taste
Paprika, for garnish

In a large bowl combine pasta, olives,  eggs and onions. In a small bowl whisk together Miracle Whip, mustard, relish, celery seed, salt and pepper. Pour over pasta mixture. Stir well to combine. Cover and chill until serving, at least 2 hours. Before serving, stir again and sprinkle with paprika.


Shared on The Country Cook Sept. 13, 2013
Pasta Salad at Very Good Recipes
reade more... Résuméabuiyad

Doesn't Get Fresher

Having a big barbecue this Labor Day weekend? Have fresh veggies from the garden you would like to use? How about a cool, creamy, crunchy and most of all flavorful salad you and your guests will love? Your everyday mom is here with the perfect idea!

I love summer for so many reasons, too many to even list, but the foodie in me loves being able to eat foods we grow ourselves in our backyard. Or should I say, foods my boys grow in our backyard. Because besides picking them, I don't have much to do with it. It's better that way. My thumbs are not green in any way!

But when they come inside with a big bowl filled with beautiful tomatoes, cucumbers, blackberries, grapes, etc...that's when it's my job to find ways to use them all in a yummy, and sometimes new way.

When I first saw this recipe, it reminded me of other creamy veggie salads I've made in the past, except for one thing: the radishes. We are huge radish fans. Even little man loves them, so I was happy to find a new way to use them. Plus, I loved the use of lemon and seasoning salt in the dressing. They really took the basic sour cream dressing and took it to a whole other flavor level. Oh, and I have to tell you, I was extremely pleased with it's consistency after sitting in the fridge for a few hours. The vegetables were still crisp, not mushy at all.

Since we're going into the "last weekend of summer" (the quotations are because I don't consider it to be, but I know society says different) there is no better time than to head outside, fire up the grill, invite friends and family over, and enjoy a backyard bash. And this salad would be great with anything you're pulling off the fire. Enjoy summer's bounty while you still can because it doesn't get fresher, and in about 3 months when we're knee deep in snow, we will be missing it profusely!

Creamy Vegetable Salad Adapted From Taste of Home
2 large tomatoes, seeded and chopped
2 large cucumbers, seeded and chopped
3-4 green onions, chopped, reserve a few for garnish
6 radishes, finely chopped
1 c. sour cream
1/2 tsp. seasoning salt
1/8 c. lemon juice
1/4 tsp. pepper
1/2 tsp. celery seed, extra for garnish

In a large bowl combine tomatoes, cucumbers, green onions, and radishes. Toss to combine. In a small bowl whisk together sour cream, seasoning salt, lemon juice, pepper and celery seed. Pour over veggies. Mix well. Cover and refrigerate at least 2 hours. Serve with a slotted spoon.


Shared on The Country Cook Aug. 30, 2013
Salad at Very Good Recipes
Having a big barbecue this Labor Day weekend? Have fresh veggies from the garden you would like to use? How about a cool, creamy, crunchy and most of all flavorful salad you and your guests will love? Your everyday mom is here with the perfect idea!

I love summer for so many reasons, too many to even list, but the foodie in me loves being able to eat foods we grow ourselves in our backyard. Or should I say, foods my boys grow in our backyard. Because besides picking them, I don't have much to do with it. It's better that way. My thumbs are not green in any way!

But when they come inside with a big bowl filled with beautiful tomatoes, cucumbers, blackberries, grapes, etc...that's when it's my job to find ways to use them all in a yummy, and sometimes new way.

When I first saw this recipe, it reminded me of other creamy veggie salads I've made in the past, except for one thing: the radishes. We are huge radish fans. Even little man loves them, so I was happy to find a new way to use them. Plus, I loved the use of lemon and seasoning salt in the dressing. They really took the basic sour cream dressing and took it to a whole other flavor level. Oh, and I have to tell you, I was extremely pleased with it's consistency after sitting in the fridge for a few hours. The vegetables were still crisp, not mushy at all.

Since we're going into the "last weekend of summer" (the quotations are because I don't consider it to be, but I know society says different) there is no better time than to head outside, fire up the grill, invite friends and family over, and enjoy a backyard bash. And this salad would be great with anything you're pulling off the fire. Enjoy summer's bounty while you still can because it doesn't get fresher, and in about 3 months when we're knee deep in snow, we will be missing it profusely!

Creamy Vegetable Salad Adapted From Taste of Home
2 large tomatoes, seeded and chopped
2 large cucumbers, seeded and chopped
3-4 green onions, chopped, reserve a few for garnish
6 radishes, finely chopped
1 c. sour cream
1/2 tsp. seasoning salt
1/8 c. lemon juice
1/4 tsp. pepper
1/2 tsp. celery seed, extra for garnish

In a large bowl combine tomatoes, cucumbers, green onions, and radishes. Toss to combine. In a small bowl whisk together sour cream, seasoning salt, lemon juice, pepper and celery seed. Pour over veggies. Mix well. Cover and refrigerate at least 2 hours. Serve with a slotted spoon.


Shared on The Country Cook Aug. 30, 2013
Salad at Very Good Recipes
reade more... Résuméabuiyad

A Hand In The Kitchen Part 1 {A Review of Cooking Planit}

Have you ever said to yourself "Cooking would be so much easier, if I just had a little help. Another set of hands to make sure everything is getting done at once."? Well, if you have, you are not alone. Anyone who spends any amount of time in the kitchen at some point has wished for a little assistance to make everything run smoothly. And today I have the answer to those wishes...in the form of not only a website, but also an app you can run on your iPad or iPhone! 

Let me introduce you to Cooking Planit, the site that takes the guesswork out of the kitchen. From your grocery list to the final product, they are there every step of the way, making sure your meal goes off without a hitch. 

From their website: 
• Simplified Meal Planning – Thoughtful and tested meal plans that your family and friends will love.
  • • Organized Shopping – No more headaches while getting your list together. We build your shopping list just like you would.
  • • Guided Cooking Steps – It's like G.P.S. for cooking! We'll do all the organization and lead you through each recipe's steps so that the entire meal is ready at the same time.
  • • Cloud Sync – Sync your account across the web, your iPhone and iPad
That's right, every single detail is not only thought of, but executed with ease and simplicity. When you find a recipe you want to make, just save it to your cookbook. Then when you are ready, it's waiting on you. Step by step instructions, all leading to a delicious meal, where all dishes are done at the same time! 

Let's start at the beginning. Here is this recipe, on my iPhone using the Cooking Planit app. It starts by telling me everything I should gather in the kitchen, so my ingredients are waiting on me, not the other way around. 


Next up, it tells me what equipment I'll need throughout the entire cooking process. No searching for a gadget at the last minute this way!


Now here is one of my favorite parts. Before you even start, it asks how many servings you are cooking for, adapted the recipe accordingly. Only have 2 in your house? Not a problem. No more guessing how much to make. It's so user friendly for cooks of all walks of life, from the small household to the ones cooking for a small army.


And this...well, this is my absolute favorite part. The timing aspect. It talks to you and tells you how much time you have before the next step needs to be completed. It even has a timer so you know exactly where you are in the process. Plus...if you get ahead of schedule...it even tells you that. And suggests you have a seat and enjoy a glass of wine while you wait! It truly is like having a friend in the kitchen with you!

Cooking Planit is the perfect site/app for everyone who enjoys cooking, but can always use a little help. I think it would be a great idea for college kids, living on their own for the first time, or maybe a new bride who isn't quite comfortable in the kitchen yet. But I also love that the more experienced home cook can adapt the recipes to fit their tastes (which is exactly what I did for this one) and even "skip" steps to better fit their time frame. Cooking Planit is easy to use, fun, and a home cook's best friend! 

Plus, they are very generous! They are giving EMM readers a chance to win a 12-piece T-Fal Cookware Set! It is GORGEOUS! And all you have to do to enter, is follow the directions in the Rafflecopter widget below! 

Now, for this recipe, I took one on their site, and adapted it to satisfy our family a little better. If you want to see the original, click here. This would make a great addition to your Labor Day picnic or backyard party...NO mayo! The light dressing makes it delicious without being too heavy. And I love the combination of spinach and feta! 

If you are looking for a little help in the kitchen, look no further than Cooking Planit. And be sure to check out the giveaway below, and come back on Wednesday to see the sandwich I made to go with this salad too!

Bow-Tie Pasta Salad with Spinach and Feta Adapted from Cooking Planit
12 oz. bow-tie pasta
1/2 c. sliced black olives
1 c. fresh baby spinach, chopped
1 (12 oz.) jar roasted red peppers, drained and rough chopped
1 c. feta cheese crumbles
1 clove garlic, minced
1 TBS olive oil
1 TBS lemon juice
Salt and Pepper to taste

Bring a large pot of water to a boil. Cook pasta to al dente, about 10 minutes. While pasta is cooking, add garlic, spinach, peppers and olives to a large bowl. Stir to combine. When pasta is done, drain well. Add directly to bowl. In a small bowl combine olive oil and lemon juice. Whisk to combine. Pour over pasta while warm. Season with salt and pepper. Stir to combine. Place in fridge at least 10 minutes to chill. Just before serving add feta and toss to combine. 


Shared on Mandy's Recipe Box Aug. 27, 2013
Shared on Lady Behind The Curtain Aug. 28, 2013
Shared on The Country Cook Aug. 30, 2013
Salad at Very Good Recipes

For More Info: 
CookingPlanit
 Website: http://www.cookingplanit.com/browse
 iOS'Apps: https://itunes.apple.com/us/artist/cooking.planit/id544421990

 Social Media:
 Blog: http://blog.cookingplanit.com/
 Facebook:' https://www.facebook.com/cookingplanit
 Twitter: https://twitter.com/cookingplanit
 Pinterest:'' http://pinterest.com/cookingplanit
 YouTube:' http://www.youtube.com/cookingplanit
 Instagram: http://instagram.com/cookingplanit

a Rafflecopter giveaway
Have you ever said to yourself "Cooking would be so much easier, if I just had a little help. Another set of hands to make sure everything is getting done at once."? Well, if you have, you are not alone. Anyone who spends any amount of time in the kitchen at some point has wished for a little assistance to make everything run smoothly. And today I have the answer to those wishes...in the form of not only a website, but also an app you can run on your iPad or iPhone! 

Let me introduce you to Cooking Planit, the site that takes the guesswork out of the kitchen. From your grocery list to the final product, they are there every step of the way, making sure your meal goes off without a hitch. 

From their website: 
• Simplified Meal Planning – Thoughtful and tested meal plans that your family and friends will love.
  • • Organized Shopping – No more headaches while getting your list together. We build your shopping list just like you would.
  • • Guided Cooking Steps – It's like G.P.S. for cooking! We'll do all the organization and lead you through each recipe's steps so that the entire meal is ready at the same time.
  • • Cloud Sync – Sync your account across the web, your iPhone and iPad
That's right, every single detail is not only thought of, but executed with ease and simplicity. When you find a recipe you want to make, just save it to your cookbook. Then when you are ready, it's waiting on you. Step by step instructions, all leading to a delicious meal, where all dishes are done at the same time! 

Let's start at the beginning. Here is this recipe, on my iPhone using the Cooking Planit app. It starts by telling me everything I should gather in the kitchen, so my ingredients are waiting on me, not the other way around. 


Next up, it tells me what equipment I'll need throughout the entire cooking process. No searching for a gadget at the last minute this way!


Now here is one of my favorite parts. Before you even start, it asks how many servings you are cooking for, adapted the recipe accordingly. Only have 2 in your house? Not a problem. No more guessing how much to make. It's so user friendly for cooks of all walks of life, from the small household to the ones cooking for a small army.


And this...well, this is my absolute favorite part. The timing aspect. It talks to you and tells you how much time you have before the next step needs to be completed. It even has a timer so you know exactly where you are in the process. Plus...if you get ahead of schedule...it even tells you that. And suggests you have a seat and enjoy a glass of wine while you wait! It truly is like having a friend in the kitchen with you!

Cooking Planit is the perfect site/app for everyone who enjoys cooking, but can always use a little help. I think it would be a great idea for college kids, living on their own for the first time, or maybe a new bride who isn't quite comfortable in the kitchen yet. But I also love that the more experienced home cook can adapt the recipes to fit their tastes (which is exactly what I did for this one) and even "skip" steps to better fit their time frame. Cooking Planit is easy to use, fun, and a home cook's best friend! 

Plus, they are very generous! They are giving EMM readers a chance to win a 12-piece T-Fal Cookware Set! It is GORGEOUS! And all you have to do to enter, is follow the directions in the Rafflecopter widget below! 

Now, for this recipe, I took one on their site, and adapted it to satisfy our family a little better. If you want to see the original, click here. This would make a great addition to your Labor Day picnic or backyard party...NO mayo! The light dressing makes it delicious without being too heavy. And I love the combination of spinach and feta! 

If you are looking for a little help in the kitchen, look no further than Cooking Planit. And be sure to check out the giveaway below, and come back on Wednesday to see the sandwich I made to go with this salad too!

Bow-Tie Pasta Salad with Spinach and Feta Adapted from Cooking Planit
12 oz. bow-tie pasta
1/2 c. sliced black olives
1 c. fresh baby spinach, chopped
1 (12 oz.) jar roasted red peppers, drained and rough chopped
1 c. feta cheese crumbles
1 clove garlic, minced
1 TBS olive oil
1 TBS lemon juice
Salt and Pepper to taste

Bring a large pot of water to a boil. Cook pasta to al dente, about 10 minutes. While pasta is cooking, add garlic, spinach, peppers and olives to a large bowl. Stir to combine. When pasta is done, drain well. Add directly to bowl. In a small bowl combine olive oil and lemon juice. Whisk to combine. Pour over pasta while warm. Season with salt and pepper. Stir to combine. Place in fridge at least 10 minutes to chill. Just before serving add feta and toss to combine. 


Shared on Mandy's Recipe Box Aug. 27, 2013
Shared on Lady Behind The Curtain Aug. 28, 2013
Shared on The Country Cook Aug. 30, 2013
Salad at Very Good Recipes

For More Info: 
CookingPlanit
 Website: http://www.cookingplanit.com/browse
 iOS'Apps: https://itunes.apple.com/us/artist/cooking.planit/id544421990

 Social Media:
 Blog: http://blog.cookingplanit.com/
 Facebook:' https://www.facebook.com/cookingplanit
 Twitter: https://twitter.com/cookingplanit
 Pinterest:'' http://pinterest.com/cookingplanit
 YouTube:' http://www.youtube.com/cookingplanit
 Instagram: http://instagram.com/cookingplanit

a Rafflecopter giveaway
reade more... Résuméabuiyad