Pages

Showing posts with label Black Olives. Show all posts

Don't Party In The Kitchen

Christmas is only a little over 1 week away! And I have one question for you. How many holiday parties have you been to thus far? Is your calendar over flowing? Is your dance card full? Have you been to many already, with many still to come? Have you hosted any yet? Are you trying to plan one for next week, or maybe even New Year's Eve? Tis the season for parties, parties and more parties, and today I've got a great appetizer/party food your guests will love and will keep you in the party, not watching from the kitchen.

I love party foods; but I especially love those that I can either make ahead of time and have waiting on me, or those that can be assembled as needed, as the night goes on, so hungry guest can easily be satisfied, without me missing out on all the fun! 

Bruschetta is one of my favorite appetizers of all time, but this time I wanted to switch it up a little and make one featuring olives instead of tomatoes. And not just every day olives, but kalamata olives! They are a little fancier in my mind, and it is the holiday season after all! 

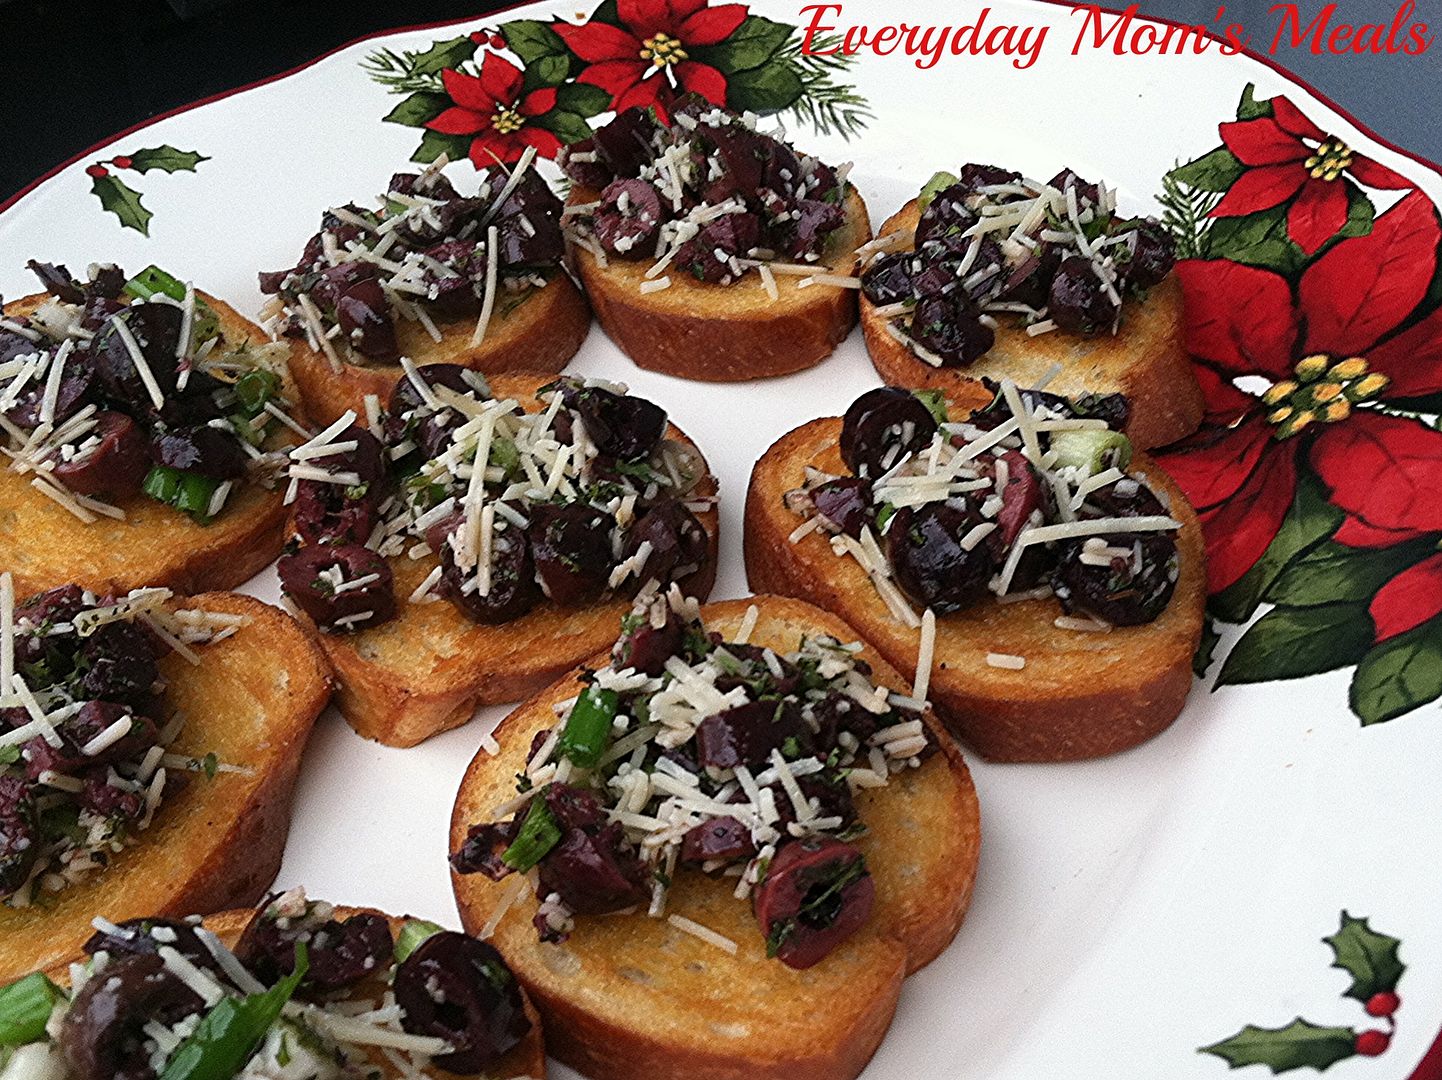
Your guests will love the crisp bread, briny olives, and the salty nutty flavor of the Parmesan. It's a fantastic twist on a traditional bruschetta everyone will find refreshing and unique. Plus, you can make the olive mixture, keep it chilling in the fridge and then just bake off more bread as you need it, topping tray after tray all night long!

Holiday parties are meant to be enjoyed by all, and that includes the host/hostess! No where is there a rule saying if you are the "hostess with the mostess" you have to be in the kitchen all night, making sure everyone else is fed and having a good time while you miss out. Enjoy all those parties over the next couple weeks, it will be a whole year until they are here again!

Olive Bruschetta
20-24 Slices French bread or baguette about 1/4" thick
1 c. kalamata olives, pitted and chopped
2 green onions, chopped
1 garlic clove, finely minced
2 tsp. dried basil
2 tsp. dried parsley
1/4 c. olive oil, plus more for bread
1/4 c. shredded Parmesan cheese, plus extra for garnish
Salt and pepper

Preheat oven to 350. Brush both sides of bread with oil and season with salt and pepper. Place on rimmed baking sheets. Bake for 8-10 minutes, flip and bake 8-10 minutes more. (Watch carefully, these are times for my oven, but they can burn easily!)

In a medium bowl combine olive, garlic, green onions, basil, parsley, olive oil and cheese. Mix well. If not serving right away, chill. When bread is done, allow to cool. Top with olive mixture. Garnish with extra cheese.


Shared on The Country Cook Dec. 20, 2013

Appetizers at Very Good Recipes
Christmas is only a little over 1 week away! And I have one question for you. How many holiday parties have you been to thus far? Is your calendar over flowing? Is your dance card full? Have you been to many already, with many still to come? Have you hosted any yet? Are you trying to plan one for next week, or maybe even New Year's Eve? Tis the season for parties, parties and more parties, and today I've got a great appetizer/party food your guests will love and will keep you in the party, not watching from the kitchen.

I love party foods; but I especially love those that I can either make ahead of time and have waiting on me, or those that can be assembled as needed, as the night goes on, so hungry guest can easily be satisfied, without me missing out on all the fun! 

Bruschetta is one of my favorite appetizers of all time, but this time I wanted to switch it up a little and make one featuring olives instead of tomatoes. And not just every day olives, but kalamata olives! They are a little fancier in my mind, and it is the holiday season after all! 

Your guests will love the crisp bread, briny olives, and the salty nutty flavor of the Parmesan. It's a fantastic twist on a traditional bruschetta everyone will find refreshing and unique. Plus, you can make the olive mixture, keep it chilling in the fridge and then just bake off more bread as you need it, topping tray after tray all night long!

Holiday parties are meant to be enjoyed by all, and that includes the host/hostess! No where is there a rule saying if you are the "hostess with the mostess" you have to be in the kitchen all night, making sure everyone else is fed and having a good time while you miss out. Enjoy all those parties over the next couple weeks, it will be a whole year until they are here again!

Olive Bruschetta
20-24 Slices French bread or baguette about 1/4" thick
1 c. kalamata olives, pitted and chopped
2 green onions, chopped
1 garlic clove, finely minced
2 tsp. dried basil
2 tsp. dried parsley
1/4 c. olive oil, plus more for bread
1/4 c. shredded Parmesan cheese, plus extra for garnish
Salt and pepper

Preheat oven to 350. Brush both sides of bread with oil and season with salt and pepper. Place on rimmed baking sheets. Bake for 8-10 minutes, flip and bake 8-10 minutes more. (Watch carefully, these are times for my oven, but they can burn easily!)

In a medium bowl combine olive, garlic, green onions, basil, parsley, olive oil and cheese. Mix well. If not serving right away, chill. When bread is done, allow to cool. Top with olive mixture. Garnish with extra cheese.


Shared on The Country Cook Dec. 20, 2013

Appetizers at Very Good Recipes
reade more... Résuméabuiyad

A Classic Revisted

Today's recipe has been a staple in our house for a very long time. In fact, it was already blogged back when only maybe five people, including my mom, read EMM. And if you remember, my "foodie resolution" for 2013 was to revisit some of those "back in the day" posts, and re-blog them for everyone to enjoy again. So, since the year is quickly winding down, I had to make sure this was on the list!

The first time I ever had a Greek salad was at one of our favorite restaurants here in Fort Wayne. It's a nicer place, and one we go to for only special occasions, so in my mind this salad option will always be a little on the fancy side, when it reality, it could not be easier to make!

I love entertaining with salad, as a first course; but they also make an incredible light, but still filling, weeknight salad supper. They are a very common star on our dinner table during the warm summer months, but we love them so much I am required to make them year round. Especially now that the little man has also fallen in love with them; and not only does he love them, but he will actually eat the one part of this salad that I won't touch. The anchovies. His father loves them; and when I serve them to others, I always have them as an option, but to me, they just aren't appetizing. So to see my son not only like them, but ask for extra kinda makes me giggle. And proves once again, this child has the most diverse palate of any 9 year old I know!

Greek Salads
1 head iceberg lettuce, chopped
1 (15 oz.) can pitted black olives, drained (see note below)
1 (20 oz.) can pineapple chunks, drained
1 large green bell pepper, finely chopped
1 (15 oz.) can sliced beets, drained and chopped
1 small container crumbed feta cheese
1 small tin anchovies in olive oil, optional
Greek Dressing

Divide lettuce, olives, green peppers, pineapple, beets and feta among plates evenly. This amount will make 3 large dinner salads, or 4 small side salads. For those wanting anchovies, add to very top. Serve with dressing on side. *NOTE* I prefer to make these with kalamata olives. They are the most authentic. However, sometimes the budget doesn't allow it, and black olives work just as well.


Salads at Very Good Recipes
Today's recipe has been a staple in our house for a very long time. In fact, it was already blogged back when only maybe five people, including my mom, read EMM. And if you remember, my "foodie resolution" for 2013 was to revisit some of those "back in the day" posts, and re-blog them for everyone to enjoy again. So, since the year is quickly winding down, I had to make sure this was on the list!

The first time I ever had a Greek salad was at one of our favorite restaurants here in Fort Wayne. It's a nicer place, and one we go to for only special occasions, so in my mind this salad option will always be a little on the fancy side, when it reality, it could not be easier to make!

I love entertaining with salad, as a first course; but they also make an incredible light, but still filling, weeknight salad supper. They are a very common star on our dinner table during the warm summer months, but we love them so much I am required to make them year round. Especially now that the little man has also fallen in love with them; and not only does he love them, but he will actually eat the one part of this salad that I won't touch. The anchovies. His father loves them; and when I serve them to others, I always have them as an option, but to me, they just aren't appetizing. So to see my son not only like them, but ask for extra kinda makes me giggle. And proves once again, this child has the most diverse palate of any 9 year old I know!

Greek Salads
1 head iceberg lettuce, chopped
1 (15 oz.) can pitted black olives, drained (see note below)
1 (20 oz.) can pineapple chunks, drained
1 large green bell pepper, finely chopped
1 (15 oz.) can sliced beets, drained and chopped
1 small container crumbed feta cheese
1 small tin anchovies in olive oil, optional
Greek Dressing

Divide lettuce, olives, green peppers, pineapple, beets and feta among plates evenly. This amount will make 3 large dinner salads, or 4 small side salads. For those wanting anchovies, add to very top. Serve with dressing on side. *NOTE* I prefer to make these with kalamata olives. They are the most authentic. However, sometimes the budget doesn't allow it, and black olives work just as well.


Salads at Very Good Recipes
reade more... Résuméabuiyad

Weeknight Rush

Is it just me or are the weeknights becoming more and more rushed? Between homework, after school activities and every day life, I am pretty sure the hours between 3:30 and 8 pm are some of the busiest in my life. So, it's so nice when I can come up with a meal that is quick, tasty and has us going back out the door on time!

You've heard me say it before, but I think it bears repeating. Casseroles are a mom's best friend. I know many people turn their noses up at just the word, but to me, if I can put a bunch of things into one pan, throw it in the oven and in about 30 minutes have dinner on the table, I am a happy mama. Sure, there are some casseroles out there that were simply never meant to be, most likely because someone started throwing ingredients together that had no business being paired, but those aren't the ones I'm talking about. I mean the ones that are made up of things we already love, that compliment each other, and simply make sense hanging out in one simple dish.

Tacos. We love them. Taco fixins'. We love those too. So why not take everything I would normally have out for a "taco bar", and see what kind of casserole I can make? See, this is my thought process. And I know I'm not the first one to have this crazy notion.

So here is a simple, delicious Mexican casserole perfect for any crazy, crammed full of things to do, weeknight! Adapt it with your favorite ingredients. Have the kids help pick out what things they want in it. Easy, yummy and fun for the whole family. I told you a good casserole is a mom's best friend!

Taco Casserole
1 lb. ground beef
1 packet taco seasoning
1 (16 oz.) can refried black beans with onion and garlic
1 (16 oz.) jar mild chunky salsa
1 green pepper, chopped
1 (2.2 oz) can sliced black olives
3 Roma tomatoes, chopped, divided
1 c. shredded taco cheese
Shredded Lettuce
Tortilla Chips, slightly crushed

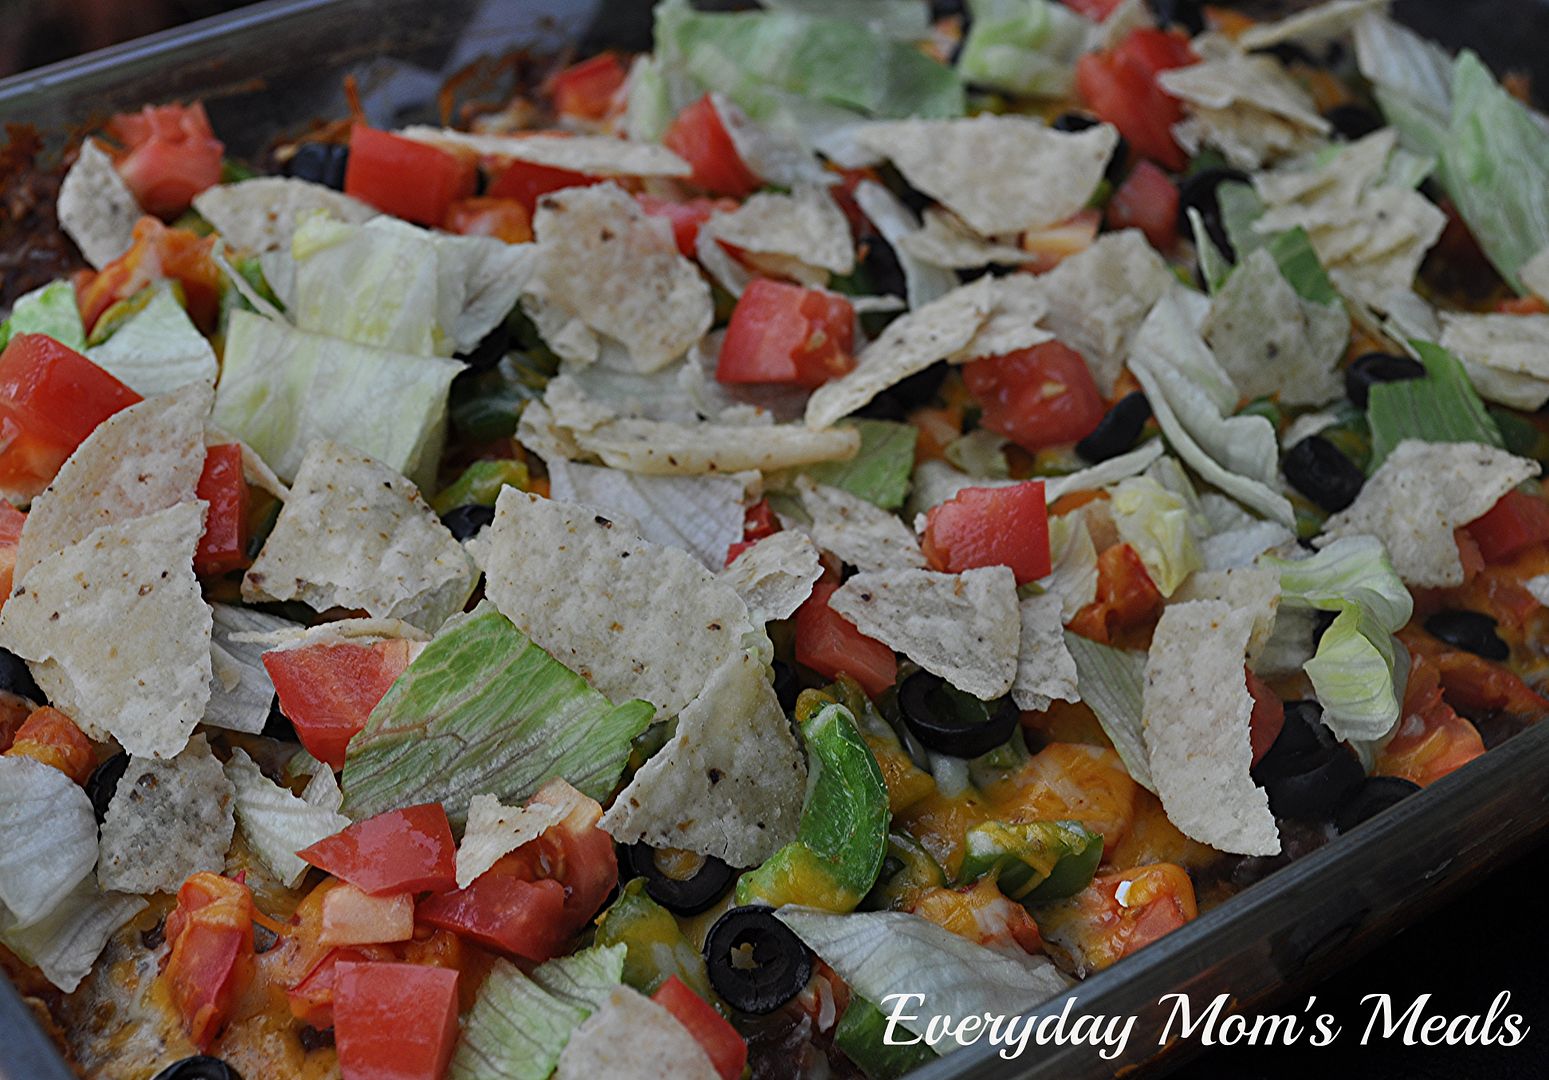
Preheat oven to 350. Add enough broken tortilla chips to bottom of 9x13 dish to cover. In a large skillet brown beef until no longer pink. Add taco seasoning, stir well. Add beans and salsa. Stir well. Cook 5-7 minutes to allow flavors to combine. Add to top of chips. Spread evenly. Add green pepper and 2/3 chopped tomato. Sprinkle top with cheese and black olives. Bake for 20-25 minutes until cheese melts. Top with rest of tomato, lettuce and more broken chips.


Shared on The Country Cook Oct. 11, 2013


  Casseroles at Very Good Recipes
Is it just me or are the weeknights becoming more and more rushed? Between homework, after school activities and every day life, I am pretty sure the hours between 3:30 and 8 pm are some of the busiest in my life. So, it's so nice when I can come up with a meal that is quick, tasty and has us going back out the door on time!

You've heard me say it before, but I think it bears repeating. Casseroles are a mom's best friend. I know many people turn their noses up at just the word, but to me, if I can put a bunch of things into one pan, throw it in the oven and in about 30 minutes have dinner on the table, I am a happy mama. Sure, there are some casseroles out there that were simply never meant to be, most likely because someone started throwing ingredients together that had no business being paired, but those aren't the ones I'm talking about. I mean the ones that are made up of things we already love, that compliment each other, and simply make sense hanging out in one simple dish.

Tacos. We love them. Taco fixins'. We love those too. So why not take everything I would normally have out for a "taco bar", and see what kind of casserole I can make? See, this is my thought process. And I know I'm not the first one to have this crazy notion.

So here is a simple, delicious Mexican casserole perfect for any crazy, crammed full of things to do, weeknight! Adapt it with your favorite ingredients. Have the kids help pick out what things they want in it. Easy, yummy and fun for the whole family. I told you a good casserole is a mom's best friend!

Taco Casserole
1 lb. ground beef
1 packet taco seasoning
1 (16 oz.) can refried black beans with onion and garlic
1 (16 oz.) jar mild chunky salsa
1 green pepper, chopped
1 (2.2 oz) can sliced black olives
3 Roma tomatoes, chopped, divided
1 c. shredded taco cheese
Shredded Lettuce
Tortilla Chips, slightly crushed

Preheat oven to 350. Add enough broken tortilla chips to bottom of 9x13 dish to cover. In a large skillet brown beef until no longer pink. Add taco seasoning, stir well. Add beans and salsa. Stir well. Cook 5-7 minutes to allow flavors to combine. Add to top of chips. Spread evenly. Add green pepper and 2/3 chopped tomato. Sprinkle top with cheese and black olives. Bake for 20-25 minutes until cheese melts. Top with rest of tomato, lettuce and more broken chips.


Shared on The Country Cook Oct. 11, 2013


  Casseroles at Very Good Recipes
reade more... Résuméabuiyad

Crack Nachos

Ha! That got your attention, didn't it??!! Hey, I have to suck you in somehow! I will explain the inspiration for that title in just a minute!

I love taking things I know how to cook blindfolded, and turn them into something brand new. It's a great way to create brand new things in the kitchen with some of the pressure taken away. If part of a new dish is something that is "tried and true" it takes some of the anxiety of  "will it turn out" away! Not all, but some!

So when I was thinking of new ways to use my now almost famous Coney Sauce, I was talking to a friend who loves it as much as we do; and she mentioned she loves making nachos out of it when I make it for her. How perfect! And since she refers to it as "Crack Sauce", the name of this post was born.

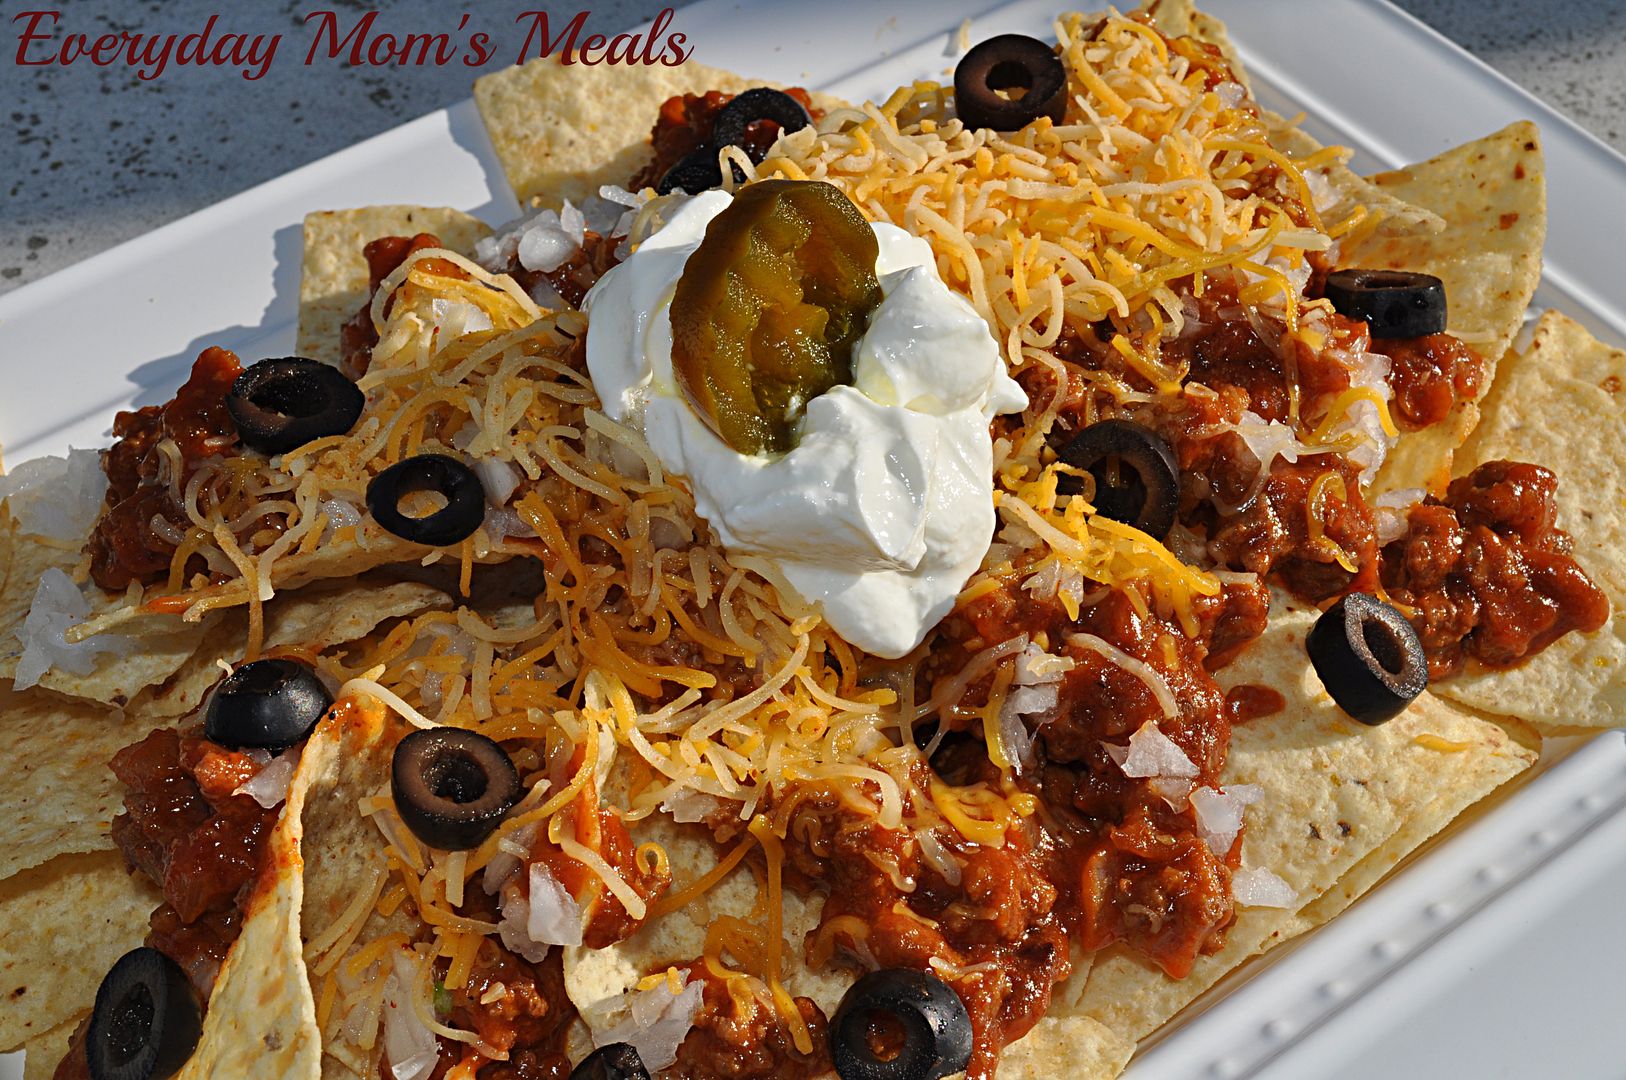
If you love Coney Dogs, or even Chili Dogs, you will love these nachos. The flavor of the sauce is only enhanced by your topping choices. I decided to go with things we top our Coney Dogs with, plus a few extra nacho must haves. The combination was definitely a winner! They make a fun, tasty, light summer supper, or make a huge platter for your next backyard party! But don't forget to tell your friends they are eating "crack nachos"...the look on their faces is worth the price of admission!

Coney Nachos
1 lb. ground beef
1/2 c. chopped onion
1 clove garlic, minced
2 TBS butter
2 TBS yellow mustard
2 TBS cider vinegar
1 tsp. Worcestershire sauce
1/2 tsp. hot pepper sauce
1 c. ketchup
2 tsp. paprika
2 tsp. chili powder
Salt and Pepper to taste
Tortilla Chips
Toppings:
Sliced Black Olives
Finely Chopped White Onion
Shredded Cheese
Sour Cream
Jalapeno Peppers

In a medium bowl combine ketchup, mustard, vinegar, Worcestershire, hot sauce, paprika, chili powder,  salt and pepper. In a skillet over medium heat, melt butter. Add ground beef, onion and garlic. Cook until meat is no longer pink, breaking up very fine. (I like to use a potato masher.) Add ketchup mixture. Reduce heat to low and allow to simmer 20-25 minutes until thickened. Lay tortilla chips on plate, top with coney sauce. Garnish with favorite toppings.


Pin It
Ha! That got your attention, didn't it??!! Hey, I have to suck you in somehow! I will explain the inspiration for that title in just a minute!

I love taking things I know how to cook blindfolded, and turn them into something brand new. It's a great way to create brand new things in the kitchen with some of the pressure taken away. If part of a new dish is something that is "tried and true" it takes some of the anxiety of  "will it turn out" away! Not all, but some!

So when I was thinking of new ways to use my now almost famous Coney Sauce, I was talking to a friend who loves it as much as we do; and she mentioned she loves making nachos out of it when I make it for her. How perfect! And since she refers to it as "Crack Sauce", the name of this post was born.

If you love Coney Dogs, or even Chili Dogs, you will love these nachos. The flavor of the sauce is only enhanced by your topping choices. I decided to go with things we top our Coney Dogs with, plus a few extra nacho must haves. The combination was definitely a winner! They make a fun, tasty, light summer supper, or make a huge platter for your next backyard party! But don't forget to tell your friends they are eating "crack nachos"...the look on their faces is worth the price of admission!

Coney Nachos
1 lb. ground beef
1/2 c. chopped onion
1 clove garlic, minced
2 TBS butter
2 TBS yellow mustard
2 TBS cider vinegar
1 tsp. Worcestershire sauce
1/2 tsp. hot pepper sauce
1 c. ketchup
2 tsp. paprika
2 tsp. chili powder
Salt and Pepper to taste
Tortilla Chips
Toppings:
Sliced Black Olives
Finely Chopped White Onion
Shredded Cheese
Sour Cream
Jalapeno Peppers

In a medium bowl combine ketchup, mustard, vinegar, Worcestershire, hot sauce, paprika, chili powder,  salt and pepper. In a skillet over medium heat, melt butter. Add ground beef, onion and garlic. Cook until meat is no longer pink, breaking up very fine. (I like to use a potato masher.) Add ketchup mixture. Reduce heat to low and allow to simmer 20-25 minutes until thickened. Lay tortilla chips on plate, top with coney sauce. Garnish with favorite toppings.


Pin It
reade more... Résuméabuiyad

He Loves The Box

The blue one. That says Kraft on it. With the mac and cheese inside of it. And to be honest, I can't say I blame him. Sometimes, I need transported back in time to my childhood and enjoy a classic. No, it's not as good as homemade. No, it's not that great for me. But I can't help myself, sometimes I just gotta have it. 

Most of the time when I satisfy his craving, or indulge myself, it's as a side dish...easy and quick...exactly what I need sometimes. But a few years ago when a friend shared this with me, I was pleasantly surprised that with just a few ingredients I could make that classic into something new, and a filling main dish, perfect for a busy weeknight when I'm rushing around trying to get supper on the table, along with about a hundred other things.

Now, if you prefer a homemade version, and stay away from the pre-packaged version all together, kudos to you! Seriously, you have much more will power than I do. This could easily be made with a creamy "from scratch" version, just be sure your end product results in about a pound of pasta. Then simply add the rest of the ingredients. Either way you make it, your kids are going to love it! Mac n Cheese and Pizza in one delicious dish...they will think you are a genius!!

Every once in awhile it's okay to treat ourselves to one of life's simple pleasure. For our family that means mac and cheese out of a certain blue box. But at least this way I get to "jazz" it up a little and give my little guy two things he loves in one simple dish.

Pizza Style Mac n Cheese
2 (7.5 oz) boxes mac n cheese
1/2 stick butter (NOTE this is a different amount than listed on box)
1/2 cup milk
1 (15 oz.) jar pizza sauce
3/4 c. pepperoni, chopped
1 (6.5 oz) can sliced mushrooms, drained
1 (3.5 oz) can sliced black olives, drained, a few reserved for garnish
2 TBS Italian Seasoning, extra for garnish

Bring a large pot of water to a boil. Cook macaroni until done. Put back on hot pan over low heat. Add milk, butter and cheese packet. Stir until well combined. Add pizza sauce. Stir and cook on low until some liquid evaporates. Add pepperoni, mushrooms, olives and seasoning. Stir well to combine. Cook on low for 10-15 minutes to allow flavors to combine, stirring often. Garnish with extra black olives and seasoning. 


Shared on Lady Behind The Curtain May 15, 2013
Shared on The Country Cook May 17, 2013
Pasta at Very Good Recipes
Pin It
The blue one. That says Kraft on it. With the mac and cheese inside of it. And to be honest, I can't say I blame him. Sometimes, I need transported back in time to my childhood and enjoy a classic. No, it's not as good as homemade. No, it's not that great for me. But I can't help myself, sometimes I just gotta have it. 

Most of the time when I satisfy his craving, or indulge myself, it's as a side dish...easy and quick...exactly what I need sometimes. But a few years ago when a friend shared this with me, I was pleasantly surprised that with just a few ingredients I could make that classic into something new, and a filling main dish, perfect for a busy weeknight when I'm rushing around trying to get supper on the table, along with about a hundred other things.

Now, if you prefer a homemade version, and stay away from the pre-packaged version all together, kudos to you! Seriously, you have much more will power than I do. This could easily be made with a creamy "from scratch" version, just be sure your end product results in about a pound of pasta. Then simply add the rest of the ingredients. Either way you make it, your kids are going to love it! Mac n Cheese and Pizza in one delicious dish...they will think you are a genius!!

Every once in awhile it's okay to treat ourselves to one of life's simple pleasure. For our family that means mac and cheese out of a certain blue box. But at least this way I get to "jazz" it up a little and give my little guy two things he loves in one simple dish.

Pizza Style Mac n Cheese
2 (7.5 oz) boxes mac n cheese
1/2 stick butter (NOTE this is a different amount than listed on box)
1/2 cup milk
1 (15 oz.) jar pizza sauce
3/4 c. pepperoni, chopped
1 (6.5 oz) can sliced mushrooms, drained
1 (3.5 oz) can sliced black olives, drained, a few reserved for garnish
2 TBS Italian Seasoning, extra for garnish

Bring a large pot of water to a boil. Cook macaroni until done. Put back on hot pan over low heat. Add milk, butter and cheese packet. Stir until well combined. Add pizza sauce. Stir and cook on low until some liquid evaporates. Add pepperoni, mushrooms, olives and seasoning. Stir well to combine. Cook on low for 10-15 minutes to allow flavors to combine, stirring often. Garnish with extra black olives and seasoning. 


Shared on Lady Behind The Curtain May 15, 2013
Shared on The Country Cook May 17, 2013
Pasta at Very Good Recipes
Pin It
reade more... Résuméabuiyad

Party Or Dinner

Lately I've been finding myself stumbling up on more and more recipes that would be perfect for a party, made for a party in fact...but there's one problem. I don't have a party on our calendar in sight. I know many of you entertain or get entertained on a weekly basis, but that just doesn't happen around here. Special occasions, holidays, birthdays...that's when they party platters come out in my house, but I refuse to wait for some of these yummy things I'm finding, so I simply take the recipe, make more of it, add somethings on the side...and we've got ourselves a new meal idea. And today's recipe is the perfect example of that.

Now, if you are need of a party idea, I'm telling you, your guests will flip for these! A taco they can eat with one hand, and probably in one bite!! All the flavors they love of a taco bar, but in an easy to handle tiny package. Not to mention, they are as cute as all get out. When I first saw this idea on Pinterest, it was actually before the holiday party season in our house, and yep, I forgot about them. It wasn't until a few weeks ago when I was going through some of my "pins" looking for inspiration I happened to find them once again and then kick myself for not including them in any one of many get togethers I could have. But oh well...these things happen, and I still got a new, fun weeknight dinner out of it...one that I know your kids will love as much as mine did! 

So if it's a quick Tuesday night supper or a last minute party treat you're looking for, search no further. EMM has you covered! 

Mini Taco Bites
1 bag Scoops tortilla chips
1 lb. ground beef
3/4 c. water
1 (4.5 oz) can chopped black olives
1 (1.1 oz) packet taco seasoning
1 (15 oz.) can petite diced tomatoes, drained
1 c. shredded cheddar cheese
Sour cream, optional

In a large skillet brown beef. Drain if necessary. Add taco seasoning and water. Bring to a boil. Reduce heat and cook about 5 minutes until slightly thickened. Add olives and tomatoes. Stir until well combined. Add cheese and stir until melted. Allow to cook 5-7 minutes until mixture is thick and flavors develop. Carefully fill chips with beef mixture and top with sour cream.
*NOTE* This made enough for about 30 for us, 10 each, for a meal. Plus I had some extra filling leftover. 


Shared on Make Ahead Meals Mar. 18, 2013
Shared on Mandy's Recipe Box Mar. 19, 2013
Shared on Lady Behind The Curtain Mar. 20, 2013
Shared on Miz Helen's Country Cottage Mar. 21, 2013
Shared on The Country Cook Mar. 22, 2013
Mexican at Very Good Recipes
Pin It
Lately I've been finding myself stumbling up on more and more recipes that would be perfect for a party, made for a party in fact...but there's one problem. I don't have a party on our calendar in sight. I know many of you entertain or get entertained on a weekly basis, but that just doesn't happen around here. Special occasions, holidays, birthdays...that's when they party platters come out in my house, but I refuse to wait for some of these yummy things I'm finding, so I simply take the recipe, make more of it, add somethings on the side...and we've got ourselves a new meal idea. And today's recipe is the perfect example of that.

Now, if you are need of a party idea, I'm telling you, your guests will flip for these! A taco they can eat with one hand, and probably in one bite!! All the flavors they love of a taco bar, but in an easy to handle tiny package. Not to mention, they are as cute as all get out. When I first saw this idea on Pinterest, it was actually before the holiday party season in our house, and yep, I forgot about them. It wasn't until a few weeks ago when I was going through some of my "pins" looking for inspiration I happened to find them once again and then kick myself for not including them in any one of many get togethers I could have. But oh well...these things happen, and I still got a new, fun weeknight dinner out of it...one that I know your kids will love as much as mine did! 

So if it's a quick Tuesday night supper or a last minute party treat you're looking for, search no further. EMM has you covered! 

Mini Taco Bites
1 bag Scoops tortilla chips
1 lb. ground beef
3/4 c. water
1 (4.5 oz) can chopped black olives
1 (1.1 oz) packet taco seasoning
1 (15 oz.) can petite diced tomatoes, drained
1 c. shredded cheddar cheese
Sour cream, optional

In a large skillet brown beef. Drain if necessary. Add taco seasoning and water. Bring to a boil. Reduce heat and cook about 5 minutes until slightly thickened. Add olives and tomatoes. Stir until well combined. Add cheese and stir until melted. Allow to cook 5-7 minutes until mixture is thick and flavors develop. Carefully fill chips with beef mixture and top with sour cream.
*NOTE* This made enough for about 30 for us, 10 each, for a meal. Plus I had some extra filling leftover. 


Shared on Make Ahead Meals Mar. 18, 2013
Shared on Mandy's Recipe Box Mar. 19, 2013
Shared on Lady Behind The Curtain Mar. 20, 2013
Shared on Miz Helen's Country Cottage Mar. 21, 2013
Shared on The Country Cook Mar. 22, 2013
Mexican at Very Good Recipes
Pin It
reade more... Résuméabuiyad

Snow or Sun

I don't care if there is 3 feet of snow on the ground or if there is a month long heat wave happening, it's a good time for a new pasta salad recipe. Any time. All the time! We love the stuff. I have so many varieties I make I sometimes lose track of them; and now I have yet another to add to the list.

A couple weeks ago our aunt was cleaning out her pantry and found a Greek Seasoning blend she had bought for one recipe, never used again, and since she won't be making that recipe again (let's just say it wasn't her favorite) she asked if I could use it. Sure I can! I have a bunch of recipes that call for Greek Seasoning, and even if I didn't, it's a free seasoning blend. I'll take it.

Well, I had never heard of this particular brand, so I looked them up online. Cavender's All Purpose Greek Seasoning. And while I was on their site, I found some great recipe ideas, including this pasta salad. I guess if I didn't have enough recipes to use it in, now I do! 

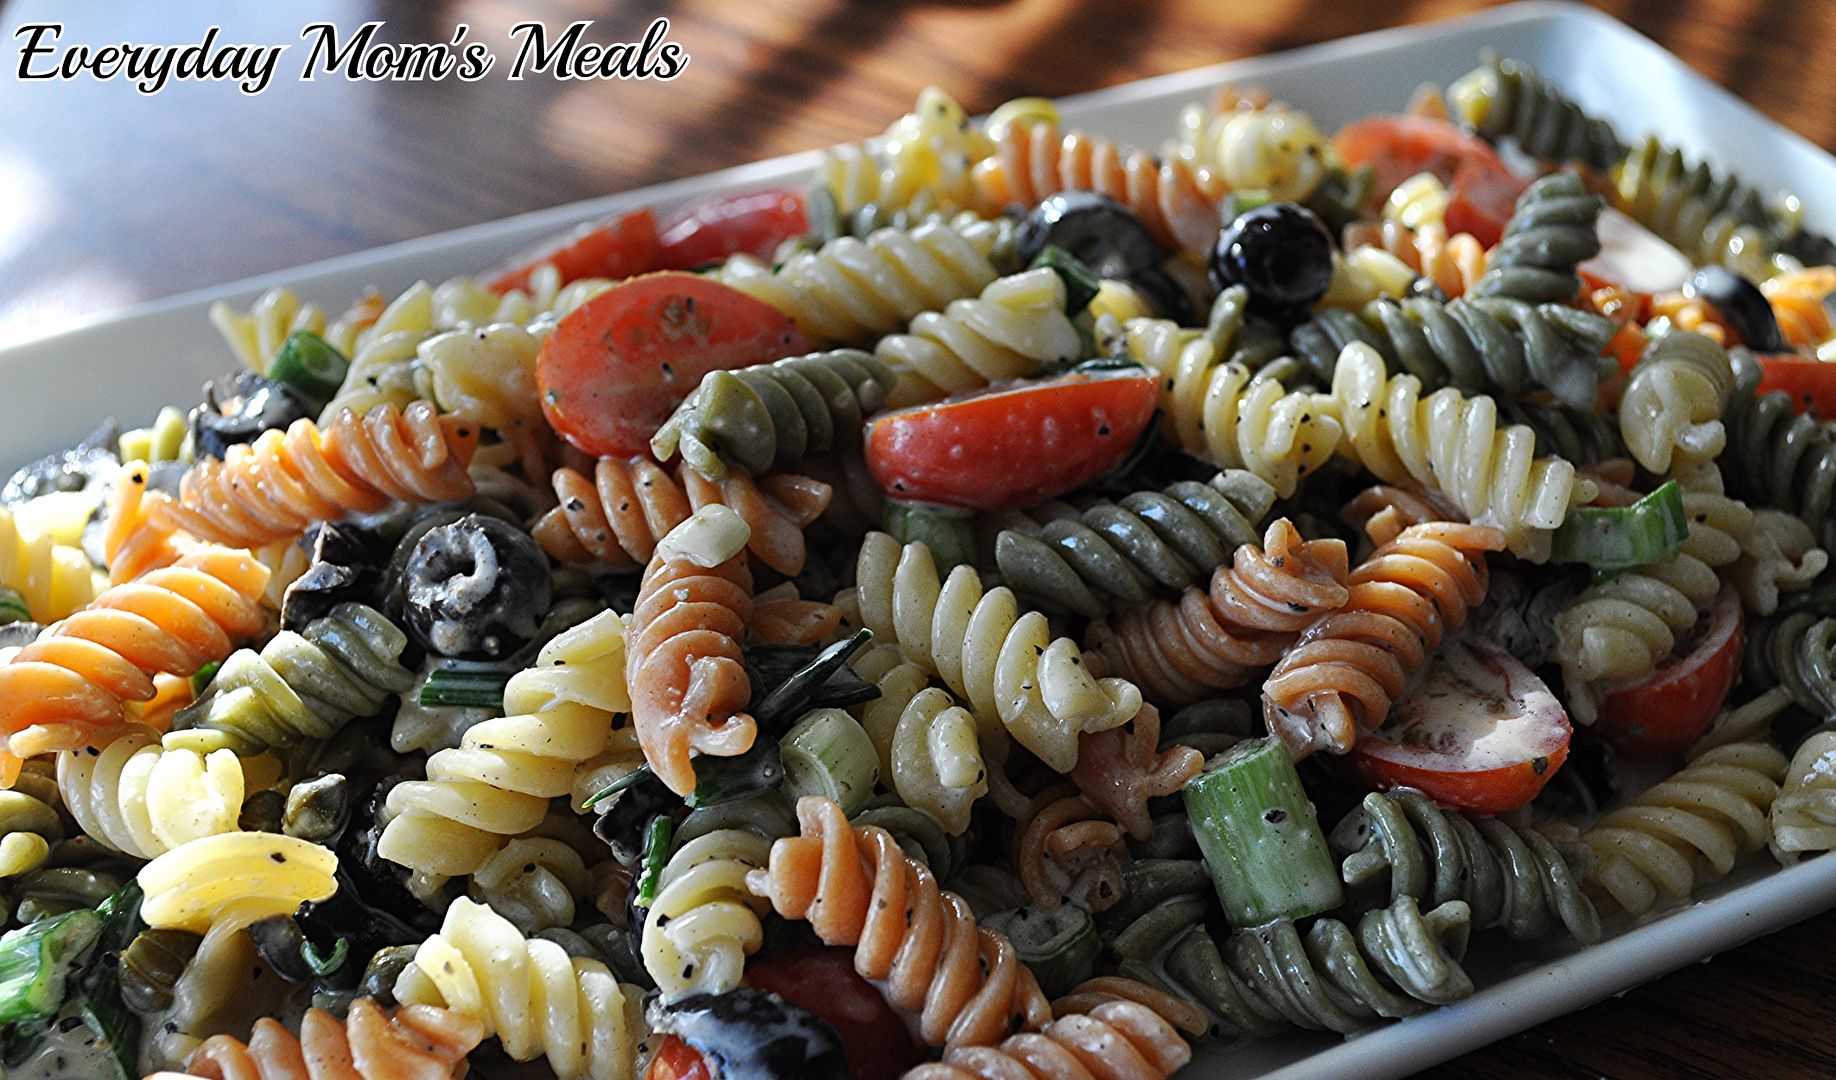
This makes a great side dish any night of the week and is bursting with an unique Mediterranean flavor. Plus, it's easily adaptable to include the veggies you love. I added some, and took a couple away from the original recipe to use what I had on hand. 

If you want to wait until warmer weather to enjoy this, that's your choice. To each their own. But me...I will be enjoying this for dinner, watching the snow flakes gather on the frozen grass!

Greek Pasta Salad Adapted from Cavender's
12 oz. garden rotini pasta
5 green onions, chopped
1 (2.5) oz. can sliced black olives
1/3 c. grape tomatoes, halved
2 TBS capers
1/2 c. mayo
4 1/4 TBS lemon juice
1/4 c. olive oil
3 TBS Greek Seasoning

Boil pasta, drain and rinse with cold water. Drain again. In a medium bowl combine olive oil, seasoning, lemon juice and mayo. Whisk well to combine. In a large bowl combine pasta, olives, capers, green onions and tomatoes. Stir well. Pour dressing over. Mix well to combine. Chill until serving, at least 2 hours. 


Shared on The Country Cook Feb. 15, 2013
Shared on Make Ahead Meals Feb. 18, 2013
Greek at Very Good Recipes
Pin It
I don't care if there is 3 feet of snow on the ground or if there is a month long heat wave happening, it's a good time for a new pasta salad recipe. Any time. All the time! We love the stuff. I have so many varieties I make I sometimes lose track of them; and now I have yet another to add to the list.

A couple weeks ago our aunt was cleaning out her pantry and found a Greek Seasoning blend she had bought for one recipe, never used again, and since she won't be making that recipe again (let's just say it wasn't her favorite) she asked if I could use it. Sure I can! I have a bunch of recipes that call for Greek Seasoning, and even if I didn't, it's a free seasoning blend. I'll take it.

Well, I had never heard of this particular brand, so I looked them up online. Cavender's All Purpose Greek Seasoning. And while I was on their site, I found some great recipe ideas, including this pasta salad. I guess if I didn't have enough recipes to use it in, now I do! 

This makes a great side dish any night of the week and is bursting with an unique Mediterranean flavor. Plus, it's easily adaptable to include the veggies you love. I added some, and took a couple away from the original recipe to use what I had on hand. 

If you want to wait until warmer weather to enjoy this, that's your choice. To each their own. But me...I will be enjoying this for dinner, watching the snow flakes gather on the frozen grass!

Greek Pasta Salad Adapted from Cavender's
12 oz. garden rotini pasta
5 green onions, chopped
1 (2.5) oz. can sliced black olives
1/3 c. grape tomatoes, halved
2 TBS capers
1/2 c. mayo
4 1/4 TBS lemon juice
1/4 c. olive oil
3 TBS Greek Seasoning

Boil pasta, drain and rinse with cold water. Drain again. In a medium bowl combine olive oil, seasoning, lemon juice and mayo. Whisk well to combine. In a large bowl combine pasta, olives, capers, green onions and tomatoes. Stir well. Pour dressing over. Mix well to combine. Chill until serving, at least 2 hours. 


Shared on The Country Cook Feb. 15, 2013
Shared on Make Ahead Meals Feb. 18, 2013
Greek at Very Good Recipes
Pin It
reade more... Résuméabuiyad