Pages

Showing posts with label Cheese. Show all posts

No, Mommy Can't Do That

One week folks! That's right, in case you haven't been paying attention, we only have 7 days until the big day! Have your kids been counting down for days now? Heck, have you? Do you still have a ton of things on your to-do list? Rather you are ready or not, it's coming and fast!

But if one of the things on your list is to find a great idea for Christmas morning breakfast, your favorite everyday mom has you covered! Stay calm and relax because you've come to the right place and I have a great idea for you.

This recipe came about because of a request from my son. He decided to ask me if I would make omelets for supper one night. Now, breakfast for supper is a very common occurrence in this house, so that wasn't the issue. The problem was what he asked for. See, I can't make an omelet in the skillet to save my life. If you have ever seen my recipe for Baked Omelet I talked about this at length. How I've tried and tried and they just never come out right, so I admitted defeat and began baking a big omelet in the oven.

So, I explained to my son how this was just one food request I didn't think I could come through on, but I promised to take the baked omelet idea and turn up the factor a little, just for him. And that is when these mini baked omelets were born. I figured take some fresh ingredients, add some eggs, put everything in a muffin tin and bake it. I get the ease of a baked version, and the little guy gets omelets just his size.

These would be perfect for Christmas morning, or a brunch where you have to feed a crowd. You can pump out a whole pan of these in almost no time; and you can even swap out the ingredients in every single cup to fit everyone's favorites. Don't stand over the stove in a make shift omelet bar. Do this instead and feed everyone in almost no time at all!

There aren't many requests I will deny my son, but when it's something I have accepted I can't do, and moved on with my life, I have to find another way to make his wish come true. After all, I'm his Mommy and that's my job!

Egg, Broccoli and Ham Muffins
1 (12 oz.) bag frozen chopped broccoli, thawed
1 (8 oz.) bag diced ham
1 (8 oz.) bag Mexican style cheese
12 eggs, beaten
Salt an Pepper to taste

Preheat oven to 350. Grease a muffin tin liberally. Equally divide broccoli, ham and cheese among tin, only filling each vessel about 1/3 of the way. Pour eggs over, evenly, reaching 3/4 way to top. (They will puff when cooked) Bake for 25-30 minutes until toothpick comes out clean. Let sit 5 minutes and then carefully run knife along edge to loosen.


Shared on The Country Cook Dec. 20, 2013

Eggs at Very Good Recipes
One week folks! That's right, in case you haven't been paying attention, we only have 7 days until the big day! Have your kids been counting down for days now? Heck, have you? Do you still have a ton of things on your to-do list? Rather you are ready or not, it's coming and fast!

But if one of the things on your list is to find a great idea for Christmas morning breakfast, your favorite everyday mom has you covered! Stay calm and relax because you've come to the right place and I have a great idea for you.

This recipe came about because of a request from my son. He decided to ask me if I would make omelets for supper one night. Now, breakfast for supper is a very common occurrence in this house, so that wasn't the issue. The problem was what he asked for. See, I can't make an omelet in the skillet to save my life. If you have ever seen my recipe for Baked Omelet I talked about this at length. How I've tried and tried and they just never come out right, so I admitted defeat and began baking a big omelet in the oven.

So, I explained to my son how this was just one food request I didn't think I could come through on, but I promised to take the baked omelet idea and turn up the factor a little, just for him. And that is when these mini baked omelets were born. I figured take some fresh ingredients, add some eggs, put everything in a muffin tin and bake it. I get the ease of a baked version, and the little guy gets omelets just his size.

These would be perfect for Christmas morning, or a brunch where you have to feed a crowd. You can pump out a whole pan of these in almost no time; and you can even swap out the ingredients in every single cup to fit everyone's favorites. Don't stand over the stove in a make shift omelet bar. Do this instead and feed everyone in almost no time at all!

There aren't many requests I will deny my son, but when it's something I have accepted I can't do, and moved on with my life, I have to find another way to make his wish come true. After all, I'm his Mommy and that's my job!

Egg, Broccoli and Ham Muffins
1 (12 oz.) bag frozen chopped broccoli, thawed
1 (8 oz.) bag diced ham
1 (8 oz.) bag Mexican style cheese
12 eggs, beaten
Salt an Pepper to taste

Preheat oven to 350. Grease a muffin tin liberally. Equally divide broccoli, ham and cheese among tin, only filling each vessel about 1/3 of the way. Pour eggs over, evenly, reaching 3/4 way to top. (They will puff when cooked) Bake for 25-30 minutes until toothpick comes out clean. Let sit 5 minutes and then carefully run knife along edge to loosen.


Shared on The Country Cook Dec. 20, 2013

Eggs at Very Good Recipes
reade more... Résuméabuiyad

A Twist On a NYE Favorite

If you know me personally, or have been following the blog for a while now, you know we have a very fun tradition in this house for New Year's Eve. It doesn't involve getting all dressed up, or heading out with the masses. What it does involve is plenty of family time and yummy food. Each December 31st we ring in the new year here at home, just the 3 of us, watching movies or holiday specials, or even mixed martial arts on the tv, all while enjoying a buffet of our favorite appetizers. I filled the table with a huge variety of our most enjoyed "nibbly bits" (as Alex calls them) and we eat all night long, warm and safe in our home.

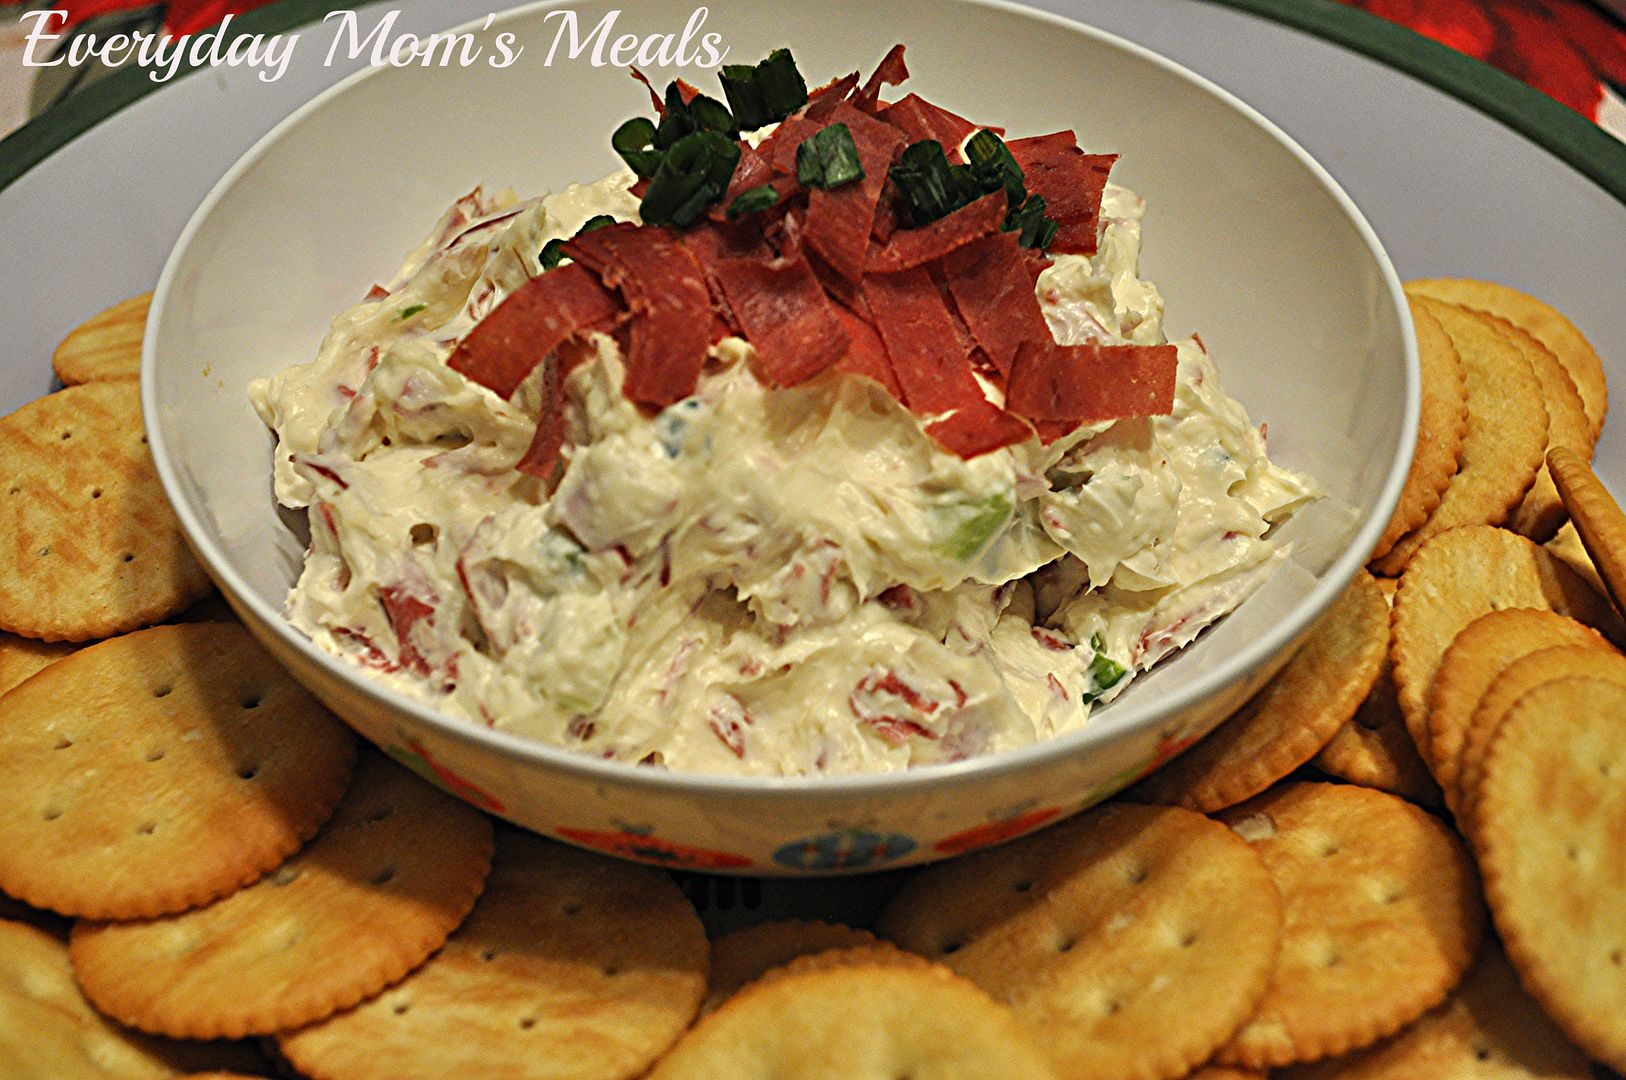
Today's recipe is a new twist on one of my husband's favorite things I put out on this buffet every year. Probably what is the most simple appetizer ever created. Dried Beef Rolls. You've had these, right?? Cream cheese spread on dried beef, rolled and cut into bite sized pieces. I still remember the first year I made them for him. I had all these amazing dishes sitting out, some kind of complicated, and these simple rolls that took me all of 10 minutes to make were the one thing he was most excited about. The thing he went on and on about. The thing he could not get enough of. I was like "All of this food, and that is what you are most excited about?" Hey, he likes the simple things, what can I say? So every year since they are always included in our New Year's Eve feast.

But this year I will be switching it up just a little, with this fantastic dip that is super tasty, and almost just as easy. It really doesn't take much more time and has incredible flavor. It would be perfect for any holiday party, rather it be next week for Christmas, or if like me you're already planning how to welcome in 2014. It will be here before we know it!

Creamy Beef Spread From Hometown Christmas
1 (8 oz.) package cream cheese, at room temperature
1/4 c. sour cream
1/4 c. mayo
1/4 c. grated Parmesan cheese
1 green onion, finely chopped, plus extra for garnish
1 (2.5 oz.) jar dried beefy, finely chopped and divided

In a bowl beat cream cheese until smooth. Add remaining ingredients, reserving 2 TBS dried beef. Mix well and transfer to a serving bowl. Sprinkle with reserved beef and extra onion. Cover and chill until serving. Serve with crackers.


Shared on The Country Cook Dec. 20, 2013

Appetizers at Very Good Recipes
If you know me personally, or have been following the blog for a while now, you know we have a very fun tradition in this house for New Year's Eve. It doesn't involve getting all dressed up, or heading out with the masses. What it does involve is plenty of family time and yummy food. Each December 31st we ring in the new year here at home, just the 3 of us, watching movies or holiday specials, or even mixed martial arts on the tv, all while enjoying a buffet of our favorite appetizers. I filled the table with a huge variety of our most enjoyed "nibbly bits" (as Alex calls them) and we eat all night long, warm and safe in our home.

Today's recipe is a new twist on one of my husband's favorite things I put out on this buffet every year. Probably what is the most simple appetizer ever created. Dried Beef Rolls. You've had these, right?? Cream cheese spread on dried beef, rolled and cut into bite sized pieces. I still remember the first year I made them for him. I had all these amazing dishes sitting out, some kind of complicated, and these simple rolls that took me all of 10 minutes to make were the one thing he was most excited about. The thing he went on and on about. The thing he could not get enough of. I was like "All of this food, and that is what you are most excited about?" Hey, he likes the simple things, what can I say? So every year since they are always included in our New Year's Eve feast.

But this year I will be switching it up just a little, with this fantastic dip that is super tasty, and almost just as easy. It really doesn't take much more time and has incredible flavor. It would be perfect for any holiday party, rather it be next week for Christmas, or if like me you're already planning how to welcome in 2014. It will be here before we know it!

Creamy Beef Spread From Hometown Christmas
1 (8 oz.) package cream cheese, at room temperature
1/4 c. sour cream
1/4 c. mayo
1/4 c. grated Parmesan cheese
1 green onion, finely chopped, plus extra for garnish
1 (2.5 oz.) jar dried beefy, finely chopped and divided

In a bowl beat cream cheese until smooth. Add remaining ingredients, reserving 2 TBS dried beef. Mix well and transfer to a serving bowl. Sprinkle with reserved beef and extra onion. Cover and chill until serving. Serve with crackers.


Shared on The Country Cook Dec. 20, 2013

Appetizers at Very Good Recipes
reade more... Résuméabuiyad

Don't Party In The Kitchen

Christmas is only a little over 1 week away! And I have one question for you. How many holiday parties have you been to thus far? Is your calendar over flowing? Is your dance card full? Have you been to many already, with many still to come? Have you hosted any yet? Are you trying to plan one for next week, or maybe even New Year's Eve? Tis the season for parties, parties and more parties, and today I've got a great appetizer/party food your guests will love and will keep you in the party, not watching from the kitchen.

I love party foods; but I especially love those that I can either make ahead of time and have waiting on me, or those that can be assembled as needed, as the night goes on, so hungry guest can easily be satisfied, without me missing out on all the fun! 

Bruschetta is one of my favorite appetizers of all time, but this time I wanted to switch it up a little and make one featuring olives instead of tomatoes. And not just every day olives, but kalamata olives! They are a little fancier in my mind, and it is the holiday season after all! 

Your guests will love the crisp bread, briny olives, and the salty nutty flavor of the Parmesan. It's a fantastic twist on a traditional bruschetta everyone will find refreshing and unique. Plus, you can make the olive mixture, keep it chilling in the fridge and then just bake off more bread as you need it, topping tray after tray all night long!

Holiday parties are meant to be enjoyed by all, and that includes the host/hostess! No where is there a rule saying if you are the "hostess with the mostess" you have to be in the kitchen all night, making sure everyone else is fed and having a good time while you miss out. Enjoy all those parties over the next couple weeks, it will be a whole year until they are here again!

Olive Bruschetta
20-24 Slices French bread or baguette about 1/4" thick
1 c. kalamata olives, pitted and chopped
2 green onions, chopped
1 garlic clove, finely minced
2 tsp. dried basil
2 tsp. dried parsley
1/4 c. olive oil, plus more for bread
1/4 c. shredded Parmesan cheese, plus extra for garnish
Salt and pepper

Preheat oven to 350. Brush both sides of bread with oil and season with salt and pepper. Place on rimmed baking sheets. Bake for 8-10 minutes, flip and bake 8-10 minutes more. (Watch carefully, these are times for my oven, but they can burn easily!)

In a medium bowl combine olive, garlic, green onions, basil, parsley, olive oil and cheese. Mix well. If not serving right away, chill. When bread is done, allow to cool. Top with olive mixture. Garnish with extra cheese.


Shared on The Country Cook Dec. 20, 2013

Appetizers at Very Good Recipes
Christmas is only a little over 1 week away! And I have one question for you. How many holiday parties have you been to thus far? Is your calendar over flowing? Is your dance card full? Have you been to many already, with many still to come? Have you hosted any yet? Are you trying to plan one for next week, or maybe even New Year's Eve? Tis the season for parties, parties and more parties, and today I've got a great appetizer/party food your guests will love and will keep you in the party, not watching from the kitchen.

I love party foods; but I especially love those that I can either make ahead of time and have waiting on me, or those that can be assembled as needed, as the night goes on, so hungry guest can easily be satisfied, without me missing out on all the fun! 

Bruschetta is one of my favorite appetizers of all time, but this time I wanted to switch it up a little and make one featuring olives instead of tomatoes. And not just every day olives, but kalamata olives! They are a little fancier in my mind, and it is the holiday season after all! 

Your guests will love the crisp bread, briny olives, and the salty nutty flavor of the Parmesan. It's a fantastic twist on a traditional bruschetta everyone will find refreshing and unique. Plus, you can make the olive mixture, keep it chilling in the fridge and then just bake off more bread as you need it, topping tray after tray all night long!

Holiday parties are meant to be enjoyed by all, and that includes the host/hostess! No where is there a rule saying if you are the "hostess with the mostess" you have to be in the kitchen all night, making sure everyone else is fed and having a good time while you miss out. Enjoy all those parties over the next couple weeks, it will be a whole year until they are here again!

Olive Bruschetta
20-24 Slices French bread or baguette about 1/4" thick
1 c. kalamata olives, pitted and chopped
2 green onions, chopped
1 garlic clove, finely minced
2 tsp. dried basil
2 tsp. dried parsley
1/4 c. olive oil, plus more for bread
1/4 c. shredded Parmesan cheese, plus extra for garnish
Salt and pepper

Preheat oven to 350. Brush both sides of bread with oil and season with salt and pepper. Place on rimmed baking sheets. Bake for 8-10 minutes, flip and bake 8-10 minutes more. (Watch carefully, these are times for my oven, but they can burn easily!)

In a medium bowl combine olive, garlic, green onions, basil, parsley, olive oil and cheese. Mix well. If not serving right away, chill. When bread is done, allow to cool. Top with olive mixture. Garnish with extra cheese.


Shared on The Country Cook Dec. 20, 2013

Appetizers at Very Good Recipes
reade more... Résuméabuiyad

Warning, This One Might Make You Cry

We love French Onion Soup, but it's one of those things I've never even attempted to make at home. I'm not sure why, but I probably had a good reason in my head, each time, but right now they escape me. But when I found a version that my slow cooker could help me out with, those reasons all disappeared and I was ready to give it a try.

Now here is when this story turns hilarious. I made this on a Friday when Alex was home, on fall break from school. So I'm standing in the kitchen peeling and slicing all these onions. My eyes are beginning to water a little, but not too bad. He's in the living room, adjacent to the kitchen, and pretty soon he asks "Mommy, are you chopping onions?" I answer "Yes, why? Can you smell them?" "No, my eyes are watering." Well, being in the next room, I was sure it couldn't be affecting him that badly, so I kept right on going. Pretty soon, I had all those onions in the skillet, cooking...and the smell only got worse. He finally came out to the kitchen to show me just how bad his eyes were. The poor kid!!! They were as red as fire, and the tears were streaming down his cheeks. It was so pathetic! Apparently, he has a much higher sensitivity to onions than we ever realized!

Well, of course cutting and cooking that many at a time, the odor kind of lingered in the house for a while, even after I had everything in the Crock Pot with the lid on. Luckily, we were already planning on going out to lunch and shopping, so I left the fans on and we got the heck out of dodge! It's pretty bad when you have to take your child out of the house because you're torturing him with onions! Thankfully, by the time we returned from our day, the smell had dissipated, and he could once again open his eyes inside the house without needing tissues and eye drops!

If you love French Onion Soup as much as we do, you're going to really enjoy this. It's super simple, takes little effort and tastes just like my favorite versions I get out at restaurants. The cheese melting down into the soup, almost creating a layer right under the surface, was our favorite part. That way with each bite, you get a big spoonful of ooey, gooey, yummy cheese.

I hope you make this for your family soon. Just be sure to have extra tissues on hand, and if they all start running for the doors, don't be insulted!

Crock Pot French Onion Soup 
8 large yellow onions, sliced thin
1/2 c. butter
3 dry bay leaves
6 (10 3/4 oz.) cans condensed beef broth
3 cups water
1 beef bouillon cube
Salt and Pepper to taste
8 oz. shredded mozzarella cheese

In a large skillet over medium heat, melt butter. Add onions (in batches if necessary) and saute' until tender and slightly golden. Transfer to Crock Pot. Add broth, water, bouillon, bay leaves, salt and pepper. Cook on low for 7-8 hours. Remove bay leaves. To serve, place some cheese in bottom of bowl. Ladle soup over and add more cheese to top. Wait just a minute for it to sink and melt. Serve with crusty bread on the side.


Shared on The Country Cook Nov. 8, 2013

Soup at Very Good Recipes

We love French Onion Soup, but it's one of those things I've never even attempted to make at home. I'm not sure why, but I probably had a good reason in my head, each time, but right now they escape me. But when I found a version that my slow cooker could help me out with, those reasons all disappeared and I was ready to give it a try.

Now here is when this story turns hilarious. I made this on a Friday when Alex was home, on fall break from school. So I'm standing in the kitchen peeling and slicing all these onions. My eyes are beginning to water a little, but not too bad. He's in the living room, adjacent to the kitchen, and pretty soon he asks "Mommy, are you chopping onions?" I answer "Yes, why? Can you smell them?" "No, my eyes are watering." Well, being in the next room, I was sure it couldn't be affecting him that badly, so I kept right on going. Pretty soon, I had all those onions in the skillet, cooking...and the smell only got worse. He finally came out to the kitchen to show me just how bad his eyes were. The poor kid!!! They were as red as fire, and the tears were streaming down his cheeks. It was so pathetic! Apparently, he has a much higher sensitivity to onions than we ever realized!

Well, of course cutting and cooking that many at a time, the odor kind of lingered in the house for a while, even after I had everything in the Crock Pot with the lid on. Luckily, we were already planning on going out to lunch and shopping, so I left the fans on and we got the heck out of dodge! It's pretty bad when you have to take your child out of the house because you're torturing him with onions! Thankfully, by the time we returned from our day, the smell had dissipated, and he could once again open his eyes inside the house without needing tissues and eye drops!

If you love French Onion Soup as much as we do, you're going to really enjoy this. It's super simple, takes little effort and tastes just like my favorite versions I get out at restaurants. The cheese melting down into the soup, almost creating a layer right under the surface, was our favorite part. That way with each bite, you get a big spoonful of ooey, gooey, yummy cheese.

I hope you make this for your family soon. Just be sure to have extra tissues on hand, and if they all start running for the doors, don't be insulted!

Crock Pot French Onion Soup 
8 large yellow onions, sliced thin
1/2 c. butter
3 dry bay leaves
6 (10 3/4 oz.) cans condensed beef broth
3 cups water
1 beef bouillon cube
Salt and Pepper to taste
8 oz. shredded mozzarella cheese

In a large skillet over medium heat, melt butter. Add onions (in batches if necessary) and saute' until tender and slightly golden. Transfer to Crock Pot. Add broth, water, bouillon, bay leaves, salt and pepper. Cook on low for 7-8 hours. Remove bay leaves. To serve, place some cheese in bottom of bowl. Ladle soup over and add more cheese to top. Wait just a minute for it to sink and melt. Serve with crusty bread on the side.


Shared on The Country Cook Nov. 8, 2013

Soup at Very Good Recipes

reade more... Résuméabuiyad

His Wish Is My Command

"Mommy, I'm hungry for meatball subs." 
"Have you ever had meatball subs?" 
"No, but I know I would like them. I wish you would make them." 

This is the conversation I had with Alex a few weeks ago. I was pretty sure he had never had one before, but he was convinced he was hungry for them. I was convinced he had seen a Subway commercial and decided this. That's okay though. My meal inspirations can come from many different places, and if he wants to add input based on an imaginary craving, I'll do my best.

You're going to love this recipe for the same reason I did. About 10 minutes of your time in the morning dumping things into the Crock Pot, and when you get home after a long day, supper is ready to go. Simple add a nice green salad on the side (maybe my Easy Caesar Salad) and your family can be eating in about 15 minutes. Perfect on those nights when you're exhausted, they are starving and you want them to think it took a lot more effort than it actually did! (See, this way, they volunteer to do the dishes because you have "worked so hard" on dinner!) 

My little man loves to eat, and I am happy to encourage this. If he says he is hungry for something specific, I will try my hardest to oblige him and add it to the menu plan. And if it's something he's never had before, but he is convinced he will like, that's when my fun begins creating a new recipe for him to enjoy. After all, as his Mommy, in life, his wish is my command!

Slow Cooker Meatball Subs
3 cups frozen Italian meatballs
1 (15 oz.) can tomato sauce
1 (15 oz.) can diced tomatoes
2 (26 oz.) jars spaghetti sauce
1 TBS Italian seasoning
1 TBS sugar
Salt and Pepper to taste
8 oz. Shredded Mozzarella Cheese
Shredded Parmesan Cheese
Hoagie Buns

Place meatballs in bottom of slow cooker. Add spaghetti sauce, tomato sauce, diced tomatoes, sugar, Italian seasoning, salt and pepper. Stir to combine. Cook on LOW 6-7 hours. When ready to serve, place mozzarella cheese on bottom of bun, spoon meatballs and sauce over. Sprinkle with extra mozzarella and Parmesan cheeses.


Shared on The Country Cook Nov. 8, 2013

Sandwiches at Very Good Recipes

"Mommy, I'm hungry for meatball subs." 
"Have you ever had meatball subs?" 
"No, but I know I would like them. I wish you would make them." 

This is the conversation I had with Alex a few weeks ago. I was pretty sure he had never had one before, but he was convinced he was hungry for them. I was convinced he had seen a Subway commercial and decided this. That's okay though. My meal inspirations can come from many different places, and if he wants to add input based on an imaginary craving, I'll do my best.

You're going to love this recipe for the same reason I did. About 10 minutes of your time in the morning dumping things into the Crock Pot, and when you get home after a long day, supper is ready to go. Simple add a nice green salad on the side (maybe my Easy Caesar Salad) and your family can be eating in about 15 minutes. Perfect on those nights when you're exhausted, they are starving and you want them to think it took a lot more effort than it actually did! (See, this way, they volunteer to do the dishes because you have "worked so hard" on dinner!) 

My little man loves to eat, and I am happy to encourage this. If he says he is hungry for something specific, I will try my hardest to oblige him and add it to the menu plan. And if it's something he's never had before, but he is convinced he will like, that's when my fun begins creating a new recipe for him to enjoy. After all, as his Mommy, in life, his wish is my command!

Slow Cooker Meatball Subs
3 cups frozen Italian meatballs
1 (15 oz.) can tomato sauce
1 (15 oz.) can diced tomatoes
2 (26 oz.) jars spaghetti sauce
1 TBS Italian seasoning
1 TBS sugar
Salt and Pepper to taste
8 oz. Shredded Mozzarella Cheese
Shredded Parmesan Cheese
Hoagie Buns

Place meatballs in bottom of slow cooker. Add spaghetti sauce, tomato sauce, diced tomatoes, sugar, Italian seasoning, salt and pepper. Stir to combine. Cook on LOW 6-7 hours. When ready to serve, place mozzarella cheese on bottom of bun, spoon meatballs and sauce over. Sprinkle with extra mozzarella and Parmesan cheeses.


Shared on The Country Cook Nov. 8, 2013

Sandwiches at Very Good Recipes
reade more... Résuméabuiyad

Soul Food Saturday #29

Welcome to November!! Yep, that's right, Halloween is behind us, and the downhill coast to Thanksgiving and Christmas is here! In case you aren't paying attention, Turkey Day is 26 days from today, and here on EMM we're going to try to give you some ideas over the next few weeks for all those meals you'll have to plan when guests are visiting. Today, Bekki has got one I think would make a great breakfast or brunch, perfect for a crowd, because they can add their favorite toppings to personalize!


What comes to mind when you think of comfort? Warm blankets straight from the dryer, a fuzzy pair of socks; oh wait, we were talking about food right? Yes. Well one thing that I really enjoyed growing up was breakfast with the family. Whether it was a scrambled egg dish, first thing Saturday morning or a big cinnamon roll after church; that’s was always comforting to me. So, with that said here is one of my favorite scrambled egg dishes. Loaded with spicy sausage, and cheese who wouldn't want to dive in? Grab a fork quick these will be gone before you can pour a second cup of coffee.
Loaded Spicy Scrambled Eggs 
1 medium onion, chopped
2 jalapenos, sliced
3 mini sweet peppers, sliced
6 Spicy Sausage Links –Precooked, sliced
6 eggs
1 c. grated cheddar jack cheese
1 tsp. granulated garlic
Salt and pepper to taste
Sour cream –optional
In a large skillet add oil, onion, jalapeno, and sweet peppers. Cook until onions are clear and peppers have softened, stirring often. In a small bowl crack eggs, and add garlic, salt and pepper. Set aside. Then add sausage to pan with onions, and allow to warm through, toasting the edges slightly.  Beat eggs in bowl, and mix to combine seasoning. Then add to the pan, stirring to combine.  Stir often and cook to desired egg doneness. Remove from heat and add cheese. Stir to combine and allow cheese to melt.
Serve with a dollop of sour cream, fresh salsa or extra cheese!


Welcome to November!! Yep, that's right, Halloween is behind us, and the downhill coast to Thanksgiving and Christmas is here! In case you aren't paying attention, Turkey Day is 26 days from today, and here on EMM we're going to try to give you some ideas over the next few weeks for all those meals you'll have to plan when guests are visiting. Today, Bekki has got one I think would make a great breakfast or brunch, perfect for a crowd, because they can add their favorite toppings to personalize!


What comes to mind when you think of comfort? Warm blankets straight from the dryer, a fuzzy pair of socks; oh wait, we were talking about food right? Yes. Well one thing that I really enjoyed growing up was breakfast with the family. Whether it was a scrambled egg dish, first thing Saturday morning or a big cinnamon roll after church; that’s was always comforting to me. So, with that said here is one of my favorite scrambled egg dishes. Loaded with spicy sausage, and cheese who wouldn't want to dive in? Grab a fork quick these will be gone before you can pour a second cup of coffee.
Loaded Spicy Scrambled Eggs 
1 medium onion, chopped
2 jalapenos, sliced
3 mini sweet peppers, sliced
6 Spicy Sausage Links –Precooked, sliced
6 eggs
1 c. grated cheddar jack cheese
1 tsp. granulated garlic
Salt and pepper to taste
Sour cream –optional
In a large skillet add oil, onion, jalapeno, and sweet peppers. Cook until onions are clear and peppers have softened, stirring often. In a small bowl crack eggs, and add garlic, salt and pepper. Set aside. Then add sausage to pan with onions, and allow to warm through, toasting the edges slightly.  Beat eggs in bowl, and mix to combine seasoning. Then add to the pan, stirring to combine.  Stir often and cook to desired egg doneness. Remove from heat and add cheese. Stir to combine and allow cheese to melt.
Serve with a dollop of sour cream, fresh salsa or extra cheese!


reade more... Résuméabuiyad

Bonfire Bundles

This time of year I always try to provide you with a great idea for your upcoming Halloween party, or if your family is like ours and the evening is a simple one of neighborhood trick-or-treating, and supper needs to be quick and simple, something that would work for that too. Well, today is the day!

If your house is the place to be Halloween night, with friends and family dropping by, or a huge kids party, these would be a huge hit! I guarantee! Have a big platter of these sitting next to your cauldron of apple cider, and all the little ghoulish guests will flip! Rather it is held indoors, our out next to the biggest bonfire of the season, they are the perfect party food!

Our Halloween does indeed include a party, but I am not the host. We actually go back to my hometown (about 15 minutes from our house) so Alex can trick-or-treat in the neighborhood I grew up in, and then head to the local volunteer Fire Department for the fun filled party, with games, costume contests, door prizes and candy galore! It's a great tradition I'm so excited to be continuing with him. It allows his grandma to always be part of the festivities and it's kinda nice to see something I enjoyed so much as a child still going strong, and a community still enjoying it.

But all of this going on between the hours of 6pm and 8pm means supper needs to be quick, simple, but most of all FUN! I like treating him to something "party inspired" on Halloween, and it's usually something he can eat with his hands. Plus, it needs to be on the light side. Between the excitement of the night, and the sheer rush, supper really isn't high on his priority list.

These take the fun and yumminess of pizza and turns them into something new, adorable, and 100% kid friendly! Three things that all food should be on Halloween!

However you are spending next Thursday night, I hope it's full of smiles, more treats than tricks and some delicious food, not just Snickers and Butterfingers!

Mini Pizza Bundles Inspired by The Gunny Sack
20 refrigerated buttermilk biscuits
20 pieces pepperoni
2-3 String Cheese, cut into 20 small chunks
1 egg, beaten
Parmesan Cheese
Italian Seasoning
Garlic Powder
Pizza Sauce

Preheat oven to 425. Grease a 9x13 baking dish. Flatten each biscuit out. Lay a piece
of pepperoni on each, then a piece of string cheese. Gather sides of biscuit up, forming a bundle. Lay, seam side down in baking dish. Brush all with egg. Sprinkle with Parmesan, Garlic Powder and Italian Seasoning. Bake 18-20 minutes until browned. Serve with warm pizza sauce for dipping.


Shared on The Country Cook Oct. 25, 2013

Appetizer at Very Good Recipes
This time of year I always try to provide you with a great idea for your upcoming Halloween party, or if your family is like ours and the evening is a simple one of neighborhood trick-or-treating, and supper needs to be quick and simple, something that would work for that too. Well, today is the day!

If your house is the place to be Halloween night, with friends and family dropping by, or a huge kids party, these would be a huge hit! I guarantee! Have a big platter of these sitting next to your cauldron of apple cider, and all the little ghoulish guests will flip! Rather it is held indoors, our out next to the biggest bonfire of the season, they are the perfect party food!

Our Halloween does indeed include a party, but I am not the host. We actually go back to my hometown (about 15 minutes from our house) so Alex can trick-or-treat in the neighborhood I grew up in, and then head to the local volunteer Fire Department for the fun filled party, with games, costume contests, door prizes and candy galore! It's a great tradition I'm so excited to be continuing with him. It allows his grandma to always be part of the festivities and it's kinda nice to see something I enjoyed so much as a child still going strong, and a community still enjoying it.

But all of this going on between the hours of 6pm and 8pm means supper needs to be quick, simple, but most of all FUN! I like treating him to something "party inspired" on Halloween, and it's usually something he can eat with his hands. Plus, it needs to be on the light side. Between the excitement of the night, and the sheer rush, supper really isn't high on his priority list.

These take the fun and yumminess of pizza and turns them into something new, adorable, and 100% kid friendly! Three things that all food should be on Halloween!

However you are spending next Thursday night, I hope it's full of smiles, more treats than tricks and some delicious food, not just Snickers and Butterfingers!

Mini Pizza Bundles Inspired by The Gunny Sack
20 refrigerated buttermilk biscuits
20 pieces pepperoni
2-3 String Cheese, cut into 20 small chunks
1 egg, beaten
Parmesan Cheese
Italian Seasoning
Garlic Powder
Pizza Sauce

Preheat oven to 425. Grease a 9x13 baking dish. Flatten each biscuit out. Lay a piece
of pepperoni on each, then a piece of string cheese. Gather sides of biscuit up, forming a bundle. Lay, seam side down in baking dish. Brush all with egg. Sprinkle with Parmesan, Garlic Powder and Italian Seasoning. Bake 18-20 minutes until browned. Serve with warm pizza sauce for dipping.


Shared on The Country Cook Oct. 25, 2013

Appetizer at Very Good Recipes

reade more... Résuméabuiyad

Check The Pantry

Right about now, after reading that ^^^ title, I bet you are asking yourself "Why?" Why does she want me to check my pantry? Well, for a few reasons actually. 

First off, I want to check your pantry because I'm guessing you currently have everything on hand to make this amazingly tasty side dish; and for me, that's always a nice thing. I love finding recipes that I can make "on the fly" with things I already have sitting in the cupboard without adding a single item to my grocery list. It not only helps the weekly budget, but it means I can make it any time I want when I'm desperate to put supper on the table. 

Secondly, I want you to check because I'm hoping at least a few of you are in the same boat I was when I went to make this and you find things you weren't even aware you had, and this is obviously because you have multiples of them. Let me explain. I knew I had bagged rice. I knew I had probably half the bag left. What I didn't realize was evidently there were a few times I forgot about said bag, bought a new bag, and only used half of it too. See, I had not one, not two, but three half used bags of rice. So apparently, there were a couple times I didn't bother to check the rice situation before adding it to my grocery list. Hence why when I did find them, rice immediately went on the menu. 

Third, I want you to check the herbs and spices in your pantry. For when I discovered the plethora of rice I was hoarding, it caused a mini clean out of my pantry, which is when I discovered it was time to get some new bottles of dried spices. Why? Well, let's just say their "best used by" dates were long in the past. I'm not going to tell you just how long ago, frankly, it's embarrassing, but rest assured, they were replaced promptly. In case you didn't know, that stuff does have a shelf life, and eventually it does lose flavor, so it's best to switch them out now and again.

Now, all of that being said, this side dish could not be more simple, and every bite it is delicious. It goes well with chicken, fish, beef, or maybe add some veggies for a complete one pot meal. However you decide to serve it, you will be glad to have the recipe to fall back on for those nights the family is starving and your creativity with supper just isn't up to par. Check the pantry, and in about 30 minutes you can have this sitting on the table. They will think you planned it all along!

Parmesan Rice Pilaf From McCormick
2 TBS butter
1 c. rice
2 c. chicken broth
1/2 tsp. garlic powder
1/2 tsp. dried parsley
2 TBS sliced almonds, plus more for garnish
2 TBS shredded Parmesan cheese, plus more for garnish
Salt and Pepper to taste

In medium sauce pan melt butter over medium-high heat. Add rice and cook, stirring constantly for 3 minutes until lightly toasted. Stir in broth, garlic powder, parsley, salt and pepper. Bring to a boil. Reduce heat, cover and simmer for 15-20 minutes until rice is tender. Remove from meat, stir in almonds and cheese. Transfer to a serving bowl. Garnish with extra almonds and cheese.


Shared on The Country Cook Oct. 18, 2013


Rice at Very Good Recipes
Right about now, after reading that ^^^ title, I bet you are asking yourself "Why?" Why does she want me to check my pantry? Well, for a few reasons actually. 

First off, I want to check your pantry because I'm guessing you currently have everything on hand to make this amazingly tasty side dish; and for me, that's always a nice thing. I love finding recipes that I can make "on the fly" with things I already have sitting in the cupboard without adding a single item to my grocery list. It not only helps the weekly budget, but it means I can make it any time I want when I'm desperate to put supper on the table. 

Secondly, I want you to check because I'm hoping at least a few of you are in the same boat I was when I went to make this and you find things you weren't even aware you had, and this is obviously because you have multiples of them. Let me explain. I knew I had bagged rice. I knew I had probably half the bag left. What I didn't realize was evidently there were a few times I forgot about said bag, bought a new bag, and only used half of it too. See, I had not one, not two, but three half used bags of rice. So apparently, there were a couple times I didn't bother to check the rice situation before adding it to my grocery list. Hence why when I did find them, rice immediately went on the menu. 

Third, I want you to check the herbs and spices in your pantry. For when I discovered the plethora of rice I was hoarding, it caused a mini clean out of my pantry, which is when I discovered it was time to get some new bottles of dried spices. Why? Well, let's just say their "best used by" dates were long in the past. I'm not going to tell you just how long ago, frankly, it's embarrassing, but rest assured, they were replaced promptly. In case you didn't know, that stuff does have a shelf life, and eventually it does lose flavor, so it's best to switch them out now and again.

Now, all of that being said, this side dish could not be more simple, and every bite it is delicious. It goes well with chicken, fish, beef, or maybe add some veggies for a complete one pot meal. However you decide to serve it, you will be glad to have the recipe to fall back on for those nights the family is starving and your creativity with supper just isn't up to par. Check the pantry, and in about 30 minutes you can have this sitting on the table. They will think you planned it all along!

Parmesan Rice Pilaf From McCormick
2 TBS butter
1 c. rice
2 c. chicken broth
1/2 tsp. garlic powder
1/2 tsp. dried parsley
2 TBS sliced almonds, plus more for garnish
2 TBS shredded Parmesan cheese, plus more for garnish
Salt and Pepper to taste

In medium sauce pan melt butter over medium-high heat. Add rice and cook, stirring constantly for 3 minutes until lightly toasted. Stir in broth, garlic powder, parsley, salt and pepper. Bring to a boil. Reduce heat, cover and simmer for 15-20 minutes until rice is tender. Remove from meat, stir in almonds and cheese. Transfer to a serving bowl. Garnish with extra almonds and cheese.


Shared on The Country Cook Oct. 18, 2013


Rice at Very Good Recipes
reade more... Résuméabuiyad

Our Veggie Bin

Last week I told you about our experience with Green BEAN Delivery; and how much we enjoyed the fresh produce we were provided. If you missed that review, or are totally intrigued, you can read about it here.

One of the things I added to our bin that wasn't initially included was acorn squash. We love all kinds of squash, and we love to eat it year round, but to me, there is just something about enjoying fresh squash during the fall months. Maybe it stems from my childhood when my dad used to have a pretty impressive garden, and the squash were always ready to be picked about the time the leaves were falling from the trees. Maybe it's simply because squash reminds me of pumpkin. Whatever the reason, this time of year is when squash begins to makes an appearance on our table more frequently.

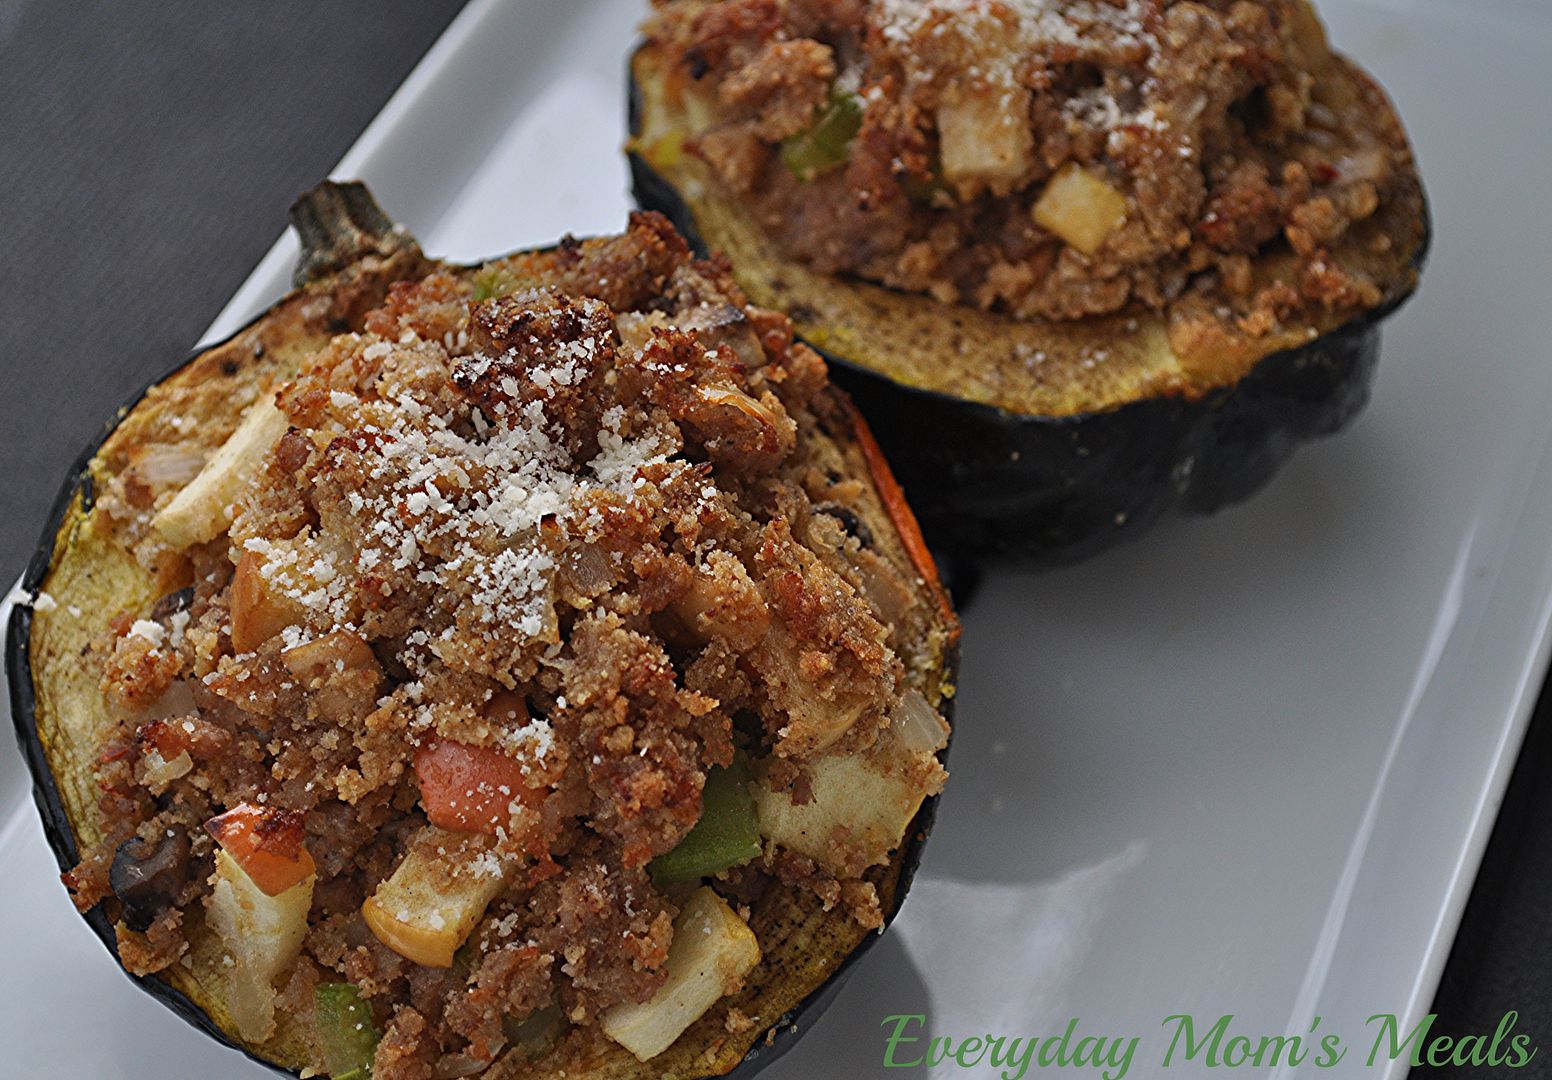
I'm telling you, this recipe looks like autumn on a plate! From the squash to another of fall's best gifts, apples, this looks, smells and tastes like a celebration of the season! These would make a great Sunday supper on a brisk, fall day, or even a weeknight meal if you have a little extra time on your hands. (Don't let that scare you. It's not a difficult recipe, the squash just needs some time in the oven to get tender and delicious.)

If you are looking for more meals that include autumn's bounty, make sure to save this one. Celebrate the changing of the seasons with fresh ingredients that come together in a beautiful and tasty way!

Sausage and Apple Stuffed Acorn Squash
2 Acorn Squash, cut in half and seeded
1 lb. pork sausage
1 TBS butter, melted
1/4 tsp. garlic salt
3/4 tsp. ground sage, divided
1/2 c. onion, finely chopped
1 celery rib, finely chopped
6 button mushrooms, finely chopped
2 apples, cored and finely chopped
1 c. bread crumbs
1 egg, beaten
Salt and Pepper to taste
Grated Parmesan cheese for garnish

Preheat oven to 400. Place cut squash, cut side up, in a 9x13 baking dish. In a small bowl combine melted butter, garlic salt and 1/4 tsp. sage. Mix well. Brush the cavity of each squash with butter mixture, coating it well. Bake for 1 hour until squash is tender, but holds shape.

While squash is roasting, brown sausage over medium heat in a large skillet. Drain, reserving 2 TBS of drippings. Place drippings back in pan. Add onion, celery, and mushrooms. Saute for 4 minutes. Add apples and saute 2 more minutes. In a large bowl combine browned sausage, veggies, 1/2 tsp. sage, salt, pepper, bread crumbs and egg. Mix well to combine. Remove squash from oven. Fill each with sausage mixture, mounding slightly. Bake for 20 additional minutes until browned. Sprinkle with cheese before serving.


Shared on The Country Cook Oct. 18, 2013


Squash at Very Good Recipes
Last week I told you about our experience with Green BEAN Delivery; and how much we enjoyed the fresh produce we were provided. If you missed that review, or are totally intrigued, you can read about it here.

One of the things I added to our bin that wasn't initially included was acorn squash. We love all kinds of squash, and we love to eat it year round, but to me, there is just something about enjoying fresh squash during the fall months. Maybe it stems from my childhood when my dad used to have a pretty impressive garden, and the squash were always ready to be picked about the time the leaves were falling from the trees. Maybe it's simply because squash reminds me of pumpkin. Whatever the reason, this time of year is when squash begins to makes an appearance on our table more frequently.

I'm telling you, this recipe looks like autumn on a plate! From the squash to another of fall's best gifts, apples, this looks, smells and tastes like a celebration of the season! These would make a great Sunday supper on a brisk, fall day, or even a weeknight meal if you have a little extra time on your hands. (Don't let that scare you. It's not a difficult recipe, the squash just needs some time in the oven to get tender and delicious.)

If you are looking for more meals that include autumn's bounty, make sure to save this one. Celebrate the changing of the seasons with fresh ingredients that come together in a beautiful and tasty way!

Sausage and Apple Stuffed Acorn Squash
2 Acorn Squash, cut in half and seeded
1 lb. pork sausage
1 TBS butter, melted
1/4 tsp. garlic salt
3/4 tsp. ground sage, divided
1/2 c. onion, finely chopped
1 celery rib, finely chopped
6 button mushrooms, finely chopped
2 apples, cored and finely chopped
1 c. bread crumbs
1 egg, beaten
Salt and Pepper to taste
Grated Parmesan cheese for garnish

Preheat oven to 400. Place cut squash, cut side up, in a 9x13 baking dish. In a small bowl combine melted butter, garlic salt and 1/4 tsp. sage. Mix well. Brush the cavity of each squash with butter mixture, coating it well. Bake for 1 hour until squash is tender, but holds shape.

While squash is roasting, brown sausage over medium heat in a large skillet. Drain, reserving 2 TBS of drippings. Place drippings back in pan. Add onion, celery, and mushrooms. Saute for 4 minutes. Add apples and saute 2 more minutes. In a large bowl combine browned sausage, veggies, 1/2 tsp. sage, salt, pepper, bread crumbs and egg. Mix well to combine. Remove squash from oven. Fill each with sausage mixture, mounding slightly. Bake for 20 additional minutes until browned. Sprinkle with cheese before serving.


Shared on The Country Cook Oct. 18, 2013


Squash at Very Good Recipes
reade more... Résuméabuiyad

Weeknight Rush

Is it just me or are the weeknights becoming more and more rushed? Between homework, after school activities and every day life, I am pretty sure the hours between 3:30 and 8 pm are some of the busiest in my life. So, it's so nice when I can come up with a meal that is quick, tasty and has us going back out the door on time!

You've heard me say it before, but I think it bears repeating. Casseroles are a mom's best friend. I know many people turn their noses up at just the word, but to me, if I can put a bunch of things into one pan, throw it in the oven and in about 30 minutes have dinner on the table, I am a happy mama. Sure, there are some casseroles out there that were simply never meant to be, most likely because someone started throwing ingredients together that had no business being paired, but those aren't the ones I'm talking about. I mean the ones that are made up of things we already love, that compliment each other, and simply make sense hanging out in one simple dish.

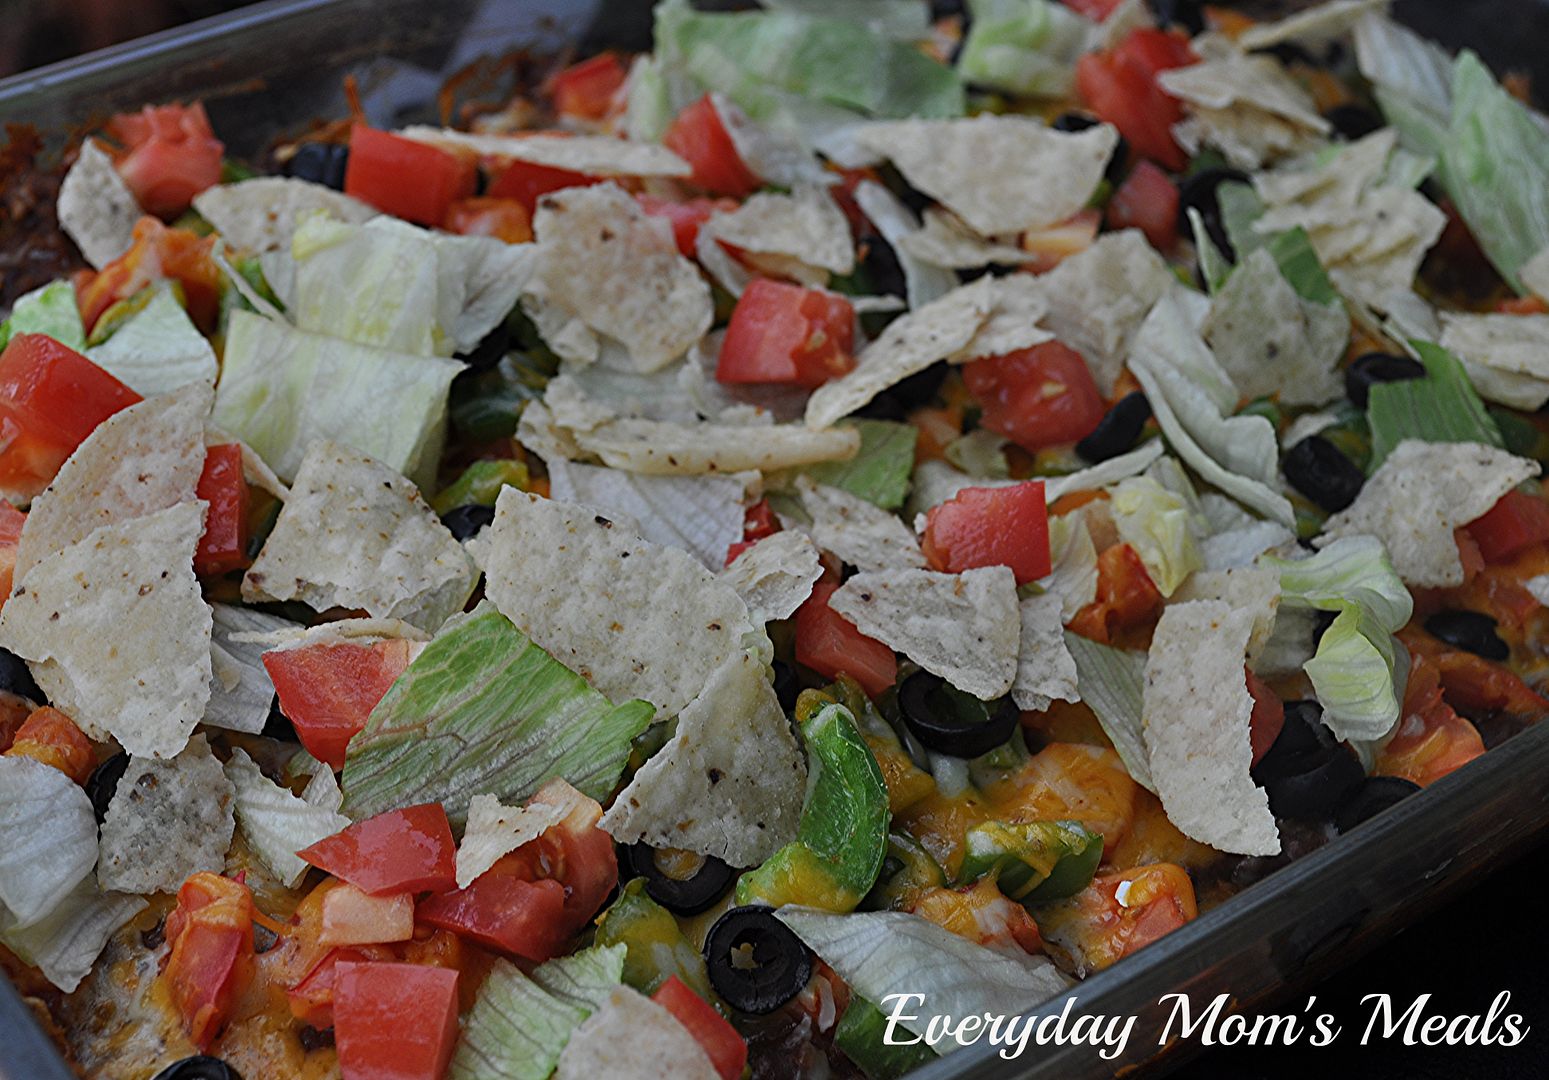
Tacos. We love them. Taco fixins'. We love those too. So why not take everything I would normally have out for a "taco bar", and see what kind of casserole I can make? See, this is my thought process. And I know I'm not the first one to have this crazy notion.

So here is a simple, delicious Mexican casserole perfect for any crazy, crammed full of things to do, weeknight! Adapt it with your favorite ingredients. Have the kids help pick out what things they want in it. Easy, yummy and fun for the whole family. I told you a good casserole is a mom's best friend!

Taco Casserole
1 lb. ground beef
1 packet taco seasoning
1 (16 oz.) can refried black beans with onion and garlic
1 (16 oz.) jar mild chunky salsa
1 green pepper, chopped
1 (2.2 oz) can sliced black olives
3 Roma tomatoes, chopped, divided
1 c. shredded taco cheese
Shredded Lettuce
Tortilla Chips, slightly crushed

Preheat oven to 350. Add enough broken tortilla chips to bottom of 9x13 dish to cover. In a large skillet brown beef until no longer pink. Add taco seasoning, stir well. Add beans and salsa. Stir well. Cook 5-7 minutes to allow flavors to combine. Add to top of chips. Spread evenly. Add green pepper and 2/3 chopped tomato. Sprinkle top with cheese and black olives. Bake for 20-25 minutes until cheese melts. Top with rest of tomato, lettuce and more broken chips.


Shared on The Country Cook Oct. 11, 2013


  Casseroles at Very Good Recipes
Is it just me or are the weeknights becoming more and more rushed? Between homework, after school activities and every day life, I am pretty sure the hours between 3:30 and 8 pm are some of the busiest in my life. So, it's so nice when I can come up with a meal that is quick, tasty and has us going back out the door on time!

You've heard me say it before, but I think it bears repeating. Casseroles are a mom's best friend. I know many people turn their noses up at just the word, but to me, if I can put a bunch of things into one pan, throw it in the oven and in about 30 minutes have dinner on the table, I am a happy mama. Sure, there are some casseroles out there that were simply never meant to be, most likely because someone started throwing ingredients together that had no business being paired, but those aren't the ones I'm talking about. I mean the ones that are made up of things we already love, that compliment each other, and simply make sense hanging out in one simple dish.

Tacos. We love them. Taco fixins'. We love those too. So why not take everything I would normally have out for a "taco bar", and see what kind of casserole I can make? See, this is my thought process. And I know I'm not the first one to have this crazy notion.

So here is a simple, delicious Mexican casserole perfect for any crazy, crammed full of things to do, weeknight! Adapt it with your favorite ingredients. Have the kids help pick out what things they want in it. Easy, yummy and fun for the whole family. I told you a good casserole is a mom's best friend!

Taco Casserole
1 lb. ground beef
1 packet taco seasoning
1 (16 oz.) can refried black beans with onion and garlic
1 (16 oz.) jar mild chunky salsa
1 green pepper, chopped
1 (2.2 oz) can sliced black olives
3 Roma tomatoes, chopped, divided
1 c. shredded taco cheese
Shredded Lettuce
Tortilla Chips, slightly crushed

Preheat oven to 350. Add enough broken tortilla chips to bottom of 9x13 dish to cover. In a large skillet brown beef until no longer pink. Add taco seasoning, stir well. Add beans and salsa. Stir well. Cook 5-7 minutes to allow flavors to combine. Add to top of chips. Spread evenly. Add green pepper and 2/3 chopped tomato. Sprinkle top with cheese and black olives. Bake for 20-25 minutes until cheese melts. Top with rest of tomato, lettuce and more broken chips.


Shared on The Country Cook Oct. 11, 2013


  Casseroles at Very Good Recipes
reade more... Résuméabuiyad

Don't Make Me Blush

Have you ever seen a word on a restaurant menu describing a dish, wondered what they meant, but were willing to try it, only to find out upon eating it "That is the most perfect way to describe this dish!" That was exactly the experience I had the first time I encountered the word "blush" on an Italian menu.

Years ago we were having dinner with friends when I was actually pregnant with Alex. Now, you have to understand the first 3 months of my pregnancy were not the most pleasant in the world. I was very ill. Morning sickness doesn't even begin to describe it. I was sick all day, every day. I lost 30 lbs and was almost hospitalized. However, when our friends invited us out for a meal at Olive Garden, I didn't want to miss out. So, I'm sitting in the booth, excited to be finally feel somewhat human, and trying to find something that I thought wouldn't bother my sensitive stomach. 

So, I'm reading along and I come across ravioli in a "blush" sauce. I had never seen that word used in food, and I was intrigued. I went on to read the actual description of the dish and discovered it was quite simple. They combined a red sauce and a cream sauce and got a pink sauce. But let's face it, "ravioli in pink sauce" does not sound appetizing. Now you have to remember, I'm not a huge red sauce fan, but love a good cream sauce. So I figured this might be the best of both worlds; and I was oh so right! I loved the flavor from combining the two, and the word "blush" was the perfect way to describe it. It looked as if a delicious cream sauce got a little embarrassed and was blushing. 

I hadn't thought about that experience in years, but during a conversation about pregnancy woes a few weeks back, it popped into my head; and I just had to recreate a version of it in my kitchen. Ya'll know how much we love a good pasta bake, and can't get enough versions. This one is great for a weeknight meal because it takes a lot of help from the store using not one, but two jarred sauces. 

Through blogging, I've learned the way you describe food is almost as important as the food itself, and that was a lesson that actually began long before EMM!

Blush Pasta Bake
1 lb. penne pasta, cooked and drained
1 (24 oz.) jar spaghetti sauce
1 (15 oz.) jar roasted garlic Alfredo sauce
2 c. shredded mozzarella cheese
1 c. shredded Parmesan cheese
1 TBS Italian Seasoning
2 tsp. dried parsley
Salt and pepper to taste

Preheat oven to 350. Once pasta is cooked and drained, transfer to a large bowl. Add spaghetti sauce and Alfredo. (See Note below.) Stir well. Season with salt and pepper. Add mozzarella cheese. Mix well. In a small bowl, combine Parmesan, Italian Seasoning and parsley. Mix well. Add half the Parmesan mixture to pasta and stir to combine. Transfer pasta to greased 9x13 pan. Bake for 20-25 minutes until heated through. Top with remaining Parmesan mixture. Bake another 5 minutes. *NOTE* Add both sauces, alternating between the two, a little at a time until the desired consistency is achieved. You don't want it too wet. I probably had about 1/4 c. of each left in the bottom of both jars. 


Shared on The Country Cook Oct. 11, 2013


Pasta at Very Good Recipes
Have you ever seen a word on a restaurant menu describing a dish, wondered what they meant, but were willing to try it, only to find out upon eating it "That is the most perfect way to describe this dish!" That was exactly the experience I had the first time I encountered the word "blush" on an Italian menu.

Years ago we were having dinner with friends when I was actually pregnant with Alex. Now, you have to understand the first 3 months of my pregnancy were not the most pleasant in the world. I was very ill. Morning sickness doesn't even begin to describe it. I was sick all day, every day. I lost 30 lbs and was almost hospitalized. However, when our friends invited us out for a meal at Olive Garden, I didn't want to miss out. So, I'm sitting in the booth, excited to be finally feel somewhat human, and trying to find something that I thought wouldn't bother my sensitive stomach. 

So, I'm reading along and I come across ravioli in a "blush" sauce. I had never seen that word used in food, and I was intrigued. I went on to read the actual description of the dish and discovered it was quite simple. They combined a red sauce and a cream sauce and got a pink sauce. But let's face it, "ravioli in pink sauce" does not sound appetizing. Now you have to remember, I'm not a huge red sauce fan, but love a good cream sauce. So I figured this might be the best of both worlds; and I was oh so right! I loved the flavor from combining the two, and the word "blush" was the perfect way to describe it. It looked as if a delicious cream sauce got a little embarrassed and was blushing. 

I hadn't thought about that experience in years, but during a conversation about pregnancy woes a few weeks back, it popped into my head; and I just had to recreate a version of it in my kitchen. Ya'll know how much we love a good pasta bake, and can't get enough versions. This one is great for a weeknight meal because it takes a lot of help from the store using not one, but two jarred sauces. 

Through blogging, I've learned the way you describe food is almost as important as the food itself, and that was a lesson that actually began long before EMM!

Blush Pasta Bake
1 lb. penne pasta, cooked and drained
1 (24 oz.) jar spaghetti sauce
1 (15 oz.) jar roasted garlic Alfredo sauce
2 c. shredded mozzarella cheese
1 c. shredded Parmesan cheese
1 TBS Italian Seasoning
2 tsp. dried parsley
Salt and pepper to taste

Preheat oven to 350. Once pasta is cooked and drained, transfer to a large bowl. Add spaghetti sauce and Alfredo. (See Note below.) Stir well. Season with salt and pepper. Add mozzarella cheese. Mix well. In a small bowl, combine Parmesan, Italian Seasoning and parsley. Mix well. Add half the Parmesan mixture to pasta and stir to combine. Transfer pasta to greased 9x13 pan. Bake for 20-25 minutes until heated through. Top with remaining Parmesan mixture. Bake another 5 minutes. *NOTE* Add both sauces, alternating between the two, a little at a time until the desired consistency is achieved. You don't want it too wet. I probably had about 1/4 c. of each left in the bottom of both jars. 


Shared on The Country Cook Oct. 11, 2013


Pasta at Very Good Recipes
reade more... Résuméabuiyad

Soul Food Saturday #25

Welcome to the first weekend of October! It's hard to believe, but in this house September was simply a blur due to how busy we were, so it kind of snuck up on me. Today Bekki has a great recipe, perfect for using the squash that is so beautiful this time of year. I can not wait to try this one myself!!


During a recent visit with my family, we were all completely engaged in our conversation until Rachael came back from commercial. As soon as she was back on we were glued to the TV waiting for her to reveal the recipe we had just heard her mention. Double stuffed Butternut squash! What? Yes! Just like a twice baked potato, loaded to the heavens with bacon and cheeses. How could to be bad? Of course it had my name written all over it. I had to try it as soon as I could get a hold of a butternut squash. But…to my dismay the recipe had been removed from her fan page, and seemed to have disappeared forever. With that thought still in my head and a butternut squash in hand my recipe was born. Just before writing this I did a search for her recipe and found it! Thank you Internet angels! I hope you enjoy this as much as I did. I never imagined it could really be THIS good! Enjoy!
 
 
Double Stuffed Butternut Squash Adapted from Rachael Ray
 2 Butternut squash
12 slices thick cut bacon
3 green onions, chopped
1 c. ricotta cheese
1 c. cheddar cheese blend
1 tsp. granulated garlic
Salt and pepper to taste
 
 
Preheat oven to 425 degrees. Place bacon slices on a slotted pan, bake until crisp. Remove and chop. Set aside. Cut squash in half lengthwise. Scoop out the seeds and season with salt and pepper. Place flesh side down in a baking dish. Roast until just tender. About 30 minutes. Carefully scoop the flesh into a bowl, keeping the skin intact. Mash with half of bacon, ¾ c. cheddar, ricotta and garlic. Adjust seasoning by adding additional salt and pepper if needed. Add filling back into skins and top with remaining cheddar. Bake until golden. Garnish with remaining bacon and chopped green onions.


Welcome to the first weekend of October! It's hard to believe, but in this house September was simply a blur due to how busy we were, so it kind of snuck up on me. Today Bekki has a great recipe, perfect for using the squash that is so beautiful this time of year. I can not wait to try this one myself!!


During a recent visit with my family, we were all completely engaged in our conversation until Rachael came back from commercial. As soon as she was back on we were glued to the TV waiting for her to reveal the recipe we had just heard her mention. Double stuffed Butternut squash! What? Yes! Just like a twice baked potato, loaded to the heavens with bacon and cheeses. How could to be bad? Of course it had my name written all over it. I had to try it as soon as I could get a hold of a butternut squash. But…to my dismay the recipe had been removed from her fan page, and seemed to have disappeared forever. With that thought still in my head and a butternut squash in hand my recipe was born. Just before writing this I did a search for her recipe and found it! Thank you Internet angels! I hope you enjoy this as much as I did. I never imagined it could really be THIS good! Enjoy!
 
 
Double Stuffed Butternut Squash Adapted from Rachael Ray
 2 Butternut squash
12 slices thick cut bacon
3 green onions, chopped
1 c. ricotta cheese
1 c. cheddar cheese blend
1 tsp. granulated garlic
Salt and pepper to taste
 
 
Preheat oven to 425 degrees. Place bacon slices on a slotted pan, bake until crisp. Remove and chop. Set aside. Cut squash in half lengthwise. Scoop out the seeds and season with salt and pepper. Place flesh side down in a baking dish. Roast until just tender. About 30 minutes. Carefully scoop the flesh into a bowl, keeping the skin intact. Mash with half of bacon, ¾ c. cheddar, ricotta and garlic. Adjust seasoning by adding additional salt and pepper if needed. Add filling back into skins and top with remaining cheddar. Bake until golden. Garnish with remaining bacon and chopped green onions.


reade more... Résuméabuiyad

It's An Epidemic

I know many of you are read this blog every day also follow me on Facebook, and while I try not to blog to a specific audience, today's post is mostly directed to you Facebook users. For those of you who aren't on Facebook, I still encourage you to read and enjoy the recipe!

About 8 months ago, recipe sharing on Facebook really went wild. Not only were there food blogger fans pages, like mine, but there were every day people starting pages as a place to share food, recipes and tips. Great. I love sharing. If I didn't I wouldn't do this. I adore taking something from my kitchen and putting it out there for the world to enjoy. But when this trend became so popular, somewhere along the way, something went wrong. Let me explain.

It is a common rule among us food bloggers, if you use my recipe, please simply give me credit. A link back to my blog is sufficient and so easy to do. We all understand it, respect and live by it. (If you ever look at the recipes I share that aren't my own, I always give credit.) However, many of these pages on Facebook have dismissed this common courtesy and they have made a bad habit into an epidemic. Take a look at some of the recipes being shared, and I'm guessing 80-90% of them are a photo, with the entire recipe and directions typed out in the description, with no mention of the original source.

This is wrong. There is no wiggle room. It violates copyright law, and we food bloggers aren't sitting back and taking it anymore. We realize many on Facebook don't realize it's wrong, and that's why we are trying to educate our fans on what to look for, recognize and avoid. Every time one of these violations is shared, with NO reference to the blogger that put so much work into it, it's literally taking money out of that blogger's hands. See, most of us who have made a career by doing this, make the money we do by advertising, which is directly related to the number of visitors we get each day. Hence, when a recipe we have posted is now shared thousands of times without nobody having to visit our blog to see it, we lose visitors and money.

Once you see a post shared the incorrect way, they are so easy to spot; and actually very simple to track down the original post. This recipe is actually an example of one I've seen stolen and shared too many times to count. I simply downloaded the photo to my computer, then went to Google images and uploaded it, to do a search. With 2 clicks I was able to find where the photo was originally posted, along with the recipe, and now I can give credit where credit is due.

These are a great, easy, but beautiful side dish for any weeknight meal. The kids will love them! They are like a little rice muffin or cupcake! Cheesy and delicious, they are fun and delicious.

I know so many of you probably never realized some of the recipes you are seeing, sharing and loving on Facebook were stolen in the eyes of food bloggers. Please know, we don't blame you. We just want to inform you, so you can notice it, and still continue to support your favorite bloggers in every possible way, like you already do. We appreciate you, and everything you do for us every single day!

Broccoli and Cheese Rice Cups Adapted from The Fountain Avenue Kitchen
1 (12 oz.) frozen broccoli cuts, thawed
1 c. water
1 c. instant brown rice
1 c. shredded sharp cheddar cheese, divided
2 eggs, beaten
1/4 c. ranch dressing
Salt and Pepper to taste

 Preheat oven to 350. In a microwave safe dish, combine water and rice. Cover and cook for 7 minutes. (Check your box for directions. These were mine.) Transfer rice to large bowl and allow to cool slightly. Add broccoli, 3/4 c. cheese, eggs, ranch dressing, salt and pepper. Stir well to combine. Spray an 8 cup muffin tin with cooking spray. Fill each with rice mixture, pressing slightly to pack. Sprinkle remaining 1/4 c. cheese over each cup. Bake for 20-25 minutes until slightly brown around edges. Allow to cool 2-3 minutes before removing and serving.


Shared on The Country Cook Oct. 4, 2013
Rice at Very Good Recipes

I know many of you are read this blog every day also follow me on Facebook, and while I try not to blog to a specific audience, today's post is mostly directed to you Facebook users. For those of you who aren't on Facebook, I still encourage you to read and enjoy the recipe!

About 8 months ago, recipe sharing on Facebook really went wild. Not only were there food blogger fans pages, like mine, but there were every day people starting pages as a place to share food, recipes and tips. Great. I love sharing. If I didn't I wouldn't do this. I adore taking something from my kitchen and putting it out there for the world to enjoy. But when this trend became so popular, somewhere along the way, something went wrong. Let me explain.

It is a common rule among us food bloggers, if you use my recipe, please simply give me credit. A link back to my blog is sufficient and so easy to do. We all understand it, respect and live by it. (If you ever look at the recipes I share that aren't my own, I always give credit.) However, many of these pages on Facebook have dismissed this common courtesy and they have made a bad habit into an epidemic. Take a look at some of the recipes being shared, and I'm guessing 80-90% of them are a photo, with the entire recipe and directions typed out in the description, with no mention of the original source.

This is wrong. There is no wiggle room. It violates copyright law, and we food bloggers aren't sitting back and taking it anymore. We realize many on Facebook don't realize it's wrong, and that's why we are trying to educate our fans on what to look for, recognize and avoid. Every time one of these violations is shared, with NO reference to the blogger that put so much work into it, it's literally taking money out of that blogger's hands. See, most of us who have made a career by doing this, make the money we do by advertising, which is directly related to the number of visitors we get each day. Hence, when a recipe we have posted is now shared thousands of times without nobody having to visit our blog to see it, we lose visitors and money.

Once you see a post shared the incorrect way, they are so easy to spot; and actually very simple to track down the original post. This recipe is actually an example of one I've seen stolen and shared too many times to count. I simply downloaded the photo to my computer, then went to Google images and uploaded it, to do a search. With 2 clicks I was able to find where the photo was originally posted, along with the recipe, and now I can give credit where credit is due.

These are a great, easy, but beautiful side dish for any weeknight meal. The kids will love them! They are like a little rice muffin or cupcake! Cheesy and delicious, they are fun and delicious.

I know so many of you probably never realized some of the recipes you are seeing, sharing and loving on Facebook were stolen in the eyes of food bloggers. Please know, we don't blame you. We just want to inform you, so you can notice it, and still continue to support your favorite bloggers in every possible way, like you already do. We appreciate you, and everything you do for us every single day!

Broccoli and Cheese Rice Cups Adapted from The Fountain Avenue Kitchen
1 (12 oz.) frozen broccoli cuts, thawed
1 c. water
1 c. instant brown rice
1 c. shredded sharp cheddar cheese, divided
2 eggs, beaten
1/4 c. ranch dressing
Salt and Pepper to taste

 Preheat oven to 350. In a microwave safe dish, combine water and rice. Cover and cook for 7 minutes. (Check your box for directions. These were mine.) Transfer rice to large bowl and allow to cool slightly. Add broccoli, 3/4 c. cheese, eggs, ranch dressing, salt and pepper. Stir well to combine. Spray an 8 cup muffin tin with cooking spray. Fill each with rice mixture, pressing slightly to pack. Sprinkle remaining 1/4 c. cheese over each cup. Bake for 20-25 minutes until slightly brown around edges. Allow to cool 2-3 minutes before removing and serving.


Shared on The Country Cook Oct. 4, 2013
Rice at Very Good Recipes

reade more... Résuméabuiyad

For The Meat Free Fans

We are meat lovin' people. I have never tried to hide that fact. In fact, we wear it as a badge of honor, as we cut into our juicy steaks, pork chops and roasts. I have said it before, and will again, as much as we love our vegetables, there is just not way we could ever give up meat entirely. But I also realize more and more people are doing just that, and making it a true lifestyle change in their life, so today I've got something just for them, or for your parents out there trying to get one more veggie into the kids.

If your kids fight you tooth and nail every time you say "you have to eat your vegetables", I feel for you. I can't say I know how you feel, because as most of you know, my son has never met a vegetable he doesn't like, but I truly do have empathy for those parents who are in the constant struggle. I have a lot of moms ask me how they can entice their kids with meals that include veggies; and I have to be honest with them. When in doubt, pair them with something they already love, or in dire times....hide 'em! And this meal accomplishes both of those in one dish!

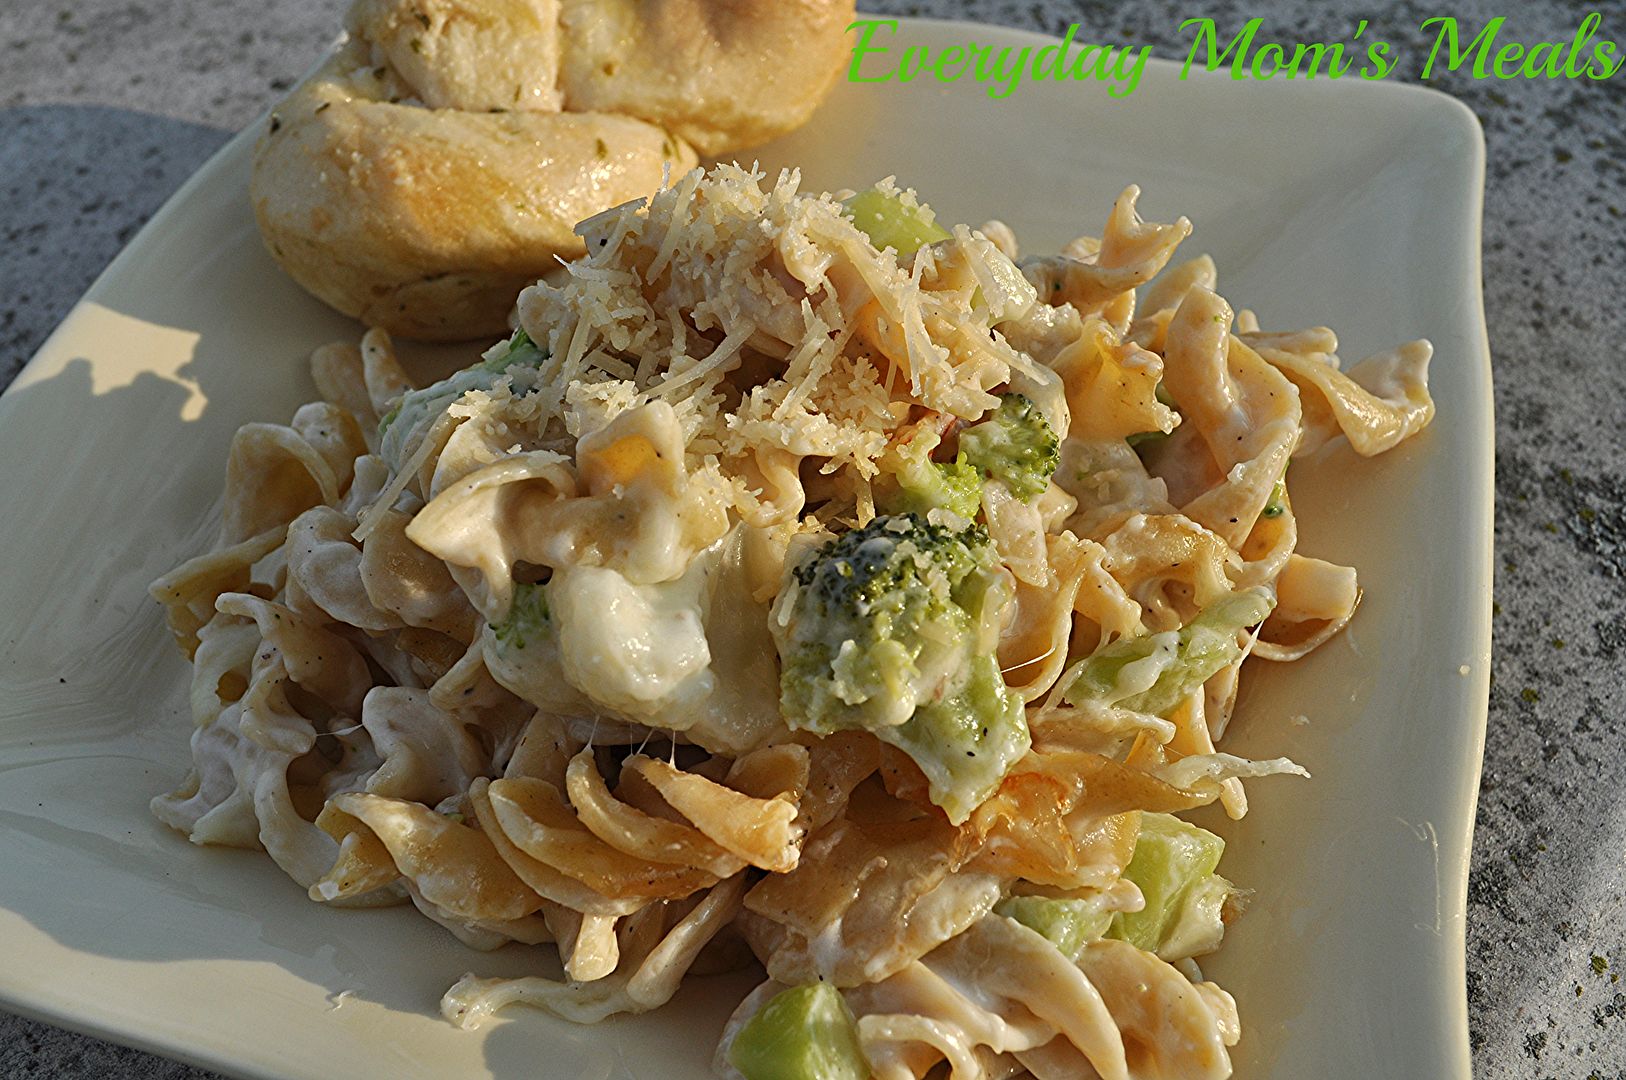
Pasta and cheese. What kid is going to turn that down? And if they happened to have some broccoli and cauliflower mixed in...even better! My family did not miss the meat one bit. In fact, when he first saw it my husband asked if there was chicken in it. (So if your kids ask the same, feel free to tell a little white lie, if it makes dinner time easier!) There is so much ooey gooey cheese, it's hard to even think about the veggies you are eating. But if you're a veggie lover, like us, you too will enjoy every single bite.

I know many who are taking the meat free option, and I respect it 100%. And with the love affair I have with veggies, at times it even sounds appealing. But then a juicy tender medium rare steak waves at me from the grill and I'm once again reminded of how much we enjoy it. But if you are looking for more meat free options, or simply trying to incorporate more veggies into your kids' diets, this meal will satisfy all!

Cheesy Veggie Pasta Bake Featured on SpacesQuarterly.com
3 c. frozen chopped broccoli, thawed
2 c. frozen cauliflower, thawed and cut into small pieces
1 (10 3/4 oz.) can cream of mushroom soup, undiluted
12 oz. egg noodles, cooked and drained
1 c. sour cream
2 c. shredded mozzarella cheese
1/2 c. shredded Parmesan cheese
1 tsp. onion powder
Salt and Pepper to taste

Preheat oven to 350. In a large bowl combine broccoli, cauliflower, soup, noodles, sour cream, onion powder, salt, pepper and ½ c. mozzarella. Pour into a greased 9×13 baking pan. Top with remaining mozzarella and Parmesan. Bake, uncovered, 30 minutes or until bubbly.


Shared on The Country Cook Sept. 20, 2013
Pasta at Very Good Recipes
We are meat lovin' people. I have never tried to hide that fact. In fact, we wear it as a badge of honor, as we cut into our juicy steaks, pork chops and roasts. I have said it before, and will again, as much as we love our vegetables, there is just not way we could ever give up meat entirely. But I also realize more and more people are doing just that, and making it a true lifestyle change in their life, so today I've got something just for them, or for your parents out there trying to get one more veggie into the kids.

If your kids fight you tooth and nail every time you say "you have to eat your vegetables", I feel for you. I can't say I know how you feel, because as most of you know, my son has never met a vegetable he doesn't like, but I truly do have empathy for those parents who are in the constant struggle. I have a lot of moms ask me how they can entice their kids with meals that include veggies; and I have to be honest with them. When in doubt, pair them with something they already love, or in dire times....hide 'em! And this meal accomplishes both of those in one dish!

Pasta and cheese. What kid is going to turn that down? And if they happened to have some broccoli and cauliflower mixed in...even better! My family did not miss the meat one bit. In fact, when he first saw it my husband asked if there was chicken in it. (So if your kids ask the same, feel free to tell a little white lie, if it makes dinner time easier!) There is so much ooey gooey cheese, it's hard to even think about the veggies you are eating. But if you're a veggie lover, like us, you too will enjoy every single bite.

I know many who are taking the meat free option, and I respect it 100%. And with the love affair I have with veggies, at times it even sounds appealing. But then a juicy tender medium rare steak waves at me from the grill and I'm once again reminded of how much we enjoy it. But if you are looking for more meat free options, or simply trying to incorporate more veggies into your kids' diets, this meal will satisfy all!

Cheesy Veggie Pasta Bake Featured on SpacesQuarterly.com
3 c. frozen chopped broccoli, thawed
2 c. frozen cauliflower, thawed and cut into small pieces
1 (10 3/4 oz.) can cream of mushroom soup, undiluted
12 oz. egg noodles, cooked and drained
1 c. sour cream
2 c. shredded mozzarella cheese
1/2 c. shredded Parmesan cheese
1 tsp. onion powder
Salt and Pepper to taste

Preheat oven to 350. In a large bowl combine broccoli, cauliflower, soup, noodles, sour cream, onion powder, salt, pepper and ½ c. mozzarella. Pour into a greased 9×13 baking pan. Top with remaining mozzarella and Parmesan. Bake, uncovered, 30 minutes or until bubbly.


Shared on The Country Cook Sept. 20, 2013
Pasta at Very Good Recipes
reade more... Résuméabuiyad

My Mom, His Grandma

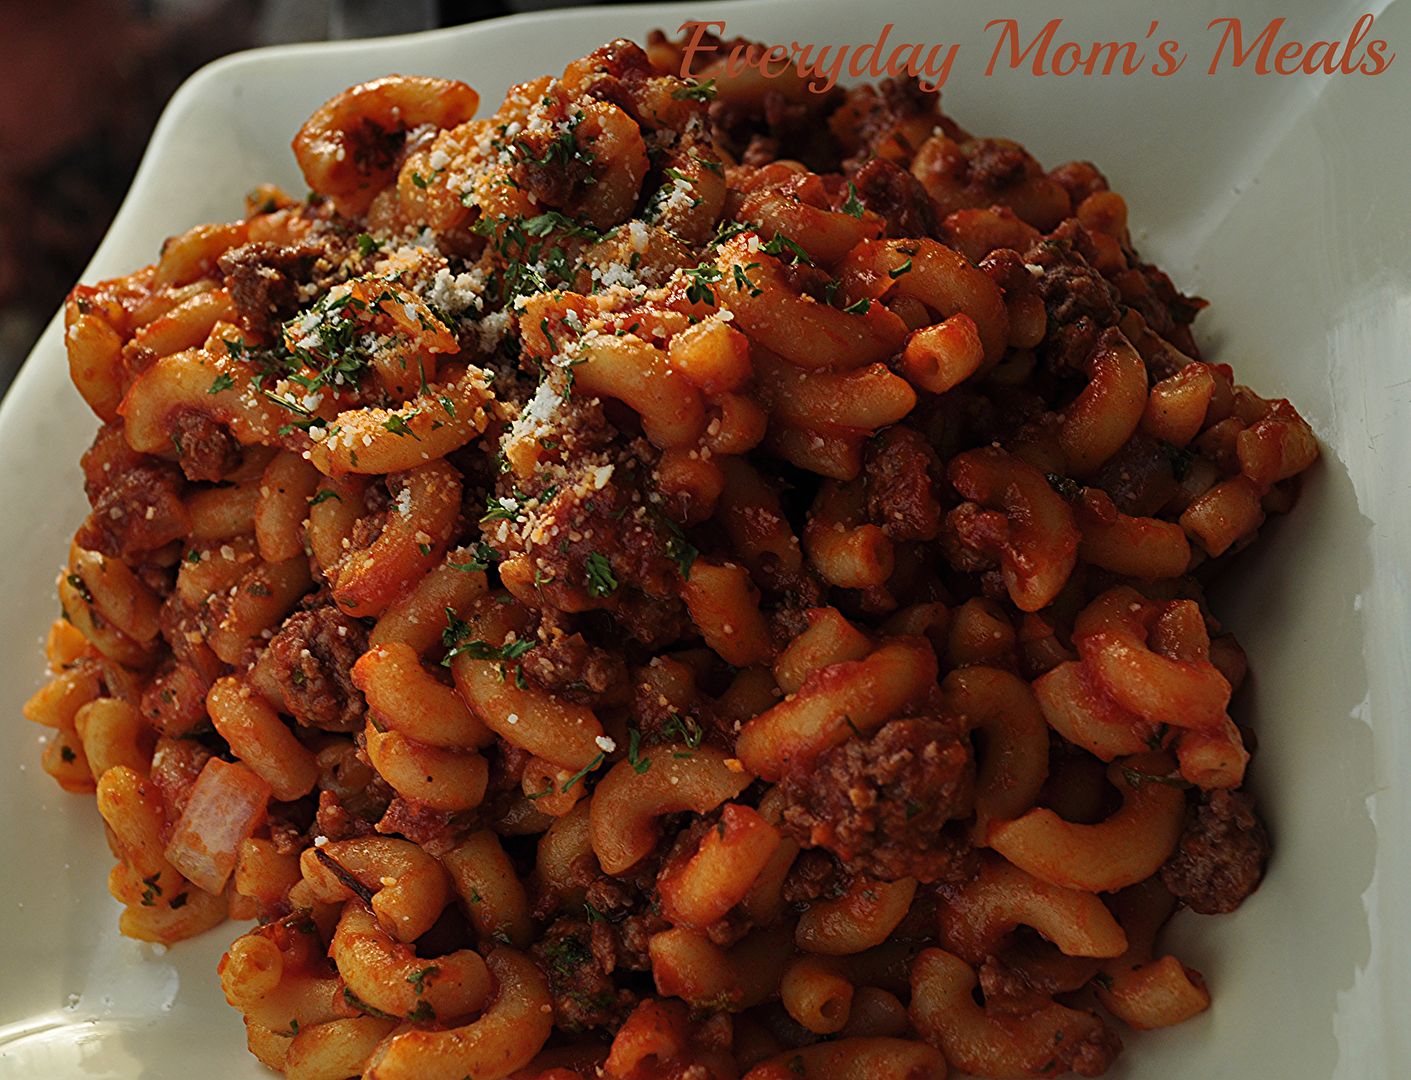
I'm going to start today's post off with a preface. I know many of you are going to read this recipe and say "That's not traditional goulash." I am well aware of this, and respect the fact that for those of you enjoy a more traditional version, this is nothing similar to that. Please do not fill my inbox with the differences. In fact, I'm so aware of this, there will be another recipe posted on Friday that might be a little closer to what you consider the "real thing", and I will even be discussing why the difference.

Okay, with that out of the way, let me tell you about this dish. This is something I grew up on. My mom made this at least a couple times per month. It was simple, fast and tasty, 3 things she needed after working all day and having my dad and I starving, waiting impatiently to be fed. She was taught how to make it by her mother, so it's been in our family for many, many years.

Now, here is where the story takes an ironic, but very special twist. When Adam and I were first married, and I was looking for new recipes to cook for him, he told me he loved his grandma's goulash and asked me to get her recipe. Well, I'm not going to lie, I forgot. I did however, mention to my mom I needed supper ideas and she suggested I make her goulash, so I did. Adam came home from work, sat down to dinner and was so excited. "You got Grandma's recipe??!!" Confused I looked at him and replied, "No, I made it like my mom." Yep...they were the exact same recipe!! We had both been eating the same dish for years, loving it, but from two different sources, only making it all the more special! I like to say it's a family tradition, any which way you look at it!

This is a fantastic weeknight meal for those evening your butt is really dragging and cooking is the last thing you want to do. It comes together in almost no time at all. It's also perfect for those nights when every member of the family is eating at a different time. It reheats beautifully, and almost tastes better the longer it sits.

If this is like the goulash you grew up on, welcome to the club. If yours was nothing like this, then come back on Friday to see another version I made, and read all about why they are at completely opposite ends of the food scale!

Mom's Goulash
1 lb. elbow macaroni, cooked and drained
1 lb. ground beef
1 small onion, chopped
1 tsp. garlic powder
1 (26 oz.) jar spaghetti sauce
1 TBS dried parsley, extra for garnish
Salt and Pepper to taste.
Grated Parmesan cheese

In a large skillet, brown ground beef and onion until no longer pink. Drain if necessary. Reduce heat, season with garlic powder, salt and pepper. When macaroni is cooked, add to meat mixture. Add spaghetti sauce. Stir to combine. Sprinkle with parsley and stir. Cook on low for 10-15 minutes to allow flavors to combine and thicken slightly. Serve with extra parsley and Parmesan cheese.


Shared on Lady Behind The Curtain Sept. 4, 2013
Shared on The Country Cook Sept. 6, 2013
Macaroni at Very Good Recipes
I'm going to start today's post off with a preface. I know many of you are going to read this recipe and say "That's not traditional goulash." I am well aware of this, and respect the fact that for those of you enjoy a more traditional version, this is nothing similar to that. Please do not fill my inbox with the differences. In fact, I'm so aware of this, there will be another recipe posted on Friday that might be a little closer to what you consider the "real thing", and I will even be discussing why the difference.

Okay, with that out of the way, let me tell you about this dish. This is something I grew up on. My mom made this at least a couple times per month. It was simple, fast and tasty, 3 things she needed after working all day and having my dad and I starving, waiting impatiently to be fed. She was taught how to make it by her mother, so it's been in our family for many, many years.

Now, here is where the story takes an ironic, but very special twist. When Adam and I were first married, and I was looking for new recipes to cook for him, he told me he loved his grandma's goulash and asked me to get her recipe. Well, I'm not going to lie, I forgot. I did however, mention to my mom I needed supper ideas and she suggested I make her goulash, so I did. Adam came home from work, sat down to dinner and was so excited. "You got Grandma's recipe??!!" Confused I looked at him and replied, "No, I made it like my mom." Yep...they were the exact same recipe!! We had both been eating the same dish for years, loving it, but from two different sources, only making it all the more special! I like to say it's a family tradition, any which way you look at it!

This is a fantastic weeknight meal for those evening your butt is really dragging and cooking is the last thing you want to do. It comes together in almost no time at all. It's also perfect for those nights when every member of the family is eating at a different time. It reheats beautifully, and almost tastes better the longer it sits.

If this is like the goulash you grew up on, welcome to the club. If yours was nothing like this, then come back on Friday to see another version I made, and read all about why they are at completely opposite ends of the food scale!

Mom's Goulash
1 lb. elbow macaroni, cooked and drained
1 lb. ground beef
1 small onion, chopped
1 tsp. garlic powder
1 (26 oz.) jar spaghetti sauce
1 TBS dried parsley, extra for garnish
Salt and Pepper to taste.
Grated Parmesan cheese

In a large skillet, brown ground beef and onion until no longer pink. Drain if necessary. Reduce heat, season with garlic powder, salt and pepper. When macaroni is cooked, add to meat mixture. Add spaghetti sauce. Stir to combine. Sprinkle with parsley and stir. Cook on low for 10-15 minutes to allow flavors to combine and thicken slightly. Serve with extra parsley and Parmesan cheese.


Shared on Lady Behind The Curtain Sept. 4, 2013
Shared on The Country Cook Sept. 6, 2013
Macaroni at Very Good Recipes
reade more... Résuméabuiyad

He Finally Got His Enchiladas

Today's recipe is another that has appeared on EMM before, but probably before most of you were around to read it. Yes, it was here when I was just getting started, and I'm pretty sure my husband, mother and maybe a few rogue family members were the only ones who saw it. And with the quality of the photograph I included in that original post, I can't say I'm sad about that. Thank goodness my food photography has come a long way since those days! 

This was the perfect time to feature this meal again because it was something little man kept requesting over and over during those months when my oven was out of commission; and as most of you know, it's up and working like a champ again...so we are taking full advantage! 

That first week it was in working order again I asked Alex for some ideas on things he had been craving, but I was unable to make. One of the first things out of his mouth was "enchiladas." And while I have a few different recipes for them, including Chicken and Green Chile, I knew these were what he was talking about, without even asking. What can I say? I know my kid! 

If your family loves Mexican night, but you're tired of the same old tacos, but don't have the time for much more, you will love these. With only a few ingredients and about 30 minutes you can have a tasty Mexican meal on the table they will love. Add some chips and my Restaurant Style Salsa on the side, and they will think they are sitting in their favorite Mexican joint, not gathered around your kitchen table. 

I'm so happy to have my oven in tip-top shape again. But I think my son might be even happier than I am. Some of his favorite things, from desserts to things like this, come from the oven. If you want a simple meal tonight, try these enchiladas, and put your oven to work too!

Easy Beef Enchiladas
1 lb. ground beef
1 (16 oz.) jar picante sauce
8 corn or flour tortillas
8 oz. shredded sharp cheddar cheese
Salt and Pepper to taste
Sour Cream, optional
Green Onions, optional

Preheat oven to 325. Wrap tortillas in foil. Place on oven rack and warm for 5-7 minutes. Remove and increase heat to 350. In a large skillet, brown beef seasoned with salt and pepper, until no longer pink. Drain if necessary. Add 1/2 c. picante sauce and 1 cup cheese. Mix well and cook until combined. Spread 1/2 c. picante sauce in bottom of 9x13 pan. Spoon 2-3 TBS of beef mixture down center of each tortilla. Roll and place seam side down in pan. Top with remaining picante sauce and cheese. Bake uncovered for 20 minutes until heated through and cheese melts. Top with sour cream and green onions, if desired. 


Shared on Lady Behind The Curtain Sept. 4, 2013
Shared on The Country Cook Sept. 6, 2013

Today's recipe is another that has appeared on EMM before, but probably before most of you were around to read it. Yes, it was here when I was just getting started, and I'm pretty sure my husband, mother and maybe a few rogue family members were the only ones who saw it. And with the quality of the photograph I included in that original post, I can't say I'm sad about that. Thank goodness my food photography has come a long way since those days! 

This was the perfect time to feature this meal again because it was something little man kept requesting over and over during those months when my oven was out of commission; and as most of you know, it's up and working like a champ again...so we are taking full advantage! 

That first week it was in working order again I asked Alex for some ideas on things he had been craving, but I was unable to make. One of the first things out of his mouth was "enchiladas." And while I have a few different recipes for them, including Chicken and Green Chile, I knew these were what he was talking about, without even asking. What can I say? I know my kid! 

If your family loves Mexican night, but you're tired of the same old tacos, but don't have the time for much more, you will love these. With only a few ingredients and about 30 minutes you can have a tasty Mexican meal on the table they will love. Add some chips and my Restaurant Style Salsa on the side, and they will think they are sitting in their favorite Mexican joint, not gathered around your kitchen table. 

I'm so happy to have my oven in tip-top shape again. But I think my son might be even happier than I am. Some of his favorite things, from desserts to things like this, come from the oven. If you want a simple meal tonight, try these enchiladas, and put your oven to work too!

Easy Beef Enchiladas
1 lb. ground beef
1 (16 oz.) jar picante sauce
8 corn or flour tortillas
8 oz. shredded sharp cheddar cheese
Salt and Pepper to taste
Sour Cream, optional
Green Onions, optional

Preheat oven to 325. Wrap tortillas in foil. Place on oven rack and warm for 5-7 minutes. Remove and increase heat to 350. In a large skillet, brown beef seasoned with salt and pepper, until no longer pink. Drain if necessary. Add 1/2 c. picante sauce and 1 cup cheese. Mix well and cook until combined. Spread 1/2 c. picante sauce in bottom of 9x13 pan. Spoon 2-3 TBS of beef mixture down center of each tortilla. Roll and place seam side down in pan. Top with remaining picante sauce and cheese. Bake uncovered for 20 minutes until heated through and cheese melts. Top with sour cream and green onions, if desired. 


Shared on Lady Behind The Curtain Sept. 4, 2013
Shared on The Country Cook Sept. 6, 2013

reade more... Résuméabuiyad

A Hand In The Kitchen Part 1 {A Review of Cooking Planit}

Have you ever said to yourself "Cooking would be so much easier, if I just had a little help. Another set of hands to make sure everything is getting done at once."? Well, if you have, you are not alone. Anyone who spends any amount of time in the kitchen at some point has wished for a little assistance to make everything run smoothly. And today I have the answer to those wishes...in the form of not only a website, but also an app you can run on your iPad or iPhone! 

Let me introduce you to Cooking Planit, the site that takes the guesswork out of the kitchen. From your grocery list to the final product, they are there every step of the way, making sure your meal goes off without a hitch. 

From their website: 
• Simplified Meal Planning – Thoughtful and tested meal plans that your family and friends will love.
  • • Organized Shopping – No more headaches while getting your list together. We build your shopping list just like you would.
  • • Guided Cooking Steps – It's like G.P.S. for cooking! We'll do all the organization and lead you through each recipe's steps so that the entire meal is ready at the same time.
  • • Cloud Sync – Sync your account across the web, your iPhone and iPad
That's right, every single detail is not only thought of, but executed with ease and simplicity. When you find a recipe you want to make, just save it to your cookbook. Then when you are ready, it's waiting on you. Step by step instructions, all leading to a delicious meal, where all dishes are done at the same time! 

Let's start at the beginning. Here is this recipe, on my iPhone using the Cooking Planit app. It starts by telling me everything I should gather in the kitchen, so my ingredients are waiting on me, not the other way around. 


Next up, it tells me what equipment I'll need throughout the entire cooking process. No searching for a gadget at the last minute this way!


Now here is one of my favorite parts. Before you even start, it asks how many servings you are cooking for, adapted the recipe accordingly. Only have 2 in your house? Not a problem. No more guessing how much to make. It's so user friendly for cooks of all walks of life, from the small household to the ones cooking for a small army.


And this...well, this is my absolute favorite part. The timing aspect. It talks to you and tells you how much time you have before the next step needs to be completed. It even has a timer so you know exactly where you are in the process. Plus...if you get ahead of schedule...it even tells you that. And suggests you have a seat and enjoy a glass of wine while you wait! It truly is like having a friend in the kitchen with you!

Cooking Planit is the perfect site/app for everyone who enjoys cooking, but can always use a little help. I think it would be a great idea for college kids, living on their own for the first time, or maybe a new bride who isn't quite comfortable in the kitchen yet. But I also love that the more experienced home cook can adapt the recipes to fit their tastes (which is exactly what I did for this one) and even "skip" steps to better fit their time frame. Cooking Planit is easy to use, fun, and a home cook's best friend! 

Plus, they are very generous! They are giving EMM readers a chance to win a 12-piece T-Fal Cookware Set! It is GORGEOUS! And all you have to do to enter, is follow the directions in the Rafflecopter widget below! 

Now, for this recipe, I took one on their site, and adapted it to satisfy our family a little better. If you want to see the original, click here. This would make a great addition to your Labor Day picnic or backyard party...NO mayo! The light dressing makes it delicious without being too heavy. And I love the combination of spinach and feta! 

If you are looking for a little help in the kitchen, look no further than Cooking Planit. And be sure to check out the giveaway below, and come back on Wednesday to see the sandwich I made to go with this salad too!

Bow-Tie Pasta Salad with Spinach and Feta Adapted from Cooking Planit
12 oz. bow-tie pasta
1/2 c. sliced black olives
1 c. fresh baby spinach, chopped
1 (12 oz.) jar roasted red peppers, drained and rough chopped
1 c. feta cheese crumbles
1 clove garlic, minced
1 TBS olive oil
1 TBS lemon juice
Salt and Pepper to taste

Bring a large pot of water to a boil. Cook pasta to al dente, about 10 minutes. While pasta is cooking, add garlic, spinach, peppers and olives to a large bowl. Stir to combine. When pasta is done, drain well. Add directly to bowl. In a small bowl combine olive oil and lemon juice. Whisk to combine. Pour over pasta while warm. Season with salt and pepper. Stir to combine. Place in fridge at least 10 minutes to chill. Just before serving add feta and toss to combine. 


Shared on Mandy's Recipe Box Aug. 27, 2013
Shared on Lady Behind The Curtain Aug. 28, 2013
Shared on The Country Cook Aug. 30, 2013
Salad at Very Good Recipes

For More Info: 
CookingPlanit
 Website: http://www.cookingplanit.com/browse
 iOS'Apps: https://itunes.apple.com/us/artist/cooking.planit/id544421990

 Social Media:
 Blog: http://blog.cookingplanit.com/
 Facebook:' https://www.facebook.com/cookingplanit
 Twitter: https://twitter.com/cookingplanit
 Pinterest:'' http://pinterest.com/cookingplanit
 YouTube:' http://www.youtube.com/cookingplanit
 Instagram: http://instagram.com/cookingplanit

a Rafflecopter giveaway
Have you ever said to yourself "Cooking would be so much easier, if I just had a little help. Another set of hands to make sure everything is getting done at once."? Well, if you have, you are not alone. Anyone who spends any amount of time in the kitchen at some point has wished for a little assistance to make everything run smoothly. And today I have the answer to those wishes...in the form of not only a website, but also an app you can run on your iPad or iPhone! 

Let me introduce you to Cooking Planit, the site that takes the guesswork out of the kitchen. From your grocery list to the final product, they are there every step of the way, making sure your meal goes off without a hitch. 

From their website: 
• Simplified Meal Planning – Thoughtful and tested meal plans that your family and friends will love.
  • • Organized Shopping – No more headaches while getting your list together. We build your shopping list just like you would.
  • • Guided Cooking Steps – It's like G.P.S. for cooking! We'll do all the organization and lead you through each recipe's steps so that the entire meal is ready at the same time.
  • • Cloud Sync – Sync your account across the web, your iPhone and iPad
That's right, every single detail is not only thought of, but executed with ease and simplicity. When you find a recipe you want to make, just save it to your cookbook. Then when you are ready, it's waiting on you. Step by step instructions, all leading to a delicious meal, where all dishes are done at the same time! 

Let's start at the beginning. Here is this recipe, on my iPhone using the Cooking Planit app. It starts by telling me everything I should gather in the kitchen, so my ingredients are waiting on me, not the other way around. 


Next up, it tells me what equipment I'll need throughout the entire cooking process. No searching for a gadget at the last minute this way!


Now here is one of my favorite parts. Before you even start, it asks how many servings you are cooking for, adapted the recipe accordingly. Only have 2 in your house? Not a problem. No more guessing how much to make. It's so user friendly for cooks of all walks of life, from the small household to the ones cooking for a small army.


And this...well, this is my absolute favorite part. The timing aspect. It talks to you and tells you how much time you have before the next step needs to be completed. It even has a timer so you know exactly where you are in the process. Plus...if you get ahead of schedule...it even tells you that. And suggests you have a seat and enjoy a glass of wine while you wait! It truly is like having a friend in the kitchen with you!

Cooking Planit is the perfect site/app for everyone who enjoys cooking, but can always use a little help. I think it would be a great idea for college kids, living on their own for the first time, or maybe a new bride who isn't quite comfortable in the kitchen yet. But I also love that the more experienced home cook can adapt the recipes to fit their tastes (which is exactly what I did for this one) and even "skip" steps to better fit their time frame. Cooking Planit is easy to use, fun, and a home cook's best friend! 

Plus, they are very generous! They are giving EMM readers a chance to win a 12-piece T-Fal Cookware Set! It is GORGEOUS! And all you have to do to enter, is follow the directions in the Rafflecopter widget below! 

Now, for this recipe, I took one on their site, and adapted it to satisfy our family a little better. If you want to see the original, click here. This would make a great addition to your Labor Day picnic or backyard party...NO mayo! The light dressing makes it delicious without being too heavy. And I love the combination of spinach and feta! 

If you are looking for a little help in the kitchen, look no further than Cooking Planit. And be sure to check out the giveaway below, and come back on Wednesday to see the sandwich I made to go with this salad too!

Bow-Tie Pasta Salad with Spinach and Feta Adapted from Cooking Planit
12 oz. bow-tie pasta
1/2 c. sliced black olives
1 c. fresh baby spinach, chopped
1 (12 oz.) jar roasted red peppers, drained and rough chopped
1 c. feta cheese crumbles
1 clove garlic, minced
1 TBS olive oil
1 TBS lemon juice
Salt and Pepper to taste

Bring a large pot of water to a boil. Cook pasta to al dente, about 10 minutes. While pasta is cooking, add garlic, spinach, peppers and olives to a large bowl. Stir to combine. When pasta is done, drain well. Add directly to bowl. In a small bowl combine olive oil and lemon juice. Whisk to combine. Pour over pasta while warm. Season with salt and pepper. Stir to combine. Place in fridge at least 10 minutes to chill. Just before serving add feta and toss to combine. 


Shared on Mandy's Recipe Box Aug. 27, 2013
Shared on Lady Behind The Curtain Aug. 28, 2013
Shared on The Country Cook Aug. 30, 2013
Salad at Very Good Recipes

For More Info: 
CookingPlanit
 Website: http://www.cookingplanit.com/browse
 iOS'Apps: https://itunes.apple.com/us/artist/cooking.planit/id544421990

 Social Media:
 Blog: http://blog.cookingplanit.com/
 Facebook:' https://www.facebook.com/cookingplanit
 Twitter: https://twitter.com/cookingplanit
 Pinterest:'' http://pinterest.com/cookingplanit
 YouTube:' http://www.youtube.com/cookingplanit
 Instagram: http://instagram.com/cookingplanit

a Rafflecopter giveaway
reade more... Résuméabuiyad

Soul Food Saturday #19

Well, we have one week of school under our belts! Five days down. Only 175 more to go! It's hard to believe that summer is coming to end, Labor Day is next weekend, and autumn is just around the corner. And today Bekki is sharing a great idea for any busy school night, especially if your family is like ours and the "after school" activities keep you just as busy!

  *NOTE* Bekki had a friend give her this recipe, but couldn't remember where she got it, so if you recognize it, or where it came from, please let us know so we can give them a little shout out love!


For most summer vacation is officially over. The new school year has begun and thoughts of fall sports and fun are in the air. So I decided we needed a fun recipe that’s great for a family movie night snack or one to come home and have right after a day at school. This one will be fun for the kids to help with. Choosing your favorite combinations of meats and cheese, just like your favorite pizzas. Whether you are a dipper or a purist, this will fit everyone’s fancy. Pull out the ranch, or your favorite marinara. Or maybe even both. This one is a winner!
 
 
Mini Pepperoni Pizza Egg Rolls
3 mozzarella string cheese, quartered
12 mini egg roll wrappers
36 slices of mini pepperoni
Oil for deep-frying

Marinara or pizza sauce (optional)

On top of egg roll wrapper, place three pieces of pepperoni from one corner to another. Place a piece of the quartered string cheese on top of the pepperoni. Moisten around entire edge with water to seal, with either your finger, or a brush. Start fold by folding corners over the cheese. Then pull bottom corner over cheese and pepperoni and keep rolling until cheese is tightly wrapped. Repeat with the rest of wrappers.

In a skillet, heat oil to 375 degrees F. Fry sticks, a few at a time, for 30-60 seconds on each side until completely brown. Drain on paper towels.


Well, we have one week of school under our belts! Five days down. Only 175 more to go! It's hard to believe that summer is coming to end, Labor Day is next weekend, and autumn is just around the corner. And today Bekki is sharing a great idea for any busy school night, especially if your family is like ours and the "after school" activities keep you just as busy!

  *NOTE* Bekki had a friend give her this recipe, but couldn't remember where she got it, so if you recognize it, or where it came from, please let us know so we can give them a little shout out love!


For most summer vacation is officially over. The new school year has begun and thoughts of fall sports and fun are in the air. So I decided we needed a fun recipe that’s great for a family movie night snack or one to come home and have right after a day at school. This one will be fun for the kids to help with. Choosing your favorite combinations of meats and cheese, just like your favorite pizzas. Whether you are a dipper or a purist, this will fit everyone’s fancy. Pull out the ranch, or your favorite marinara. Or maybe even both. This one is a winner!
 
 
Mini Pepperoni Pizza Egg Rolls
3 mozzarella string cheese, quartered
12 mini egg roll wrappers
36 slices of mini pepperoni
Oil for deep-frying

Marinara or pizza sauce (optional)

On top of egg roll wrapper, place three pieces of pepperoni from one corner to another. Place a piece of the quartered string cheese on top of the pepperoni. Moisten around entire edge with water to seal, with either your finger, or a brush. Start fold by folding corners over the cheese. Then pull bottom corner over cheese and pepperoni and keep rolling until cheese is tightly wrapped. Repeat with the rest of wrappers.

In a skillet, heat oil to 375 degrees F. Fry sticks, a few at a time, for 30-60 seconds on each side until completely brown. Drain on paper towels.


reade more... Résuméabuiyad

The Best E.V.E.R.

Having a big party this weekend? Maybe a back to school blowout? Or heading up to the lake for one of the last summer weekend getaways before it's too late? Or maybe you're even looking ahead to next weekend, Labor Day and a big backyard barbecue. If any of these are true, or you're just looking for a great party idea to keep in your back pocket, or even a simple side dish for your next Mexican night at home, I've got something that works for every single one of those!

As most of you know, before I was a SAHM, I had a career outside the home. After getting my degree, I worked in an Orthopedic Medical Office for 2 1/2 years before little man came along and changed my world forever. I was lucky enough to work with a great group of people, including the other ladies in my department, nurses, PAs, doctors, support staff, etc. It was a great company and there are still days when I miss it.

And one of the best things about this office were the carry ins! Rather it be in our department, another down the hall, or office wide, those were some of the yummiest days on the job! Now working in medical records, we had a lot of contact with other departments, and on the days they were having carry-ins and we weren't, more likely than not, they were always so kind to invite us to share in their "brought from home" goodies, and this was one of those recipes.

I was actually pregnant the day the nurses were having a carry-in and were so kind to share. Who can say no to a 7 month pregnant lady drooling over your plate? The minute I dipped my first chip into this queso, I had to have the recipe...because it was the BEST I'd ever had. She was kind of enough to share, and I couldn't believe how simple it was, plus being Crock Pot friendly makes it so nice for parties or potlucks.

I remember the next fall, after Alex was born, I made this one Sunday and we literally ate it all day long while we watched football, making it a meal. These days, I use it as a side dish if we're having tacos, enchiladas, etc. Or it's a great one to set out for a large crowd, because the pot never seems to end!

I've been so lucky to stay at home with Alex. After all, it's what lead me to blogging, and all of you. But I took a lot away from my working years too. Experience, knowledge, great friends, and even some tasty recipes to share!

Crock Pot Queso Dip
1 lb. bulk sausage, browned and drained
32 oz. Velveeta, cubed
8 oz. cream cheese, softened a bit
1 (10 3/4 oz.) can cream of mushroom soup, unprepared
1 ( 10 oz.) can Rotel

Place Crock Pot on low setting. Combine Velveeta, cream cheese and mushroom soup. Stir well. Add Rotel. Mix again. Cook on LOW 30 minutes. Add sausage and stir well. Continue cooking on LOW for another 30 minutes, stirring occasionally, or until completely melted and combined. *NOTE* If you wish to leave this in the Crock Pot for a long duration, turn to KEEP WARM or even OFF. If it becomes extra thick, add a few splashes of water to thin it out. Also do this if left over and reheating.


Shared on The Country Cook Aug. 23, 2013
Shared on Mandy's Recipe Box Aug. 27, 2013
Mexican at Very Good Recipes
Having a big party this weekend? Maybe a back to school blowout? Or heading up to the lake for one of the last summer weekend getaways before it's too late? Or maybe you're even looking ahead to next weekend, Labor Day and a big backyard barbecue. If any of these are true, or you're just looking for a great party idea to keep in your back pocket, or even a simple side dish for your next Mexican night at home, I've got something that works for every single one of those!

As most of you know, before I was a SAHM, I had a career outside the home. After getting my degree, I worked in an Orthopedic Medical Office for 2 1/2 years before little man came along and changed my world forever. I was lucky enough to work with a great group of people, including the other ladies in my department, nurses, PAs, doctors, support staff, etc. It was a great company and there are still days when I miss it.

And one of the best things about this office were the carry ins! Rather it be in our department, another down the hall, or office wide, those were some of the yummiest days on the job! Now working in medical records, we had a lot of contact with other departments, and on the days they were having carry-ins and we weren't, more likely than not, they were always so kind to invite us to share in their "brought from home" goodies, and this was one of those recipes.

I was actually pregnant the day the nurses were having a carry-in and were so kind to share. Who can say no to a 7 month pregnant lady drooling over your plate? The minute I dipped my first chip into this queso, I had to have the recipe...because it was the BEST I'd ever had. She was kind of enough to share, and I couldn't believe how simple it was, plus being Crock Pot friendly makes it so nice for parties or potlucks.

I remember the next fall, after Alex was born, I made this one Sunday and we literally ate it all day long while we watched football, making it a meal. These days, I use it as a side dish if we're having tacos, enchiladas, etc. Or it's a great one to set out for a large crowd, because the pot never seems to end!

I've been so lucky to stay at home with Alex. After all, it's what lead me to blogging, and all of you. But I took a lot away from my working years too. Experience, knowledge, great friends, and even some tasty recipes to share!

Crock Pot Queso Dip
1 lb. bulk sausage, browned and drained
32 oz. Velveeta, cubed
8 oz. cream cheese, softened a bit
1 (10 3/4 oz.) can cream of mushroom soup, unprepared
1 ( 10 oz.) can Rotel

Place Crock Pot on low setting. Combine Velveeta, cream cheese and mushroom soup. Stir well. Add Rotel. Mix again. Cook on LOW 30 minutes. Add sausage and stir well. Continue cooking on LOW for another 30 minutes, stirring occasionally, or until completely melted and combined. *NOTE* If you wish to leave this in the Crock Pot for a long duration, turn to KEEP WARM or even OFF. If it becomes extra thick, add a few splashes of water to thin it out. Also do this if left over and reheating.


Shared on The Country Cook Aug. 23, 2013
Shared on Mandy's Recipe Box Aug. 27, 2013
Mexican at Very Good Recipes
reade more... Résuméabuiyad