Pages

Showing posts with label Kids. Show all posts

No, Mommy Can't Do That

One week folks! That's right, in case you haven't been paying attention, we only have 7 days until the big day! Have your kids been counting down for days now? Heck, have you? Do you still have a ton of things on your to-do list? Rather you are ready or not, it's coming and fast!

But if one of the things on your list is to find a great idea for Christmas morning breakfast, your favorite everyday mom has you covered! Stay calm and relax because you've come to the right place and I have a great idea for you.

This recipe came about because of a request from my son. He decided to ask me if I would make omelets for supper one night. Now, breakfast for supper is a very common occurrence in this house, so that wasn't the issue. The problem was what he asked for. See, I can't make an omelet in the skillet to save my life. If you have ever seen my recipe for Baked Omelet I talked about this at length. How I've tried and tried and they just never come out right, so I admitted defeat and began baking a big omelet in the oven.

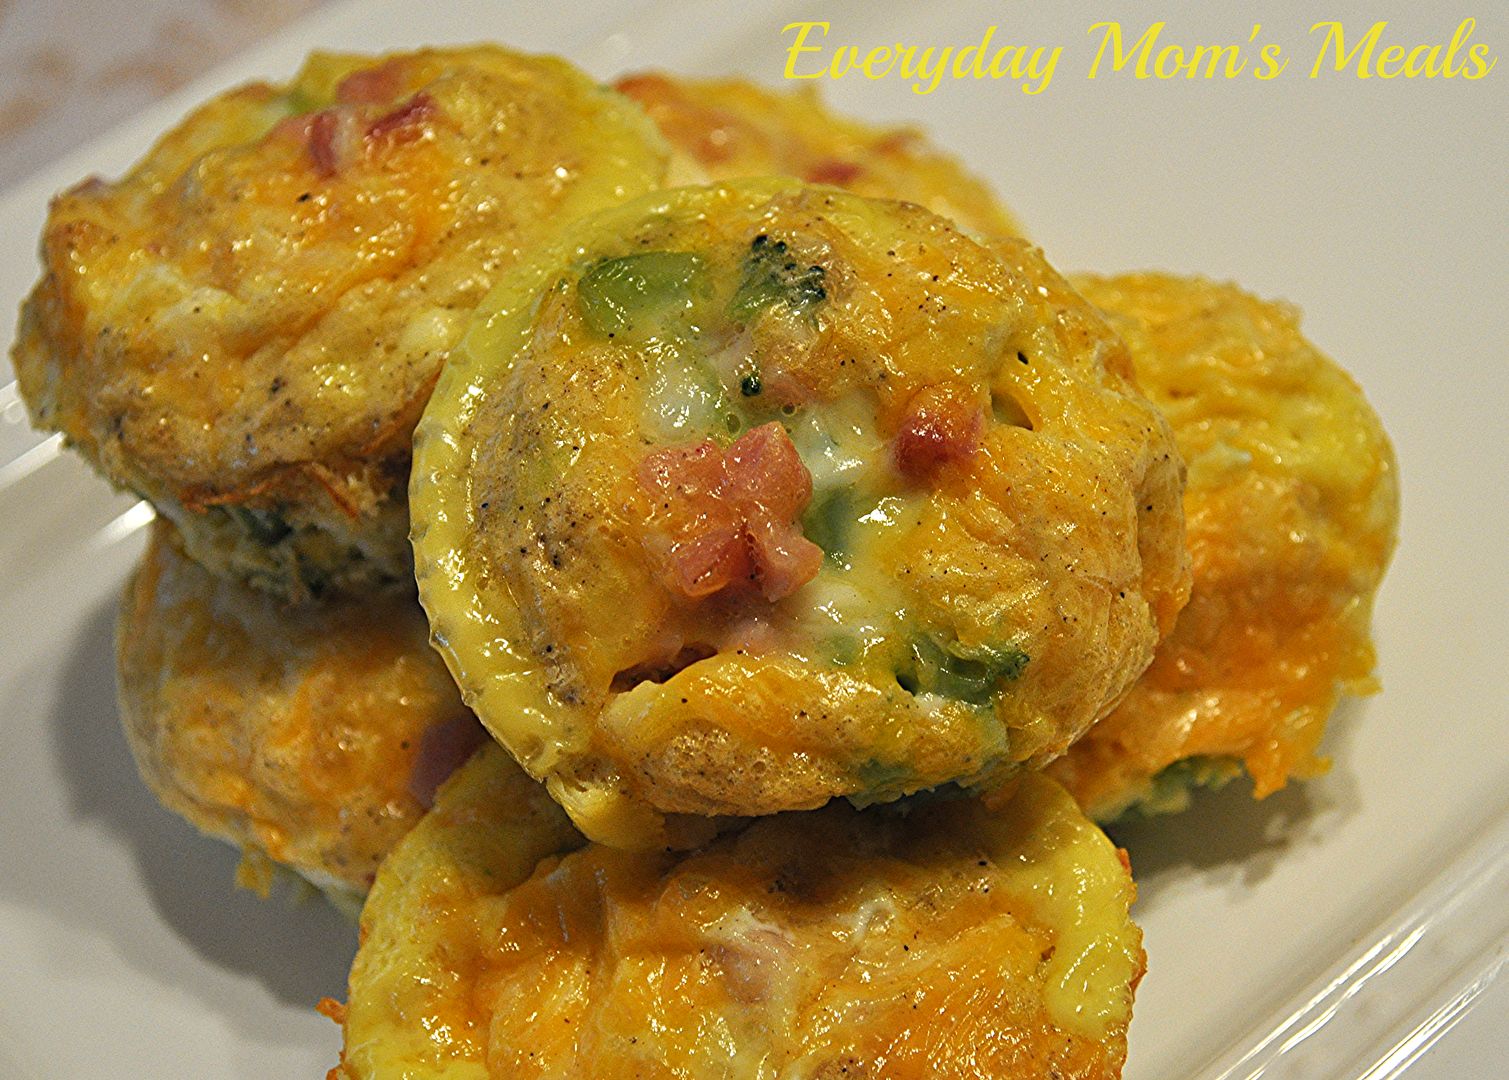
So, I explained to my son how this was just one food request I didn't think I could come through on, but I promised to take the baked omelet idea and turn up the factor a little, just for him. And that is when these mini baked omelets were born. I figured take some fresh ingredients, add some eggs, put everything in a muffin tin and bake it. I get the ease of a baked version, and the little guy gets omelets just his size.

These would be perfect for Christmas morning, or a brunch where you have to feed a crowd. You can pump out a whole pan of these in almost no time; and you can even swap out the ingredients in every single cup to fit everyone's favorites. Don't stand over the stove in a make shift omelet bar. Do this instead and feed everyone in almost no time at all!

There aren't many requests I will deny my son, but when it's something I have accepted I can't do, and moved on with my life, I have to find another way to make his wish come true. After all, I'm his Mommy and that's my job!

Egg, Broccoli and Ham Muffins
1 (12 oz.) bag frozen chopped broccoli, thawed
1 (8 oz.) bag diced ham
1 (8 oz.) bag Mexican style cheese
12 eggs, beaten
Salt an Pepper to taste

Preheat oven to 350. Grease a muffin tin liberally. Equally divide broccoli, ham and cheese among tin, only filling each vessel about 1/3 of the way. Pour eggs over, evenly, reaching 3/4 way to top. (They will puff when cooked) Bake for 25-30 minutes until toothpick comes out clean. Let sit 5 minutes and then carefully run knife along edge to loosen.


Shared on The Country Cook Dec. 20, 2013

Eggs at Very Good Recipes
One week folks! That's right, in case you haven't been paying attention, we only have 7 days until the big day! Have your kids been counting down for days now? Heck, have you? Do you still have a ton of things on your to-do list? Rather you are ready or not, it's coming and fast!

But if one of the things on your list is to find a great idea for Christmas morning breakfast, your favorite everyday mom has you covered! Stay calm and relax because you've come to the right place and I have a great idea for you.

This recipe came about because of a request from my son. He decided to ask me if I would make omelets for supper one night. Now, breakfast for supper is a very common occurrence in this house, so that wasn't the issue. The problem was what he asked for. See, I can't make an omelet in the skillet to save my life. If you have ever seen my recipe for Baked Omelet I talked about this at length. How I've tried and tried and they just never come out right, so I admitted defeat and began baking a big omelet in the oven.

So, I explained to my son how this was just one food request I didn't think I could come through on, but I promised to take the baked omelet idea and turn up the factor a little, just for him. And that is when these mini baked omelets were born. I figured take some fresh ingredients, add some eggs, put everything in a muffin tin and bake it. I get the ease of a baked version, and the little guy gets omelets just his size.

These would be perfect for Christmas morning, or a brunch where you have to feed a crowd. You can pump out a whole pan of these in almost no time; and you can even swap out the ingredients in every single cup to fit everyone's favorites. Don't stand over the stove in a make shift omelet bar. Do this instead and feed everyone in almost no time at all!

There aren't many requests I will deny my son, but when it's something I have accepted I can't do, and moved on with my life, I have to find another way to make his wish come true. After all, I'm his Mommy and that's my job!

Egg, Broccoli and Ham Muffins
1 (12 oz.) bag frozen chopped broccoli, thawed
1 (8 oz.) bag diced ham
1 (8 oz.) bag Mexican style cheese
12 eggs, beaten
Salt an Pepper to taste

Preheat oven to 350. Grease a muffin tin liberally. Equally divide broccoli, ham and cheese among tin, only filling each vessel about 1/3 of the way. Pour eggs over, evenly, reaching 3/4 way to top. (They will puff when cooked) Bake for 25-30 minutes until toothpick comes out clean. Let sit 5 minutes and then carefully run knife along edge to loosen.

Shared on The Country Cook Dec. 20, 2013

Eggs at Very Good Recipes
reade more... Résuméabuiyad

Soul Food Saturday #35

Good Morning! I hope this weekend finds you warm and cozy. If you live in a part of the country, like we do, where the deep freeze set in this past week, I hope you are thawing out. Temps below 0 and wind chills around -15 are not what I consider fun! But the snow came with them, and that makes for a happy little boy! Today we've got something the kiddies will love for Christmas...and maybe they will even want to share with Santa!


Are you still looking for ideas for all those holiday parties coming your way? Don't you love when you show up with the one thing that everyone loves? Especially when the kids do too/ You know someone is going to ask you for the recipe, and why not share the holiday spirit in one more way. This is an oldie but goodie recipe for me. I have always loved our beloved Rice Krispie treats, who doesn’t? But I have also loved so many other cereals along the way. So just for you and in giving more during this holiday season here is a treat made just like our favorite, but with Pebbles cereal instead. This one uses the fruity variety keeping in tune with our Christmas theme. Grab a few bags of marshmallows you’ll want to make a few batches of these.
Christmas Treats Adapted from Rice Krispies
3 tbs. butter
1 (10 oz.) package regular marshmallows
6 c. Fruity Pebbles cereal

In a large saucepan melt butter over low heat. Add marshmallows and stir until completely melted. Remove from heat.  Add fruity pebbles cereal. Stir until well coated.
Using buttered spatula or wax paper evenly press mixture into 13 x 9 x 2-inch pan coated with cooking spray. Cool. Cut into 2-inch squares. Best if served the same day.


Good Morning! I hope this weekend finds you warm and cozy. If you live in a part of the country, like we do, where the deep freeze set in this past week, I hope you are thawing out. Temps below 0 and wind chills around -15 are not what I consider fun! But the snow came with them, and that makes for a happy little boy! Today we've got something the kiddies will love for Christmas...and maybe they will even want to share with Santa!


Are you still looking for ideas for all those holiday parties coming your way? Don't you love when you show up with the one thing that everyone loves? Especially when the kids do too/ You know someone is going to ask you for the recipe, and why not share the holiday spirit in one more way. This is an oldie but goodie recipe for me. I have always loved our beloved Rice Krispie treats, who doesn’t? But I have also loved so many other cereals along the way. So just for you and in giving more during this holiday season here is a treat made just like our favorite, but with Pebbles cereal instead. This one uses the fruity variety keeping in tune with our Christmas theme. Grab a few bags of marshmallows you’ll want to make a few batches of these.
Christmas Treats Adapted from Rice Krispies
3 tbs. butter
1 (10 oz.) package regular marshmallows
6 c. Fruity Pebbles cereal

In a large saucepan melt butter over low heat. Add marshmallows and stir until completely melted. Remove from heat.  Add fruity pebbles cereal. Stir until well coated.
Using buttered spatula or wax paper evenly press mixture into 13 x 9 x 2-inch pan coated with cooking spray. Cool. Cut into 2-inch squares. Best if served the same day.


reade more... Résuméabuiyad

After School Snack Inspiration

After school snacks. We all had our favorites, and our children have theirs. But there have always been stand-bys that moms everywhere depend on, knowing they will be loved no matter how many times the little ones come home to them. Cookies and milk. Veggies with dip. Apple slices and caramel. Peanut Butter and bananas. They are what we turn to when the child walks through the door starving, and you want to make sure they get a little nosh, but don't ruin their supper. And the last one in that list was the inspiration for this dessert.

Oh, and have you seen the mini graham cracker pie shells in the baking aisle? They were also inspiration for this recipe. I've used them several times now and love them. They allow me to make mini desserts that are cute, simple and the perfect serving size! If you haven't, they are right there next to the other pre-made crusts!

Basically I had bought these mini pie shells but had no idea what I was going to do with them yet. Then I started thinking of new flavor combinations for pies, and with my brainstorming, this happened. If you love the flavors of banana and peanut butter together, you're gonna flip for this! Plus, something magical happens when the pudding meets the peanut butter and then they both meet the Cool Whip. It's a wonderful thing.

Now, I know some out there are going to look at this recipe and be critical of just how much help I took from the store. That's fine, go ahead and hate. But I'm okay with it, and I know many of my fellow crazy busy moms out there will appreciate it. If you have the time to make fresh banana pie filling, go for it! Or if you prefer to use a box of instant pie filling, go ahead. I actually probably would have done that myself had I not been able to find the canned variety.

These would be perfect if you're hosting a Halloween party later this week. Kids will enjoy the flavor and size. Adults will love the flavors reminding them of their childhood. It's a win win dessert...

Mini Peanut Butter and Banana Pies
12 mini graham cracker pie shells
1 (21 oz.) can banana cream pie filling
1 (4 serving) box instant vanilla pudding
1 c. cold milk
1 tub Cool Whip
1/2 c. creamy peanut butter
Roasted Peanuts, chopped, for garnish

In a medium bowl combine pudding mix and milk. Whisk for 2 minutes. It will be thick. Stir in peanut butter. Mix well. Gently fold in Cool Whip. Divide pie filling among pie shells, about 2 TBS each. Add peanut butter mixture to a gallon sized plastic bag. Cut off tip, creating a pastry bag. Pipe peanut butter mixture evenly over each pie. Top with chopped peanut. Chill to set, about an hour. Refrigerate any leftovers. *NOTE* When measuring out the peanut butter, first run the measuring cup under hot water. This will allow the peanut butter to slide out easily.


Shared on The Country Cook November 1, 2013


Peanut Butter at Very Good Recipes
After school snacks. We all had our favorites, and our children have theirs. But there have always been stand-bys that moms everywhere depend on, knowing they will be loved no matter how many times the little ones come home to them. Cookies and milk. Veggies with dip. Apple slices and caramel. Peanut Butter and bananas. They are what we turn to when the child walks through the door starving, and you want to make sure they get a little nosh, but don't ruin their supper. And the last one in that list was the inspiration for this dessert.

Oh, and have you seen the mini graham cracker pie shells in the baking aisle? They were also inspiration for this recipe. I've used them several times now and love them. They allow me to make mini desserts that are cute, simple and the perfect serving size! If you haven't, they are right there next to the other pre-made crusts!

Basically I had bought these mini pie shells but had no idea what I was going to do with them yet. Then I started thinking of new flavor combinations for pies, and with my brainstorming, this happened. If you love the flavors of banana and peanut butter together, you're gonna flip for this! Plus, something magical happens when the pudding meets the peanut butter and then they both meet the Cool Whip. It's a wonderful thing.

Now, I know some out there are going to look at this recipe and be critical of just how much help I took from the store. That's fine, go ahead and hate. But I'm okay with it, and I know many of my fellow crazy busy moms out there will appreciate it. If you have the time to make fresh banana pie filling, go for it! Or if you prefer to use a box of instant pie filling, go ahead. I actually probably would have done that myself had I not been able to find the canned variety.

These would be perfect if you're hosting a Halloween party later this week. Kids will enjoy the flavor and size. Adults will love the flavors reminding them of their childhood. It's a win win dessert...

Mini Peanut Butter and Banana Pies
12 mini graham cracker pie shells
1 (21 oz.) can banana cream pie filling
1 (4 serving) box instant vanilla pudding
1 c. cold milk
1 tub Cool Whip
1/2 c. creamy peanut butter
Roasted Peanuts, chopped, for garnish

In a medium bowl combine pudding mix and milk. Whisk for 2 minutes. It will be thick. Stir in peanut butter. Mix well. Gently fold in Cool Whip. Divide pie filling among pie shells, about 2 TBS each. Add peanut butter mixture to a gallon sized plastic bag. Cut off tip, creating a pastry bag. Pipe peanut butter mixture evenly over each pie. Top with chopped peanut. Chill to set, about an hour. Refrigerate any leftovers. *NOTE* When measuring out the peanut butter, first run the measuring cup under hot water. This will allow the peanut butter to slide out easily.


Shared on The Country Cook November 1, 2013


Peanut Butter at Very Good Recipes
reade more... Résuméabuiyad

Soul Food Saturday #28

Welcome to the last weekend in October! Halloween is knocking on the door, and before we meet again it will be November! Today Bekki is here with a fun dessert perfect for this time of year. Serve it at your next bonfire party, save it for the upcoming holiday parties, either way, I think you're going to love this one!


Lately I have been thinking a lot about desserts. Maybe it’s the idea of the Holiday season just around the corner. I have pumpkin, apple, and every other kind of pie dancing through my mind. I saw this recipe on Facebook and it looked so delicious, I couldn't pass up the chance to give them a try. With a little tweak here and there voila I was off and running. The ingredients are easily swapped to recreate your favorite pie. Bring the kids in to help you with this one, they may just surprise you by creating a new favorite for the whole family to enjoy.

Apple Pie Egg Rolls Adapted from Spending with Pennies
3 c. apples, peeled and diced (approx. 3 apples)
4 tbs. honey
3/4 tsp. Apple Pie Spice
12 Egg Roll Wrappers
Oil for Frying

Combine all filling ingredients and mix well. First, place 2 full tablespoons of filling in the center of each wrapper. Moisten around entire edge with water to seal, with either your finger, or a brush. Start fold by folding corners over the filling. Then pull bottom corner over and keep rolling until it’s tightly wrapped. Repeat with the rest of wrappers. **Note: Be sure that the edges are sealed well, so the filling does not ooze out and cause the oil to splatter** In a skillet, heat oil to 350 degrees F. Fry a few at a time, for 4-5 minutes or until golden brown. Drain on paper towels. Top with powdered sugar, or eat plain with a tall glass of milk. Either way you choose, they are sure to fill that sweet tooth quick. Enjoy!


Welcome to the last weekend in October! Halloween is knocking on the door, and before we meet again it will be November! Today Bekki is here with a fun dessert perfect for this time of year. Serve it at your next bonfire party, save it for the upcoming holiday parties, either way, I think you're going to love this one!


Lately I have been thinking a lot about desserts. Maybe it’s the idea of the Holiday season just around the corner. I have pumpkin, apple, and every other kind of pie dancing through my mind. I saw this recipe on Facebook and it looked so delicious, I couldn't pass up the chance to give them a try. With a little tweak here and there voila I was off and running. The ingredients are easily swapped to recreate your favorite pie. Bring the kids in to help you with this one, they may just surprise you by creating a new favorite for the whole family to enjoy.

Apple Pie Egg Rolls Adapted from Spending with Pennies
3 c. apples, peeled and diced (approx. 3 apples)
4 tbs. honey
3/4 tsp. Apple Pie Spice
12 Egg Roll Wrappers
Oil for Frying

Combine all filling ingredients and mix well. First, place 2 full tablespoons of filling in the center of each wrapper. Moisten around entire edge with water to seal, with either your finger, or a brush. Start fold by folding corners over the filling. Then pull bottom corner over and keep rolling until it’s tightly wrapped. Repeat with the rest of wrappers. **Note: Be sure that the edges are sealed well, so the filling does not ooze out and cause the oil to splatter** In a skillet, heat oil to 350 degrees F. Fry a few at a time, for 4-5 minutes or until golden brown. Drain on paper towels. Top with powdered sugar, or eat plain with a tall glass of milk. Either way you choose, they are sure to fill that sweet tooth quick. Enjoy!


reade more... Résuméabuiyad

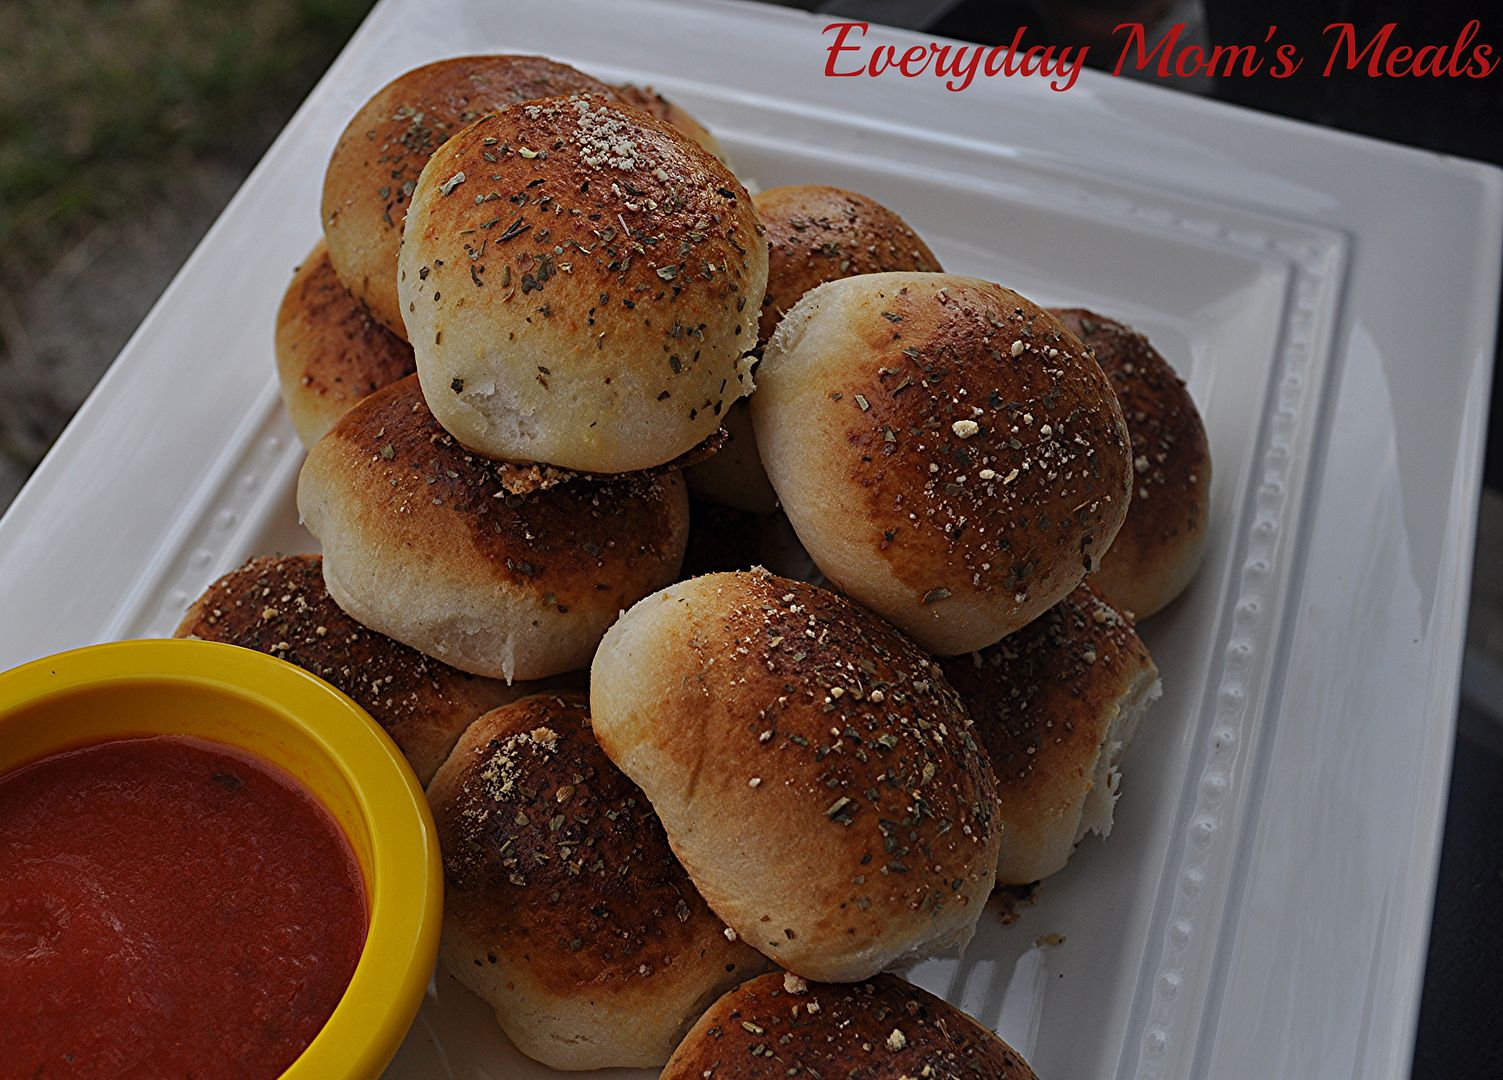
Bonfire Bundles

This time of year I always try to provide you with a great idea for your upcoming Halloween party, or if your family is like ours and the evening is a simple one of neighborhood trick-or-treating, and supper needs to be quick and simple, something that would work for that too. Well, today is the day!

If your house is the place to be Halloween night, with friends and family dropping by, or a huge kids party, these would be a huge hit! I guarantee! Have a big platter of these sitting next to your cauldron of apple cider, and all the little ghoulish guests will flip! Rather it is held indoors, our out next to the biggest bonfire of the season, they are the perfect party food!

Our Halloween does indeed include a party, but I am not the host. We actually go back to my hometown (about 15 minutes from our house) so Alex can trick-or-treat in the neighborhood I grew up in, and then head to the local volunteer Fire Department for the fun filled party, with games, costume contests, door prizes and candy galore! It's a great tradition I'm so excited to be continuing with him. It allows his grandma to always be part of the festivities and it's kinda nice to see something I enjoyed so much as a child still going strong, and a community still enjoying it.

But all of this going on between the hours of 6pm and 8pm means supper needs to be quick, simple, but most of all FUN! I like treating him to something "party inspired" on Halloween, and it's usually something he can eat with his hands. Plus, it needs to be on the light side. Between the excitement of the night, and the sheer rush, supper really isn't high on his priority list.

These take the fun and yumminess of pizza and turns them into something new, adorable, and 100% kid friendly! Three things that all food should be on Halloween!

However you are spending next Thursday night, I hope it's full of smiles, more treats than tricks and some delicious food, not just Snickers and Butterfingers!

Mini Pizza Bundles Inspired by The Gunny Sack
20 refrigerated buttermilk biscuits
20 pieces pepperoni
2-3 String Cheese, cut into 20 small chunks
1 egg, beaten
Parmesan Cheese
Italian Seasoning
Garlic Powder
Pizza Sauce

Preheat oven to 425. Grease a 9x13 baking dish. Flatten each biscuit out. Lay a piece
of pepperoni on each, then a piece of string cheese. Gather sides of biscuit up, forming a bundle. Lay, seam side down in baking dish. Brush all with egg. Sprinkle with Parmesan, Garlic Powder and Italian Seasoning. Bake 18-20 minutes until browned. Serve with warm pizza sauce for dipping.


Shared on The Country Cook Oct. 25, 2013

Appetizer at Very Good Recipes
This time of year I always try to provide you with a great idea for your upcoming Halloween party, or if your family is like ours and the evening is a simple one of neighborhood trick-or-treating, and supper needs to be quick and simple, something that would work for that too. Well, today is the day!

If your house is the place to be Halloween night, with friends and family dropping by, or a huge kids party, these would be a huge hit! I guarantee! Have a big platter of these sitting next to your cauldron of apple cider, and all the little ghoulish guests will flip! Rather it is held indoors, our out next to the biggest bonfire of the season, they are the perfect party food!

Our Halloween does indeed include a party, but I am not the host. We actually go back to my hometown (about 15 minutes from our house) so Alex can trick-or-treat in the neighborhood I grew up in, and then head to the local volunteer Fire Department for the fun filled party, with games, costume contests, door prizes and candy galore! It's a great tradition I'm so excited to be continuing with him. It allows his grandma to always be part of the festivities and it's kinda nice to see something I enjoyed so much as a child still going strong, and a community still enjoying it.

But all of this going on between the hours of 6pm and 8pm means supper needs to be quick, simple, but most of all FUN! I like treating him to something "party inspired" on Halloween, and it's usually something he can eat with his hands. Plus, it needs to be on the light side. Between the excitement of the night, and the sheer rush, supper really isn't high on his priority list.

These take the fun and yumminess of pizza and turns them into something new, adorable, and 100% kid friendly! Three things that all food should be on Halloween!

However you are spending next Thursday night, I hope it's full of smiles, more treats than tricks and some delicious food, not just Snickers and Butterfingers!

Mini Pizza Bundles Inspired by The Gunny Sack
20 refrigerated buttermilk biscuits
20 pieces pepperoni
2-3 String Cheese, cut into 20 small chunks
1 egg, beaten
Parmesan Cheese
Italian Seasoning
Garlic Powder
Pizza Sauce

Preheat oven to 425. Grease a 9x13 baking dish. Flatten each biscuit out. Lay a piece
of pepperoni on each, then a piece of string cheese. Gather sides of biscuit up, forming a bundle. Lay, seam side down in baking dish. Brush all with egg. Sprinkle with Parmesan, Garlic Powder and Italian Seasoning. Bake 18-20 minutes until browned. Serve with warm pizza sauce for dipping.


Shared on The Country Cook Oct. 25, 2013

Appetizer at Very Good Recipes
reade more... Résuméabuiyad

A Cupcake Twist

Some of the most comforting recipes I have, also happen to be some of the most time consuming. Not that I'm complaining, it's just something I have to remember when I start craving them on days when I'm simply not going to have the time to make them. That's why I was so excited to find this recipe. It's super simple, reminds me of a cross between chicken pot pie and chicken noodle soup (two comfort foods at the top of my favorites list!) and is so adorable beyond words!

I swear, if your kids are anything like my son, the minute they are in the house after school, the first question they have is "What's for supper?" Well, imagine their excitement when you tell them you're having cupcakes! Yeah, I got a strange look from Alex on that one. He really thought I'd lost my mind. But then when they were baked and I put a couple on his plate he was thrilled with the play on words.

Now, his one question, thinking the was going to be funny was "But Mommy, they aren't frosted." Ha! Yes, they are, it's just done before you bake instead of after, and the frosting is made out of butter and seasonings instead of colored sugar!

These make a great, simple, fall meal any night of the week. Or if you're hosting a crowd, a big platter of them would be cute and something new for a party.

Comfort foods that simmer and cook all day just like mom used to make are one of life's simple pleasures and are to be treasured. But ones that are quick and easy for our busy lives, that are delicious too, are just as valuable to busy moms every where!

Chicken n Noodle Cupcakes Inspired by Pillsbury
1 can (8 ct.) Grands® biscuits, each separated into 2 layers each
1 (19 oz.) can Progresso® traditional chicken noodle soup
2 TBS softened butter
1 tsp. dried Italian seasoning
1/2 tsp. garlic powder

Preheat oven to 375. Spray a muffin tin with cooking spray. Place 8 of the biscuit layers into the muffin tins, working up the sides to create a "cup". Drain soup. Spoon about 2 TBS into each muffin cup. Top each muffin top with the remaining layers. Seal to close. Using a butter knife, carefully spread butter on the top of each. Sprinkle with Italian seasoning and garlic powder. Bake for 15-18 minutes until golden brown. 


Shared on The Country Cook Oct. 25, 2013


Chicken at Very Good Recipes


Some of the most comforting recipes I have, also happen to be some of the most time consuming. Not that I'm complaining, it's just something I have to remember when I start craving them on days when I'm simply not going to have the time to make them. That's why I was so excited to find this recipe. It's super simple, reminds me of a cross between chicken pot pie and chicken noodle soup (two comfort foods at the top of my favorites list!) and is so adorable beyond words!

I swear, if your kids are anything like my son, the minute they are in the house after school, the first question they have is "What's for supper?" Well, imagine their excitement when you tell them you're having cupcakes! Yeah, I got a strange look from Alex on that one. He really thought I'd lost my mind. But then when they were baked and I put a couple on his plate he was thrilled with the play on words.

Now, his one question, thinking the was going to be funny was "But Mommy, they aren't frosted." Ha! Yes, they are, it's just done before you bake instead of after, and the frosting is made out of butter and seasonings instead of colored sugar!

These make a great, simple, fall meal any night of the week. Or if you're hosting a crowd, a big platter of them would be cute and something new for a party.

Comfort foods that simmer and cook all day just like mom used to make are one of life's simple pleasures and are to be treasured. But ones that are quick and easy for our busy lives, that are delicious too, are just as valuable to busy moms every where!

Chicken n Noodle Cupcakes Inspired by Pillsbury
1 can (8 ct.) Grands® biscuits, each separated into 2 layers each
1 (19 oz.) can Progresso® traditional chicken noodle soup
2 TBS softened butter
1 tsp. dried Italian seasoning
1/2 tsp. garlic powder

Preheat oven to 375. Spray a muffin tin with cooking spray. Place 8 of the biscuit layers into the muffin tins, working up the sides to create a "cup". Drain soup. Spoon about 2 TBS into each muffin cup. Top each muffin top with the remaining layers. Seal to close. Using a butter knife, carefully spread butter on the top of each. Sprinkle with Italian seasoning and garlic powder. Bake for 15-18 minutes until golden brown. 


Shared on The Country Cook Oct. 25, 2013


Chicken at Very Good Recipes


reade more... Résuméabuiyad

Weeknight Rush

Is it just me or are the weeknights becoming more and more rushed? Between homework, after school activities and every day life, I am pretty sure the hours between 3:30 and 8 pm are some of the busiest in my life. So, it's so nice when I can come up with a meal that is quick, tasty and has us going back out the door on time!

You've heard me say it before, but I think it bears repeating. Casseroles are a mom's best friend. I know many people turn their noses up at just the word, but to me, if I can put a bunch of things into one pan, throw it in the oven and in about 30 minutes have dinner on the table, I am a happy mama. Sure, there are some casseroles out there that were simply never meant to be, most likely because someone started throwing ingredients together that had no business being paired, but those aren't the ones I'm talking about. I mean the ones that are made up of things we already love, that compliment each other, and simply make sense hanging out in one simple dish.

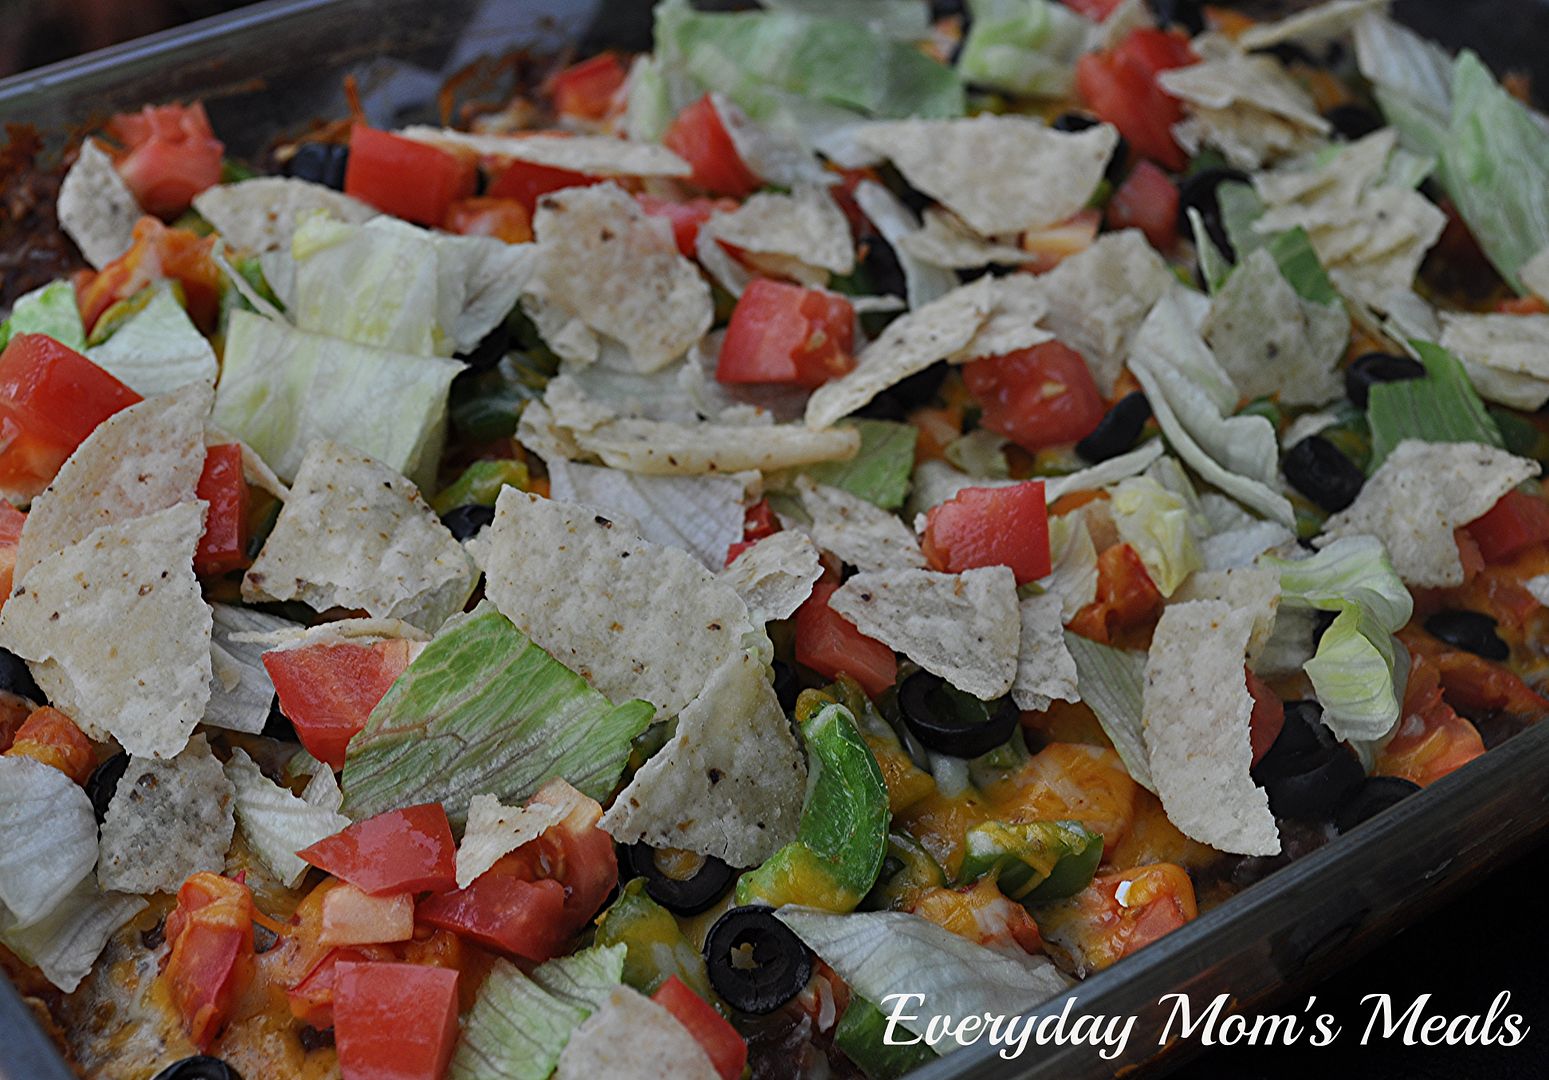
Tacos. We love them. Taco fixins'. We love those too. So why not take everything I would normally have out for a "taco bar", and see what kind of casserole I can make? See, this is my thought process. And I know I'm not the first one to have this crazy notion.

So here is a simple, delicious Mexican casserole perfect for any crazy, crammed full of things to do, weeknight! Adapt it with your favorite ingredients. Have the kids help pick out what things they want in it. Easy, yummy and fun for the whole family. I told you a good casserole is a mom's best friend!

Taco Casserole
1 lb. ground beef
1 packet taco seasoning
1 (16 oz.) can refried black beans with onion and garlic
1 (16 oz.) jar mild chunky salsa
1 green pepper, chopped
1 (2.2 oz) can sliced black olives
3 Roma tomatoes, chopped, divided
1 c. shredded taco cheese
Shredded Lettuce
Tortilla Chips, slightly crushed

Preheat oven to 350. Add enough broken tortilla chips to bottom of 9x13 dish to cover. In a large skillet brown beef until no longer pink. Add taco seasoning, stir well. Add beans and salsa. Stir well. Cook 5-7 minutes to allow flavors to combine. Add to top of chips. Spread evenly. Add green pepper and 2/3 chopped tomato. Sprinkle top with cheese and black olives. Bake for 20-25 minutes until cheese melts. Top with rest of tomato, lettuce and more broken chips.


Shared on The Country Cook Oct. 11, 2013


  Casseroles at Very Good Recipes
Is it just me or are the weeknights becoming more and more rushed? Between homework, after school activities and every day life, I am pretty sure the hours between 3:30 and 8 pm are some of the busiest in my life. So, it's so nice when I can come up with a meal that is quick, tasty and has us going back out the door on time!

You've heard me say it before, but I think it bears repeating. Casseroles are a mom's best friend. I know many people turn their noses up at just the word, but to me, if I can put a bunch of things into one pan, throw it in the oven and in about 30 minutes have dinner on the table, I am a happy mama. Sure, there are some casseroles out there that were simply never meant to be, most likely because someone started throwing ingredients together that had no business being paired, but those aren't the ones I'm talking about. I mean the ones that are made up of things we already love, that compliment each other, and simply make sense hanging out in one simple dish.

Tacos. We love them. Taco fixins'. We love those too. So why not take everything I would normally have out for a "taco bar", and see what kind of casserole I can make? See, this is my thought process. And I know I'm not the first one to have this crazy notion.

So here is a simple, delicious Mexican casserole perfect for any crazy, crammed full of things to do, weeknight! Adapt it with your favorite ingredients. Have the kids help pick out what things they want in it. Easy, yummy and fun for the whole family. I told you a good casserole is a mom's best friend!

Taco Casserole
1 lb. ground beef
1 packet taco seasoning
1 (16 oz.) can refried black beans with onion and garlic
1 (16 oz.) jar mild chunky salsa
1 green pepper, chopped
1 (2.2 oz) can sliced black olives
3 Roma tomatoes, chopped, divided
1 c. shredded taco cheese
Shredded Lettuce
Tortilla Chips, slightly crushed

Preheat oven to 350. Add enough broken tortilla chips to bottom of 9x13 dish to cover. In a large skillet brown beef until no longer pink. Add taco seasoning, stir well. Add beans and salsa. Stir well. Cook 5-7 minutes to allow flavors to combine. Add to top of chips. Spread evenly. Add green pepper and 2/3 chopped tomato. Sprinkle top with cheese and black olives. Bake for 20-25 minutes until cheese melts. Top with rest of tomato, lettuce and more broken chips.


Shared on The Country Cook Oct. 11, 2013


  Casseroles at Very Good Recipes
reade more... Résuméabuiyad

For The Meat Free Fans

We are meat lovin' people. I have never tried to hide that fact. In fact, we wear it as a badge of honor, as we cut into our juicy steaks, pork chops and roasts. I have said it before, and will again, as much as we love our vegetables, there is just not way we could ever give up meat entirely. But I also realize more and more people are doing just that, and making it a true lifestyle change in their life, so today I've got something just for them, or for your parents out there trying to get one more veggie into the kids.

If your kids fight you tooth and nail every time you say "you have to eat your vegetables", I feel for you. I can't say I know how you feel, because as most of you know, my son has never met a vegetable he doesn't like, but I truly do have empathy for those parents who are in the constant struggle. I have a lot of moms ask me how they can entice their kids with meals that include veggies; and I have to be honest with them. When in doubt, pair them with something they already love, or in dire times....hide 'em! And this meal accomplishes both of those in one dish!

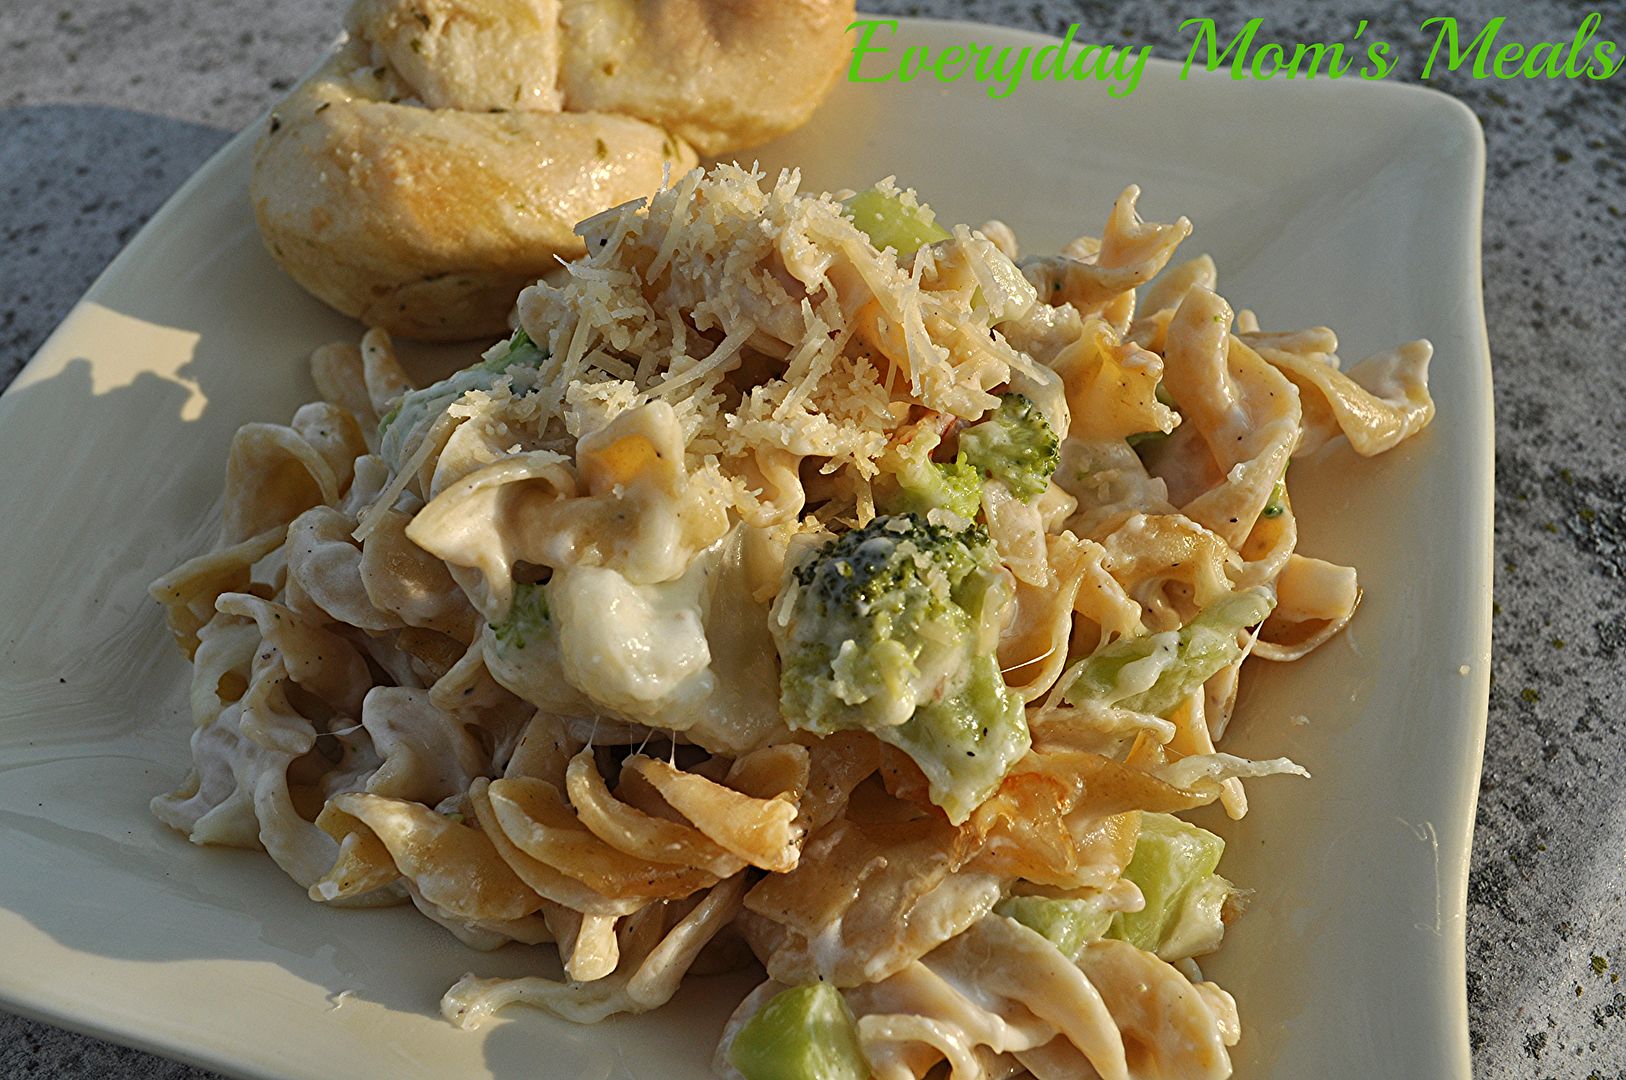
Pasta and cheese. What kid is going to turn that down? And if they happened to have some broccoli and cauliflower mixed in...even better! My family did not miss the meat one bit. In fact, when he first saw it my husband asked if there was chicken in it. (So if your kids ask the same, feel free to tell a little white lie, if it makes dinner time easier!) There is so much ooey gooey cheese, it's hard to even think about the veggies you are eating. But if you're a veggie lover, like us, you too will enjoy every single bite.

I know many who are taking the meat free option, and I respect it 100%. And with the love affair I have with veggies, at times it even sounds appealing. But then a juicy tender medium rare steak waves at me from the grill and I'm once again reminded of how much we enjoy it. But if you are looking for more meat free options, or simply trying to incorporate more veggies into your kids' diets, this meal will satisfy all!

Cheesy Veggie Pasta Bake Featured on SpacesQuarterly.com
3 c. frozen chopped broccoli, thawed
2 c. frozen cauliflower, thawed and cut into small pieces
1 (10 3/4 oz.) can cream of mushroom soup, undiluted
12 oz. egg noodles, cooked and drained
1 c. sour cream
2 c. shredded mozzarella cheese
1/2 c. shredded Parmesan cheese
1 tsp. onion powder
Salt and Pepper to taste

Preheat oven to 350. In a large bowl combine broccoli, cauliflower, soup, noodles, sour cream, onion powder, salt, pepper and ½ c. mozzarella. Pour into a greased 9×13 baking pan. Top with remaining mozzarella and Parmesan. Bake, uncovered, 30 minutes or until bubbly.


Shared on The Country Cook Sept. 20, 2013
Pasta at Very Good Recipes
We are meat lovin' people. I have never tried to hide that fact. In fact, we wear it as a badge of honor, as we cut into our juicy steaks, pork chops and roasts. I have said it before, and will again, as much as we love our vegetables, there is just not way we could ever give up meat entirely. But I also realize more and more people are doing just that, and making it a true lifestyle change in their life, so today I've got something just for them, or for your parents out there trying to get one more veggie into the kids.

If your kids fight you tooth and nail every time you say "you have to eat your vegetables", I feel for you. I can't say I know how you feel, because as most of you know, my son has never met a vegetable he doesn't like, but I truly do have empathy for those parents who are in the constant struggle. I have a lot of moms ask me how they can entice their kids with meals that include veggies; and I have to be honest with them. When in doubt, pair them with something they already love, or in dire times....hide 'em! And this meal accomplishes both of those in one dish!

Pasta and cheese. What kid is going to turn that down? And if they happened to have some broccoli and cauliflower mixed in...even better! My family did not miss the meat one bit. In fact, when he first saw it my husband asked if there was chicken in it. (So if your kids ask the same, feel free to tell a little white lie, if it makes dinner time easier!) There is so much ooey gooey cheese, it's hard to even think about the veggies you are eating. But if you're a veggie lover, like us, you too will enjoy every single bite.

I know many who are taking the meat free option, and I respect it 100%. And with the love affair I have with veggies, at times it even sounds appealing. But then a juicy tender medium rare steak waves at me from the grill and I'm once again reminded of how much we enjoy it. But if you are looking for more meat free options, or simply trying to incorporate more veggies into your kids' diets, this meal will satisfy all!

Cheesy Veggie Pasta Bake Featured on SpacesQuarterly.com
3 c. frozen chopped broccoli, thawed
2 c. frozen cauliflower, thawed and cut into small pieces
1 (10 3/4 oz.) can cream of mushroom soup, undiluted
12 oz. egg noodles, cooked and drained
1 c. sour cream
2 c. shredded mozzarella cheese
1/2 c. shredded Parmesan cheese
1 tsp. onion powder
Salt and Pepper to taste

Preheat oven to 350. In a large bowl combine broccoli, cauliflower, soup, noodles, sour cream, onion powder, salt, pepper and ½ c. mozzarella. Pour into a greased 9×13 baking pan. Top with remaining mozzarella and Parmesan. Bake, uncovered, 30 minutes or until bubbly.


Shared on The Country Cook Sept. 20, 2013
Pasta at Very Good Recipes
reade more... Résuméabuiyad

Alex Makes Dessert

Nine years ago today I received the most precious gift of my life. God brought our beautiful baby boy into this world, forever making me the luckiest Mommy ever. 

That's right, it's Monkey's birthday!!! I am celebrating my favorite little man today. The one whose smile can instantly make my day go from bad to great, the one whose hugs and kisses complete my world, and the one who when he says "I love you, Mommy", makes my heart skip a beat and my soul leap for joy. 

I thought instead of sharing something I made for him, it would be fun to share something with you that he made himself! That's right this is so simple, that with just a little help from Mommy (or any other adult) a little monkey can make it! 

It was Labor Day weekend and Alex wanted to be in the kitchen, so I figured why not put him in charge of dessert! He and I love anything peach, so we couldn't wait to try this. But to be honest, even his Daddy, who isn't the biggest peach fan in the world, could not get enough. Mixing the sugar with the peaches, even though they are drained, forms this almost custard like filling that takes this from good to outstanding. 

If you are looking for an easy sweet treat tonight, maybe your little ones could have a hand in making it. 

~Happy Birthday Alex! We could not love you more. 
The day we had you, God gave us the world.~


Easy Peach Cobbler From Betty Crocker
1 c. original Bisquick mix
1 c. milk
1/2 tsp. ground nutmeg
1/2 c. butter, melted
1 c. sugar
1 (29 oz.) can sliced peaches, drained
Cinnamon for garnish

Preheat oven to 375. Stir together Bisquick, milk and nutmeg in an ungreased 8x8 baking pan. Stir in butter until blended. Stir together sugar and peaches. Spoon over batter. Bake 50-60 minutes until golden. Sprinkle with cinnamon before serving.


Shared on The Country Cook Sept. 20, 2013


Nine years ago today I received the most precious gift of my life. God brought our beautiful baby boy into this world, forever making me the luckiest Mommy ever. 

That's right, it's Monkey's birthday!!! I am celebrating my favorite little man today. The one whose smile can instantly make my day go from bad to great, the one whose hugs and kisses complete my world, and the one who when he says "I love you, Mommy", makes my heart skip a beat and my soul leap for joy. 

I thought instead of sharing something I made for him, it would be fun to share something with you that he made himself! That's right this is so simple, that with just a little help from Mommy (or any other adult) a little monkey can make it! 

It was Labor Day weekend and Alex wanted to be in the kitchen, so I figured why not put him in charge of dessert! He and I love anything peach, so we couldn't wait to try this. But to be honest, even his Daddy, who isn't the biggest peach fan in the world, could not get enough. Mixing the sugar with the peaches, even though they are drained, forms this almost custard like filling that takes this from good to outstanding. 

If you are looking for an easy sweet treat tonight, maybe your little ones could have a hand in making it. 

~Happy Birthday Alex! We could not love you more. 
The day we had you, God gave us the world.~


Easy Peach Cobbler From Betty Crocker
1 c. original Bisquick mix
1 c. milk
1/2 tsp. ground nutmeg
1/2 c. butter, melted
1 c. sugar
1 (29 oz.) can sliced peaches, drained
Cinnamon for garnish

Preheat oven to 375. Stir together Bisquick, milk and nutmeg in an ungreased 8x8 baking pan. Stir in butter until blended. Stir together sugar and peaches. Spoon over batter. Bake 50-60 minutes until golden. Sprinkle with cinnamon before serving.


Shared on The Country Cook Sept. 20, 2013


reade more... Résuméabuiyad

Soul Food Saturday #22

It's a special weekend at our house. Monkey will be turning 9 on Monday, and we are celebrating all weekend long! So of course Bekki couldn't have Soul Food Saturday without a little party for her favorite little guy!


Right here on Soul Food Saturday we are celebrating our favorite Monkey’s birthday! Yep, its here again! Can you believe it? It feels like we just celebrated him turning 8. Where has the time gone? It seems like just as fast as these pizzas bake, our Monkey is growing up before our eyes. I want to thank his sweet Mama for sharing him with us all, and giving me this opportunity to celebrate and create this party food for him.

Big love to you from California Alex! May God continue to bless you in every area of your life, keep your heart full of His everlasting love, and show you every moment that you are his beautiful child.
1 can Pillsbury pizza dough
Jar of pizza sauce of your choice
1 c. pizza cheese blend
1 c. Mexican cheese blend
1 package mini pepperoni
1 c. thickly sliced pepperoni
1 c. precooked sausage crumbles
1 jalapeno, chopped
4 sweet mini peppers, sliced
½ c. red onion, sliced
1 tbs. olive oil

Preheat oven to 425°F. Spray cookie sheet with cooking spray; sprinkle with cornmeal. Set aside. Cut roll of dough into 2 equal pieces; shape each piece into a ball. Roll out ball of dough into a 10-inch round. Place the rounds on the prepared cookie sheet; brush each with oil. Bake 6 to 8 minutes.

The Perfect Monkey Combo
Spread round with 4 tablespoons pizza sauce. In a small bowl mix cheese together; sprinkle ½ c. over pizza sauce. Top with 2/3 of pepperoni, half of crumbled sausage, ½ of sweet peppers, ½ of jalapeno and ½ of onions. Then top with ½ c. of blended cheeses. Bake 10 to 13 minutes longer or until crust is golden brown and cheese is melted and bubbly.


Meat Loving Monkey Super Supreme
Spread round with 4 tablespoons pizza sauce. Sprinkle ½ c. cheese over pizza sauce. Top with remaining pepperoni. Add thick sliced pepperoni, remaining half of crumbled sausage, sweet peppers, jalapeno and onions. Finally top with ½ c. cheese. Spread round with 2 tablespoons pizza sauce. Mix 1/2 cup Pizza blend cheese and 1/2 cup Mexican blend cheese; sprinkle half over pizza sauce.


Turbo Booster Punch
You can’t have a party without a great drink, so for this party I chose punch! Because Monkey loves it and so do I.
1 64 oz. can of pineapple juice
1 full cap of presweetened cherry Kool aid
64 oz. water
1 2 liter of 7up
Maraschino cherries
In a large pitcher or punch bowl add water, and kool aide mix. Stir to combine. Add pineapple juice and 7 up and mix to combine. Serve with ice, and garnish with maraschino cherries.

04b746e4bf8d10a6f444e1b911272d19f33bec4cfbf860be27
It's a special weekend at our house. Monkey will be turning 9 on Monday, and we are celebrating all weekend long! So of course Bekki couldn't have Soul Food Saturday without a little party for her favorite little guy!


Right here on Soul Food Saturday we are celebrating our favorite Monkey’s birthday! Yep, its here again! Can you believe it? It feels like we just celebrated him turning 8. Where has the time gone? It seems like just as fast as these pizzas bake, our Monkey is growing up before our eyes. I want to thank his sweet Mama for sharing him with us all, and giving me this opportunity to celebrate and create this party food for him.

Big love to you from California Alex! May God continue to bless you in every area of your life, keep your heart full of His everlasting love, and show you every moment that you are his beautiful child.
1 can Pillsbury pizza dough
Jar of pizza sauce of your choice
1 c. pizza cheese blend
1 c. Mexican cheese blend
1 package mini pepperoni
1 c. thickly sliced pepperoni
1 c. precooked sausage crumbles
1 jalapeno, chopped
4 sweet mini peppers, sliced
½ c. red onion, sliced
1 tbs. olive oil

Preheat oven to 425°F. Spray cookie sheet with cooking spray; sprinkle with cornmeal. Set aside. Cut roll of dough into 2 equal pieces; shape each piece into a ball. Roll out ball of dough into a 10-inch round. Place the rounds on the prepared cookie sheet; brush each with oil. Bake 6 to 8 minutes.

The Perfect Monkey Combo
Spread round with 4 tablespoons pizza sauce. In a small bowl mix cheese together; sprinkle ½ c. over pizza sauce. Top with 2/3 of pepperoni, half of crumbled sausage, ½ of sweet peppers, ½ of jalapeno and ½ of onions. Then top with ½ c. of blended cheeses. Bake 10 to 13 minutes longer or until crust is golden brown and cheese is melted and bubbly.


Meat Loving Monkey Super Supreme
Spread round with 4 tablespoons pizza sauce. Sprinkle ½ c. cheese over pizza sauce. Top with remaining pepperoni. Add thick sliced pepperoni, remaining half of crumbled sausage, sweet peppers, jalapeno and onions. Finally top with ½ c. cheese. Spread round with 2 tablespoons pizza sauce. Mix 1/2 cup Pizza blend cheese and 1/2 cup Mexican blend cheese; sprinkle half over pizza sauce.


Turbo Booster Punch
You can’t have a party without a great drink, so for this party I chose punch! Because Monkey loves it and so do I.
1 64 oz. can of pineapple juice
1 full cap of presweetened cherry Kool aid
64 oz. water
1 2 liter of 7up
Maraschino cherries
In a large pitcher or punch bowl add water, and kool aide mix. Stir to combine. Add pineapple juice and 7 up and mix to combine. Serve with ice, and garnish with maraschino cherries.

04b746e4bf8d10a6f444e1b911272d19f33bec4cfbf860be27
reade more... Résuméabuiyad

He Finally Got His Enchiladas

Today's recipe is another that has appeared on EMM before, but probably before most of you were around to read it. Yes, it was here when I was just getting started, and I'm pretty sure my husband, mother and maybe a few rogue family members were the only ones who saw it. And with the quality of the photograph I included in that original post, I can't say I'm sad about that. Thank goodness my food photography has come a long way since those days! 

This was the perfect time to feature this meal again because it was something little man kept requesting over and over during those months when my oven was out of commission; and as most of you know, it's up and working like a champ again...so we are taking full advantage! 

That first week it was in working order again I asked Alex for some ideas on things he had been craving, but I was unable to make. One of the first things out of his mouth was "enchiladas." And while I have a few different recipes for them, including Chicken and Green Chile, I knew these were what he was talking about, without even asking. What can I say? I know my kid! 

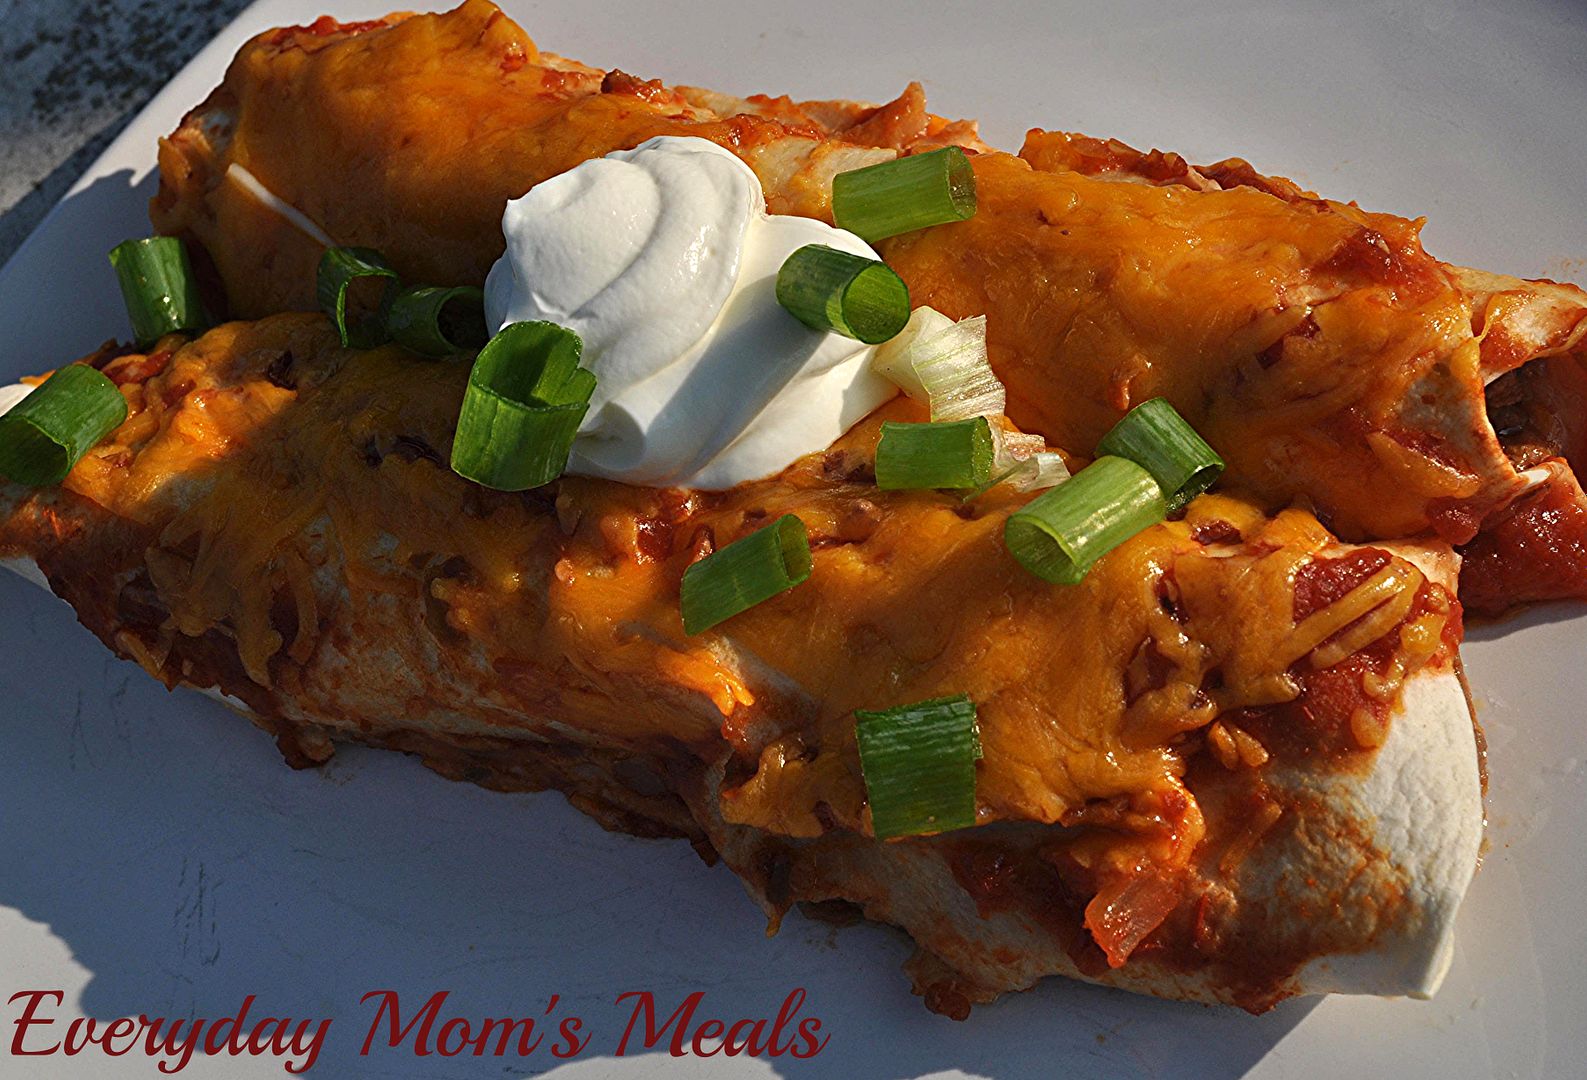
If your family loves Mexican night, but you're tired of the same old tacos, but don't have the time for much more, you will love these. With only a few ingredients and about 30 minutes you can have a tasty Mexican meal on the table they will love. Add some chips and my Restaurant Style Salsa on the side, and they will think they are sitting in their favorite Mexican joint, not gathered around your kitchen table. 

I'm so happy to have my oven in tip-top shape again. But I think my son might be even happier than I am. Some of his favorite things, from desserts to things like this, come from the oven. If you want a simple meal tonight, try these enchiladas, and put your oven to work too!

Easy Beef Enchiladas
1 lb. ground beef
1 (16 oz.) jar picante sauce
8 corn or flour tortillas
8 oz. shredded sharp cheddar cheese
Salt and Pepper to taste
Sour Cream, optional
Green Onions, optional

Preheat oven to 325. Wrap tortillas in foil. Place on oven rack and warm for 5-7 minutes. Remove and increase heat to 350. In a large skillet, brown beef seasoned with salt and pepper, until no longer pink. Drain if necessary. Add 1/2 c. picante sauce and 1 cup cheese. Mix well and cook until combined. Spread 1/2 c. picante sauce in bottom of 9x13 pan. Spoon 2-3 TBS of beef mixture down center of each tortilla. Roll and place seam side down in pan. Top with remaining picante sauce and cheese. Bake uncovered for 20 minutes until heated through and cheese melts. Top with sour cream and green onions, if desired. 


Shared on Lady Behind The Curtain Sept. 4, 2013
Shared on The Country Cook Sept. 6, 2013

Today's recipe is another that has appeared on EMM before, but probably before most of you were around to read it. Yes, it was here when I was just getting started, and I'm pretty sure my husband, mother and maybe a few rogue family members were the only ones who saw it. And with the quality of the photograph I included in that original post, I can't say I'm sad about that. Thank goodness my food photography has come a long way since those days! 

This was the perfect time to feature this meal again because it was something little man kept requesting over and over during those months when my oven was out of commission; and as most of you know, it's up and working like a champ again...so we are taking full advantage! 

That first week it was in working order again I asked Alex for some ideas on things he had been craving, but I was unable to make. One of the first things out of his mouth was "enchiladas." And while I have a few different recipes for them, including Chicken and Green Chile, I knew these were what he was talking about, without even asking. What can I say? I know my kid! 

If your family loves Mexican night, but you're tired of the same old tacos, but don't have the time for much more, you will love these. With only a few ingredients and about 30 minutes you can have a tasty Mexican meal on the table they will love. Add some chips and my Restaurant Style Salsa on the side, and they will think they are sitting in their favorite Mexican joint, not gathered around your kitchen table. 

I'm so happy to have my oven in tip-top shape again. But I think my son might be even happier than I am. Some of his favorite things, from desserts to things like this, come from the oven. If you want a simple meal tonight, try these enchiladas, and put your oven to work too!

Easy Beef Enchiladas
1 lb. ground beef
1 (16 oz.) jar picante sauce
8 corn or flour tortillas
8 oz. shredded sharp cheddar cheese
Salt and Pepper to taste
Sour Cream, optional
Green Onions, optional

Preheat oven to 325. Wrap tortillas in foil. Place on oven rack and warm for 5-7 minutes. Remove and increase heat to 350. In a large skillet, brown beef seasoned with salt and pepper, until no longer pink. Drain if necessary. Add 1/2 c. picante sauce and 1 cup cheese. Mix well and cook until combined. Spread 1/2 c. picante sauce in bottom of 9x13 pan. Spoon 2-3 TBS of beef mixture down center of each tortilla. Roll and place seam side down in pan. Top with remaining picante sauce and cheese. Bake uncovered for 20 minutes until heated through and cheese melts. Top with sour cream and green onions, if desired. 


Shared on Lady Behind The Curtain Sept. 4, 2013
Shared on The Country Cook Sept. 6, 2013

reade more... Résuméabuiyad

Soul Food Saturday #19

Well, we have one week of school under our belts! Five days down. Only 175 more to go! It's hard to believe that summer is coming to end, Labor Day is next weekend, and autumn is just around the corner. And today Bekki is sharing a great idea for any busy school night, especially if your family is like ours and the "after school" activities keep you just as busy!

  *NOTE* Bekki had a friend give her this recipe, but couldn't remember where she got it, so if you recognize it, or where it came from, please let us know so we can give them a little shout out love!


For most summer vacation is officially over. The new school year has begun and thoughts of fall sports and fun are in the air. So I decided we needed a fun recipe that’s great for a family movie night snack or one to come home and have right after a day at school. This one will be fun for the kids to help with. Choosing your favorite combinations of meats and cheese, just like your favorite pizzas. Whether you are a dipper or a purist, this will fit everyone’s fancy. Pull out the ranch, or your favorite marinara. Or maybe even both. This one is a winner!
 
 
Mini Pepperoni Pizza Egg Rolls
3 mozzarella string cheese, quartered
12 mini egg roll wrappers
36 slices of mini pepperoni
Oil for deep-frying

Marinara or pizza sauce (optional)

On top of egg roll wrapper, place three pieces of pepperoni from one corner to another. Place a piece of the quartered string cheese on top of the pepperoni. Moisten around entire edge with water to seal, with either your finger, or a brush. Start fold by folding corners over the cheese. Then pull bottom corner over cheese and pepperoni and keep rolling until cheese is tightly wrapped. Repeat with the rest of wrappers.

In a skillet, heat oil to 375 degrees F. Fry sticks, a few at a time, for 30-60 seconds on each side until completely brown. Drain on paper towels.


Well, we have one week of school under our belts! Five days down. Only 175 more to go! It's hard to believe that summer is coming to end, Labor Day is next weekend, and autumn is just around the corner. And today Bekki is sharing a great idea for any busy school night, especially if your family is like ours and the "after school" activities keep you just as busy!

  *NOTE* Bekki had a friend give her this recipe, but couldn't remember where she got it, so if you recognize it, or where it came from, please let us know so we can give them a little shout out love!


For most summer vacation is officially over. The new school year has begun and thoughts of fall sports and fun are in the air. So I decided we needed a fun recipe that’s great for a family movie night snack or one to come home and have right after a day at school. This one will be fun for the kids to help with. Choosing your favorite combinations of meats and cheese, just like your favorite pizzas. Whether you are a dipper or a purist, this will fit everyone’s fancy. Pull out the ranch, or your favorite marinara. Or maybe even both. This one is a winner!
 
 
Mini Pepperoni Pizza Egg Rolls
3 mozzarella string cheese, quartered
12 mini egg roll wrappers
36 slices of mini pepperoni
Oil for deep-frying

Marinara or pizza sauce (optional)

On top of egg roll wrapper, place three pieces of pepperoni from one corner to another. Place a piece of the quartered string cheese on top of the pepperoni. Moisten around entire edge with water to seal, with either your finger, or a brush. Start fold by folding corners over the cheese. Then pull bottom corner over cheese and pepperoni and keep rolling until cheese is tightly wrapped. Repeat with the rest of wrappers.

In a skillet, heat oil to 375 degrees F. Fry sticks, a few at a time, for 30-60 seconds on each side until completely brown. Drain on paper towels.


reade more... Résuméabuiyad

Last Hurrah Of Summer

That's right, our world is going to be shocked back into reality come Monday morning. From the sound of the alarm, which we haven't heard for 2 months, to the fact my favorite side kick won't be with me all day, to the fact we have to get up on Tuesday and do it all over again, it's not going to be easy!

I'm very lucky that Monkey loves school, and I'm sure by the second week, he will be happy to be there, but for right now, he isn't ready for summer break to end, and I can't say I blame him. I feel like we barely got a summer, and now it's time for school which means autumn can't be far behind. I just want to find the pause button! But I'm sure some of that is the fact my baby is going to be a 3rd grader, and thus far I simply can't wrap my mind around it.

So we aren't quite ready to let summer go yet, and one of the things we've really enjoyed this year is making homemade ice cream in the new machine I got back in May. We've definitely put it to good use over the past few months, and this is our newest concoction. In fact, this was our dessert last week when we grilled some steaks and I had fresh corn on the cob too. As I told my friends "Summer mind be winding down, but it isn't over yet!!" And with a meal like that, it truly felt like it.

If you love mint...you are going to love this. It has such a smooth flavor and creamy texture. The combination of milk and cream give it a tad different texture than the other ice creams we've made thus far. And the tiny chocolate chips are like finding little treasures in every bite!

The school year is quickly approaching, but I'm determined to squeeze every little bit of fun, and deliciousness, out of this summer as I possibly can!

Mint Chocolate Chip Ice Cream 
2 c. 2 % milk
2 c.heavy cream
1 c. sugar
1/2 tsp. salt
1 tsp. vanilla
1 tsp. mint extract
1 c. mini chocolate chips
5 drops green food coloring

In a large bowl combine all ingredients and stir well, until sugar is dissolved. Pour into ice cream maker and freeze according to directions. For a harder ice cream, remove to a large bowl, cover and freeze for at least 2 hours. *NOTE* Mine is served in waffle bowls, which you can find with the other ice cream novelties.


Shared on Mandy's Recipe Box Aug. 20, 2013
Shared on Lady Behind The Curtain Aug. 21, 2013
Ice Cream at Very Good Recipes
That's right, our world is going to be shocked back into reality come Monday morning. From the sound of the alarm, which we haven't heard for 2 months, to the fact my favorite side kick won't be with me all day, to the fact we have to get up on Tuesday and do it all over again, it's not going to be easy!

I'm very lucky that Monkey loves school, and I'm sure by the second week, he will be happy to be there, but for right now, he isn't ready for summer break to end, and I can't say I blame him. I feel like we barely got a summer, and now it's time for school which means autumn can't be far behind. I just want to find the pause button! But I'm sure some of that is the fact my baby is going to be a 3rd grader, and thus far I simply can't wrap my mind around it.

So we aren't quite ready to let summer go yet, and one of the things we've really enjoyed this year is making homemade ice cream in the new machine I got back in May. We've definitely put it to good use over the past few months, and this is our newest concoction. In fact, this was our dessert last week when we grilled some steaks and I had fresh corn on the cob too. As I told my friends "Summer mind be winding down, but it isn't over yet!!" And with a meal like that, it truly felt like it.

If you love mint...you are going to love this. It has such a smooth flavor and creamy texture. The combination of milk and cream give it a tad different texture than the other ice creams we've made thus far. And the tiny chocolate chips are like finding little treasures in every bite!

The school year is quickly approaching, but I'm determined to squeeze every little bit of fun, and deliciousness, out of this summer as I possibly can!

Mint Chocolate Chip Ice Cream 
2 c. 2 % milk
2 c.heavy cream
1 c. sugar
1/2 tsp. salt
1 tsp. vanilla
1 tsp. mint extract
1 c. mini chocolate chips
5 drops green food coloring

In a large bowl combine all ingredients and stir well, until sugar is dissolved. Pour into ice cream maker and freeze according to directions. For a harder ice cream, remove to a large bowl, cover and freeze for at least 2 hours. *NOTE* Mine is served in waffle bowls, which you can find with the other ice cream novelties.


Shared on Mandy's Recipe Box Aug. 20, 2013
Shared on Lady Behind The Curtain Aug. 21, 2013
Ice Cream at Very Good Recipes

reade more... Résuméabuiyad

Alex In The Kitchen Once Again

Two years ago we started a tradition here on EMM, my favorite little monkey stopping by to guest blog something simple and yummy that your kids can enjoy making, and of course eating, too. And two of those posts, one at the beginning of his 1st grade year, and one at the end, had something in common. Lemon Fruit Salad and Key Lime Fruit Salad  were both creations he and I worked on together, and were perfect for little hands and little tummies.

So, in that same tradition, and since the school year is once again quickly approaching, we thought ti was a great time for Alex (now a 3rd grader!) to share yet another easy but tasty fruit salad perfect for an after school snack or even a light dessert. Or if you are like us and you are filling these last few days of summer vacation with as much fun as possible, it would be great for a picnic in the park too!

Please welcome the best little sous chef around back to the EMM kitchen!

Hi everyone! I'm so excited Mommy asked me to cook for you again! Well, I guess this isn't really something you actually cook, but you know what I mean! For those of you who don't know, I am going into the 3rd grade, and am really looking forward to it! I am sad to see summer end, but I love school, and seeing my friends, so I'm okay with going back too. (But that 7:30 am wake up Monday morning will NOT be easy!!) 

Mommy and I love finding simple sweet treats I can help her make, and this is another one of those. Using mostly canned fruit, it's nice for little kids because there isn't a lot of chopping. (Mommy did slice the bananas though) Plus, it's really neat to watch how the pudding mix and fruit juice turn into a "sauce" while you stir...which was my job! This makes a perfect snack, now or once school is in, or a dessert too. Oh, and I actually like eating it for breakfast too, especially on a hot day! 


I hope you enjoy my newest fruit salad creation. Be sure to make it with your kids too! I've been helping Mommy in the kitchen since I was a tiny baby, and we always have so much fun! I bet your kids would too!

Vanilla Fruit Salad Adapted from Taste of Home
1 (29 oz.) can fruit cocktail, with juice
1 (11 oz.) can mandarin oranges, drained
1 (20 oz.) can pineapple chunks, drained
3/4 c. fresh blueberries
1 TBS lemon juice
2 bananas, sliced
1 (3.4 oz) box instant vanilla pudding
Whipped Cream
Pecan Halves

In a large bowl combine all fruit except bananas. Add lemon juice. Stir. Sprinkle with pudding mix. Gently stir for about a minute until slightly thickened. Fold in bananas. Refrigerate until serving, at least an hour. When ready to serve, top with whipped cream and sprinkle with pecans.


Pin It
Two years ago we started a tradition here on EMM, my favorite little monkey stopping by to guest blog something simple and yummy that your kids can enjoy making, and of course eating, too. And two of those posts, one at the beginning of his 1st grade year, and one at the end, had something in common. Lemon Fruit Salad and Key Lime Fruit Salad  were both creations he and I worked on together, and were perfect for little hands and little tummies.

So, in that same tradition, and since the school year is once again quickly approaching, we thought ti was a great time for Alex (now a 3rd grader!) to share yet another easy but tasty fruit salad perfect for an after school snack or even a light dessert. Or if you are like us and you are filling these last few days of summer vacation with as much fun as possible, it would be great for a picnic in the park too!

Please welcome the best little sous chef around back to the EMM kitchen!

Hi everyone! I'm so excited Mommy asked me to cook for you again! Well, I guess this isn't really something you actually cook, but you know what I mean! For those of you who don't know, I am going into the 3rd grade, and am really looking forward to it! I am sad to see summer end, but I love school, and seeing my friends, so I'm okay with going back too. (But that 7:30 am wake up Monday morning will NOT be easy!!) 

Mommy and I love finding simple sweet treats I can help her make, and this is another one of those. Using mostly canned fruit, it's nice for little kids because there isn't a lot of chopping. (Mommy did slice the bananas though) Plus, it's really neat to watch how the pudding mix and fruit juice turn into a "sauce" while you stir...which was my job! This makes a perfect snack, now or once school is in, or a dessert too. Oh, and I actually like eating it for breakfast too, especially on a hot day! 


I hope you enjoy my newest fruit salad creation. Be sure to make it with your kids too! I've been helping Mommy in the kitchen since I was a tiny baby, and we always have so much fun! I bet your kids would too!

Vanilla Fruit Salad Adapted from Taste of Home
1 (29 oz.) can fruit cocktail, with juice
1 (11 oz.) can mandarin oranges, drained
1 (20 oz.) can pineapple chunks, drained
3/4 c. fresh blueberries
1 TBS lemon juice
2 bananas, sliced
1 (3.4 oz) box instant vanilla pudding
Whipped Cream
Pecan Halves

In a large bowl combine all fruit except bananas. Add lemon juice. Stir. Sprinkle with pudding mix. Gently stir for about a minute until slightly thickened. Fold in bananas. Refrigerate until serving, at least an hour. When ready to serve, top with whipped cream and sprinkle with pecans.


Pin It
reade more... Résuméabuiyad

Yeah, It's Still Broke

As most of you know already, I am usually about "two weeks out on the blog" as I like to say. This means that when I post something for you, I made it approximately 2 weeks ago in my kitchen. I really like this time frame, I've found it's what works best for me, allows me to be the most flexible with my blogging schedule, and still leave me time for my family too. For instance, when we were in Florida for 3 weeks, I had planned ahead and was actually a month ahead, so I could relax and enjoy our time on the beach without stressing about making sure there were new recipes to share with all of you. But for the most part, it's about a two week turn around from my table to your screen.

But as it is usually in life, there is always a down side. See that title? Yep...if I didn't take the time to explain, it would totally be making me out to be a liar. As I'm typing this, it's been one week since I cooked this yummy dish, and it will be another week before you read it. Well, the night I made this, I came up with that title, so I typed it up really quick, knowing I could come back to do the "main part" of the post later. Well, tonight as I sat down to do so, I reread it thought "oh great, now I have to change it." Let me explain...

As of last week my oven was still broke. Yep, going on 4 months without a working oven, and this food blogger was going a little stir crazy. Now, to be fair, it was better to have it happen in the warm, grilling, months than the winter time, but believe me, there wasn't a day that I didn't wish it was back in commission. So when I found this recipe for a stove top version of  one of Monkey's favorite foods, I was super excited. He had been asking over and over for my Baked Mac n Cheese, and I kept having to remind him why that wasn't possible. So I was going to talk about that and why having this "back- up" was so nice.

But miracles do happen, and wonders never cease. After almost four months, and 3 incorrect parts later, we finally got the ignitor switch we needed to fix my oven, and as of this past Saturday, Mr. Everyday had it back up and running! I was so excited. I was like a little kid on Christmas with a new toy. The next morning I had to get up and bake something just because I knew I could.

So while this recipe started out as a substitution with a funny store about my poor oven, it is ending on a happy note with me being able to bake and roast once again, plus a great new, simple recipe perfect for a easy weeknight dinner that the kids will love. And anyways, anything that can be cooked completely on the stove top, in one pot is a great idea, no matter what the circumstances surrounding it are!

Stove Top Creamy Mac n Cheese Adapted from Food Network
1 lb. elbow macaroni
1 stick butter
4 large eggs
4 c. shredded sharp cheddar cheese
1/2 c. shredded Monterrey Jack cheese
1 1/2 tsp. ground mustard
1 (12 oz.) can evaporated milk
Salt and Pepper to taste

Cook macaroni until al dente. Drain. While it's cooking, mix eggs, milk, mustard, salt and pepper. Whisk well. When macaroni is done, return to hot pot. Turn heat to LOW. Add butter. Toss and stir to coat. Add in egg mixture. Mix well. Add cheese in several batches, stirring constantly until cheese is melted and creamy, about 3-4 minutes.


Shared on Mandy's Recipe Box Aug. 13, 2013
Pasta at Very Good Recipes
As most of you know already, I am usually about "two weeks out on the blog" as I like to say. This means that when I post something for you, I made it approximately 2 weeks ago in my kitchen. I really like this time frame, I've found it's what works best for me, allows me to be the most flexible with my blogging schedule, and still leave me time for my family too. For instance, when we were in Florida for 3 weeks, I had planned ahead and was actually a month ahead, so I could relax and enjoy our time on the beach without stressing about making sure there were new recipes to share with all of you. But for the most part, it's about a two week turn around from my table to your screen.

But as it is usually in life, there is always a down side. See that title? Yep...if I didn't take the time to explain, it would totally be making me out to be a liar. As I'm typing this, it's been one week since I cooked this yummy dish, and it will be another week before you read it. Well, the night I made this, I came up with that title, so I typed it up really quick, knowing I could come back to do the "main part" of the post later. Well, tonight as I sat down to do so, I reread it thought "oh great, now I have to change it." Let me explain...

As of last week my oven was still broke. Yep, going on 4 months without a working oven, and this food blogger was going a little stir crazy. Now, to be fair, it was better to have it happen in the warm, grilling, months than the winter time, but believe me, there wasn't a day that I didn't wish it was back in commission. So when I found this recipe for a stove top version of  one of Monkey's favorite foods, I was super excited. He had been asking over and over for my Baked Mac n Cheese, and I kept having to remind him why that wasn't possible. So I was going to talk about that and why having this "back- up" was so nice.

But miracles do happen, and wonders never cease. After almost four months, and 3 incorrect parts later, we finally got the ignitor switch we needed to fix my oven, and as of this past Saturday, Mr. Everyday had it back up and running! I was so excited. I was like a little kid on Christmas with a new toy. The next morning I had to get up and bake something just because I knew I could.

So while this recipe started out as a substitution with a funny store about my poor oven, it is ending on a happy note with me being able to bake and roast once again, plus a great new, simple recipe perfect for a easy weeknight dinner that the kids will love. And anyways, anything that can be cooked completely on the stove top, in one pot is a great idea, no matter what the circumstances surrounding it are!

Stove Top Creamy Mac n Cheese Adapted from Food Network
1 lb. elbow macaroni
1 stick butter
4 large eggs
4 c. shredded sharp cheddar cheese
1/2 c. shredded Monterrey Jack cheese
1 1/2 tsp. ground mustard
1 (12 oz.) can evaporated milk
Salt and Pepper to taste

Cook macaroni until al dente. Drain. While it's cooking, mix eggs, milk, mustard, salt and pepper. Whisk well. When macaroni is done, return to hot pot. Turn heat to LOW. Add butter. Toss and stir to coat. Add in egg mixture. Mix well. Add cheese in several batches, stirring constantly until cheese is melted and creamy, about 3-4 minutes.


Shared on Mandy's Recipe Box Aug. 13, 2013
Pasta at Very Good Recipes
reade more... Résuméabuiyad

Coney 3.0

I would not describe my recipes as famous. My recipes are for myself, my family and of course you, my faithful foodie family. But there are two dishes that are the exception. One, my Deviled Eggs, which are what I like to call "family famous", because they are the one thing I am always required to bring to family parties and holidays. And two, my Coney Sauce...which is now almost famous because of all the times my Coney Dogs and Coney Nachos have been shared on Facebook. I can't say they've gone "viral" but it's the closet thing I will probably ever get to one doing so, and I will take it! So for all of you that loved both of those recipes. and like me would like to find more ways to use that yummy sauce...I am back today with yet another!

We love sliders in this house. Burgers are great, but there is something about a mini burger that tastes even better. Maybe that old adage of "the best things come in small packages" is why. We don't know, we just know they are a favorite around here, and I love finding new ones to try.

I was lucky enough to receive a free package of frozen slider patties from Kroger through BzzAgent, and wanted to do something extra fun with them. (If you have never heard of BzzAgent, be sure to click on the link to see how you can get in on the fun!) I love these patties!! They are the perfect slider size, and can be thrown on the grill completely frozen, no need to thaw, making them so convenient for a busy night! 

So when we got back from Florida the beginning of July and I was still getting back into the swing of things, they were the perfect meal. Well, it just so happened to be the same night I had made a batch of my Coney Sauce to give to our friend/neighbor for watching our house and mowing our lawn while we were gone. She was the one that inspired the name Crack Nachos; and since she won't let us pay her for her 3 weeks of hard work, I make a big pot of her favorite hot dog topping to show our gratitude. 

Anyway, I was standing there stirring the pot and brain storming about what I was going to do with these slider patties when lightning struck. Why not top the burgers with Coney Sauce and our favorite Coney Dog toppings, turning an everyday slider patty into something new, fun and 100% delicious?? Well, it sounded like a great plan to me, and by the end of supper we all agreed it certainly was. Oh my goodness are these good! They are the perfect little bite sized burger combining two American classics. 

If you are looking for a new burger to treat you family with that can be on the table in almost no time at all, that they will flip for, these are the perfect idea. There are so many uses for this Coney Sauce, I can't wait to see what version 4.0 brings!

Coney Sliders
6 frozen slider patties, grilled to likeness
6 slider buns
Extra Diced Onion
Extra Mustard

Sauce: 
1/2 cup finely chopped onion
1 clove garlic minced
2 TBS butter
1 lb. lean ground beef
2 TBS yellow mustard
2 TBS cider vinegar
1 tsp. Worcestershire sauce
1/2 tsp hot pepper sauce
1 cup ketchup
2 tsp paprika
2 tsp chili powder

 In a large skillet, saute the onions and garlic in butter. Add ground beef and break up until fine.(I use my potato masher.) Cook until brown and drain fat. In a medium bowl combine all other ingredients and whisk well. Add to beef mixture. Stir well and heat. Let simmer for at least 30 minutes. If dries out, add a little water, scrape bottom of pan to get pan drippings off and continue simmering. Spread mustard on both sides of bun. Place slider patty on bottom. Top with about 2 TBS of Coney Sauce, extra mustard and diced onion. 


Shared on The Country Cook Aug. 9 2013
Shared on Mandy's Recipe Box Aug. 13, 2013

Ground Beef at Very Good Recipes
I would not describe my recipes as famous. My recipes are for myself, my family and of course you, my faithful foodie family. But there are two dishes that are the exception. One, my Deviled Eggs, which are what I like to call "family famous", because they are the one thing I am always required to bring to family parties and holidays. And two, my Coney Sauce...which is now almost famous because of all the times my Coney Dogs and Coney Nachos have been shared on Facebook. I can't say they've gone "viral" but it's the closet thing I will probably ever get to one doing so, and I will take it! So for all of you that loved both of those recipes. and like me would like to find more ways to use that yummy sauce...I am back today with yet another!

We love sliders in this house. Burgers are great, but there is something about a mini burger that tastes even better. Maybe that old adage of "the best things come in small packages" is why. We don't know, we just know they are a favorite around here, and I love finding new ones to try.

I was lucky enough to receive a free package of frozen slider patties from Kroger through BzzAgent, and wanted to do something extra fun with them. (If you have never heard of BzzAgent, be sure to click on the link to see how you can get in on the fun!) I love these patties!! They are the perfect slider size, and can be thrown on the grill completely frozen, no need to thaw, making them so convenient for a busy night! 

So when we got back from Florida the beginning of July and I was still getting back into the swing of things, they were the perfect meal. Well, it just so happened to be the same night I had made a batch of my Coney Sauce to give to our friend/neighbor for watching our house and mowing our lawn while we were gone. She was the one that inspired the name Crack Nachos; and since she won't let us pay her for her 3 weeks of hard work, I make a big pot of her favorite hot dog topping to show our gratitude. 

Anyway, I was standing there stirring the pot and brain storming about what I was going to do with these slider patties when lightning struck. Why not top the burgers with Coney Sauce and our favorite Coney Dog toppings, turning an everyday slider patty into something new, fun and 100% delicious?? Well, it sounded like a great plan to me, and by the end of supper we all agreed it certainly was. Oh my goodness are these good! They are the perfect little bite sized burger combining two American classics. 

If you are looking for a new burger to treat you family with that can be on the table in almost no time at all, that they will flip for, these are the perfect idea. There are so many uses for this Coney Sauce, I can't wait to see what version 4.0 brings!

Coney Sliders
6 frozen slider patties, grilled to likeness
6 slider buns
Extra Diced Onion
Extra Mustard

Sauce: 
1/2 cup finely chopped onion
1 clove garlic minced
2 TBS butter
1 lb. lean ground beef
2 TBS yellow mustard
2 TBS cider vinegar
1 tsp. Worcestershire sauce
1/2 tsp hot pepper sauce
1 cup ketchup
2 tsp paprika
2 tsp chili powder

 In a large skillet, saute the onions and garlic in butter. Add ground beef and break up until fine.(I use my potato masher.) Cook until brown and drain fat. In a medium bowl combine all other ingredients and whisk well. Add to beef mixture. Stir well and heat. Let simmer for at least 30 minutes. If dries out, add a little water, scrape bottom of pan to get pan drippings off and continue simmering. Spread mustard on both sides of bun. Place slider patty on bottom. Top with about 2 TBS of Coney Sauce, extra mustard and diced onion. 


Shared on The Country Cook Aug. 9 2013
Shared on Mandy's Recipe Box Aug. 13, 2013

Ground Beef at Very Good Recipes
reade more... Résuméabuiyad

Dairy At The State Fair {Dairy Ambassador #WinnersDrinkMilk}

The Indiana State Fair is in full swing, and Indiana Dairy wants to make sure you enjoy what they have to offer at the fair grounds.

Anyone who has ever visited the State Fair can't help but notice the Dairy Barn, which happens to be a must on our fair agenda every single year. From the gooey grilled cheese to the thick and delicious milkshakes, we also treat ourselves to a yummy stop at the Dairy Barn.

I am especially looking forward to it this year because I've heard they have a new milkshake flavor...lemon! Ya'll know how much of a lemon freak I am...and I have to believe that will taste so refreshing during a sunny, warm day at the fair!

Plus another thing I love about the Dairy Barn is the reasonable prices! They really allow a family to enjoy some fair staples without emptying the wallet. Just take a look at this year's menu:

Open weekdays from 7 am-9 pm and weekends from 7 am- 10 pm, they also serve breakfast daily until 10 am. This year their featured sandwich is the Blue Moo- slices of blue and American cheese on sourdough bread. (I love that name! Too cute!) If you're looking for something a little healthier for the little ones at the fair, the Dairy Barn also offers the Fuel Up to Play 60 Kid's Meal-a great choice inspired by the Dairy Council's school health and wellness program. Plus, parents with babies with bottles can stop by the Dairy Barn anytime and they will fill them with milk for free!!

In addition, Indiana Dairy also sponsors the Cheese Sculpture, which will be unveiled August 7th, in the Dupont Food Pavilion. The sculpture this year will highlight the importance of childhood nutrition and starting your day with an energizing breakfast. And every day at 2 pm, also in the Dupont Food Pavilion, let Indiana Dairy's master chef show you how to prepare some delicious recipes. Plus, during one of the highlights of our visit every year, the daily parade at 6:30 pm, you can catch the dairy float rolling through the fairgrounds. 

To celebrate our upcoming trip to the fair, I decided to highlight dairy by combining two favorites in our family. I've already told you how much we love the dairy barn and all of it's yummy offerings, but at the top of the list is definitely their grilled cheese sandwiches. Seriously, they are the best ones I've ever had in my life! And the other one is pizza at the fair. While they don't offer it at the Dairy Barn, we always seem to find more than one vendor offering huge slices of pizza, perfect for a certain little boy! Actually last year, he had a Dairy Barn meal, complete with grilled cheese and milk, for lunch and pizza for supper. So I figured why not take both of Alex's favorites and turn them into one tasty, easy sandwich, perfect for a simple summer supper. 

If you are heading down to the State Fair, please include the Dairy Barn in your visit. You won't regret it! And be sure to have a grilled cheese and lemon milkshake for me!!

Pizza Grilled Cheese
Sliced mozzarella cheese
Sliced Pepperoni
Sliced White Button Mushrooms
Garlic and Herb Italian Bread, sliced medium
Pizza Sauce for dipping

Spread bread slices on one side each with butter or margarine. On bottom piece of bread layer cheese, pepperoni, mushrooms, and another slice of cheese. Top with another slice of bread, butter side up. Cook in a large skillet over medium heat until both sides are golden brown. Serve with pizza sauce on side. *NOTE* I found my bread in the bakery section at Walmart. If you can't find it, regular Italian or French bread would also work. Or even some sliced garlic bread!


Shared on Lady Behind The Curtain Aug. 7, 2013
Shared on The Country Cook Aug. 9, 2013
Sandwich at Very Good Recipes
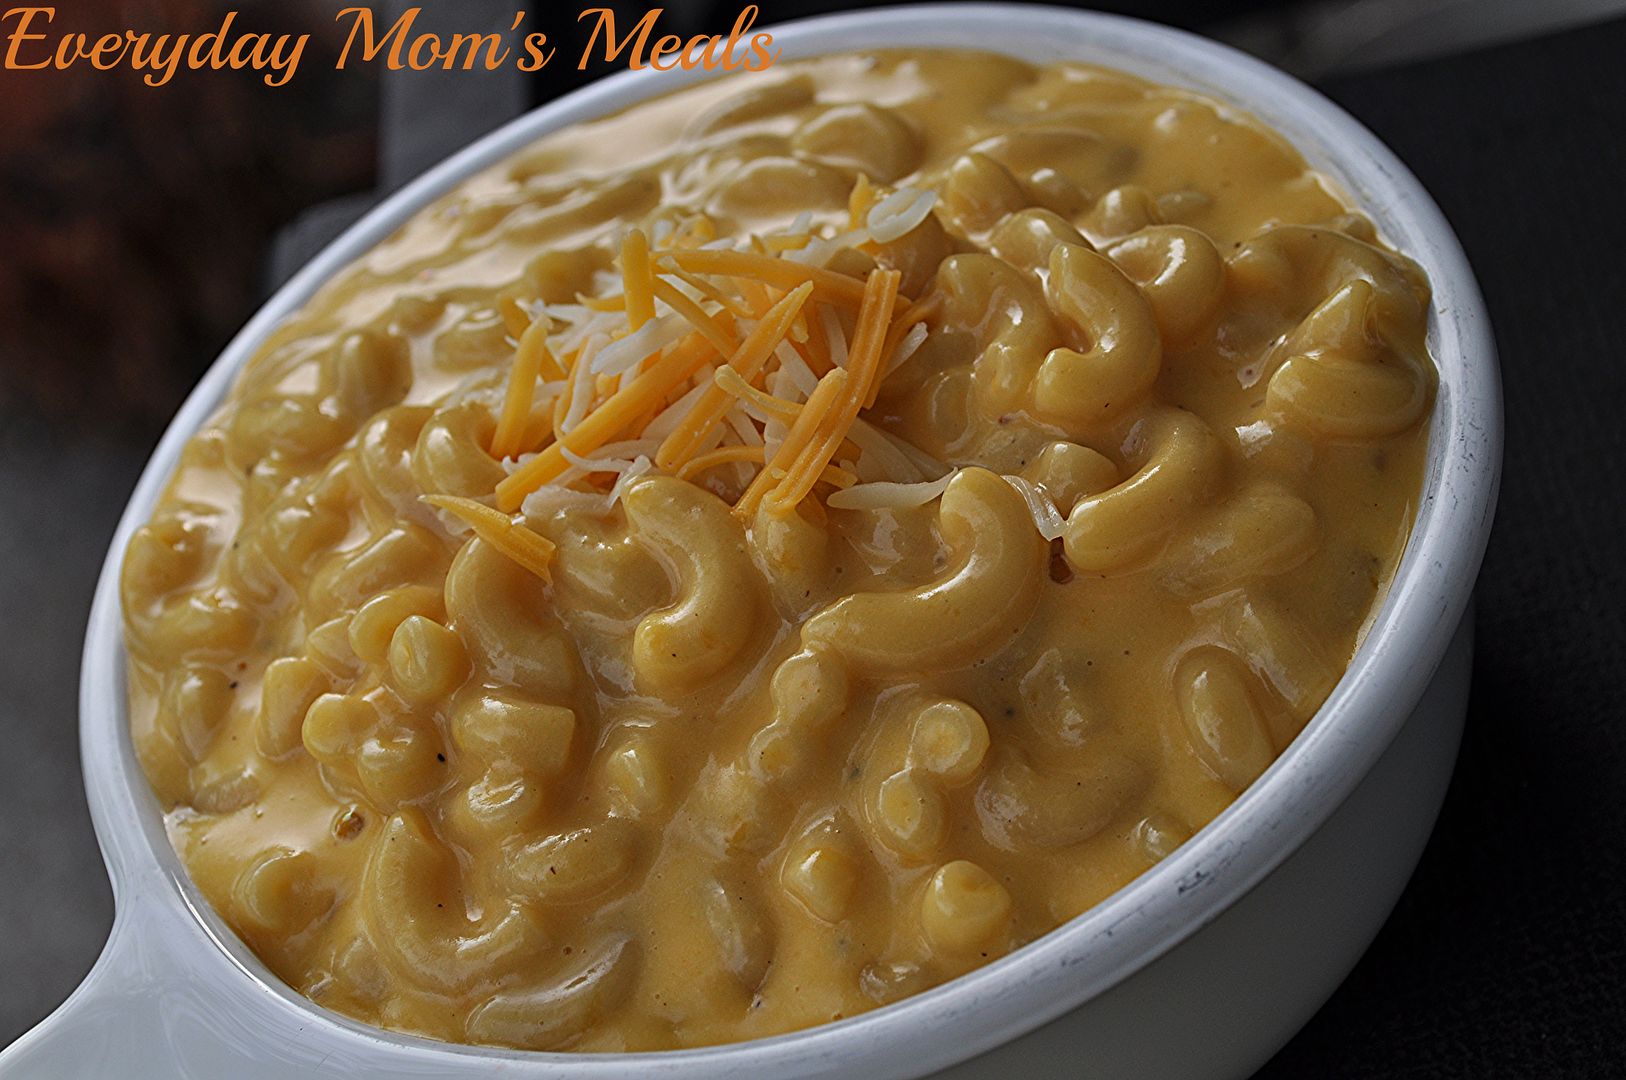
The Indiana State Fair is in full swing, and Indiana Dairy wants to make sure you enjoy what they have to offer at the fair grounds.

Anyone who has ever visited the State Fair can't help but notice the Dairy Barn, which happens to be a must on our fair agenda every single year. From the gooey grilled cheese to the thick and delicious milkshakes, we also treat ourselves to a yummy stop at the Dairy Barn.

I am especially looking forward to it this year because I've heard they have a new milkshake flavor...lemon! Ya'll know how much of a lemon freak I am...and I have to believe that will taste so refreshing during a sunny, warm day at the fair!

Plus another thing I love about the Dairy Barn is the reasonable prices! They really allow a family to enjoy some fair staples without emptying the wallet. Just take a look at this year's menu:

Open weekdays from 7 am-9 pm and weekends from 7 am- 10 pm, they also serve breakfast daily until 10 am. This year their featured sandwich is the Blue Moo- slices of blue and American cheese on sourdough bread. (I love that name! Too cute!) If you're looking for something a little healthier for the little ones at the fair, the Dairy Barn also offers the Fuel Up to Play 60 Kid's Meal-a great choice inspired by the Dairy Council's school health and wellness program. Plus, parents with babies with bottles can stop by the Dairy Barn anytime and they will fill them with milk for free!!

In addition, Indiana Dairy also sponsors the Cheese Sculpture, which will be unveiled August 7th, in the Dupont Food Pavilion. The sculpture this year will highlight the importance of childhood nutrition and starting your day with an energizing breakfast. And every day at 2 pm, also in the Dupont Food Pavilion, let Indiana Dairy's master chef show you how to prepare some delicious recipes. Plus, during one of the highlights of our visit every year, the daily parade at 6:30 pm, you can catch the dairy float rolling through the fairgrounds. 

To celebrate our upcoming trip to the fair, I decided to highlight dairy by combining two favorites in our family. I've already told you how much we love the dairy barn and all of it's yummy offerings, but at the top of the list is definitely their grilled cheese sandwiches. Seriously, they are the best ones I've ever had in my life! And the other one is pizza at the fair. While they don't offer it at the Dairy Barn, we always seem to find more than one vendor offering huge slices of pizza, perfect for a certain little boy! Actually last year, he had a Dairy Barn meal, complete with grilled cheese and milk, for lunch and pizza for supper. So I figured why not take both of Alex's favorites and turn them into one tasty, easy sandwich, perfect for a simple summer supper. 

If you are heading down to the State Fair, please include the Dairy Barn in your visit. You won't regret it! And be sure to have a grilled cheese and lemon milkshake for me!!

Pizza Grilled Cheese
Sliced mozzarella cheese
Sliced Pepperoni
Sliced White Button Mushrooms
Garlic and Herb Italian Bread, sliced medium
Pizza Sauce for dipping

Spread bread slices on one side each with butter or margarine. On bottom piece of bread layer cheese, pepperoni, mushrooms, and another slice of cheese. Top with another slice of bread, butter side up. Cook in a large skillet over medium heat until both sides are golden brown. Serve with pizza sauce on side. *NOTE* I found my bread in the bakery section at Walmart. If you can't find it, regular Italian or French bread would also work. Or even some sliced garlic bread!


Shared on Lady Behind The Curtain Aug. 7, 2013
Shared on The Country Cook Aug. 9, 2013
Sandwich at Very Good Recipes

reade more... Résuméabuiyad

Soul Food Saturday #16

Welcome to another weekend!  Can you believe August is here already? Seriously, where did July go? The time is flying by like crazy and it's hard to believe the kids will be heading back to school soon. In fact, some here in Indiana went back by the end of July! Luckily, we still have a couple weeks left of summer vacation, so we are determined to fill each minute with the most fun we can. But before the school year begins, Bekki is sharing a favorite from the summers of her childhood! I know adults and kids both are going to love this for a simple supper or even a great snack on movie night!


Summer vacation is coming to a close. For some its way to soon, and most it feels like it’s just begun. One of my most favorite things about summer vacation as a child was making some of our favorite meals as family dinner. My brother and I loved being the ones that chose our evening meal, and when we could put a spin on a favorite it was even more excited. We felt like chefs, and it gave us something we could help mom out with on a busy weeknight. So this week I am sharing our Monster Nachos. It’s a plate of nachos with twist. We added chili with beans, and of course don’t forget your favorite finish toppings. Sliced jalapenos, onions or a big dollop of sour cream! Let your little ones in on the fun, they will love them just as much as you!
Monster Nachos
2 (15 oz.) cans Thick Chili with Beans
2 c. shredded cheddar cheese
¼ c. water
Bag of tortilla chips
In a medium sauce pan, add chili and water. Stir to breakup larger pieces and heat evenly. Stirring frequently, allow to heat through completely before removing from heat. About 5 minutes. When heated through, remove from heat and set aside. On each plate add approx 2 c. of tortilla chips then top with 1 c. chili with beans. Sprinkle with ½ c. of shredded cheese. Then microwave on high for 30 to 45 sec. to melt the cheese. Serve hot. Add your favorite toppings or eat them straight from the microwave, either way they are SUPER! Enjoy!
Optional toppings:
Diced onions
Sliced jalapenos
Sour cream
Diced tomato


Pin It
Welcome to another weekend!  Can you believe August is here already? Seriously, where did July go? The time is flying by like crazy and it's hard to believe the kids will be heading back to school soon. In fact, some here in Indiana went back by the end of July! Luckily, we still have a couple weeks left of summer vacation, so we are determined to fill each minute with the most fun we can. But before the school year begins, Bekki is sharing a favorite from the summers of her childhood! I know adults and kids both are going to love this for a simple supper or even a great snack on movie night!


Summer vacation is coming to a close. For some its way to soon, and most it feels like it’s just begun. One of my most favorite things about summer vacation as a child was making some of our favorite meals as family dinner. My brother and I loved being the ones that chose our evening meal, and when we could put a spin on a favorite it was even more excited. We felt like chefs, and it gave us something we could help mom out with on a busy weeknight. So this week I am sharing our Monster Nachos. It’s a plate of nachos with twist. We added chili with beans, and of course don’t forget your favorite finish toppings. Sliced jalapenos, onions or a big dollop of sour cream! Let your little ones in on the fun, they will love them just as much as you!
Monster Nachos
2 (15 oz.) cans Thick Chili with Beans
2 c. shredded cheddar cheese
¼ c. water
Bag of tortilla chips
In a medium sauce pan, add chili and water. Stir to breakup larger pieces and heat evenly. Stirring frequently, allow to heat through completely before removing from heat. About 5 minutes. When heated through, remove from heat and set aside. On each plate add approx 2 c. of tortilla chips then top with 1 c. chili with beans. Sprinkle with ½ c. of shredded cheese. Then microwave on high for 30 to 45 sec. to melt the cheese. Serve hot. Add your favorite toppings or eat them straight from the microwave, either way they are SUPER! Enjoy!
Optional toppings:
Diced onions
Sliced jalapenos
Sour cream
Diced tomato


Pin It
reade more... Résuméabuiyad