Pages

Showing posts with label Vanilla. Show all posts

They Are Coming

In case you've been living under a rock, today is the first day of November. Put those jack-o-lanterns away and grab the turkeys and pilgrims, kids. Thanksgiving is exactly 27 days from today. In this house once the fun of Halloween is behind is, it's pretty much a downward coast to the holiday season. Thanksgiving, Christmas and even New Year's are approaching quicker than some of you might realize, or even want. But don't fret, don't freak out, I am here to help with at least one aspect of the holiday rush. Over the next several weeks, I will be offering up some ideas for your meal plans, from breakfast to mains, to sides, that could all be great additions to your holiday planning. 

First up, something I made for supper a few weeks ago, that will definitely be appearing on our table again, and if you are planning on a house full of family for Thanksgiving or Christmas, could be the answer to your breakfast prayers!

I am SO excited to share this one because I know ya'll are going to go as nuts for it as we did. Sure, I used it as "breakfast for supper", and it was just as yummy at 6pm as I know it would be for breakfast or brunch. Oh, and a side note: this reheats beautifully! We had some leftover and Alex ate it for breakfast for the next 3 days. Just pop it in the microwave for about 30 seconds! Which is also a great idea if you're having house guests because maybe you cook it once, and they eat it for a couple days, saving you time and money!

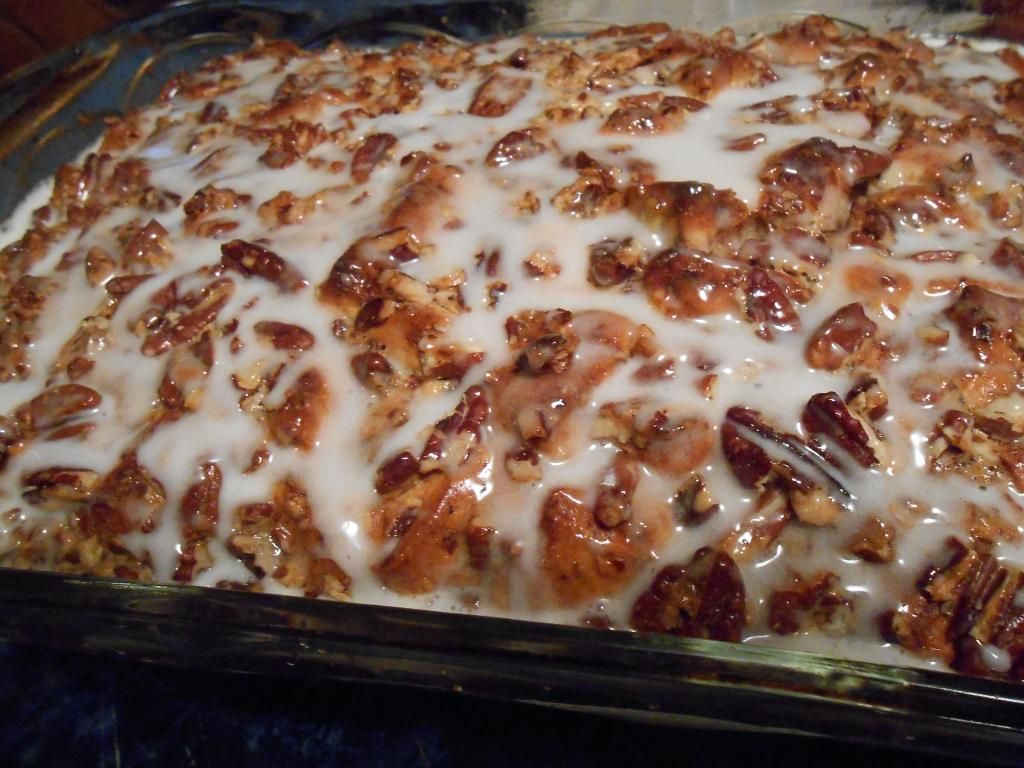
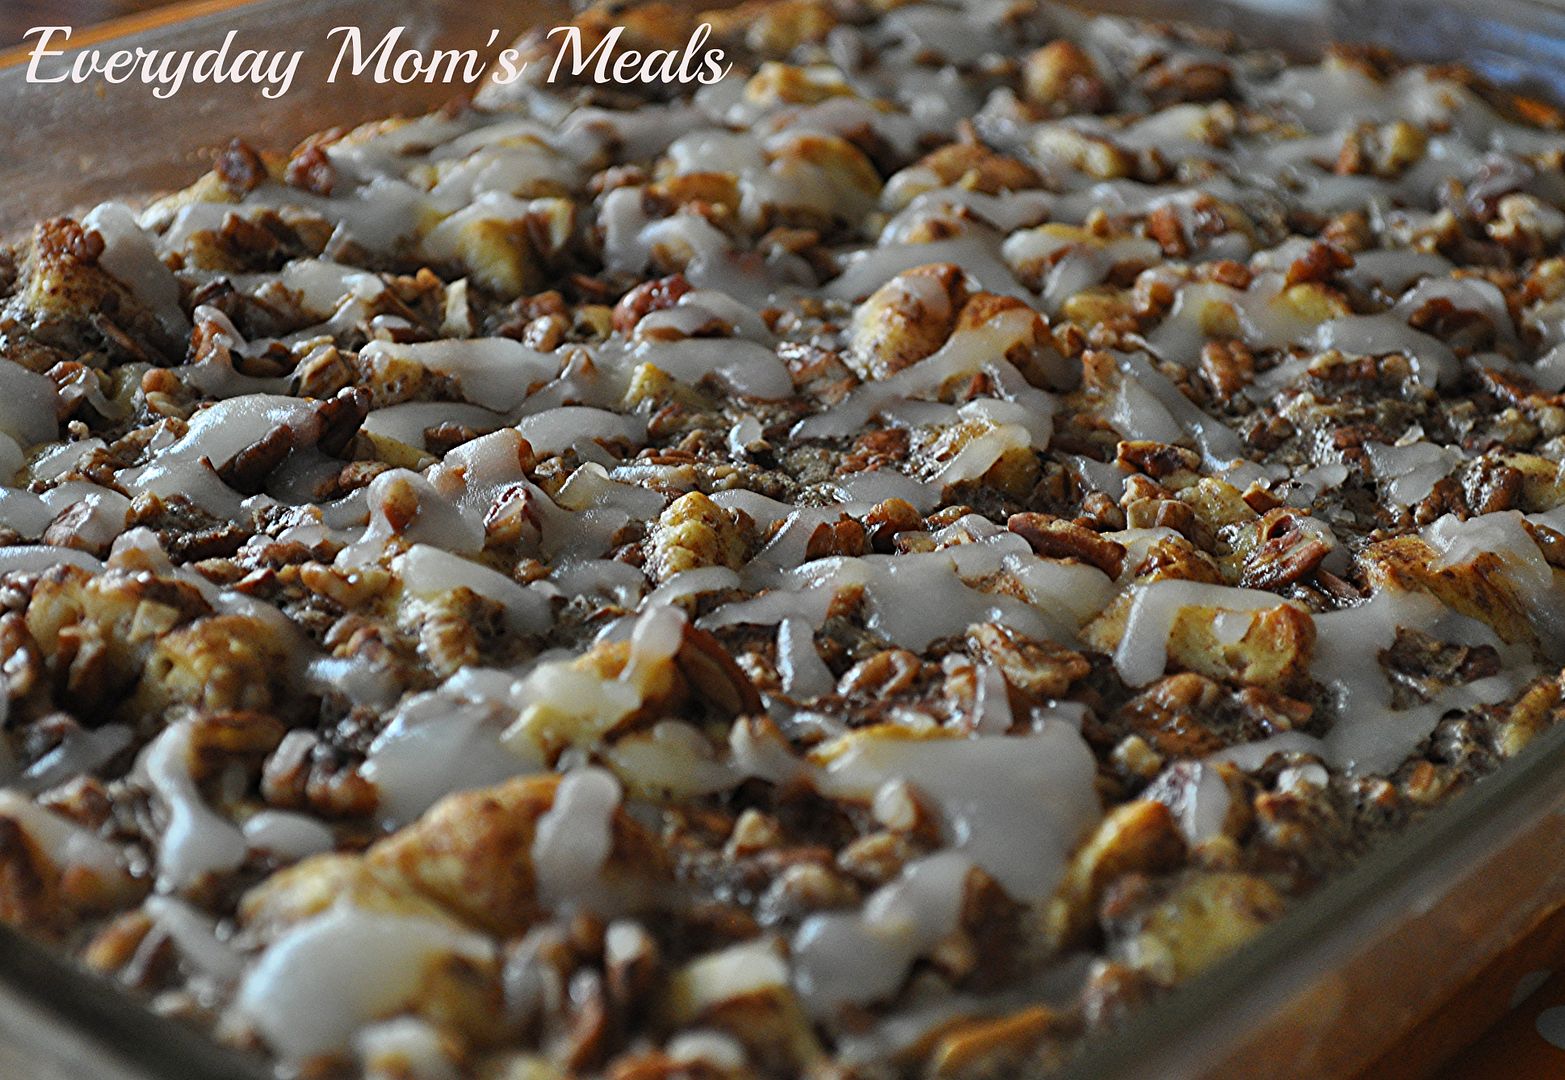
If you love cinnamon rolls, French Toast and bread pudding, then let me introduce you to your new favorite dish. With a little help from refrigerated cinnamon rolls, and a custard filling filled with flavor, oh and of course nuts, syrup and icing, this is hands down the easiest and most delicious breakfast casserole I've ever made. Yes it's rich. I'm not gonna lie. But it's the holidays. We are all supposed to indulge a little!! Serve it with some fresh fruit on the side, that will make you feel better. 

The holidays are coming, like it or not. But we can prepare, and organize and get ready so maybe just a little of the stress is taken away so we can enjoy the time with our families a little more. Or, we can totally stress, and eat plates of this and not care because it tastes so darn good!

Cinnamon Roll French Toast Bake From Pillsbury
1/4 c. butter, melted
2 (12.4 oz.) tubes refrigerated cinnamon rolls, icing removed
6 eggs, beaten
1/2 c. heavy cream
2 tsp. cinnamon
2 tsp. vanilla
1 c. chopped pecans
1 c. maple syrup

Preheat oven to 375. Pour melted butter into the bottom of a 9x13 baking dish. Separate each tube into individual rolls. Cut each roll into small bite sized pieces, about 6-8 per roll. Lay cinnamon roll pieces in butter in dish. In a medium bowl, combine eggs, cream, cinnamon and vanilla. Mix well. Pour over cinnamon roll pieces. Sprinkle with pecans. Drizzle with maple syrup. Bake about 25 minutes, until golden brown. While baking, transfer icing to microwavable safe bowl. Heat for about 15 seconds, until thin enough to pour. When casserole is finished, drizzle top with icing. 


Shared on The Country Cook November 1, 2013

Breakfast at Very Good Recipes
In case you've been living under a rock, today is the first day of November. Put those jack-o-lanterns away and grab the turkeys and pilgrims, kids. Thanksgiving is exactly 27 days from today. In this house once the fun of Halloween is behind is, it's pretty much a downward coast to the holiday season. Thanksgiving, Christmas and even New Year's are approaching quicker than some of you might realize, or even want. But don't fret, don't freak out, I am here to help with at least one aspect of the holiday rush. Over the next several weeks, I will be offering up some ideas for your meal plans, from breakfast to mains, to sides, that could all be great additions to your holiday planning. 

First up, something I made for supper a few weeks ago, that will definitely be appearing on our table again, and if you are planning on a house full of family for Thanksgiving or Christmas, could be the answer to your breakfast prayers!

I am SO excited to share this one because I know ya'll are going to go as nuts for it as we did. Sure, I used it as "breakfast for supper", and it was just as yummy at 6pm as I know it would be for breakfast or brunch. Oh, and a side note: this reheats beautifully! We had some leftover and Alex ate it for breakfast for the next 3 days. Just pop it in the microwave for about 30 seconds! Which is also a great idea if you're having house guests because maybe you cook it once, and they eat it for a couple days, saving you time and money!

If you love cinnamon rolls, French Toast and bread pudding, then let me introduce you to your new favorite dish. With a little help from refrigerated cinnamon rolls, and a custard filling filled with flavor, oh and of course nuts, syrup and icing, this is hands down the easiest and most delicious breakfast casserole I've ever made. Yes it's rich. I'm not gonna lie. But it's the holidays. We are all supposed to indulge a little!! Serve it with some fresh fruit on the side, that will make you feel better. 

The holidays are coming, like it or not. But we can prepare, and organize and get ready so maybe just a little of the stress is taken away so we can enjoy the time with our families a little more. Or, we can totally stress, and eat plates of this and not care because it tastes so darn good!

Cinnamon Roll French Toast Bake From Pillsbury
1/4 c. butter, melted
2 (12.4 oz.) tubes refrigerated cinnamon rolls, icing removed
6 eggs, beaten
1/2 c. heavy cream
2 tsp. cinnamon
2 tsp. vanilla
1 c. chopped pecans
1 c. maple syrup

Preheat oven to 375. Pour melted butter into the bottom of a 9x13 baking dish. Separate each tube into individual rolls. Cut each roll into small bite sized pieces, about 6-8 per roll. Lay cinnamon roll pieces in butter in dish. In a medium bowl, combine eggs, cream, cinnamon and vanilla. Mix well. Pour over cinnamon roll pieces. Sprinkle with pecans. Drizzle with maple syrup. Bake about 25 minutes, until golden brown. While baking, transfer icing to microwavable safe bowl. Heat for about 15 seconds, until thin enough to pour. When casserole is finished, drizzle top with icing. 


Shared on The Country Cook November 1, 2013

Breakfast at Very Good Recipes
reade more... Résuméabuiyad

Breakfast Treat

Weekends are for many things; and in this house one of them is something special for breakfast. Adam and I don't eat breakfast most days, and while I make sure Alex does every single morning, it's usually something light, easy and quick. But when I have more time on the weekends I like to treat my boys to something yummy and new.

Lately, all three of us have totally gotten addicted to scones. They are perfect for breakfast or brunch, but I've also been known to whip up a batch for dessert too! 

Ya'll know my obsession with all things lemon, so when I found this recipe uniting an old obsession with a new one, I knew they would be the perfect version to try next. They are fresh and bright, perfect to wake you up in the morning. Each bite is like a little burst of sunshine on your tongue. Plus the glaze...oh the glaze. It's literally the icing on the "cake" so to speak. The scones are delicious enough on their own, but the glaze just puts them over the top. 

If you want to surprise your family with special extra special, not to mention yummy, this weekend, maybe these scones should make an appearance in your oven too!

Lemon Poppy Seed Scones From Country Living
2 c. flour
3 TBS sugar
2 TBS poppy seeds
2 lemons, zested
1 TBS baking powder
1/2 tsp. baking soda
1/2 TBS salt
1 stick cold butter, diced
1/2 c. heavy cream
1/4 c. fresh lemon juice
1/2 c. powdered sugar

Preheat oven to 400. In a large bowl combine flour, granulated sugar, poppy seeds, lemon zest, baking powder, baking soda and salt. Cut in butter until mixture is very coarse. Pour in cream and 1/4 c. lemon juice. Mix until dough forms. Using hand, form dough into a ball. Transfer to a parchment lined baking sheet and form into 8 inch dish. Cut into 8 wedges and separate so pieces are 1 inch apart. Bake until golden and a tooth pick comes out clean, about 12-14 minutes. Transfer to a wire rack and cool about 20 minutes. In a small bowl combine powdered sugar and remaining lemon juice. Stir until smooth, and desired consistency. We like ours slightly thick. Spoon glaze over scones. 


Shared on The Country Cook September 27, 2013
Lemon at Very Good Recipes
Weekends are for many things; and in this house one of them is something special for breakfast. Adam and I don't eat breakfast most days, and while I make sure Alex does every single morning, it's usually something light, easy and quick. But when I have more time on the weekends I like to treat my boys to something yummy and new.

Lately, all three of us have totally gotten addicted to scones. They are perfect for breakfast or brunch, but I've also been known to whip up a batch for dessert too! 

Ya'll know my obsession with all things lemon, so when I found this recipe uniting an old obsession with a new one, I knew they would be the perfect version to try next. They are fresh and bright, perfect to wake you up in the morning. Each bite is like a little burst of sunshine on your tongue. Plus the glaze...oh the glaze. It's literally the icing on the "cake" so to speak. The scones are delicious enough on their own, but the glaze just puts them over the top. 

If you want to surprise your family with special extra special, not to mention yummy, this weekend, maybe these scones should make an appearance in your oven too!

Lemon Poppy Seed Scones From Country Living
2 c. flour
3 TBS sugar
2 TBS poppy seeds
2 lemons, zested
1 TBS baking powder
1/2 tsp. baking soda
1/2 TBS salt
1 stick cold butter, diced
1/2 c. heavy cream
1/4 c. fresh lemon juice
1/2 c. powdered sugar

Preheat oven to 400. In a large bowl combine flour, granulated sugar, poppy seeds, lemon zest, baking powder, baking soda and salt. Cut in butter until mixture is very coarse. Pour in cream and 1/4 c. lemon juice. Mix until dough forms. Using hand, form dough into a ball. Transfer to a parchment lined baking sheet and form into 8 inch dish. Cut into 8 wedges and separate so pieces are 1 inch apart. Bake until golden and a tooth pick comes out clean, about 12-14 minutes. Transfer to a wire rack and cool about 20 minutes. In a small bowl combine powdered sugar and remaining lemon juice. Stir until smooth, and desired consistency. We like ours slightly thick. Spoon glaze over scones. 


Shared on The Country Cook September 27, 2013
Lemon at Very Good Recipes
reade more... Résuméabuiyad

Alex In The Kitchen Once Again

Two years ago we started a tradition here on EMM, my favorite little monkey stopping by to guest blog something simple and yummy that your kids can enjoy making, and of course eating, too. And two of those posts, one at the beginning of his 1st grade year, and one at the end, had something in common. Lemon Fruit Salad and Key Lime Fruit Salad  were both creations he and I worked on together, and were perfect for little hands and little tummies.

So, in that same tradition, and since the school year is once again quickly approaching, we thought ti was a great time for Alex (now a 3rd grader!) to share yet another easy but tasty fruit salad perfect for an after school snack or even a light dessert. Or if you are like us and you are filling these last few days of summer vacation with as much fun as possible, it would be great for a picnic in the park too!

Please welcome the best little sous chef around back to the EMM kitchen!

Hi everyone! I'm so excited Mommy asked me to cook for you again! Well, I guess this isn't really something you actually cook, but you know what I mean! For those of you who don't know, I am going into the 3rd grade, and am really looking forward to it! I am sad to see summer end, but I love school, and seeing my friends, so I'm okay with going back too. (But that 7:30 am wake up Monday morning will NOT be easy!!) 

Mommy and I love finding simple sweet treats I can help her make, and this is another one of those. Using mostly canned fruit, it's nice for little kids because there isn't a lot of chopping. (Mommy did slice the bananas though) Plus, it's really neat to watch how the pudding mix and fruit juice turn into a "sauce" while you stir...which was my job! This makes a perfect snack, now or once school is in, or a dessert too. Oh, and I actually like eating it for breakfast too, especially on a hot day! 


I hope you enjoy my newest fruit salad creation. Be sure to make it with your kids too! I've been helping Mommy in the kitchen since I was a tiny baby, and we always have so much fun! I bet your kids would too!

Vanilla Fruit Salad Adapted from Taste of Home
1 (29 oz.) can fruit cocktail, with juice
1 (11 oz.) can mandarin oranges, drained
1 (20 oz.) can pineapple chunks, drained
3/4 c. fresh blueberries
1 TBS lemon juice
2 bananas, sliced
1 (3.4 oz) box instant vanilla pudding
Whipped Cream
Pecan Halves

In a large bowl combine all fruit except bananas. Add lemon juice. Stir. Sprinkle with pudding mix. Gently stir for about a minute until slightly thickened. Fold in bananas. Refrigerate until serving, at least an hour. When ready to serve, top with whipped cream and sprinkle with pecans.


Pin It
Two years ago we started a tradition here on EMM, my favorite little monkey stopping by to guest blog something simple and yummy that your kids can enjoy making, and of course eating, too. And two of those posts, one at the beginning of his 1st grade year, and one at the end, had something in common. Lemon Fruit Salad and Key Lime Fruit Salad  were both creations he and I worked on together, and were perfect for little hands and little tummies.

So, in that same tradition, and since the school year is once again quickly approaching, we thought ti was a great time for Alex (now a 3rd grader!) to share yet another easy but tasty fruit salad perfect for an after school snack or even a light dessert. Or if you are like us and you are filling these last few days of summer vacation with as much fun as possible, it would be great for a picnic in the park too!

Please welcome the best little sous chef around back to the EMM kitchen!

Hi everyone! I'm so excited Mommy asked me to cook for you again! Well, I guess this isn't really something you actually cook, but you know what I mean! For those of you who don't know, I am going into the 3rd grade, and am really looking forward to it! I am sad to see summer end, but I love school, and seeing my friends, so I'm okay with going back too. (But that 7:30 am wake up Monday morning will NOT be easy!!) 

Mommy and I love finding simple sweet treats I can help her make, and this is another one of those. Using mostly canned fruit, it's nice for little kids because there isn't a lot of chopping. (Mommy did slice the bananas though) Plus, it's really neat to watch how the pudding mix and fruit juice turn into a "sauce" while you stir...which was my job! This makes a perfect snack, now or once school is in, or a dessert too. Oh, and I actually like eating it for breakfast too, especially on a hot day! 


I hope you enjoy my newest fruit salad creation. Be sure to make it with your kids too! I've been helping Mommy in the kitchen since I was a tiny baby, and we always have so much fun! I bet your kids would too!

Vanilla Fruit Salad Adapted from Taste of Home
1 (29 oz.) can fruit cocktail, with juice
1 (11 oz.) can mandarin oranges, drained
1 (20 oz.) can pineapple chunks, drained
3/4 c. fresh blueberries
1 TBS lemon juice
2 bananas, sliced
1 (3.4 oz) box instant vanilla pudding
Whipped Cream
Pecan Halves

In a large bowl combine all fruit except bananas. Add lemon juice. Stir. Sprinkle with pudding mix. Gently stir for about a minute until slightly thickened. Fold in bananas. Refrigerate until serving, at least an hour. When ready to serve, top with whipped cream and sprinkle with pecans.


Pin It
reade more... Résuméabuiyad

Fresh From The Patch

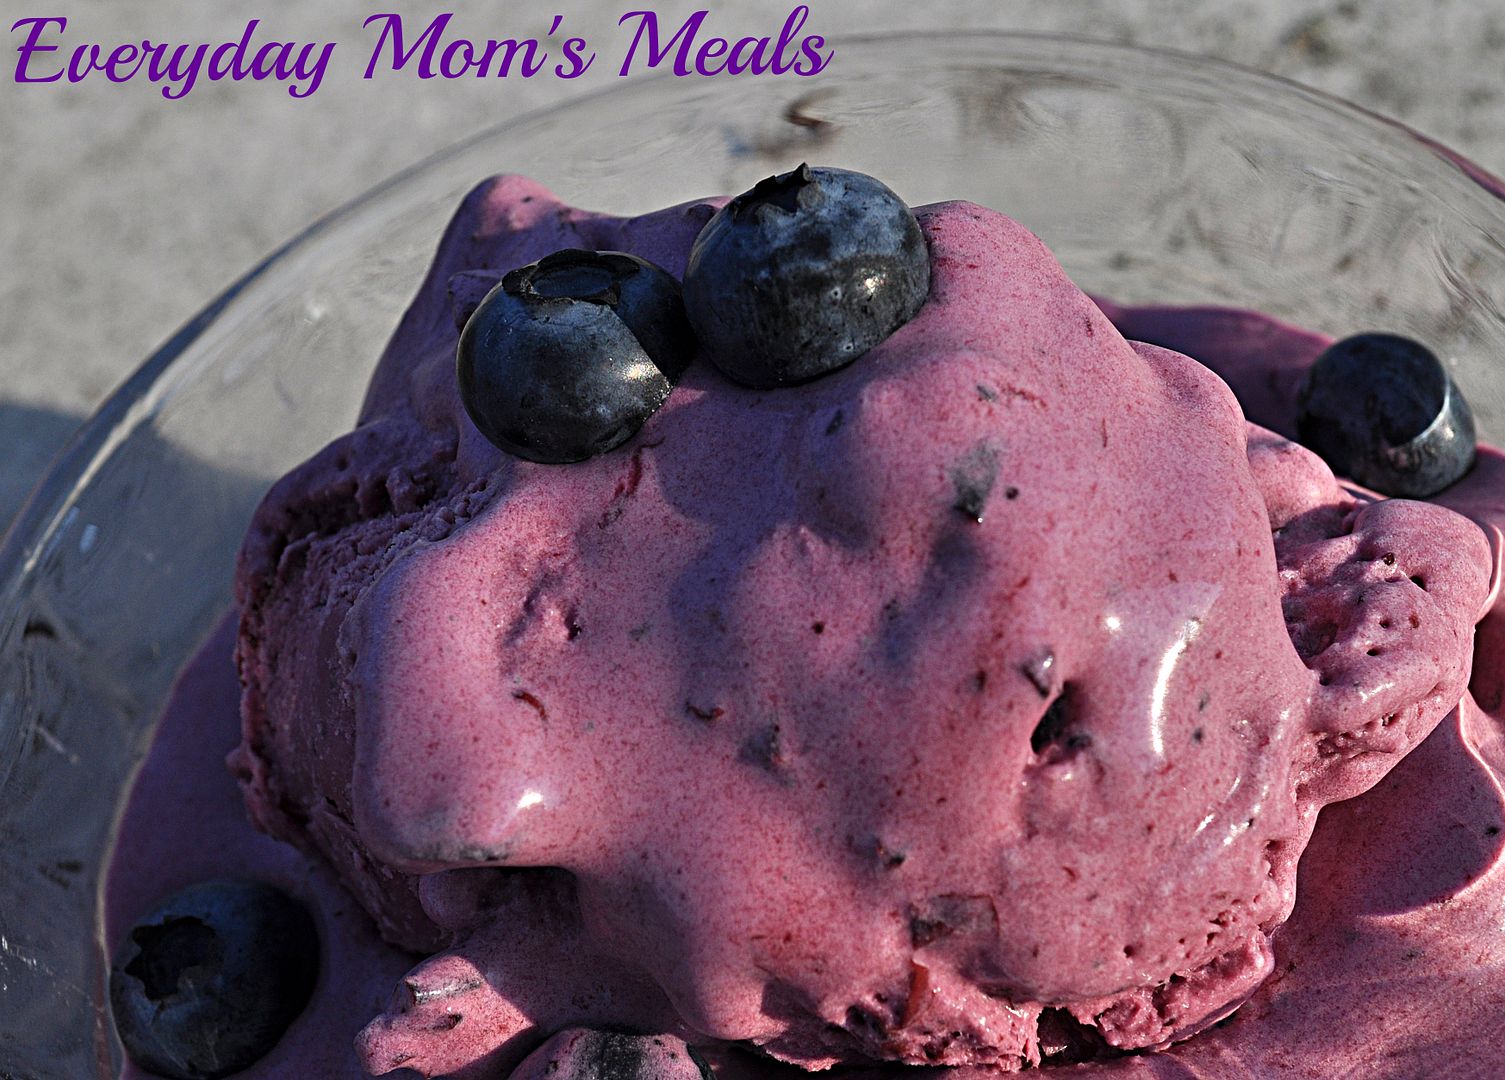
Are blueberries fresh for the picking in your area? Well, they are here in Indiana and oh, they taste so good fresh from the patch! We are lucky enough to live close to quite a few U-pick patches where I can take the boy and let him loose gathering in pound after pound. But this year, well, we did thinks a little differently.

I actually got notice that the berries were ready at one of our favorite places the day we were driving home from our vacation. I was literally sitting in the car in Jacksonville, Florida wondering "Okay, how am I going to get to the berries...and quick?" Luckily they also had some pre-picked ones available and my mother-in-law was nice enough to snag us a couple pounds so they were waiting on us when we got home.

Now I will be very honest, after being gone for 3 weeks, our cupboards and fridge were a little sad those first few days we were home. I had stock piled a few things before we left, but still, every time I went to make lunch for Alex I kind of felt like Old Mother Hubbard. So needless to say, most of that two pounds were simply eaten as is with lunch and snacks. But there was no way I wasn't going to find something to make with some of them too. And when I thought of my brand new ice cream maker...I knew exactly what it would be!

So if you have a berry patch near you, and are looking for a fun summer time activity for the kids, take them to pick their own. Then bring them home and have them help you make this great tasting, perfect cool down, summer time treat!

Blueberry Ice Cream
1/2 c. white sugar
1/4 c. water
1/2 tsp. vanilla extract
2 c. fresh blueberries, plus extra for garnish
2 c. heavy cream
1 TBS lemon juice
Pinch Salt

In a small saucepan over low heat combine sugar and water. Cook until sugar dissolves. Add berries, lemon juice, salt and vanilla. Stir and cook just until berries burst, about 5-7 minutes. Remove to bowl. Bring to room temperature. Place in refrigerator until cooled, about an hour. Add cream to blueberry mixture. Mix well. Add to ice cream machine and follow directions. For mine, after about 20 minutes of mixing it was a "soft serve" consistency. If you prefer a more frozen version, transfer to a bowl, cover and freeze until solid.


Shared on The Country Cook July 19, 2013
Shared on Make Ahead Meals July 22, 2013
Blueberry at Very Good Recipes
Pin It
Are blueberries fresh for the picking in your area? Well, they are here in Indiana and oh, they taste so good fresh from the patch! We are lucky enough to live close to quite a few U-pick patches where I can take the boy and let him loose gathering in pound after pound. But this year, well, we did thinks a little differently.

I actually got notice that the berries were ready at one of our favorite places the day we were driving home from our vacation. I was literally sitting in the car in Jacksonville, Florida wondering "Okay, how am I going to get to the berries...and quick?" Luckily they also had some pre-picked ones available and my mother-in-law was nice enough to snag us a couple pounds so they were waiting on us when we got home.

Now I will be very honest, after being gone for 3 weeks, our cupboards and fridge were a little sad those first few days we were home. I had stock piled a few things before we left, but still, every time I went to make lunch for Alex I kind of felt like Old Mother Hubbard. So needless to say, most of that two pounds were simply eaten as is with lunch and snacks. But there was no way I wasn't going to find something to make with some of them too. And when I thought of my brand new ice cream maker...I knew exactly what it would be!

So if you have a berry patch near you, and are looking for a fun summer time activity for the kids, take them to pick their own. Then bring them home and have them help you make this great tasting, perfect cool down, summer time treat!

Blueberry Ice Cream
1/2 c. white sugar
1/4 c. water
1/2 tsp. vanilla extract
2 c. fresh blueberries, plus extra for garnish
2 c. heavy cream
1 TBS lemon juice
Pinch Salt

In a small saucepan over low heat combine sugar and water. Cook until sugar dissolves. Add berries, lemon juice, salt and vanilla. Stir and cook just until berries burst, about 5-7 minutes. Remove to bowl. Bring to room temperature. Place in refrigerator until cooled, about an hour. Add cream to blueberry mixture. Mix well. Add to ice cream machine and follow directions. For mine, after about 20 minutes of mixing it was a "soft serve" consistency. If you prefer a more frozen version, transfer to a bowl, cover and freeze until solid.


Shared on The Country Cook July 19, 2013
Shared on Make Ahead Meals July 22, 2013
Blueberry at Very Good Recipes
Pin It
reade more... Résuméabuiyad

No Bake Solution

This time of year I think we are all looking for more dessert options that don't involve our oven. The dreaded "I don't want to heat up the house" season is upon us, and I for one am looking forward to the challenge.

See, before I began this blog, I truly wasn't that much of a baker. I didn't enjoy, and tried to avoid it at all costs. But after getting more and more comfortable in the kitchen and using EMM has an outlet, I have become more of a seasoned baker, and my boys are very thankful for that. But there is still something inside of me that gets excited when I can find a no-bake alternative. They are so fun, so easy and perfect for the warm months. Sure, when it's the middle of October, the crisp autumn air moving in, it's comforting to pull a big pan of hot cobbler out of the oven. But when it's the middle of July, the sun is shining and eggs are being fried on the sidewalk, not so much.

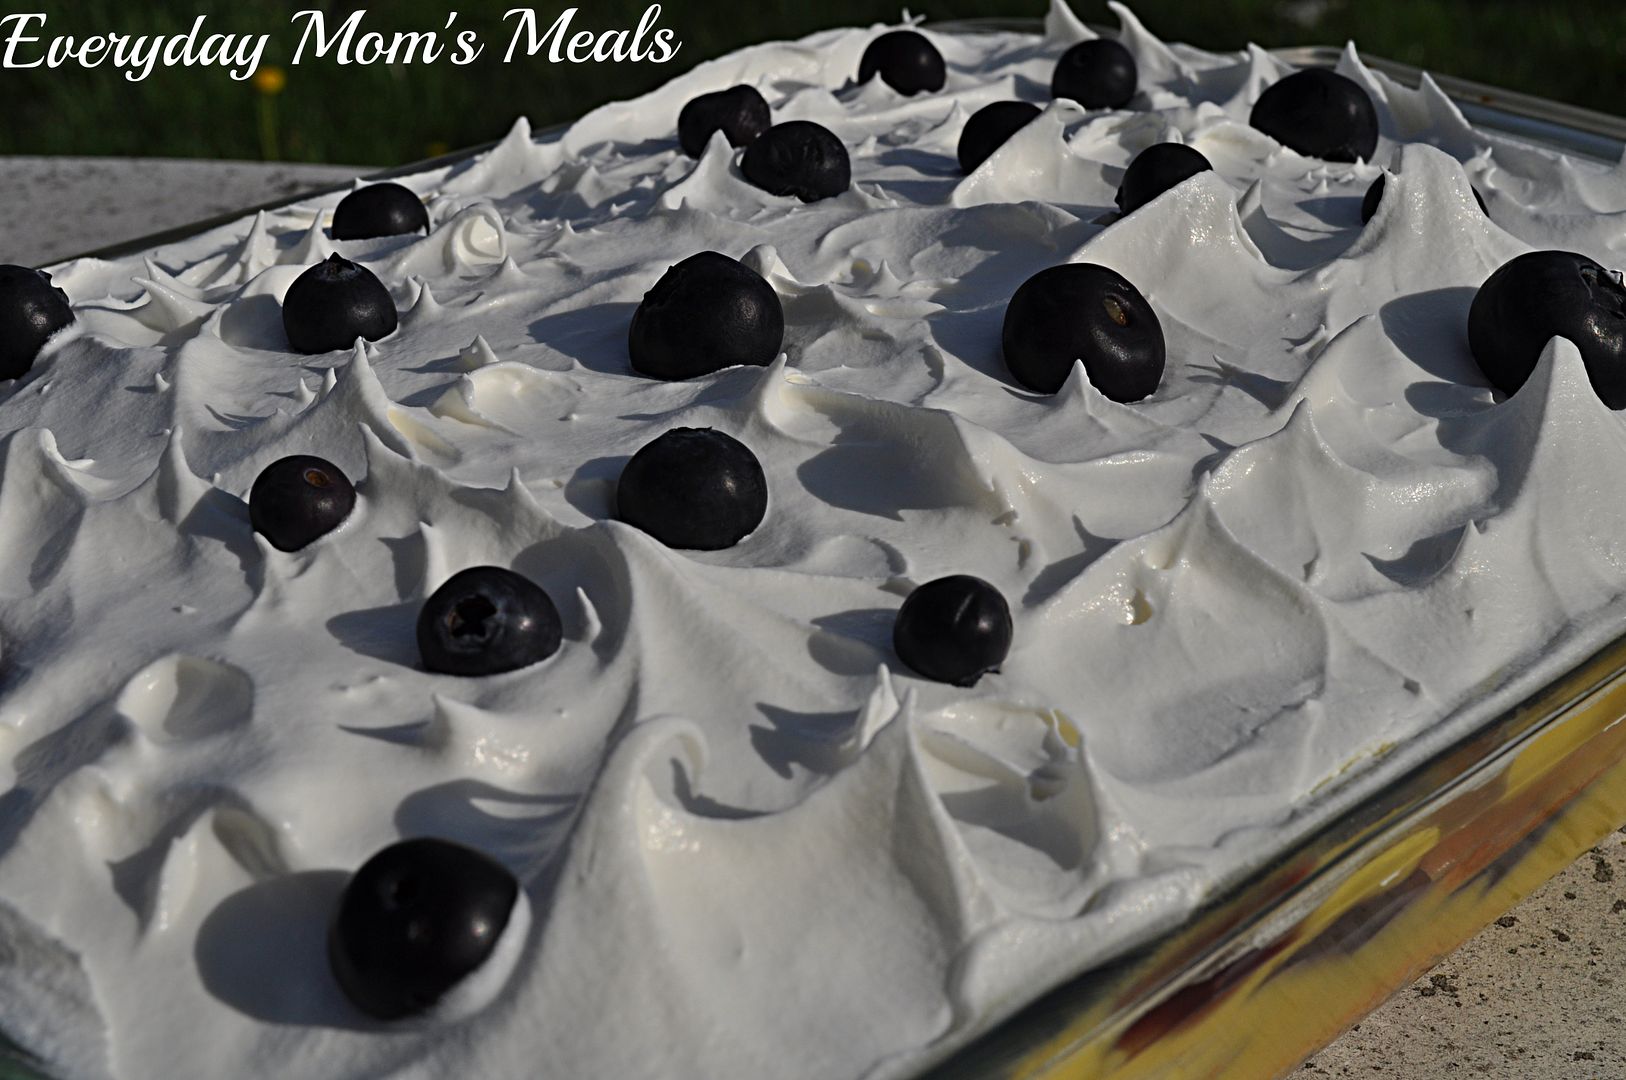
This would be perfect for you next backyard barbecue or pool party. Cool and refreshing on a hot day, the flavors easily adaptable to fit your favorites. Not to mention, if your little ones are out of school for the next couple months (We have one more week, thank goodness!) this is a fun one to have them help with. Little hands could stir the pudding, put the blueberries on top...and of course taste test!

If you want to bake a pie when it's sweltering outside, my hat is off to you. But if you are like me and truly enjoy a no-bake sweet option this time of the year, this is just for you!

No Bake Blueberry Bliss Dessert
1 (10 oz.) store bought angel food cake "loaf"
1 (21 oz.) can blueberry pie filling
1 (3.4 oz.) box instant French vanilla pudding
1 3/4 c. milk
1 (12 oz.) tub Cool Whip
1/2 c. fresh blueberries

In a medium bowl combine pudding mix and milk. Whisk for 2 minutes. Refrigerate for 5-7 minutes until "soft set". Slice angel food cake in 1/2 inch slices. In a 8 x 11 baking dish, layer angel food cake slices (You might have to cut them to make them fit. Mine took 6 regular slices, 1 cut in half and 1 cut into thirds.) Pour half the pudding over angel food cake and spread evenly. Layer with half the pie filling and spread. Repeat layers once more, ending with pie filling. Top with Cool Whip. Spread evenly using a soft spatula. To form "peaks" like mine, lightly tap Cool Whip with flat side of spatula and lift up quickly. Sprinkle with fresh berries. Chill at least an hour before serving.


Shared on The Country Cook May 31, 2013
Shared on Make Ahead Meals June 3, 2013
Shared on Mandy's Recipe Box June 4, 2013
Blueberries at Very Good Recipes
Pin It
This time of year I think we are all looking for more dessert options that don't involve our oven. The dreaded "I don't want to heat up the house" season is upon us, and I for one am looking forward to the challenge.

See, before I began this blog, I truly wasn't that much of a baker. I didn't enjoy, and tried to avoid it at all costs. But after getting more and more comfortable in the kitchen and using EMM has an outlet, I have become more of a seasoned baker, and my boys are very thankful for that. But there is still something inside of me that gets excited when I can find a no-bake alternative. They are so fun, so easy and perfect for the warm months. Sure, when it's the middle of October, the crisp autumn air moving in, it's comforting to pull a big pan of hot cobbler out of the oven. But when it's the middle of July, the sun is shining and eggs are being fried on the sidewalk, not so much.

This would be perfect for you next backyard barbecue or pool party. Cool and refreshing on a hot day, the flavors easily adaptable to fit your favorites. Not to mention, if your little ones are out of school for the next couple months (We have one more week, thank goodness!) this is a fun one to have them help with. Little hands could stir the pudding, put the blueberries on top...and of course taste test!

If you want to bake a pie when it's sweltering outside, my hat is off to you. But if you are like me and truly enjoy a no-bake sweet option this time of the year, this is just for you!

No Bake Blueberry Bliss Dessert
1 (10 oz.) store bought angel food cake "loaf"
1 (21 oz.) can blueberry pie filling
1 (3.4 oz.) box instant French vanilla pudding
1 3/4 c. milk
1 (12 oz.) tub Cool Whip
1/2 c. fresh blueberries

In a medium bowl combine pudding mix and milk. Whisk for 2 minutes. Refrigerate for 5-7 minutes until "soft set". Slice angel food cake in 1/2 inch slices. In a 8 x 11 baking dish, layer angel food cake slices (You might have to cut them to make them fit. Mine took 6 regular slices, 1 cut in half and 1 cut into thirds.) Pour half the pudding over angel food cake and spread evenly. Layer with half the pie filling and spread. Repeat layers once more, ending with pie filling. Top with Cool Whip. Spread evenly using a soft spatula. To form "peaks" like mine, lightly tap Cool Whip with flat side of spatula and lift up quickly. Sprinkle with fresh berries. Chill at least an hour before serving.


Shared on The Country Cook May 31, 2013
Shared on Make Ahead Meals June 3, 2013
Shared on Mandy's Recipe Box June 4, 2013
Blueberries at Very Good Recipes
Pin It
reade more... Résuméabuiyad

It's Almost Time

Berry season is just around the corner for most of us; and for some of you, maybe it's even closer than it is for me. We usually kick off our Memorial Day weekend with strawberry picking, and then the berry love continues right on through summer. Raspberries, red and black, blueberries....oh we love our berries!

I've told you before how raspberry crazy Mr. and Little Everyday are, so during the warm months, I try really hard to find as many recipes as I can using them. But during the colder months, they aren't something I'm really on the lookout for. However, I was always taught to never look a gift horse in the mouth. See, back in February my father in law was given an obscene amount of frozen black raspberries and he generously offered to share with us. So I filled a few bags, brought them home and popped them in the freezer, knowing at some point I would find the perfect use for them.

Then all of a sudden it was Easter weekend, and we were going to be celebrating with my parents on Good Friday evening, mom making a huge meal (it was actually the "re-do" from my birthday supper she was to ill to make), and I offered to take dessert. I knew I wanted something spring inspired, maybe with berries...and that's when I remembered those beauties just hanging out in the chest freezer.

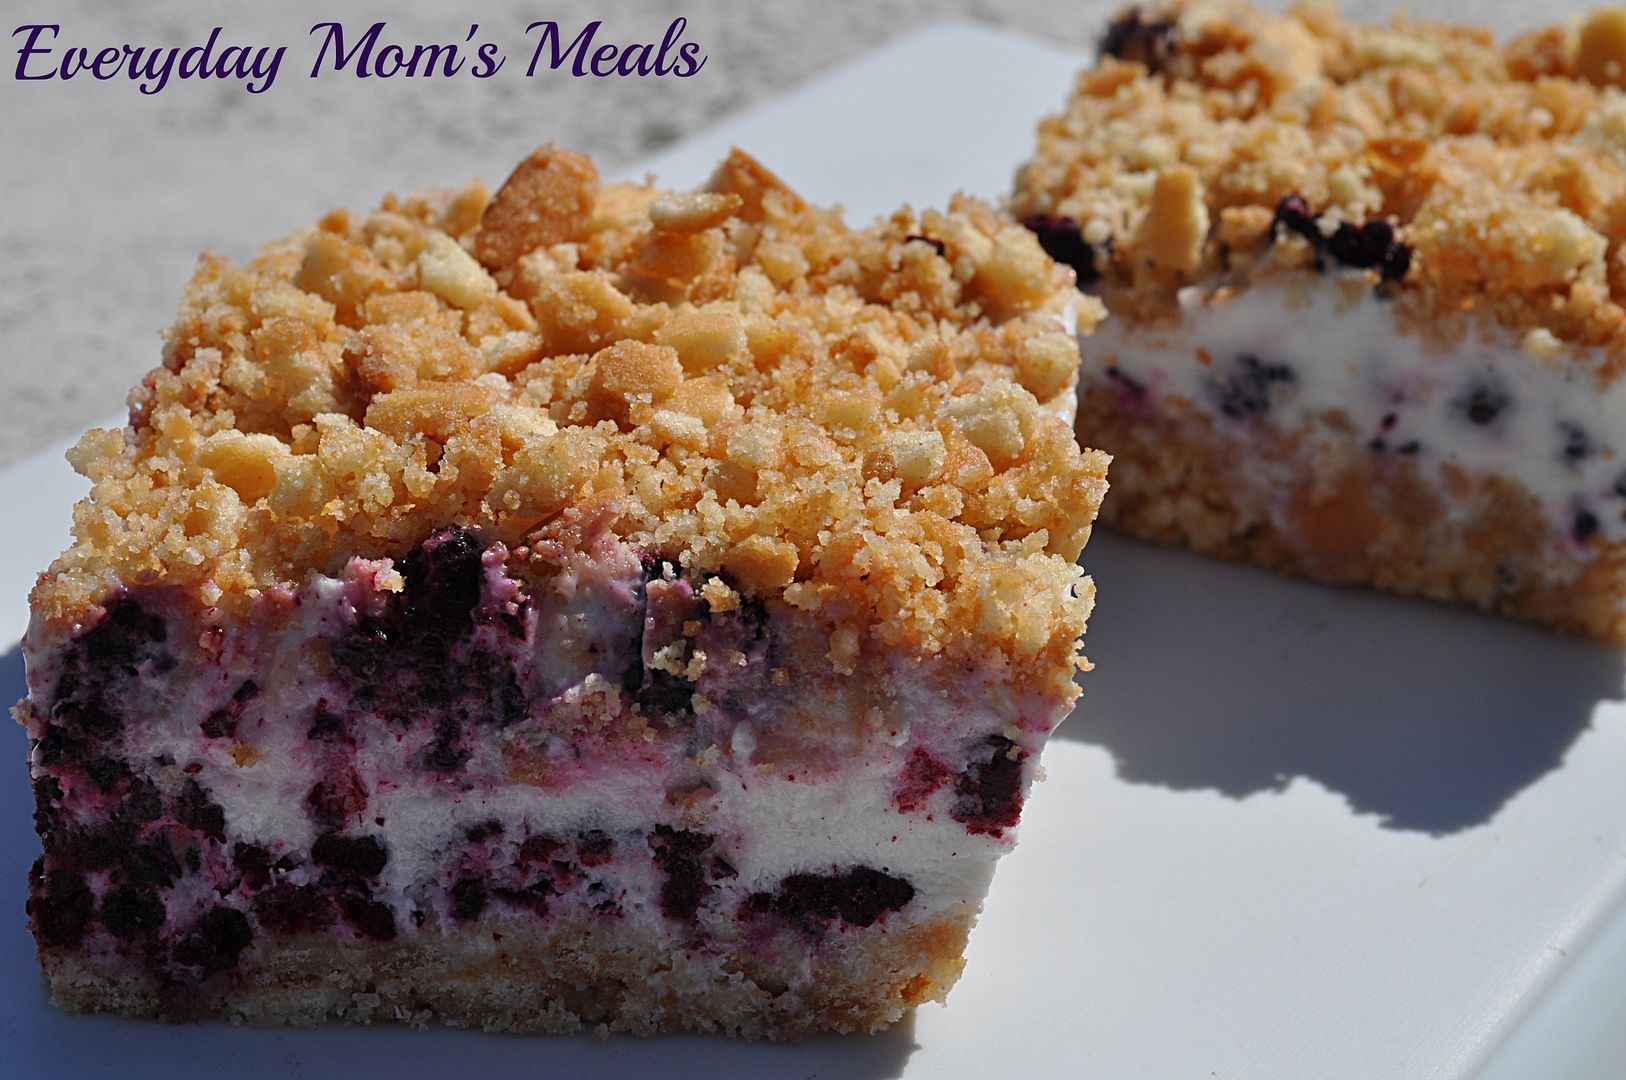
These are so incredibly pretty! The layers of berries and cream create these perfect colored bars. Oh, and not to mention they are super easy and scrumptious too. Plus, with warmer weather coming, they would make a great dessert for a hot summer day when only a frozen treat will do!

Berry season is coming, and will be here before we know it' I'm so glad I'm prepared with this great new recipe, and I hope you are too!

Frozen Raspberry Cream Bars Adapted from Taste of Home
2 c. crushed vanilla wafers (about 65 wafers)
1/4 c. butter, melted
2 c. frozen unsweetened black raspberries, do NOT thaw
3/4 c. sour cream
1 c. half and half
1/2 c. sugar

In a bowl, combine the wafer crumbs and butter. Grease a 8 x 8 baking dish. Press half of the crumb mixture into dish. Set remaining crumb mixture aside. Sprinkle berries over crust. In a bowl, combine sour cream and sugar; gradually stir in half-and-half until smooth, whisking to combine. Pour over berries. Sprinkle with remaining crumb mixture. Cover and freeze for 3 hours or until firm. You can allow these to sit for about 10 minutes to make for easier cutting, but I actually prefer to serve them frozen.


Shared on The Country Cook Apr. 19, 2013
Shared on Make Ahead Meals Apr. 22, 2013
Shared on Mandy's Recipe Box Apr. 23, 2013
Shared on Lady Behind The Curtain Apr. 24, 2013
Shared on Miz Helen's Country Cottage Apr. 25, 2013
Raspberry at Very Good Recipes
Pin It
Berry season is just around the corner for most of us; and for some of you, maybe it's even closer than it is for me. We usually kick off our Memorial Day weekend with strawberry picking, and then the berry love continues right on through summer. Raspberries, red and black, blueberries....oh we love our berries!

I've told you before how raspberry crazy Mr. and Little Everyday are, so during the warm months, I try really hard to find as many recipes as I can using them. But during the colder months, they aren't something I'm really on the lookout for. However, I was always taught to never look a gift horse in the mouth. See, back in February my father in law was given an obscene amount of frozen black raspberries and he generously offered to share with us. So I filled a few bags, brought them home and popped them in the freezer, knowing at some point I would find the perfect use for them.

Then all of a sudden it was Easter weekend, and we were going to be celebrating with my parents on Good Friday evening, mom making a huge meal (it was actually the "re-do" from my birthday supper she was to ill to make), and I offered to take dessert. I knew I wanted something spring inspired, maybe with berries...and that's when I remembered those beauties just hanging out in the chest freezer.

These are so incredibly pretty! The layers of berries and cream create these perfect colored bars. Oh, and not to mention they are super easy and scrumptious too. Plus, with warmer weather coming, they would make a great dessert for a hot summer day when only a frozen treat will do!

Berry season is coming, and will be here before we know it' I'm so glad I'm prepared with this great new recipe, and I hope you are too!

Frozen Raspberry Cream Bars Adapted from Taste of Home
2 c. crushed vanilla wafers (about 65 wafers)
1/4 c. butter, melted
2 c. frozen unsweetened black raspberries, do NOT thaw
3/4 c. sour cream
1 c. half and half
1/2 c. sugar

In a bowl, combine the wafer crumbs and butter. Grease a 8 x 8 baking dish. Press half of the crumb mixture into dish. Set remaining crumb mixture aside. Sprinkle berries over crust. In a bowl, combine sour cream and sugar; gradually stir in half-and-half until smooth, whisking to combine. Pour over berries. Sprinkle with remaining crumb mixture. Cover and freeze for 3 hours or until firm. You can allow these to sit for about 10 minutes to make for easier cutting, but I actually prefer to serve them frozen.


Shared on The Country Cook Apr. 19, 2013
Shared on Make Ahead Meals Apr. 22, 2013
Shared on Mandy's Recipe Box Apr. 23, 2013
Shared on Lady Behind The Curtain Apr. 24, 2013
Shared on Miz Helen's Country Cottage Apr. 25, 2013
Raspberry at Very Good Recipes
Pin It
reade more... Résuméabuiyad

Weekend Company {Guest Blogger Colleen}

Whew....it's December 1st! Can you believe it? I am still in disbelief myself, because I'm pretty sure Labor Day was just yesterday, but alas the calendar doesn't lie. However, I will say with the hustle and bustle of the holiday season upon us, it's nice to know ALL of my Christmas shopping is not only DONE, but also WRAPPED!!! (I realize some of you are leaving now in disgust, and I apologize.)

I hope you had a great week, and are ready for something yummy for the weekend. The is perfect for a brunch, or keep it bookmarked (or pinned) for those family visits that are just around the corner! Please welcome Colleen back to EMM~


Hi Everyone! I'm Colleen and I'm so happy to be back doing a guest spot at my favorite foodie blog. The recipe I'm going to share with you was given to me fairly recently by my dear friend, Shawna. When I told her that we were going to have a wedding rehearsal brunch for my son's upcoming wedding, she said "I've got just the recipe for you!" I was so impressed with this one that I immediately took pictures knowing that I would one day want to share it. This dish got rave reviews for the rehearsal brunch. I hope you all give it a try and enjoy it as much as we all did. I think it would make a great holiday brunch item, as well. Or maybe you could just liven up your weekend and serve this to your family one morning! They'd be thanking you all day.   

By the way, just in case you're wondering, the wedding rehearsal went great and was followed a couple days later by a beautiful wedding. The newlyweds have been married almost 2 months now and are doing very well. I'm happy to have them living just down the street from me and enjoy having them pop in now and then ... even though it's mostly to raid my refrigerator. LOL! The picture I'm including is of me with the happy new couple on their wedding day. :)

French Toast Casserole
2 tubes of refrigerated cinnamon rolls
1 cup maple syrup
6 eggs
1/2 c. heavy whipping cream
2 tsp. vanilla
1 tsp cinnamon (or to taste)
1 - 2 cups chopped nuts (optional)

Preheat oven to the temp listed on the package of cinnamon rolls (they can sometimes be different) and grease a 9 x 13 casserole dish.

Cut the cinnamon rolls into bite size pieces, reserving the icing packets for later. Place all the cut up pieces of cinnamon rolls into the buttered casserole dish. Pour the maple syrup over top of the cinnamon rolls covering as much area as you can.

In a bowl, beat the eggs and whipping cream just until it all comes together nicely. Add in the vanilla and cinnamon and mix thoroughly. Pour this mixture over the cinnamon roll mixture.
Add the chopped nuts to the top, if you are using.
Bake for about 35-40 minutes until the mixture doesn't jiggle when you shake the pan slightly.  When you take it out of the oven, open the reserved packets of icing mixture and drizzle them over the casserole. Serve warm.

Notes: This is best done in a glass casserole dish but if you do bake it in a metal or foil pan, don't add the nuts to the top until halfway through the baking process to avoid burning them. You can also bake this the day before you want to eat it. Just leave off the icing and refrigerate the casserole overnight. The next morning, heat it in a moderate oven just to re-warm it and then top with the icing after warming.


Thanks to Mrs. Everyday for allowing me to come by and share with you all once again. I hope you all have a very happy weekend full of family, love and good food. :)  


Pin It
Whew....it's December 1st! Can you believe it? I am still in disbelief myself, because I'm pretty sure Labor Day was just yesterday, but alas the calendar doesn't lie. However, I will say with the hustle and bustle of the holiday season upon us, it's nice to know ALL of my Christmas shopping is not only DONE, but also WRAPPED!!! (I realize some of you are leaving now in disgust, and I apologize.)

I hope you had a great week, and are ready for something yummy for the weekend. The is perfect for a brunch, or keep it bookmarked (or pinned) for those family visits that are just around the corner! Please welcome Colleen back to EMM~


Hi Everyone! I'm Colleen and I'm so happy to be back doing a guest spot at my favorite foodie blog. The recipe I'm going to share with you was given to me fairly recently by my dear friend, Shawna. When I told her that we were going to have a wedding rehearsal brunch for my son's upcoming wedding, she said "I've got just the recipe for you!" I was so impressed with this one that I immediately took pictures knowing that I would one day want to share it. This dish got rave reviews for the rehearsal brunch. I hope you all give it a try and enjoy it as much as we all did. I think it would make a great holiday brunch item, as well. Or maybe you could just liven up your weekend and serve this to your family one morning! They'd be thanking you all day.   

By the way, just in case you're wondering, the wedding rehearsal went great and was followed a couple days later by a beautiful wedding. The newlyweds have been married almost 2 months now and are doing very well. I'm happy to have them living just down the street from me and enjoy having them pop in now and then ... even though it's mostly to raid my refrigerator. LOL! The picture I'm including is of me with the happy new couple on their wedding day. :)

French Toast Casserole
2 tubes of refrigerated cinnamon rolls
1 cup maple syrup
6 eggs
1/2 c. heavy whipping cream
2 tsp. vanilla
1 tsp cinnamon (or to taste)
1 - 2 cups chopped nuts (optional)

Preheat oven to the temp listed on the package of cinnamon rolls (they can sometimes be different) and grease a 9 x 13 casserole dish.

Cut the cinnamon rolls into bite size pieces, reserving the icing packets for later. Place all the cut up pieces of cinnamon rolls into the buttered casserole dish. Pour the maple syrup over top of the cinnamon rolls covering as much area as you can.

In a bowl, beat the eggs and whipping cream just until it all comes together nicely. Add in the vanilla and cinnamon and mix thoroughly. Pour this mixture over the cinnamon roll mixture.
Add the chopped nuts to the top, if you are using.
Bake for about 35-40 minutes until the mixture doesn't jiggle when you shake the pan slightly.  When you take it out of the oven, open the reserved packets of icing mixture and drizzle them over the casserole. Serve warm.

Notes: This is best done in a glass casserole dish but if you do bake it in a metal or foil pan, don't add the nuts to the top until halfway through the baking process to avoid burning them. You can also bake this the day before you want to eat it. Just leave off the icing and refrigerate the casserole overnight. The next morning, heat it in a moderate oven just to re-warm it and then top with the icing after warming.


Thanks to Mrs. Everyday for allowing me to come by and share with you all once again. I hope you all have a very happy weekend full of family, love and good food. :)  


Pin It
reade more... Résuméabuiyad

Turkey Day Tradition Twist

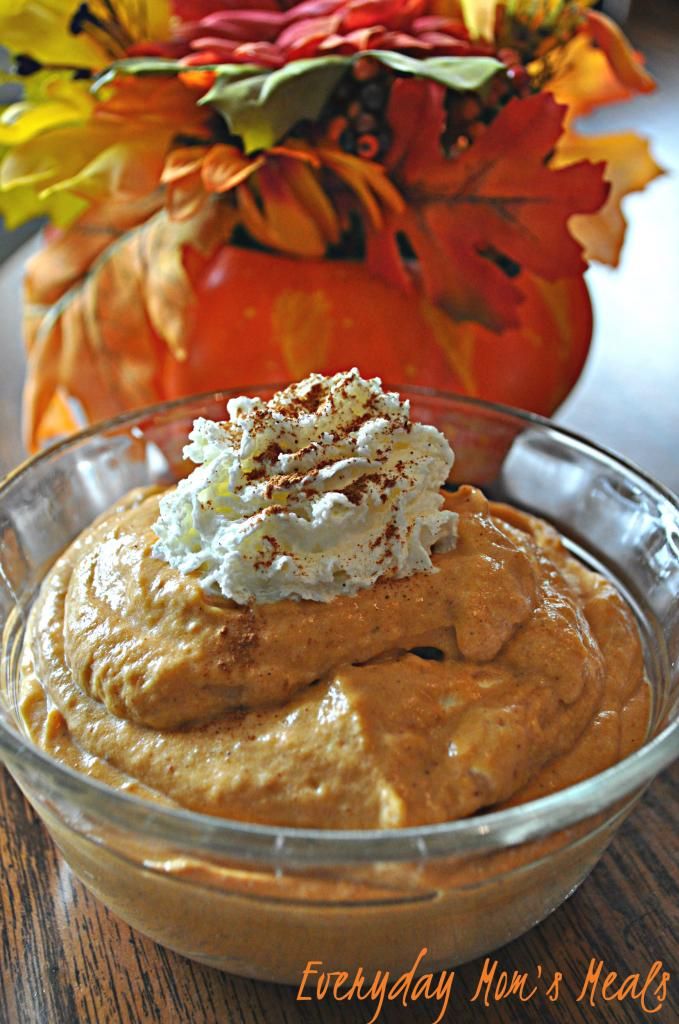
Only two more days people! I hope everyone has been to the grocery store and your turkey is thawing in the fridge. Maybe even some of you have started the prep work and have some dishes already in the works! There are so many traditions when it comes to food in our family, especially during the holidays, and one of those is pumpkin pie! And it can't be just any pumpkin pie. My mom is the pumpkin pie master! And we are the people that must have it not only at Thanksgiving but then again just a few weeks later on Christmas Day! But I realize many of you are trying to cut out certain things in your diet, and those might include the ingredients in a good pumpkin pie crust. So when I saw this recipe I thought it would be a great alternative as your family gathers around the table for turkey, dressing and all the trimmings. It is rich, creamy and the best part of a the pumpkin pie sans crust. The ingredient that I was so happy to see in the recipe was molasses! I knew it would only deepen the richness and give it an even more "pie-ish" flavor. (Yes, that is a word...) Plus, if your kids are anything like I was when I was little, the "guts" of the pie always get gobbled up with some crust remaining on the plate. So at least this way, there is no waste! This can also be made either the night before, or early Thanksgiving morning and be waiting on you when dinner is ready. Traditions are such a fun, loving part of the holidays, but starting new ones, especially delicious ones, is a great thing too!

Pumpkin Pudding From Taste of Home
1 c. solid pack pumpkin
1 (3.4 oz) package instant vanilla pudding
1/2 c. heavy cream
1 1/2 c. cold milk
1/2 tsp cinnamon, extra for garnish
1/8 tsp ground cloves
1/4 tsp salt
1 TBS molasses
Extra whipped cream for garnish, optional

In a small bowl using an electric mixer, whisk cream until soft peaks form. Set aside. In a large bowl combine pumpkin, molasses, and spices. Gradually add milk. Add pudding mix. Using electric mixer, mix slowly until thickened, about 1 minute. Fold in whipped cream until well combined. Chill for at least an hour before serving. Garnish with extra whipped cream and cinnamon.


Shared on Mandy's Recipe Box Nov. 20, 2012
Shared on Lady Behind The Curtain Nov. 21, 2012
Pumpkin at Very Good Recipes
Pin It
Only two more days people! I hope everyone has been to the grocery store and your turkey is thawing in the fridge. Maybe even some of you have started the prep work and have some dishes already in the works! There are so many traditions when it comes to food in our family, especially during the holidays, and one of those is pumpkin pie! And it can't be just any pumpkin pie. My mom is the pumpkin pie master! And we are the people that must have it not only at Thanksgiving but then again just a few weeks later on Christmas Day! But I realize many of you are trying to cut out certain things in your diet, and those might include the ingredients in a good pumpkin pie crust. So when I saw this recipe I thought it would be a great alternative as your family gathers around the table for turkey, dressing and all the trimmings. It is rich, creamy and the best part of a the pumpkin pie sans crust. The ingredient that I was so happy to see in the recipe was molasses! I knew it would only deepen the richness and give it an even more "pie-ish" flavor. (Yes, that is a word...) Plus, if your kids are anything like I was when I was little, the "guts" of the pie always get gobbled up with some crust remaining on the plate. So at least this way, there is no waste! This can also be made either the night before, or early Thanksgiving morning and be waiting on you when dinner is ready. Traditions are such a fun, loving part of the holidays, but starting new ones, especially delicious ones, is a great thing too!

Pumpkin Pudding From Taste of Home
1 c. solid pack pumpkin
1 (3.4 oz) package instant vanilla pudding
1/2 c. heavy cream
1 1/2 c. cold milk
1/2 tsp cinnamon, extra for garnish
1/8 tsp ground cloves
1/4 tsp salt
1 TBS molasses
Extra whipped cream for garnish, optional

In a small bowl using an electric mixer, whisk cream until soft peaks form. Set aside. In a large bowl combine pumpkin, molasses, and spices. Gradually add milk. Add pudding mix. Using electric mixer, mix slowly until thickened, about 1 minute. Fold in whipped cream until well combined. Chill for at least an hour before serving. Garnish with extra whipped cream and cinnamon.


Shared on Mandy's Recipe Box Nov. 20, 2012
Shared on Lady Behind The Curtain Nov. 21, 2012
Pumpkin at Very Good Recipes
Pin It
reade more... Résuméabuiyad