Pages

Showing posts with label Brown Sugar. Show all posts

Make Ahead Holiday

Sweet Potatoes. It seems folks either love 'em or hate 'em. There doesn't seem to be much wiggle room, or gray area. For our family, they are definitely a love. Any way we can get them! Mashed, baked, roasted, fries, it doesn't matter, we gobble them up.

But one thing we can't stand? The traditional addition of marshmallows to the top! Yep, what most Americans consider the norm, is not allowed on ours. And I when I say I don't enjoy the marshmallows, it's minor to the hatred my husband feels for them. Any time he sees those white clouds sitting atop, he says "Great, now they are ruined." Yeah, he's not really one to mince words. But we realize for many, they are a must, and we respect that, we just can't join in.

So I'm always on the lookout for new ways to serve sweet potatoes, especially around the holidays, and when I can also ease the stress of holiday cooking, it's an added bonus. See, these can actually be made a day or two ahead, refrigerated and then reheated in the oven, right alongside the bird! If you can check a few items off the list before the big day, why not make it a little easier on yourself?

Sweet, buttery and full of flavor, these sweet potatoes are sure to be a star at any holiday table. And if your family digs the marshmallows, by all means, add some on top. Just don't offer them to my husband.

Maple Mashed Sweet Potatoes
6 lbs. sweet potatoes, peeled
1/2 c. maple syrup
1/2 c. brown sugar
1/2 c. butter, diced
1/2 tsp. cinnamon, extra for garnish
1/2 c. chopped pecans

Preheat oven to 375. Lay potatoes on baking sheet, or 2 depending on size. Spray lightly with cooking spray. Roast for 1 hour, stirring occasionally, until tender. Remove to a large bowl. In a small sauce pan combine syrup, sugar, butter and cinnamon. Bring to a boil, stirring constantly. Allow to slightly thicken. Add syrup mixture to potatoes. Mash with potato masher, or whip with electric mixer until desired consistency. (We likes our to have a few small chunks.) Transfer to serving bowl. Top with pecans and extra cinnamon.

*NOTE* To make ahead, prepare through mashing. Put in an air tight container with lid and store in fridge for up to 2 days. When ready, preheat oven to 325. Put potatoes in casserole dish. Bake uncovered for 1 hour until warmed through. Remove and garnish as recipe states.


Shared on The Country Cook Nov. 15, 2013

Sweet Potatoes at Very Good Recipes
Sweet Potatoes. It seems folks either love 'em or hate 'em. There doesn't seem to be much wiggle room, or gray area. For our family, they are definitely a love. Any way we can get them! Mashed, baked, roasted, fries, it doesn't matter, we gobble them up.

But one thing we can't stand? The traditional addition of marshmallows to the top! Yep, what most Americans consider the norm, is not allowed on ours. And I when I say I don't enjoy the marshmallows, it's minor to the hatred my husband feels for them. Any time he sees those white clouds sitting atop, he says "Great, now they are ruined." Yeah, he's not really one to mince words. But we realize for many, they are a must, and we respect that, we just can't join in.

So I'm always on the lookout for new ways to serve sweet potatoes, especially around the holidays, and when I can also ease the stress of holiday cooking, it's an added bonus. See, these can actually be made a day or two ahead, refrigerated and then reheated in the oven, right alongside the bird! If you can check a few items off the list before the big day, why not make it a little easier on yourself?

Sweet, buttery and full of flavor, these sweet potatoes are sure to be a star at any holiday table. And if your family digs the marshmallows, by all means, add some on top. Just don't offer them to my husband.

Maple Mashed Sweet Potatoes
6 lbs. sweet potatoes, peeled
1/2 c. maple syrup
1/2 c. brown sugar
1/2 c. butter, diced
1/2 tsp. cinnamon, extra for garnish
1/2 c. chopped pecans

Preheat oven to 375. Lay potatoes on baking sheet, or 2 depending on size. Spray lightly with cooking spray. Roast for 1 hour, stirring occasionally, until tender. Remove to a large bowl. In a small sauce pan combine syrup, sugar, butter and cinnamon. Bring to a boil, stirring constantly. Allow to slightly thicken. Add syrup mixture to potatoes. Mash with potato masher, or whip with electric mixer until desired consistency. (We likes our to have a few small chunks.) Transfer to serving bowl. Top with pecans and extra cinnamon.

*NOTE* To make ahead, prepare through mashing. Put in an air tight container with lid and store in fridge for up to 2 days. When ready, preheat oven to 325. Put potatoes in casserole dish. Bake uncovered for 1 hour until warmed through. Remove and garnish as recipe states.


Shared on The Country Cook Nov. 15, 2013

Sweet Potatoes at Very Good Recipes
reade more... Résuméabuiyad

Another One For Holiday Planning

So, I might have a new addiction. I can't seem to walk past the acorn squash at the grocery store without bringing a couple home. Now, to be fair, I have always been a squash fan, and so has every one else in my house.

In fact, when Alex was a baby, his favorite baby food, hands down, was the squash. Not the sweet bananas, like so many other kids. Sure, he liked those too, but if you really wanted to bring a smile to his face, a jar of squash was a guarantee. I can remember holding him while getting the jars out of the cupboard when lunch or dinner time rolled around, and he would stretch his little neck to see if there was any squash.

Anyway, I'm a squash fan from way back. My dad used to grow them in his garden, roast them and freeze it for the winter. But his favorite variety was buttercup, and to this today that is still what I associate with "winter squash" in my head. And if you've ever bought the frozen boxed squash in the grocery store, it was more than likely buttercup, with that bright orange color. And many times, that is exactly what I do when I want squash on my table. A couple boxes of it, some butter, salt and pepper...it's quick, easy and yummy.

But every since I made the stuffed squash recipe last month, I've been on this acorn squash kick. I can't get enough. And since making it fresh isn't something I've done a lot of, it's always a treat to my "boys" too.

These would make a beautiful, simple, and tasty side dish for your Thanksgiving meal. And depending on how many people you are serving, you have a couple options to make sure you get the most "bang for your buck". (Just see the note below for serving options.) Sweet and savory, the glaze only enhances the flavor of the squash, not over powering it. It really allows the squash to shine, not to mention makes it gorgeous on a plate.

If you are a squash lover too, you are going to want to make this asap. And if you are in the midst of holiday meal planning, I think this would make the perfect addition!

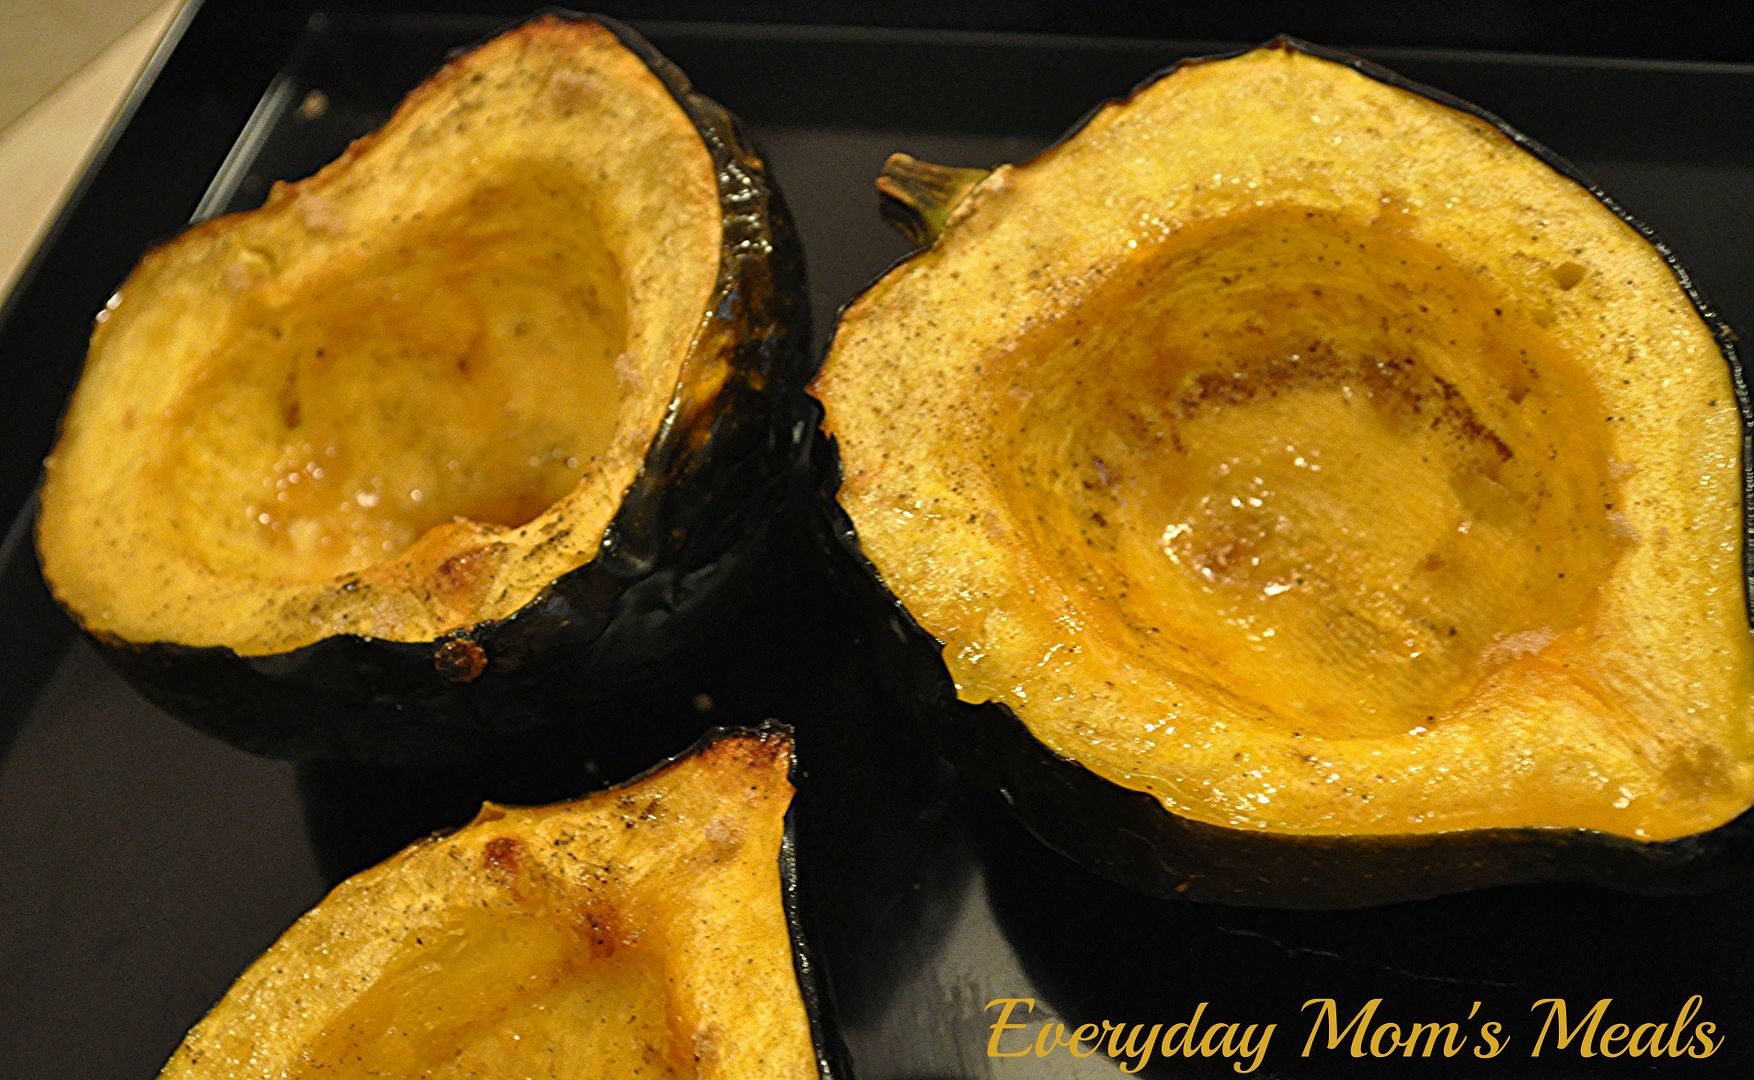
Maple and Brown Sugar Roasted Acorn Squash
2 medium acorn squash, cut in half and seeded
4 TBS butter, melted
4 TBS brown sugar
4 TBS maple syrup
Salt and Pepper to taste

Preheat oven to 400. Line a rimmed baking sheet with foil. In a small bowl combine melted butter, sugar and syrup. Whisk well to combine. It will be thick and resemble caramel! Brush cavity of squash liberally with butter mixture. Leave a little extra in each "hole". Sprinkle with salt and pepper. Roast for 1 hour or until squash is fork tender. Sprinkle with extra brown sugar before serving.

*NOTE* To serve you have a couple options. If you're feeding a big crowd, scrape the squash from the skin into a casserole dish. Adjust seasoning and cover. If need be, you can put back in the oven to reheat. If there are only a few people, I think these are very pretty to serve on individual plates, as is, letting each person season their own.


Shared on The Country Cook Nov. 8, 2013

Squash at Very Good Recipes

So, I might have a new addiction. I can't seem to walk past the acorn squash at the grocery store without bringing a couple home. Now, to be fair, I have always been a squash fan, and so has every one else in my house.

In fact, when Alex was a baby, his favorite baby food, hands down, was the squash. Not the sweet bananas, like so many other kids. Sure, he liked those too, but if you really wanted to bring a smile to his face, a jar of squash was a guarantee. I can remember holding him while getting the jars out of the cupboard when lunch or dinner time rolled around, and he would stretch his little neck to see if there was any squash.

Anyway, I'm a squash fan from way back. My dad used to grow them in his garden, roast them and freeze it for the winter. But his favorite variety was buttercup, and to this today that is still what I associate with "winter squash" in my head. And if you've ever bought the frozen boxed squash in the grocery store, it was more than likely buttercup, with that bright orange color. And many times, that is exactly what I do when I want squash on my table. A couple boxes of it, some butter, salt and pepper...it's quick, easy and yummy.

But every since I made the stuffed squash recipe last month, I've been on this acorn squash kick. I can't get enough. And since making it fresh isn't something I've done a lot of, it's always a treat to my "boys" too.

These would make a beautiful, simple, and tasty side dish for your Thanksgiving meal. And depending on how many people you are serving, you have a couple options to make sure you get the most "bang for your buck". (Just see the note below for serving options.) Sweet and savory, the glaze only enhances the flavor of the squash, not over powering it. It really allows the squash to shine, not to mention makes it gorgeous on a plate.

If you are a squash lover too, you are going to want to make this asap. And if you are in the midst of holiday meal planning, I think this would make the perfect addition!

Maple and Brown Sugar Roasted Acorn Squash
2 medium acorn squash, cut in half and seeded
4 TBS butter, melted
4 TBS brown sugar
4 TBS maple syrup
Salt and Pepper to taste

Preheat oven to 400. Line a rimmed baking sheet with foil. In a small bowl combine melted butter, sugar and syrup. Whisk well to combine. It will be thick and resemble caramel! Brush cavity of squash liberally with butter mixture. Leave a little extra in each "hole". Sprinkle with salt and pepper. Roast for 1 hour or until squash is fork tender. Sprinkle with extra brown sugar before serving.

*NOTE* To serve you have a couple options. If you're feeding a big crowd, scrape the squash from the skin into a casserole dish. Adjust seasoning and cover. If need be, you can put back in the oven to reheat. If there are only a few people, I think these are very pretty to serve on individual plates, as is, letting each person season their own.


Shared on The Country Cook Nov. 8, 2013

Squash at Very Good Recipes

reade more... Résuméabuiyad

Sugar Coma

Are you ready for the big fright night tomorrow? Less than 24 hours until it's finally Halloween, when children everywhere will be hopped up on sugary treats; and parents will be counting the minutes until bed time so they can raid the candy bags. (Don't deny it. You know you do it!! We all do!) But in case you're worried there won't be enough sugar in your house, I've got a great sweet treat for you today.

My blogging buddy Stacey over at Southern Bite posted these a few weeks back when I was desperately trying to find ways to use up the rest of the apples we picked at the orchard. (If you didn't see our adventure, you can read all about it here.) I only had a few left in the bushel basket, and I knew I wanted to bake something. These were just what I was looking for. But then my sweet tooth (teeth) got the best of me, and I decided to take them to the next level with a maple glaze.

Why? Because I could. Because it's fall, and apples, pecans and maple scream autumn to me. Because I'm an icing/frosting/glaze freak. Because I had 2 boxes of powdered sugar in the pantry calling my name. The reason doesn't matter. What matters is these are absolutely decadent, rich and delicious. Plan on only eating one, because after a few bites, you will be in a sugar induced coma, with a big smile on your face.

Now, to be fair, I did leave a couple "bare" when I made them so my family could enjoy them with or without the glaze, and they were delicious as is. But the glaze just put them over the top for me.

Need a dessert full of fall flavors (try saying that 3 times fast) tonight? Craving a little extra sugar? Have some apples to use? Looking for any excuse to make these you can find? Go ahead. The kids are going to get their candy. You can have these!

Apple Pecan Blondies with Maple Glaze Inspired by Southern Bite
1 c. packed brown sugar
1 stick butter, at room temp
1 egg
1 c. flour
1/2 tsp. baking powder
1/2 tsp. cinnamon
1/2 tsp. salt
2 apples, cored, peeled and finely chopped
1/2 c. pecans, chopped

Glaze:
1 c. powdered sugar
2 TBS milk
1 1/2 tsp. maple extract

Preheat oven to 350. In a large bowl cream butter and sugar. Add egg and mix well. (I used my electric mixer.) In another bowl combine flour, baking powder, cinnamon and salt. Whisk well. Slowly add the dry ingredients to the butter mixture. Mix well. Fold in apples and pecans. Batter will be thick and sticky. Scoop batter into a greased 8x8 baking pan. Spread evenly with a spatula. Bake for 45 minutes until golden, and a toothpick comes out clean. Transfer to a wire rack to cool. In a small bowl combine ingredients for glaze. Mix well. When blondies are cool, cut into 9 bars. Dip each into glaze, covering top. Transfer to wire rack (I set mine was wax paper for easy clean up) to set. When set, sprinkle with powdered sugar. I like to refrigerate any leftovers so the glaze continues and stays hardened.


Shared on The Country Cook November 1, 2013

Maple at Very Good Recipes

Are you ready for the big fright night tomorrow? Less than 24 hours until it's finally Halloween, when children everywhere will be hopped up on sugary treats; and parents will be counting the minutes until bed time so they can raid the candy bags. (Don't deny it. You know you do it!! We all do!) But in case you're worried there won't be enough sugar in your house, I've got a great sweet treat for you today.

My blogging buddy Stacey over at Southern Bite posted these a few weeks back when I was desperately trying to find ways to use up the rest of the apples we picked at the orchard. (If you didn't see our adventure, you can read all about it here.) I only had a few left in the bushel basket, and I knew I wanted to bake something. These were just what I was looking for. But then my sweet tooth (teeth) got the best of me, and I decided to take them to the next level with a maple glaze.

Why? Because I could. Because it's fall, and apples, pecans and maple scream autumn to me. Because I'm an icing/frosting/glaze freak. Because I had 2 boxes of powdered sugar in the pantry calling my name. The reason doesn't matter. What matters is these are absolutely decadent, rich and delicious. Plan on only eating one, because after a few bites, you will be in a sugar induced coma, with a big smile on your face.

Now, to be fair, I did leave a couple "bare" when I made them so my family could enjoy them with or without the glaze, and they were delicious as is. But the glaze just put them over the top for me.

Need a dessert full of fall flavors (try saying that 3 times fast) tonight? Craving a little extra sugar? Have some apples to use? Looking for any excuse to make these you can find? Go ahead. The kids are going to get their candy. You can have these!

Apple Pecan Blondies with Maple Glaze Inspired by Southern Bite
1 c. packed brown sugar
1 stick butter, at room temp
1 egg
1 c. flour
1/2 tsp. baking powder
1/2 tsp. cinnamon
1/2 tsp. salt
2 apples, cored, peeled and finely chopped
1/2 c. pecans, chopped

Glaze:
1 c. powdered sugar
2 TBS milk
1 1/2 tsp. maple extract

Preheat oven to 350. In a large bowl cream butter and sugar. Add egg and mix well. (I used my electric mixer.) In another bowl combine flour, baking powder, cinnamon and salt. Whisk well. Slowly add the dry ingredients to the butter mixture. Mix well. Fold in apples and pecans. Batter will be thick and sticky. Scoop batter into a greased 8x8 baking pan. Spread evenly with a spatula. Bake for 45 minutes until golden, and a toothpick comes out clean. Transfer to a wire rack to cool. In a small bowl combine ingredients for glaze. Mix well. When blondies are cool, cut into 9 bars. Dip each into glaze, covering top. Transfer to wire rack (I set mine was wax paper for easy clean up) to set. When set, sprinkle with powdered sugar. I like to refrigerate any leftovers so the glaze continues and stays hardened.


Shared on The Country Cook November 1, 2013

Maple at Very Good Recipes

reade more... Résuméabuiyad

Our First Time

Last month over Alex's birthday weekend (Ironically enough exactly 1 month ago today), we were able to experience something we never had before. See, he had made a request back in the summer that he wanted to go to an apple orchard and pick his very own. Now, we have a fantastic U-Pick place we visit in the spring and summer for berries galore (I'm sure you've seen the pictures) but I didn't even know if we had an orchard like that around here. Well, lucky for me, I mentioned my conundrum to a friend, and she told me about a farm, only about 25 minutes from our house, that was exactly what I was looking for.

Advanced Tree Technology in New Haven, Indiana specializes in their U-Pick apple orchard. They have dwarf trees, so it makes it easy and fun for kids to pick, and they have many varieties to choose from. Plus, it's really nice because they let you know the date each variety is ready to pick, so you know when your favorites will be ripe! 

Well, little man decided this was something he wanted to do for his birthday, but with it being in the middle of September, I wasn't even sure if that was possible. But as luck would have it, there were indeed some ready, and just waiting for his little hands to grab them.


We had so much fun! It was a great family experience, and he was super excited to bring home a half bushel of apples for us to snack on, and of course for Mommy to cook with! Let me tell you, it's a lot of apples! So I was happy when I found this recipe in a church cookbook! 

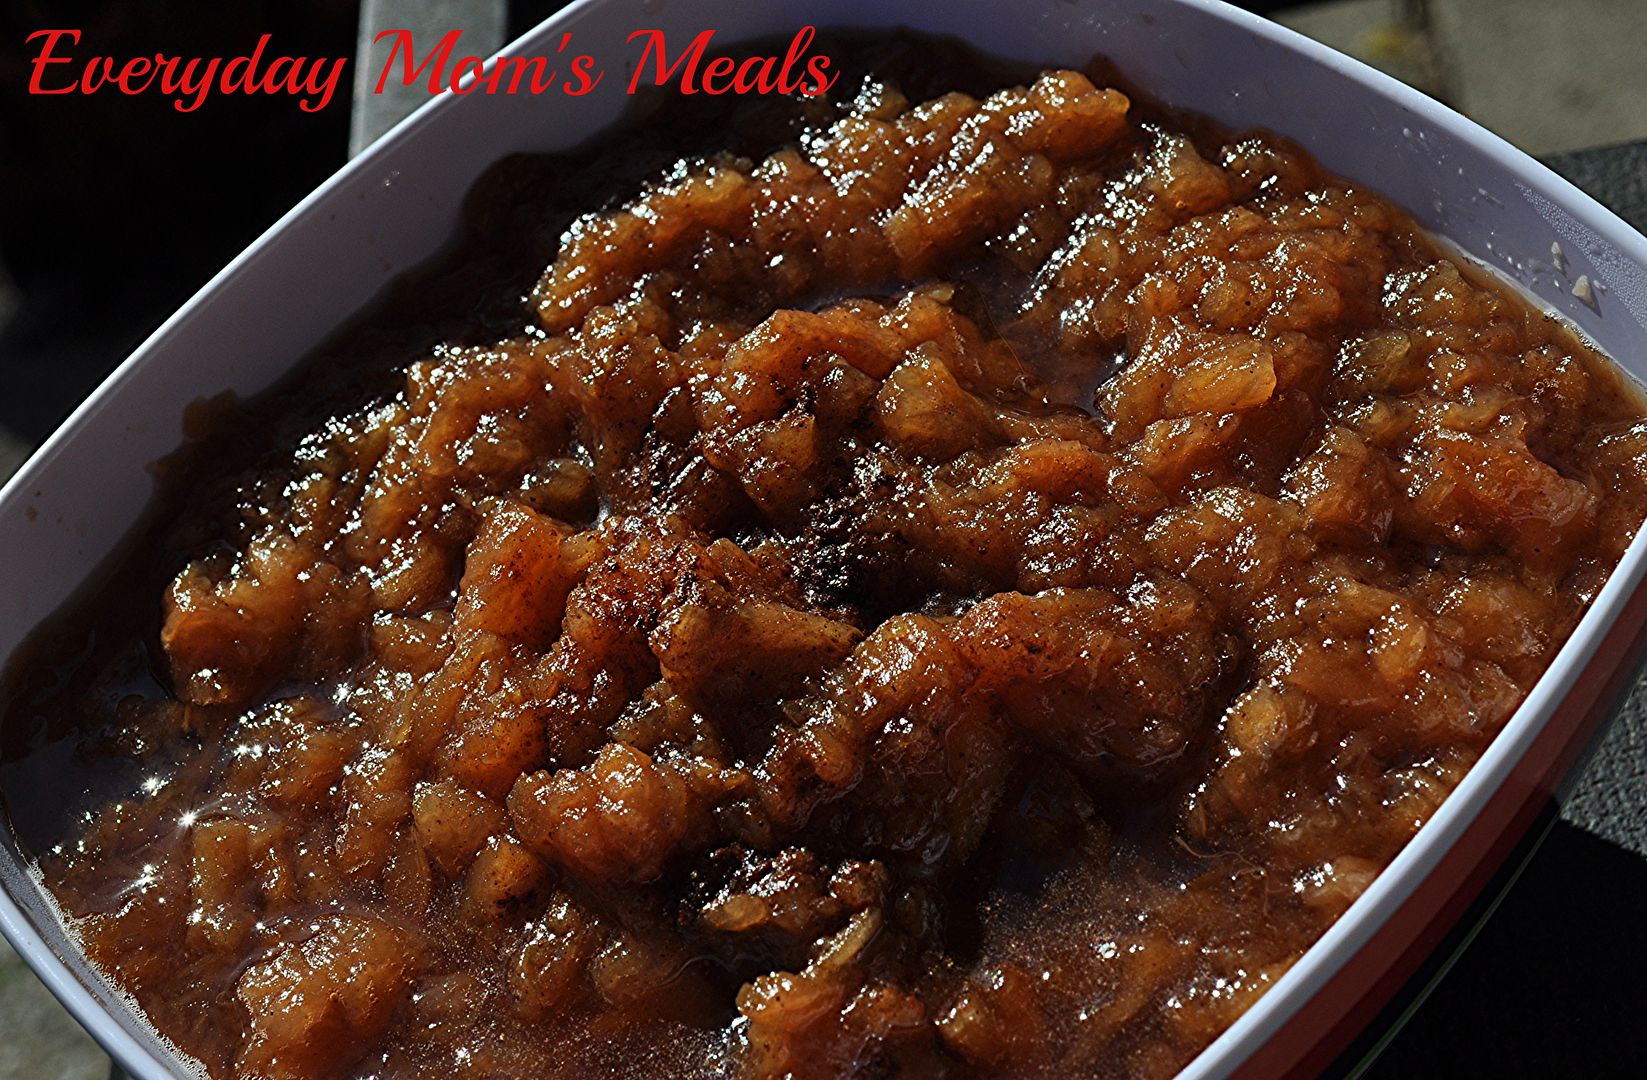
I will be honest, I wasn't sure about the addition of brown sugar, but I figured if the "little old church ladies" made it, it had to be yummy. Oh, was I right! I had nothing to worry about. This is the best applesauce I've ever had in my life! And the best part? You can start it in the morning before work, and it will be ready in time for supper. All you have to do is stir, and mash! 

If you have never picked your own apples, I encourage you to find out if you have an orchard close and get out there with the little ones and experience a true fall blessing!

Crock Pot Applesauce
8-10 Fuji apples peeled, cored and cut into chunks
1/3 c. apple juice
1/2 c. packed brown sugar
1 tsp. cinnamon

Combine all in Crock Pot. Cook on LOW 7-9 hours. Mash with a potato masher. Garnish with more cinnamon. 


Shared on The Country Cook Oct. 18, 2013


Apples at Very Good Recipes
Last month over Alex's birthday weekend (Ironically enough exactly 1 month ago today), we were able to experience something we never had before. See, he had made a request back in the summer that he wanted to go to an apple orchard and pick his very own. Now, we have a fantastic U-Pick place we visit in the spring and summer for berries galore (I'm sure you've seen the pictures) but I didn't even know if we had an orchard like that around here. Well, lucky for me, I mentioned my conundrum to a friend, and she told me about a farm, only about 25 minutes from our house, that was exactly what I was looking for.

Advanced Tree Technology in New Haven, Indiana specializes in their U-Pick apple orchard. They have dwarf trees, so it makes it easy and fun for kids to pick, and they have many varieties to choose from. Plus, it's really nice because they let you know the date each variety is ready to pick, so you know when your favorites will be ripe! 

Well, little man decided this was something he wanted to do for his birthday, but with it being in the middle of September, I wasn't even sure if that was possible. But as luck would have it, there were indeed some ready, and just waiting for his little hands to grab them.


We had so much fun! It was a great family experience, and he was super excited to bring home a half bushel of apples for us to snack on, and of course for Mommy to cook with! Let me tell you, it's a lot of apples! So I was happy when I found this recipe in a church cookbook! 

I will be honest, I wasn't sure about the addition of brown sugar, but I figured if the "little old church ladies" made it, it had to be yummy. Oh, was I right! I had nothing to worry about. This is the best applesauce I've ever had in my life! And the best part? You can start it in the morning before work, and it will be ready in time for supper. All you have to do is stir, and mash! 

If you have never picked your own apples, I encourage you to find out if you have an orchard close and get out there with the little ones and experience a true fall blessing!

Crock Pot Applesauce
8-10 Fuji apples peeled, cored and cut into chunks
1/3 c. apple juice
1/2 c. packed brown sugar
1 tsp. cinnamon

Combine all in Crock Pot. Cook on LOW 7-9 hours. Mash with a potato masher. Garnish with more cinnamon. 


Shared on The Country Cook Oct. 18, 2013


Apples at Very Good Recipes
reade more... Résuméabuiyad

Coming Soon...Autumn

If you haven't been paying attention to the calendar, the first day of fall (according to the calendar) is this Sunday. Now I realize that for many, the minute the clock struck midnight on September 1st, you were in full on autumn mode; while some, including us, still had some 95+ degree weather ahead of them, so summer was lingering in our minds. No matter what the thermometer says though, it is time to at least enjoy the flavors fall has to offer!

So I thought the perfect way to kick off the season here on EMM would be with something featuring one of autumn's greatest treats, apple!

This is the perfect dessert for a busy schedule like mine, hence the word "lazy". Taking a little help from the store with the cake mix, this comes together in no time. Plus, the use of pie filling makes it something you can make rather the fresh apples look good or not.

Rather it is for a weeknight supper, or a nice bonfire party, complete with warm cider and a hayride, this simple dessert will be loved by all, and ring in the new season with a taste bud celebration!

Lazy Apple Crisp
1 (21 oz.) can apple pie filling
2 TBS brown sugar
1 (16.5 oz) yellow cake mix, DRY do NOT add other ingredients
1/4 tsp. cinnamon
1/2 c. chopped walnuts
6 TBS butter, diced

Preheat oven to 375. In the bottom of a 8x11 pan, spread pie filling. Sprinkle with brown sugar. Evenly sprinkle cake mix until completely covering pie filling. Sprinkle with cinnamon and walnuts. Dot with diced butter. Bake for 45 minutes or until browned and bubbly. *NOTE* I did NOT use the entire package of cake mix. I probably had about 1/4 c. leftover.


Shared on The Country Cook Sept. 20, 2013
Apple at Very Good Recipes
If you haven't been paying attention to the calendar, the first day of fall (according to the calendar) is this Sunday. Now I realize that for many, the minute the clock struck midnight on September 1st, you were in full on autumn mode; while some, including us, still had some 95+ degree weather ahead of them, so summer was lingering in our minds. No matter what the thermometer says though, it is time to at least enjoy the flavors fall has to offer!

So I thought the perfect way to kick off the season here on EMM would be with something featuring one of autumn's greatest treats, apple!

This is the perfect dessert for a busy schedule like mine, hence the word "lazy". Taking a little help from the store with the cake mix, this comes together in no time. Plus, the use of pie filling makes it something you can make rather the fresh apples look good or not.

Rather it is for a weeknight supper, or a nice bonfire party, complete with warm cider and a hayride, this simple dessert will be loved by all, and ring in the new season with a taste bud celebration!

Lazy Apple Crisp
1 (21 oz.) can apple pie filling
2 TBS brown sugar
1 (16.5 oz) yellow cake mix, DRY do NOT add other ingredients
1/4 tsp. cinnamon
1/2 c. chopped walnuts
6 TBS butter, diced

Preheat oven to 375. In the bottom of a 8x11 pan, spread pie filling. Sprinkle with brown sugar. Evenly sprinkle cake mix until completely covering pie filling. Sprinkle with cinnamon and walnuts. Dot with diced butter. Bake for 45 minutes or until browned and bubbly. *NOTE* I did NOT use the entire package of cake mix. I probably had about 1/4 c. leftover.


Shared on The Country Cook Sept. 20, 2013
Apple at Very Good Recipes
reade more... Résuméabuiyad

Indoor Hog Roast

Do you enjoy a good old fashion hog roast? Do you even know what I'm talking about? See, I'm not sure it's something enjoyed from coast to coast or not, but here in the Midwest, if you have a party and mention there is going to be a freshly roasted hog, your guest list will double! In fact, we love them so much, it's what we served at our wedding reception! Yep, we had a dear friend make all the sides, salads, etc, but the main dish was shredded pork from two hogs our family prepped and roasted ourselves.

We are lucky enough that my father in law has a hog cooker, and we were happy to take full advantage on our special night. And to this day, I still get compliments about the food at our reception being some of the best, most delicious and family friendly ever.

For those of you who don't know, I'm talking about taking a whole hog, seasoning it, and putting it inside this huge cooker to slow roast for hours and hours. It comes out tender, juicy and mouth watering. Now, it's a preference thing rather you include sauerkraut, and what most folks around here do is to cook part with, and part without. I like to eat it on a plate with a fork; and yes, I enjoy the kraut too. But it makes the best pulled pork sandwich around too, and some even add barbecue or hot sauce to it.

As much as we enjoy this, it's not very practical for an every day meal. It has to be a pretty special occasion to pull out that hog cooker. So, when I crave it during random moments of the year, this is a simple, tasty alternative. With only 4 ingredients, and a few hours in the slow cooker, it gives us a flavor that is very close, and makes for an excellent weeknight meal.

If you love a good roast hog as much as I do, or are just fans of pork and kraut together, you will love this one too! But I'm still looking forward to the next hog roast. There has to be a graduation, wedding or family reunion coming soon!

Slow Cooker Sausage and Kraut
2 (9 oz.) packages smoked sausage, cut into 2 inch pieces
2 ( 15 oz.) cans sauerkraut, undrained
1/4 c. brown sugar
2 tsp. Dijon mustard

Place sauerkraut, brown sugar and mustard in Crock Pot. Stir well. Spoon some of the sauerkraut mixture on top to cover sausage. Cook on LOW 4-5 hours. Check for dryness every hour or so. If it dries out, add a splash of water.


Shared on Mandy's Recipe Box Aug. 20, 2013
Shared on Lady Behind The Curtain Aug. 21, 2013
Shared on The Country Cook Aug. 23, 2013
Crock Pot at Very Good Recipes
Do you enjoy a good old fashion hog roast? Do you even know what I'm talking about? See, I'm not sure it's something enjoyed from coast to coast or not, but here in the Midwest, if you have a party and mention there is going to be a freshly roasted hog, your guest list will double! In fact, we love them so much, it's what we served at our wedding reception! Yep, we had a dear friend make all the sides, salads, etc, but the main dish was shredded pork from two hogs our family prepped and roasted ourselves.

We are lucky enough that my father in law has a hog cooker, and we were happy to take full advantage on our special night. And to this day, I still get compliments about the food at our reception being some of the best, most delicious and family friendly ever.

For those of you who don't know, I'm talking about taking a whole hog, seasoning it, and putting it inside this huge cooker to slow roast for hours and hours. It comes out tender, juicy and mouth watering. Now, it's a preference thing rather you include sauerkraut, and what most folks around here do is to cook part with, and part without. I like to eat it on a plate with a fork; and yes, I enjoy the kraut too. But it makes the best pulled pork sandwich around too, and some even add barbecue or hot sauce to it.

As much as we enjoy this, it's not very practical for an every day meal. It has to be a pretty special occasion to pull out that hog cooker. So, when I crave it during random moments of the year, this is a simple, tasty alternative. With only 4 ingredients, and a few hours in the slow cooker, it gives us a flavor that is very close, and makes for an excellent weeknight meal.

If you love a good roast hog as much as I do, or are just fans of pork and kraut together, you will love this one too! But I'm still looking forward to the next hog roast. There has to be a graduation, wedding or family reunion coming soon!

Slow Cooker Sausage and Kraut
2 (9 oz.) packages smoked sausage, cut into 2 inch pieces
2 ( 15 oz.) cans sauerkraut, undrained
1/4 c. brown sugar
2 tsp. Dijon mustard

Place sauerkraut, brown sugar and mustard in Crock Pot. Stir well. Spoon some of the sauerkraut mixture on top to cover sausage. Cook on LOW 4-5 hours. Check for dryness every hour or so. If it dries out, add a splash of water.


Shared on Mandy's Recipe Box Aug. 20, 2013
Shared on Lady Behind The Curtain Aug. 21, 2013
Shared on The Country Cook Aug. 23, 2013
Crock Pot at Very Good Recipes
reade more... Résuméabuiyad

It's Okay To Get Sticky

I will be the first person to admit, I'm not a fan of messy things. Sure, there is no way to eat things like barbecued ribs or corn on the cob without making a total mess of yourself, but for the most part, I haven't always been a person who is okay with a mess.

In fact, I'm pretty sure I had one of the cleanest babies on the face of the planet. Yep, I was the mom who was constantly busting out the handi-wipes to clean his face and hands. I'm the one that kept a wet rag beside us during high chair feeding to promptly clean up any spills. Yeah, so I was a little OCD about it. It's okay though. I accept about myself.

But as he's gotten a little older, I've accepted the fact he is a boy and will spend 99% of his life dirty, in one way or another. And honestly, I'm pretty okay with it. I don't mind it as much as he was a baby. Maybe part of it was the whole "trying to be the perfect 1st time mommy, with the baby who always looks neat and tidy" syndrome I was suffering from. Whatever it was, I'm glad it has eased up a tad, because with this boy...who is all boy...I would be driving myself crazy at this point trying to keep him clean!

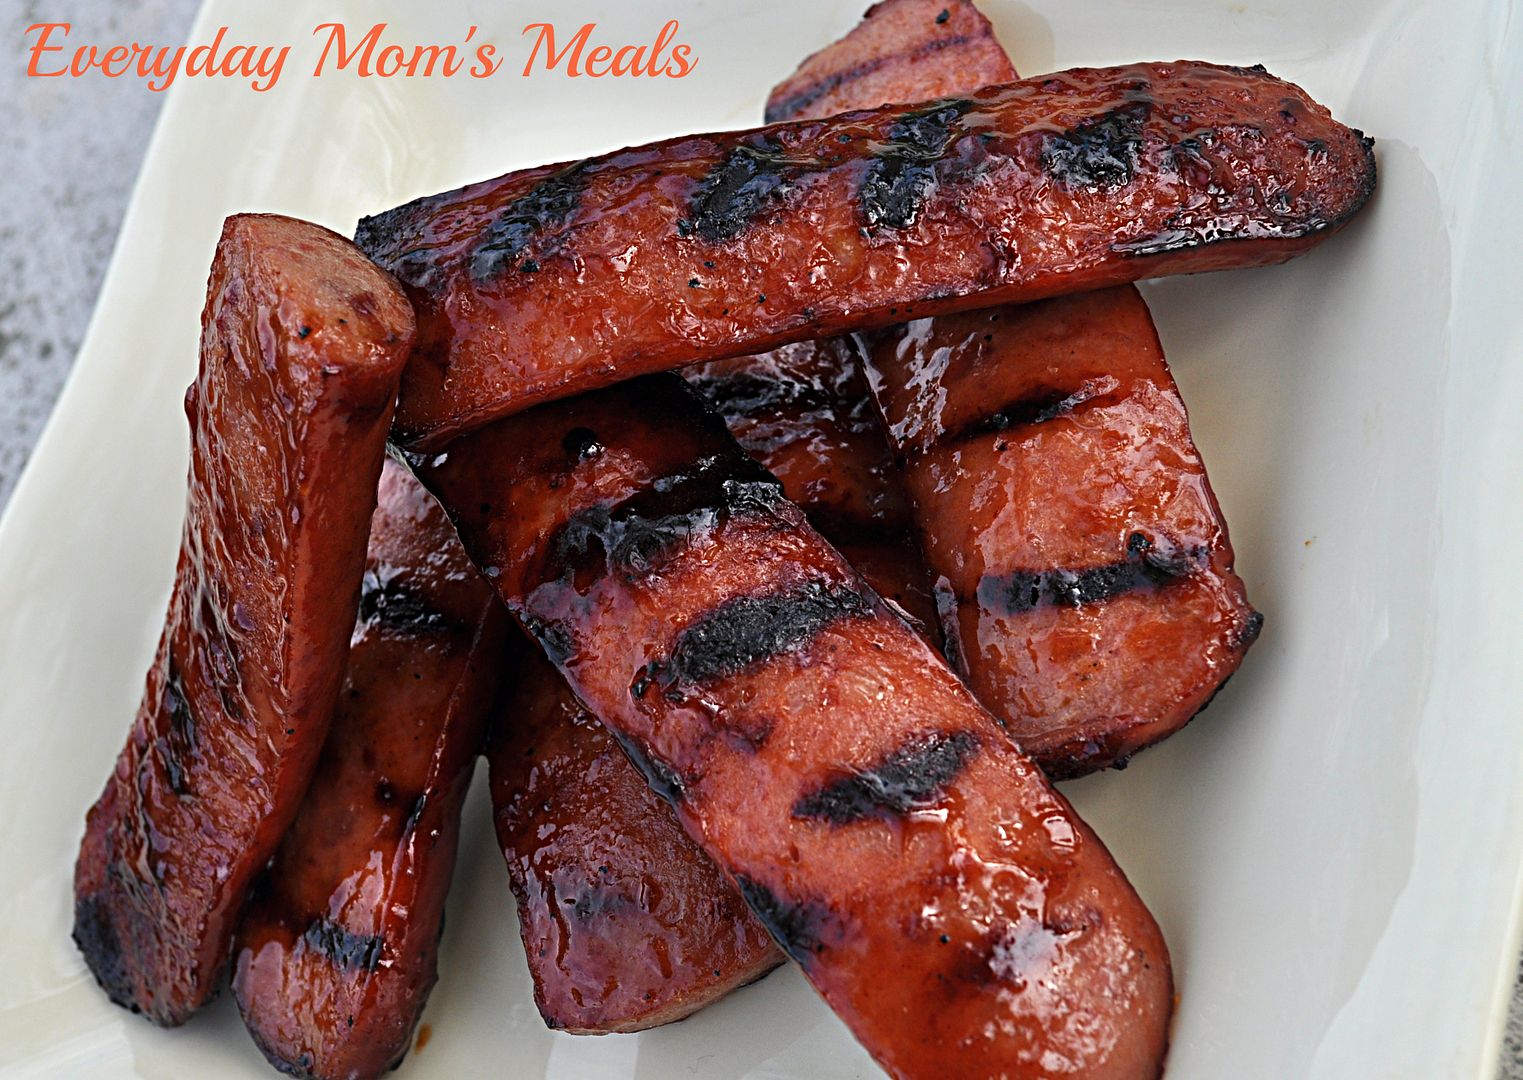
Like the ribs and corn mentioned above, this dish is one that even though it's eaten with a knife and fork, you're going to get a little sticky, a little messy eating it. But I guarantee it's totally worth it! I came up with when I had laid out smoked sausage for supper, not sure what I was going to do with it. Then I decided I would grill it and because of that, it needed a yummy sauce to be basted in. This makes for something sweet, tangy, sticky...and absolutely delicious.

I've accepted that I'm never going to be totally okay with messes in my life. But I've learned which ones are in need of prompt clean up (can't do flour all over the kitchen!) and those that make life more interesting, more fun, and in this case, much more mouth watering!

Sticky Grilled Smoked Sausage
1 lb. smoked sausage
1/3 c. barbecue sauce
1/4 c. packed brown sugar
3 TBS cider vinegar

Cut sausage into 4-5 inch pieces and slice lengthwise. In a small bowl combine barbecue sauce, sugar and vinegar. Whisk well. Preheat grill to high. Spray well with cooking spray. Brush sausage with glaze. Place on grill. Once seared, flip, baste again, and turn heat down to medium. Continue cooking and basting for about 10 minutes, turning often. *NOTE* Be careful! These will burn very easily. We like some "char" marks but they will turn black if you aren't watching!


Shared on The Country Cook July 12, 2013
Sausage at Very Good Recipes
Pin It
I will be the first person to admit, I'm not a fan of messy things. Sure, there is no way to eat things like barbecued ribs or corn on the cob without making a total mess of yourself, but for the most part, I haven't always been a person who is okay with a mess.

In fact, I'm pretty sure I had one of the cleanest babies on the face of the planet. Yep, I was the mom who was constantly busting out the handi-wipes to clean his face and hands. I'm the one that kept a wet rag beside us during high chair feeding to promptly clean up any spills. Yeah, so I was a little OCD about it. It's okay though. I accept about myself.

But as he's gotten a little older, I've accepted the fact he is a boy and will spend 99% of his life dirty, in one way or another. And honestly, I'm pretty okay with it. I don't mind it as much as he was a baby. Maybe part of it was the whole "trying to be the perfect 1st time mommy, with the baby who always looks neat and tidy" syndrome I was suffering from. Whatever it was, I'm glad it has eased up a tad, because with this boy...who is all boy...I would be driving myself crazy at this point trying to keep him clean!

Like the ribs and corn mentioned above, this dish is one that even though it's eaten with a knife and fork, you're going to get a little sticky, a little messy eating it. But I guarantee it's totally worth it! I came up with when I had laid out smoked sausage for supper, not sure what I was going to do with it. Then I decided I would grill it and because of that, it needed a yummy sauce to be basted in. This makes for something sweet, tangy, sticky...and absolutely delicious.

I've accepted that I'm never going to be totally okay with messes in my life. But I've learned which ones are in need of prompt clean up (can't do flour all over the kitchen!) and those that make life more interesting, more fun, and in this case, much more mouth watering!

Sticky Grilled Smoked Sausage
1 lb. smoked sausage
1/3 c. barbecue sauce
1/4 c. packed brown sugar
3 TBS cider vinegar

Cut sausage into 4-5 inch pieces and slice lengthwise. In a small bowl combine barbecue sauce, sugar and vinegar. Whisk well. Preheat grill to high. Spray well with cooking spray. Brush sausage with glaze. Place on grill. Once seared, flip, baste again, and turn heat down to medium. Continue cooking and basting for about 10 minutes, turning often. *NOTE* Be careful! These will burn very easily. We like some "char" marks but they will turn black if you aren't watching!


Shared on The Country Cook July 12, 2013
Sausage at Very Good Recipes
Pin It
reade more... Résuméabuiyad

We Are Steak People

Yep. That's a fact. As much as my family loves our veggies, we could never  be vegetarians. And that's not judging those out there who are, more power to you! It's simply a statement of how much we love, no make that adore, meat!

All kinds of meat, from all walks of life. If it comes from a cow, pig, chicken, fish, buffalo, pheasant...I could go on, but I won't, we will eat it! We are most definitely carnivores.

Now, here is a little secret. When I was growing up, I wasn't that big of a beef fan. It wasn't until Adam came along (Mr. give me my steak as rare as it can be. Seriously, I'm talking, show it the grill and walk away!) and showed me there were other ways to eat steak other than "well done", that I really started to enjoy it. See, like many kids, I never had my own steak, I usually shared with my mom. And like many women out there, she was a big fan of "cook it til it's dead"! And that's okay. She liked her steaks well done, and a little bit crispy around the edges, so that's the only way I ate steak for many years. Then Adam explained this wonderful thing called medium rare, and to this day, that is how I love my steaks. In fact, we've even converted mom a little, and she is now a medium steak gal. We learned that many times, you can take a steak that is tender and fabulous and cook it that long, the flavor gets ruined, becoming tough and dry. This is especially true if ordering in a restaurant. If a steakhouse knows they are going to cook it that long, that will choose a piece of "substandard" meat, so to speak. (I am saying this as a former employee of a restaurant.) But if you order one that is less cooked, they know it better come out juicy and tender, so they choice a nicer piece of beef.

And we have passed this beef love onto our son, of course. Now, when he was younger, I will admit, I made sure his meat was very well done. But as he has gotten older and his stomach has "grown up" a little, I allow him to have one that is cooked a little more like ours. (Trust me though, he never eats one that is still mooing, like his father!) Alex needs one thing for his steak....steak sauce! He likes the bottled version just fine (He gets that from his Pa Pa...another meat lover!) but I thought making a homemade version might be fun.

With grilling season in full swing for a lot of us, it's the perfect time to have something yummy to dip that perfectly cooked steak into...rather it's well done (and if that's you, I respect that!)...or pink inside for me....or practically walking off the plate like my husband!

Homemade Steak Sauce
1/2 c. ketchup
1 TBS brown sugar
1 TBS soy sauce
1/2 TBS onion powder
1/2 tsp. garlic powder
1/8 c. water
1/8 c. lemon juice
1/8 c. Worcestershire sauce
1/2 TBS yellow mustard

Combine all ingredients in a small sauce pan. Bring to a boil. Reduce heat to low. Simmer, uncovered,  for 15-20 minutes until thickened. Allow to cool and then refrigerate until serving. If it thickens too much, just add a little warm water to thin. Serve with your favorite steak!


Shared on Make Ahead Meals May 13, 2013
Shared on Mandy's Recipe Box May 14, 2013
Shared on Lady Behind The Curtain May 15, 2013
Shared on The Country Cook May 17, 2013
Steak at Very Good Recipes
Pin It
Yep. That's a fact. As much as my family loves our veggies, we could never  be vegetarians. And that's not judging those out there who are, more power to you! It's simply a statement of how much we love, no make that adore, meat!

All kinds of meat, from all walks of life. If it comes from a cow, pig, chicken, fish, buffalo, pheasant...I could go on, but I won't, we will eat it! We are most definitely carnivores.

Now, here is a little secret. When I was growing up, I wasn't that big of a beef fan. It wasn't until Adam came along (Mr. give me my steak as rare as it can be. Seriously, I'm talking, show it the grill and walk away!) and showed me there were other ways to eat steak other than "well done", that I really started to enjoy it. See, like many kids, I never had my own steak, I usually shared with my mom. And like many women out there, she was a big fan of "cook it til it's dead"! And that's okay. She liked her steaks well done, and a little bit crispy around the edges, so that's the only way I ate steak for many years. Then Adam explained this wonderful thing called medium rare, and to this day, that is how I love my steaks. In fact, we've even converted mom a little, and she is now a medium steak gal. We learned that many times, you can take a steak that is tender and fabulous and cook it that long, the flavor gets ruined, becoming tough and dry. This is especially true if ordering in a restaurant. If a steakhouse knows they are going to cook it that long, that will choose a piece of "substandard" meat, so to speak. (I am saying this as a former employee of a restaurant.) But if you order one that is less cooked, they know it better come out juicy and tender, so they choice a nicer piece of beef.

And we have passed this beef love onto our son, of course. Now, when he was younger, I will admit, I made sure his meat was very well done. But as he has gotten older and his stomach has "grown up" a little, I allow him to have one that is cooked a little more like ours. (Trust me though, he never eats one that is still mooing, like his father!) Alex needs one thing for his steak....steak sauce! He likes the bottled version just fine (He gets that from his Pa Pa...another meat lover!) but I thought making a homemade version might be fun.

With grilling season in full swing for a lot of us, it's the perfect time to have something yummy to dip that perfectly cooked steak into...rather it's well done (and if that's you, I respect that!)...or pink inside for me....or practically walking off the plate like my husband!

Homemade Steak Sauce
1/2 c. ketchup
1 TBS brown sugar
1 TBS soy sauce
1/2 TBS onion powder
1/2 tsp. garlic powder
1/8 c. water
1/8 c. lemon juice
1/8 c. Worcestershire sauce
1/2 TBS yellow mustard

Combine all ingredients in a small sauce pan. Bring to a boil. Reduce heat to low. Simmer, uncovered,  for 15-20 minutes until thickened. Allow to cool and then refrigerate until serving. If it thickens too much, just add a little warm water to thin. Serve with your favorite steak!


Shared on Make Ahead Meals May 13, 2013
Shared on Mandy's Recipe Box May 14, 2013
Shared on Lady Behind The Curtain May 15, 2013
Shared on The Country Cook May 17, 2013
Steak at Very Good Recipes
Pin It
reade more... Résuméabuiyad

Just A Little Zip

So officially, party season seems to be over for a while. The holidays are well over. The New Year has come and gone. The Super Bowl has it's victor. I guess if I was a "glass half empty" kinda person I could look at this and be more than a little depressed. Especially since I have something to share that is the perfect party food. It's easy, with only 3 ingredients. It cooks in the Crock Pot on your time schedule. It's a great finger food. All of these scream party! But I refuse to be boxed in like this. I say...let this become a main dish any night of the week. I say, we can party any time we want to...rather we have a reason or not!

If you enjoy my Cocktail Sausages, then this is right up your alley too. In fact Mr. Everyday said that's exactly what it reminded him of, only in a dinner size portion. And what did Alex think? Well, his reaction is what inspired the title of this post. He took his first bite and said "Mommy...it's sweet with just a little zip." He's exactly right! It's the perfect combination of the two, hitting all of your taste buds in exactly the right places.

A great dinner idea, yes it is. A fantastic party food, yep it's that too. Heck, I know there are plenty of birthdays, anniversaries, workplace pot-lucks, etc this recipe would be perfect for. Plus, graduation party season is just around the corner!

Crock Pot Glazed Kielbasa
2 lbs. kielbasa, cut into 1-inch pieces
1 c. packed brown sugar
3 TBS spicy brown mustard

Combine brown sugar and mustard in bottom of Crock Pot. Add kielbasa. Stir to coat. Cook on LOW for 3 hours. Stir before serving.
*NOTE* The one inch size is the perfect meal size. If I were doing these for a party I would cut them in 1/2" and have a bowl of toothpicks sitting next to them!


Shared on The Country Cook Feb. 22, 2013
Shared on Make Ahead Meals Feb. 25, 2013
Sausage at Very Good Recipes
Pin It
So officially, party season seems to be over for a while. The holidays are well over. The New Year has come and gone. The Super Bowl has it's victor. I guess if I was a "glass half empty" kinda person I could look at this and be more than a little depressed. Especially since I have something to share that is the perfect party food. It's easy, with only 3 ingredients. It cooks in the Crock Pot on your time schedule. It's a great finger food. All of these scream party! But I refuse to be boxed in like this. I say...let this become a main dish any night of the week. I say, we can party any time we want to...rather we have a reason or not!

If you enjoy my Cocktail Sausages, then this is right up your alley too. In fact Mr. Everyday said that's exactly what it reminded him of, only in a dinner size portion. And what did Alex think? Well, his reaction is what inspired the title of this post. He took his first bite and said "Mommy...it's sweet with just a little zip." He's exactly right! It's the perfect combination of the two, hitting all of your taste buds in exactly the right places.

A great dinner idea, yes it is. A fantastic party food, yep it's that too. Heck, I know there are plenty of birthdays, anniversaries, workplace pot-lucks, etc this recipe would be perfect for. Plus, graduation party season is just around the corner!

Crock Pot Glazed Kielbasa
2 lbs. kielbasa, cut into 1-inch pieces
1 c. packed brown sugar
3 TBS spicy brown mustard

Combine brown sugar and mustard in bottom of Crock Pot. Add kielbasa. Stir to coat. Cook on LOW for 3 hours. Stir before serving.
*NOTE* The one inch size is the perfect meal size. If I were doing these for a party I would cut them in 1/2" and have a bowl of toothpicks sitting next to them!


Shared on The Country Cook Feb. 22, 2013
Shared on Make Ahead Meals Feb. 25, 2013
Sausage at Very Good Recipes
Pin It
reade more... Résuméabuiyad

90's Television In My Kitchen

The new sandwich I promised to share with you today is more than likely not new to some of you. In fact, the sandwich itself isn't even new to me. I've heard of it many times, but have never eaten it, let alone made it. Many moons ago I heard the term "loose meat sandwich". For some reason it sounded so familiar to me. I researched it, found many recipes, but couldn't for the life of me figure out why it was so recognizable to me. I asked Adam if he had ever heard of them and indeed he had; but that didn't help me to figure out why I knew about them having never eaten one. It was one of those things that stays in the back of your mind for days, bugging you constantly. Then all of a sudden, I remembered! I can't even tell you why or how I thought of it, but Loose Meat Sandwiches were what they served at the restaurant on the show "Roseanne". Whew...talk about being able to sleep at night! It's crazy when something so meaningless can really drive you crazy! And what's even crazier is how once the mystery is solved how quickly it disappears from your mind. I didn't really think about these sandwiches again until that set of Crock Pot recipes I told you about yesterday. There was one included for these, but since I was already making the Southwest Mac and Cheese, I compromised, made them in a skillet, and they turned out perfectly. As we told Alex when he asked what they were "They are kind of like a sloppy jo without the sloppy. It still has a little bit of a sauce quality, but is much dryer than it's messy cousin. And the secret to deliciousness? Brown sugar. It gives these a slight sweet note in the background that makes them extra yummy. Thank goodness I finally figured out what my brain new all along...90's television could bring us something new and tasty to eat!

Tavern Sandwiches 
1 lb. ground beef
1/8 c. mustard
1/8 c. packed brown sugar
1/4 c. ketchup
Salt and Pepper to taste
Sliced Bread & Butter Pickles, optional
Diced Onion, optional
Hamburger Buns

In a large skillet, brown meat over medium heat, breaking it up as fine as possible. Drain if necessary. Add ketchup, mustard and brown sugar. Stir well to combine and allow sauce to coat all of the meat. Season with salt and pepper. Reduce heat to low and cook 5-7 minutes to let flavors develop. Serve on buns topped with pickles and onions if desired.
*NOTE* If you wish to cook these in the Crock Pot: Brown beef, transfer to Crock Pot, add ketchup, brown sugar, mustard, salt and pepper. Cook on LOW 4-6 hours.


Shared on Lady Behind The Curtain Jan. 9, 2013
Shared on Miz Helen's Country Cottage Jan. 10, 2013
Shared on The Country Cook Jan. 11, 2013
2013 Superbowl and Chili

Sandwiches at Very Good Recipes
Pin It
The new sandwich I promised to share with you today is more than likely not new to some of you. In fact, the sandwich itself isn't even new to me. I've heard of it many times, but have never eaten it, let alone made it. Many moons ago I heard the term "loose meat sandwich". For some reason it sounded so familiar to me. I researched it, found many recipes, but couldn't for the life of me figure out why it was so recognizable to me. I asked Adam if he had ever heard of them and indeed he had; but that didn't help me to figure out why I knew about them having never eaten one. It was one of those things that stays in the back of your mind for days, bugging you constantly. Then all of a sudden, I remembered! I can't even tell you why or how I thought of it, but Loose Meat Sandwiches were what they served at the restaurant on the show "Roseanne". Whew...talk about being able to sleep at night! It's crazy when something so meaningless can really drive you crazy! And what's even crazier is how once the mystery is solved how quickly it disappears from your mind. I didn't really think about these sandwiches again until that set of Crock Pot recipes I told you about yesterday. There was one included for these, but since I was already making the Southwest Mac and Cheese, I compromised, made them in a skillet, and they turned out perfectly. As we told Alex when he asked what they were "They are kind of like a sloppy jo without the sloppy. It still has a little bit of a sauce quality, but is much dryer than it's messy cousin. And the secret to deliciousness? Brown sugar. It gives these a slight sweet note in the background that makes them extra yummy. Thank goodness I finally figured out what my brain new all along...90's television could bring us something new and tasty to eat!

Tavern Sandwiches 
1 lb. ground beef
1/8 c. mustard
1/8 c. packed brown sugar
1/4 c. ketchup
Salt and Pepper to taste
Sliced Bread & Butter Pickles, optional
Diced Onion, optional
Hamburger Buns

In a large skillet, brown meat over medium heat, breaking it up as fine as possible. Drain if necessary. Add ketchup, mustard and brown sugar. Stir well to combine and allow sauce to coat all of the meat. Season with salt and pepper. Reduce heat to low and cook 5-7 minutes to let flavors develop. Serve on buns topped with pickles and onions if desired.
*NOTE* If you wish to cook these in the Crock Pot: Brown beef, transfer to Crock Pot, add ketchup, brown sugar, mustard, salt and pepper. Cook on LOW 4-6 hours.


Shared on Lady Behind The Curtain Jan. 9, 2013
Shared on Miz Helen's Country Cottage Jan. 10, 2013
Shared on The Country Cook Jan. 11, 2013
2013 Superbowl and Chili

Sandwiches at Very Good Recipes
Pin It
reade more... Résuméabuiyad

Small Stick Big Flavor

I have learned many things in my almost 32 years here on earth. And one that is tried and true, every single time...anything tastes better on a stick~ no matter the size of said stick. It can be a very long one, like on a foot long corndog at the fair, or something small on the end of a toothpick at a party. Either way, 9 times out of 10 it's going to be a huge hit, and most everyone will find it delicious! With that, you have been warned! If you set out a big platter of these at your holiday, New Year's or football party this year, they will disappear quicker than you can make more, and they will probably be one of the most popular things you make! Plus, they are super easy! And don't get me wrong, they are tasty themselves, but what is going to suck everyone is the sauce! Oh, the sauce! I remember the first time I took these to family party and our aunt declared "I like them, but I could drink the sauce with a straw!" Yep, it's that good! I first had these a few years ago at Thanksgiving when my Grammy made them. Adam and I were eating them so fast she couldn't keep them on the buffet! And now anytime we are at her house for a holiday and I see bacon in the fridge, I hope she's making them again. Oh, did I not mention that? Yeah, there is bacon involved too. You're pretty much done reading now aren't you? You just want to eat? Okay then, here is the recipe for one of the tastiest little bites on a stick you will ever have!

Bacon Wrapped Water Chestnuts
2 (8 oz) cans water chestnuts, drained
1 lb. bacon, sliced into thirds
1 c. ketchup
1 c. brown sugar

Preheat oven to 350. In a small saucepan, combine ketchup and brown sugar. Cook on low, stirring often,  until brown sugar is melted and sauce is well combined. Wrap each water chestnuts with 1/3 piece of bacon. Place in 8x8 pan, seam side down. Pour sauce over. Cover. Bake for 45 minutes until bacon is cooked through and sauce is thickened slightly.


Shared on Make Ahead Meals Dec. 17, 2012
Shared on Mandy's Recipe Box Dec. 18, 2012
Shared on Lady Behind The Curtain Dec. 19, 2012
Shared on Miz Helen's Country Cottage Dec. 20, 2012
Shared on The Country Cook Dec. 21, 2012


Appetizers at Very Good Recipes
Pin It
I have learned many things in my almost 32 years here on earth. And one that is tried and true, every single time...anything tastes better on a stick~ no matter the size of said stick. It can be a very long one, like on a foot long corndog at the fair, or something small on the end of a toothpick at a party. Either way, 9 times out of 10 it's going to be a huge hit, and most everyone will find it delicious! With that, you have been warned! If you set out a big platter of these at your holiday, New Year's or football party this year, they will disappear quicker than you can make more, and they will probably be one of the most popular things you make! Plus, they are super easy! And don't get me wrong, they are tasty themselves, but what is going to suck everyone is the sauce! Oh, the sauce! I remember the first time I took these to family party and our aunt declared "I like them, but I could drink the sauce with a straw!" Yep, it's that good! I first had these a few years ago at Thanksgiving when my Grammy made them. Adam and I were eating them so fast she couldn't keep them on the buffet! And now anytime we are at her house for a holiday and I see bacon in the fridge, I hope she's making them again. Oh, did I not mention that? Yeah, there is bacon involved too. You're pretty much done reading now aren't you? You just want to eat? Okay then, here is the recipe for one of the tastiest little bites on a stick you will ever have!

Bacon Wrapped Water Chestnuts
2 (8 oz) cans water chestnuts, drained
1 lb. bacon, sliced into thirds
1 c. ketchup
1 c. brown sugar

Preheat oven to 350. In a small saucepan, combine ketchup and brown sugar. Cook on low, stirring often,  until brown sugar is melted and sauce is well combined. Wrap each water chestnuts with 1/3 piece of bacon. Place in 8x8 pan, seam side down. Pour sauce over. Cover. Bake for 45 minutes until bacon is cooked through and sauce is thickened slightly.


Shared on Make Ahead Meals Dec. 17, 2012
Shared on Mandy's Recipe Box Dec. 18, 2012
Shared on Lady Behind The Curtain Dec. 19, 2012
Shared on Miz Helen's Country Cottage Dec. 20, 2012
Shared on The Country Cook Dec. 21, 2012


Appetizers at Very Good Recipes
Pin It
reade more... Résuméabuiyad

Not A Fan

My husband is not a Rachael Ray fan. End of story. While I enjoy her talk show, and have found success with a few of her recipes, and used to watch both 30 Minute Meals and $40 A Day multiple times a day, he just can't understand why. He doesn't enjoy her, the way she talks, or really anything about her. And that's okay because there are plenty of people he is a fan of that I do NOT like one bit! To each their own. So you can imagine my surprise when last week he was working from home one morning, walked into the living room where I was watching her, and said "That recipe wouldn't be too bad if you changed it up a little." Huh? What? Did I just hear him right? To be honest, I wasn't even paying attention to what she was cooking, and when I looked up, I knew exactly why he said what he did. She was making sloppy joes, but instead of serving them on buns, they were plated over roasted sweet potatoes. Now we love sweet potatoes, but I just couldn't get behind this idea. I understood why she was doing it. Sweet potatoes are one of the most nutrient packed things you can find in the grocery store; and this is why I serve them so often. But not this way. However, we both agreed that if they were done with a white potato instead, they could be really good. Kind of like a chili topped potato, but a little different. So using my own sloppy joe recipe and some yummy toppings, I came up with these. They are easy, delicious, and the kids will love them! Sloppy anything will get them running to the table! And here are a couple tips for you: 1. To save time, simply bake your potatoes in the microwave instead. 2. Make the sauce in the morning, cover and put in the fridge. Then when you are ready to make supper all you have to do is brown off the meat. Which ever way you decide to prepare them, they are a simple weeknight meal and a new twist on an old favorite.

Sloppy Potatoes
4 large baking potatoes, cleaned
1 lb. ground beef
3/4 c. ketchup
1 tsp. mustard
3 tsp. brown sugar
1/2 tsp. garlic powder
Olive oil
Salt and Pepper to taste
Chopped Onion, optional
Shredded Cheddar Cheese, optional

Preheat oven to 400. Rub potatoes with olive oil and salt. Wrap in foil and poke holes in them. Place on a baking sheet and cook for 1 hour or until fork tender. In a medium bowl, combine ketchup, mustard, brown sugar, garlic powder, salt and pepper. Stir well to combine. In a large skillet, brown meat until no longer pink. Drain if necessary. Add ketchup mixture to ground beef and simmer on low for 5-7 minutes until thickened. When potatoes are done split and lay open on plates. Spoon meat mixture over potato. Top with onions and cheese.


Shared on Lady Behind The Curtain Nov. 7, 2012
Shared on Miz Helen's Country Cottage Nov. 8, 2012
Shared on The Country Cook Nov. 9, 2012

Ground Beef at Very Good Recipes
Pin It
My husband is not a Rachael Ray fan. End of story. While I enjoy her talk show, and have found success with a few of her recipes, and used to watch both 30 Minute Meals and $40 A Day multiple times a day, he just can't understand why. He doesn't enjoy her, the way she talks, or really anything about her. And that's okay because there are plenty of people he is a fan of that I do NOT like one bit! To each their own. So you can imagine my surprise when last week he was working from home one morning, walked into the living room where I was watching her, and said "That recipe wouldn't be too bad if you changed it up a little." Huh? What? Did I just hear him right? To be honest, I wasn't even paying attention to what she was cooking, and when I looked up, I knew exactly why he said what he did. She was making sloppy joes, but instead of serving them on buns, they were plated over roasted sweet potatoes. Now we love sweet potatoes, but I just couldn't get behind this idea. I understood why she was doing it. Sweet potatoes are one of the most nutrient packed things you can find in the grocery store; and this is why I serve them so often. But not this way. However, we both agreed that if they were done with a white potato instead, they could be really good. Kind of like a chili topped potato, but a little different. So using my own sloppy joe recipe and some yummy toppings, I came up with these. They are easy, delicious, and the kids will love them! Sloppy anything will get them running to the table! And here are a couple tips for you: 1. To save time, simply bake your potatoes in the microwave instead. 2. Make the sauce in the morning, cover and put in the fridge. Then when you are ready to make supper all you have to do is brown off the meat. Which ever way you decide to prepare them, they are a simple weeknight meal and a new twist on an old favorite.

Sloppy Potatoes
4 large baking potatoes, cleaned
1 lb. ground beef
3/4 c. ketchup
1 tsp. mustard
3 tsp. brown sugar
1/2 tsp. garlic powder
Olive oil
Salt and Pepper to taste
Chopped Onion, optional
Shredded Cheddar Cheese, optional

Preheat oven to 400. Rub potatoes with olive oil and salt. Wrap in foil and poke holes in them. Place on a baking sheet and cook for 1 hour or until fork tender. In a medium bowl, combine ketchup, mustard, brown sugar, garlic powder, salt and pepper. Stir well to combine. In a large skillet, brown meat until no longer pink. Drain if necessary. Add ketchup mixture to ground beef and simmer on low for 5-7 minutes until thickened. When potatoes are done split and lay open on plates. Spoon meat mixture over potato. Top with onions and cheese.


Shared on Lady Behind The Curtain Nov. 7, 2012
Shared on Miz Helen's Country Cottage Nov. 8, 2012
Shared on The Country Cook Nov. 9, 2012

Ground Beef at Very Good Recipes
Pin It
reade more... Résuméabuiyad

If You Can Pour...

 Then you can make this dessert! Last Thanksgiving I shared my Pumpkin Dump Cake with you in the spirit of the autumn season. The idea of a "dump cake" is pretty straight forward. You dump everything into the baking dish, cook it and in little less than an hour you have a dessert warm from the oven. What I love about them is the use of a dry cake mix making it so time friendly; and giving the cake a more cobbler or crisp texture. By using the mix dry and adding butter instead of the normal eggs, water and oil, it becomes something totally different than the prepared cake. So in that same spirit I decided to do another one this fall with pumpkin's distant autumn cousin...the apple. Or more specifically apple pie filling. Not to mention another favorite of this time of year, pecans. There is just something about the smell of apples, spices and nuts baking the oven that make me want to put on a hoodie, grab a mug of hot apple cider, and go on a hayride. This is great served warm w/ a scoop of ice cream, or with a little dollop of whipped cream. If you are looking for a sweet treat to get your family into the autumn spirit, this is definitely one to try. Or, even jot down and tuck away for next month and Turkey Day!

Apple Dump Cake
2 cans no sugar added apple pie filling
1 (18.25oz) box butter pecan cake mix
2 sticks butter, thinly sliced
1 c. pecan chips
1/4 tsp cinnamon
1/8 tsp nutmeg
1/4 c. brown sugar

Preheat oven to 350. Lightly spray a 9x13 baking dish with cooking spray. Spread pie filling into bottom. Sprinkle with cinnamon and nutmeg. Stir well. Sprinkle with brown sugar and then cake mix. DO NOT MIX. Sprinkle with pecans. Top with butter slices. Cover dish with foil and bake for 45 minutes to an hour until browned and set. Refrigerate leftovers.

Apple Dump Cake

Shared on Miz Helen's Country Cottage Oct. 11, 2012
Shared on The Country Cook Oct. 12, 2012
Apple at Very Good Recipes
Pin It
 Then you can make this dessert! Last Thanksgiving I shared my Pumpkin Dump Cake with you in the spirit of the autumn season. The idea of a "dump cake" is pretty straight forward. You dump everything into the baking dish, cook it and in little less than an hour you have a dessert warm from the oven. What I love about them is the use of a dry cake mix making it so time friendly; and giving the cake a more cobbler or crisp texture. By using the mix dry and adding butter instead of the normal eggs, water and oil, it becomes something totally different than the prepared cake. So in that same spirit I decided to do another one this fall with pumpkin's distant autumn cousin...the apple. Or more specifically apple pie filling. Not to mention another favorite of this time of year, pecans. There is just something about the smell of apples, spices and nuts baking the oven that make me want to put on a hoodie, grab a mug of hot apple cider, and go on a hayride. This is great served warm w/ a scoop of ice cream, or with a little dollop of whipped cream. If you are looking for a sweet treat to get your family into the autumn spirit, this is definitely one to try. Or, even jot down and tuck away for next month and Turkey Day!

Apple Dump Cake
2 cans no sugar added apple pie filling
1 (18.25oz) box butter pecan cake mix
2 sticks butter, thinly sliced
1 c. pecan chips
1/4 tsp cinnamon
1/8 tsp nutmeg
1/4 c. brown sugar

Preheat oven to 350. Lightly spray a 9x13 baking dish with cooking spray. Spread pie filling into bottom. Sprinkle with cinnamon and nutmeg. Stir well. Sprinkle with brown sugar and then cake mix. DO NOT MIX. Sprinkle with pecans. Top with butter slices. Cover dish with foil and bake for 45 minutes to an hour until browned and set. Refrigerate leftovers.

Apple Dump Cake

Shared on Miz Helen's Country Cottage Oct. 11, 2012
Shared on The Country Cook Oct. 12, 2012
Apple at Very Good Recipes
Pin It
reade more... Résuméabuiyad

They Better Be The Best Apples Ever...

The weekend of Alex's birthday, one of the fun things we treated him to was a trip to Fort Wayne's fall classic, The Johnny Appleseed Festival. My boys had actually been a couple years ago, but in my 31 years of living here this was my first time! For those of you who don't know, John Chapman, also known as Johnny Appleseed, was an American pioneer nurseryman who introduced apple trees to large parts of Pennsylvania, Ohio, Illinois and Indiana. And for the 38th year in a row, our city held a festival over 2 days celebrating all things apple and autumn related. There are crafts, fall inspired foods, military reenactments, all sorts of fun for the whole family. We had such a great time, and one of my favorite parts was, as we were leaving, I found the Farmer's Market table with fresh produce and fall decor. I treated myself to some pumpkins and gourds to decorate our landscaping with, and then I saw these beautiful bags of fresh apples. I asked Mr. Everyday to please get us some, and at $1.99/bag, I said "get two bags." Well, he came back  and said "I only got 1 bag." I was about to ask why when he offered up the explanation. "They were actually $1.99 per pound, not bag, and after spending over $9 on one bag, I thought it was enough." Oops. Well, didn't I feel silly! I couldn't believe we had just spent that on apples. Don't get me wrong, they are beautiful, but I could have gotten something very close at the grocery store for much cheaper. Yes, I realize these were straight from an area farmer, and it's better to buy from them, and I'm okay with that, I'm just pointing out the other side. But my hubby is such a good sport. He never flinched. He knew I wanted some apples, so he gladly paid the $9...but not without teasing me for the rest of the night saying over and over "Those better be the best apples ever!" And actually, they are pretty tasty and I'm super excited to have a whole bag of them, but I wanted to make sure I came up with something yummy to make with them, or in this case, for them! I guess next time I need to read a little closer, or if it's going to turn out this yummy, maybe not!

Cinnamon Dip for Apples Adapted from Yummly.com
1/2 c. vanilla yogurt
1/4. c. packed brown sugar
1/2 tsp cinnamon
1 tsp honey
1 tsp butter

In a microwave safe bowl combine sugar, cinnamon, honey and butter. Don't stir. Microwave for 20 seconds until butter is melted. Remove and whisk well to incorporate. Add yogurt and stir to combine. Chill about an hour before serving.
*NOTE* If you use stick butter like me, 1 tsp is equal to 1/3 of a TBS. So cut 1 TBS into 3 equal pieces and use 1.


Shared on Miz Helen's Country Cottage Oct. 4, 2012
Shared on Jen's Favorite Cookies Oct. 4, 2012
Shared on The Country Cook Oct. 5, 2012
Apples at Very Good Recipes
Pin It
The weekend of Alex's birthday, one of the fun things we treated him to was a trip to Fort Wayne's fall classic, The Johnny Appleseed Festival. My boys had actually been a couple years ago, but in my 31 years of living here this was my first time! For those of you who don't know, John Chapman, also known as Johnny Appleseed, was an American pioneer nurseryman who introduced apple trees to large parts of Pennsylvania, Ohio, Illinois and Indiana. And for the 38th year in a row, our city held a festival over 2 days celebrating all things apple and autumn related. There are crafts, fall inspired foods, military reenactments, all sorts of fun for the whole family. We had such a great time, and one of my favorite parts was, as we were leaving, I found the Farmer's Market table with fresh produce and fall decor. I treated myself to some pumpkins and gourds to decorate our landscaping with, and then I saw these beautiful bags of fresh apples. I asked Mr. Everyday to please get us some, and at $1.99/bag, I said "get two bags." Well, he came back  and said "I only got 1 bag." I was about to ask why when he offered up the explanation. "They were actually $1.99 per pound, not bag, and after spending over $9 on one bag, I thought it was enough." Oops. Well, didn't I feel silly! I couldn't believe we had just spent that on apples. Don't get me wrong, they are beautiful, but I could have gotten something very close at the grocery store for much cheaper. Yes, I realize these were straight from an area farmer, and it's better to buy from them, and I'm okay with that, I'm just pointing out the other side. But my hubby is such a good sport. He never flinched. He knew I wanted some apples, so he gladly paid the $9...but not without teasing me for the rest of the night saying over and over "Those better be the best apples ever!" And actually, they are pretty tasty and I'm super excited to have a whole bag of them, but I wanted to make sure I came up with something yummy to make with them, or in this case, for them! I guess next time I need to read a little closer, or if it's going to turn out this yummy, maybe not!

Cinnamon Dip for Apples Adapted from Yummly.com
1/2 c. vanilla yogurt
1/4. c. packed brown sugar
1/2 tsp cinnamon
1 tsp honey
1 tsp butter

In a microwave safe bowl combine sugar, cinnamon, honey and butter. Don't stir. Microwave for 20 seconds until butter is melted. Remove and whisk well to incorporate. Add yogurt and stir to combine. Chill about an hour before serving.
*NOTE* If you use stick butter like me, 1 tsp is equal to 1/3 of a TBS. So cut 1 TBS into 3 equal pieces and use 1.


Shared on Miz Helen's Country Cottage Oct. 4, 2012
Shared on Jen's Favorite Cookies Oct. 4, 2012
Shared on The Country Cook Oct. 5, 2012
Apples at Very Good Recipes
Pin It
reade more... Résuméabuiyad