Pages

Showing posts with label Onion. Show all posts

Daddy's Request

Reading that title did you think maybe Mr. Everyday was asking for something special and Monkey helped me make it? Well, that does happen in our house, a lot, but in this case, I'm not talking about my baby daddy...but instead my Daddy.

That's right, I'm 32 and I still call him Daddy. Always have, always will! Sure he's a father. And yep, a dad too. But to me, his little girl, he will forever be Daddy.

About a month ago, he was telling me about this dish he had at a buffet while out on the road. (For those of you who don't know, he's an over the road truck driver.) Cris-crossing the country on a weekly basis tends to lead to him trying to find decent food at decent prices that isn't always fast food, and tastes like home cooking when he can.

So anyway, he told me he had this amazingly yummy dish and wanted me to try to recreate it. Now, I was waiting for something I would have to really research and find a recipe for. But instead, he started describing something I think has graced most American's dinner tables at one point. Poor Daddy. Sometimes he lives such a sheltered life. LOL Okay, so that isn't true. What is true is that some of the ingredients in a standard version, and this one too, are things my mom can't eat, hence why he's never had it at home. I told him I would try to come up with my own recipe and see if I could re-create a close match to have.

The week of Thanksgiving I made this for our supper, and actually took him a bowl of leftovers when we celebrated with them. Well, it was kinda late, he had had a big meal, and dessert, but I still wanted him to taste it while I was there. So, my mom heated up a small dish for him to try. Well....let's just say that small dish turned into a bigger bowl, and he finished off the entire thing before we left! Yep, it was a hit! He declared it "delicious" and "absolutely what he was looking for." In fact, he loved it so much he made me promise to make him a couple to freeze and have on hand for simple suppers when my mom isn't home.

Ya'll know how much I love casseroles, and this is definitely going to become a staple in our house. See, what I didn't tell you yet, was Daddy was lucky to get the bowl he did because my "boys" were fighting over the dish as soon as it came out of the oven! They could not get enough and loved every bite.

This is a great simple weeknight supper, or pot-luck dish! It can freeze and travel well, and feed a crowd for pretty cheap! I'm so glad my Daddy enjoyed what I came up with for him; and I'm also grateful he requested it in the first place, because look at the yummy creation it lead to!

Chicken, Broccoli and Rice Casserole
1 package chicken tenders
1 (12 oz.) bag frozen chopped broccoli, thawed and drained
8 oz. shredded sharp cheddar cheese
2 c. cooked rice
1/4 c. butter, diced
1 c. milk
1 (10 3/4 oz.) can cream of mushroom soup
1 (10 3/4 oz.) can cream of chicken soup
1 small onion, chopped
Olive Oil
Salt and Pepper to taste

Preheat oven to 375. Arrange chicken tenders on a baking sheet. Drizzle with olive oil. Season with salt and pepper. Roast for 30 minutes until done. Remove and set aside to cool enough to handle. When cool, chop or shred.  Reduce oven to 350.

In a large bowl combine cooked chicken, rice, broccoli, cheese, milk, soups, onion, salt and pepper. Stir well to combine. Spray a 9x13 dish with cooking spray. Pour chicken and rice mixture into dish and spread evenly. Top with diced butter. Bake for 30-45 minutes until heated through and cheese is melted. Stir before serving.


Shared on The Country Cook Dec. 13, 2013

Casseroles at Very Good Recipes


Reading that title did you think maybe Mr. Everyday was asking for something special and Monkey helped me make it? Well, that does happen in our house, a lot, but in this case, I'm not talking about my baby daddy...but instead my Daddy.

That's right, I'm 32 and I still call him Daddy. Always have, always will! Sure he's a father. And yep, a dad too. But to me, his little girl, he will forever be Daddy.

About a month ago, he was telling me about this dish he had at a buffet while out on the road. (For those of you who don't know, he's an over the road truck driver.) Cris-crossing the country on a weekly basis tends to lead to him trying to find decent food at decent prices that isn't always fast food, and tastes like home cooking when he can.

So anyway, he told me he had this amazingly yummy dish and wanted me to try to recreate it. Now, I was waiting for something I would have to really research and find a recipe for. But instead, he started describing something I think has graced most American's dinner tables at one point. Poor Daddy. Sometimes he lives such a sheltered life. LOL Okay, so that isn't true. What is true is that some of the ingredients in a standard version, and this one too, are things my mom can't eat, hence why he's never had it at home. I told him I would try to come up with my own recipe and see if I could re-create a close match to have.

The week of Thanksgiving I made this for our supper, and actually took him a bowl of leftovers when we celebrated with them. Well, it was kinda late, he had had a big meal, and dessert, but I still wanted him to taste it while I was there. So, my mom heated up a small dish for him to try. Well....let's just say that small dish turned into a bigger bowl, and he finished off the entire thing before we left! Yep, it was a hit! He declared it "delicious" and "absolutely what he was looking for." In fact, he loved it so much he made me promise to make him a couple to freeze and have on hand for simple suppers when my mom isn't home.

Ya'll know how much I love casseroles, and this is definitely going to become a staple in our house. See, what I didn't tell you yet, was Daddy was lucky to get the bowl he did because my "boys" were fighting over the dish as soon as it came out of the oven! They could not get enough and loved every bite.

This is a great simple weeknight supper, or pot-luck dish! It can freeze and travel well, and feed a crowd for pretty cheap! I'm so glad my Daddy enjoyed what I came up with for him; and I'm also grateful he requested it in the first place, because look at the yummy creation it lead to!

Chicken, Broccoli and Rice Casserole
1 package chicken tenders
1 (12 oz.) bag frozen chopped broccoli, thawed and drained
8 oz. shredded sharp cheddar cheese
2 c. cooked rice
1/4 c. butter, diced
1 c. milk
1 (10 3/4 oz.) can cream of mushroom soup
1 (10 3/4 oz.) can cream of chicken soup
1 small onion, chopped
Olive Oil
Salt and Pepper to taste

Preheat oven to 375. Arrange chicken tenders on a baking sheet. Drizzle with olive oil. Season with salt and pepper. Roast for 30 minutes until done. Remove and set aside to cool enough to handle. When cool, chop or shred.  Reduce oven to 350.

In a large bowl combine cooked chicken, rice, broccoli, cheese, milk, soups, onion, salt and pepper. Stir well to combine. Spray a 9x13 dish with cooking spray. Pour chicken and rice mixture into dish and spread evenly. Top with diced butter. Bake for 30-45 minutes until heated through and cheese is melted. Stir before serving.


Shared on The Country Cook Dec. 13, 2013

Casseroles at Very Good Recipes


reade more... Résuméabuiyad

Hometown Christmas {A Gooseberry Patch Review and Giveaway}

I'm very excited for today's post. One, it is a tasty recipe that is super simple, and oh so pretty on the plate (the perfect holiday colors too). And two, because it comes with a great cookbook I can't wait to introduce you to, and a giveaway so one of you can win it too!


Ya'll know how much I love Gooseberry Patch and their wonderful cookbooks filled with simple, yummy, down home recipes by every day cooks like you and me. Well, this year they have a new holiday one, Hometown Christmas and I'm so honored to be published in it! Yep, that's right check out the dessert section for my Mint Chocolate Chip Mousse! A delicious, simple dessert perfect for this holiday season.

But today isn't about my recipe. It's about a great side dish that could not be easier, but turns out both beautiful to the eye and satisfying to the palate. Not to mention the perfect colors for your Christmas table! 

Are you looking for a new veggie side dish to include in your holiday meal? How about one that can be done in almost no time at all, but still uses fresh produce, easily found even in these cold winter months? Oh, and did I mention it includes bacon too? That should enough to entice your taste buds right there!

These have a "cooked all day" flavor with the ease of knowing you can have them ready quickly, something we can all appreciate this time of year. I don't know about you, but I want to enjoy time with my family, not have them playing and enjoying one another, with me stuck in the kitchen the whole time missing out on the festivities. 

If you're looking for something new to add to your holiday menu, I think you've found it. Or if you're simply looking for a simple side dish to use any night of the week, you've found that too. And don't forget to scroll down after the recipe for your chance to win a copy of Hometown Christmas for yourself, or give it away to the special foodie in your life!

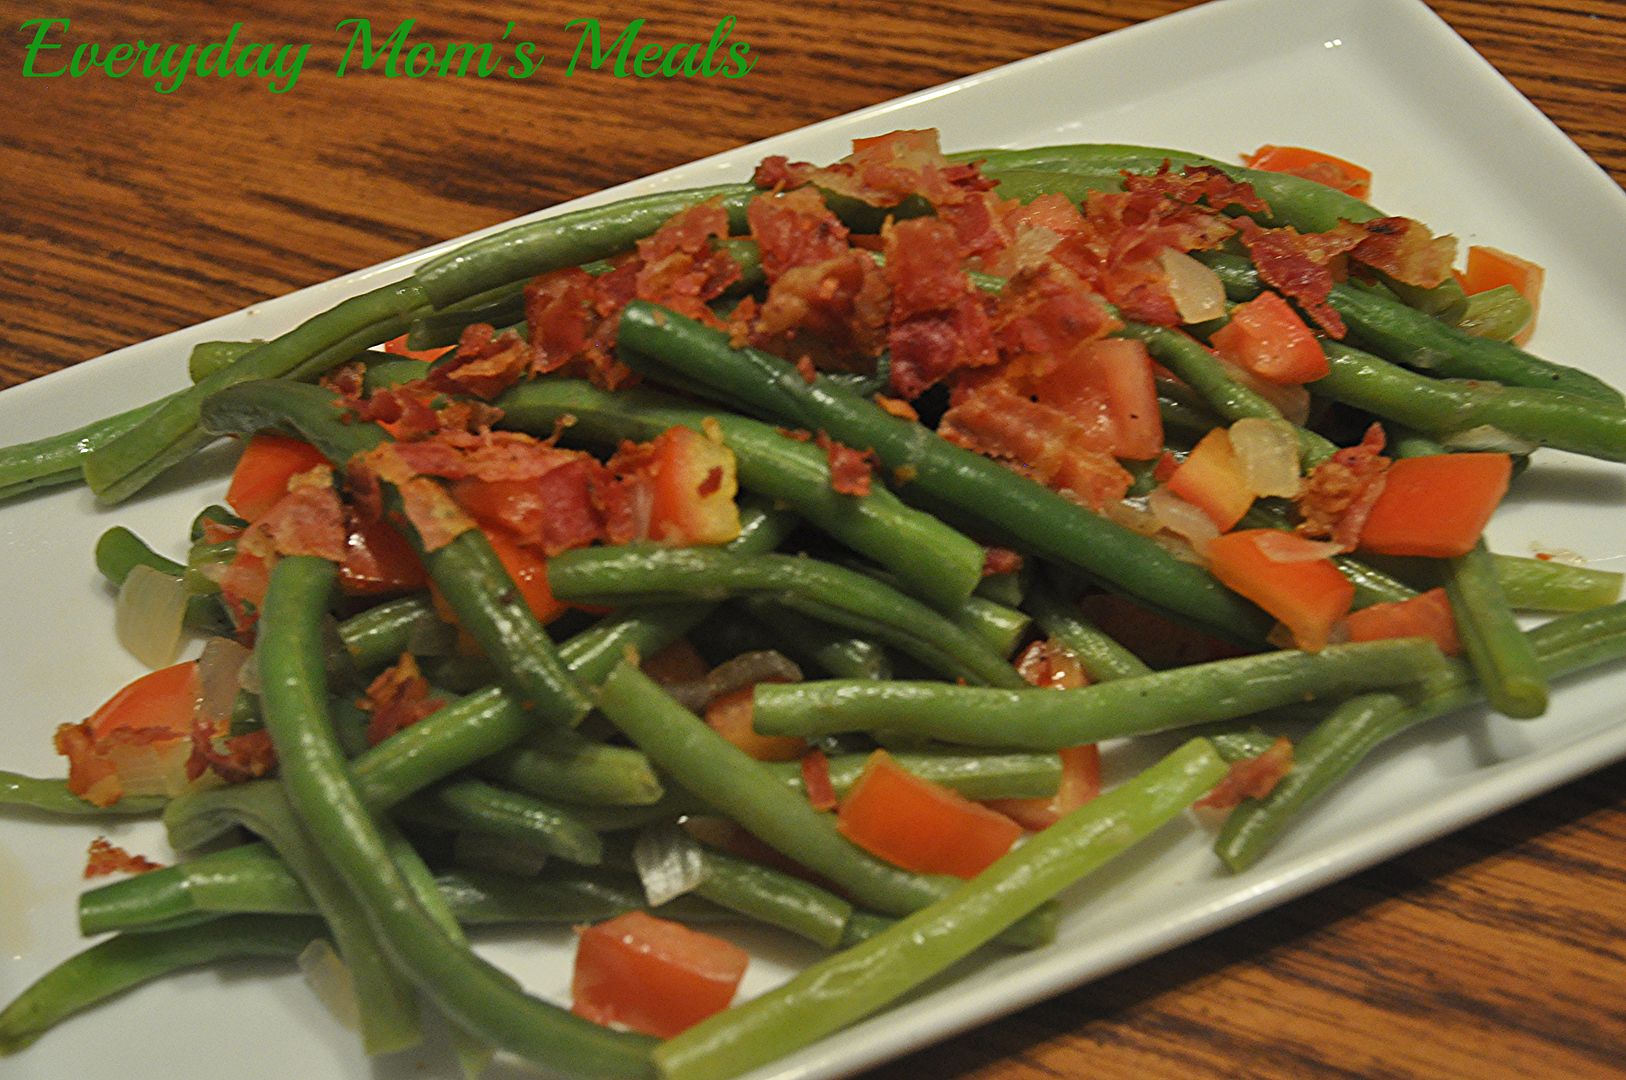
Skillet Green Beans From Hometown Christmas
Submitted by Jen Thomas, Santa Rosa, CA Page 89
1 lb. green beans, trimmed and cut into 2 inch pieces
4 Roma tomatoes, chopped
1 small onion, chopped
3 slices bacon
1/2 c. chicken broth

In a large skillet, cook bacon until crisp. Remove, but leave drippings. Add onion and cook until crisp-tender. Add beans, pepper and broth. Stir. Bring to a boil. Reduce heat to medium-low, cover and cook for 4-6 minutes. Stir in tomatoes and heat through. Top with crumbled bacon.


Shared on The Country Cook Dec. 6, 2013

Green Beans at Very Good Recipes


********Giveaway********
Rules:
1. This contest is open to US Residents 18 and older ONLY.

2. The winner will be chosen by Random.org 

3. The winner will be notified by email and Facebook. He/she will have 48 hours to respond or another winner will be chosen. 

4. When leaving comments for entries, they MUST BE SEPARATE ones AND include an email address so it's easy for me to find the winner. If entries are together, it will only count as (1) and if no email, entry will not be considered.

5. If any of the extra entries are items you are already doing, please just remind me!


6. Contest Ends: Friday Dec. 13, 2013


(1) Lucky Winner will receive Hometown Christmas


Mandatory Entry:
1.Leave a comment telling me your favorite Christmas side dish!

Extra Entry:
1. Become a Gooseberry Patch fan on Facebook. Leave me a comment when you have. 

2.  Follow Gooseberry Patch on Twitter. Leave a comment saying you've done so.

GOOD LUCK!


And if you would like to purchase this fabulous cookbook (maybe for a foodie on your shopping list) check out Gooseberry Patch online or on Amazon.

Disclaimer: I was given a free cookbook to give away to a fan for this review. All thoughts and opinions are my own.


I'm very excited for today's post. One, it is a tasty recipe that is super simple, and oh so pretty on the plate (the perfect holiday colors too). And two, because it comes with a great cookbook I can't wait to introduce you to, and a giveaway so one of you can win it too!


Ya'll know how much I love Gooseberry Patch and their wonderful cookbooks filled with simple, yummy, down home recipes by every day cooks like you and me. Well, this year they have a new holiday one, Hometown Christmas and I'm so honored to be published in it! Yep, that's right check out the dessert section for my Mint Chocolate Chip Mousse! A delicious, simple dessert perfect for this holiday season.

But today isn't about my recipe. It's about a great side dish that could not be easier, but turns out both beautiful to the eye and satisfying to the palate. Not to mention the perfect colors for your Christmas table! 

Are you looking for a new veggie side dish to include in your holiday meal? How about one that can be done in almost no time at all, but still uses fresh produce, easily found even in these cold winter months? Oh, and did I mention it includes bacon too? That should enough to entice your taste buds right there!

These have a "cooked all day" flavor with the ease of knowing you can have them ready quickly, something we can all appreciate this time of year. I don't know about you, but I want to enjoy time with my family, not have them playing and enjoying one another, with me stuck in the kitchen the whole time missing out on the festivities. 

If you're looking for something new to add to your holiday menu, I think you've found it. Or if you're simply looking for a simple side dish to use any night of the week, you've found that too. And don't forget to scroll down after the recipe for your chance to win a copy of Hometown Christmas for yourself, or give it away to the special foodie in your life!

Skillet Green Beans From Hometown Christmas
Submitted by Jen Thomas, Santa Rosa, CA Page 89
1 lb. green beans, trimmed and cut into 2 inch pieces
4 Roma tomatoes, chopped
1 small onion, chopped
3 slices bacon
1/2 c. chicken broth

In a large skillet, cook bacon until crisp. Remove, but leave drippings. Add onion and cook until crisp-tender. Add beans, pepper and broth. Stir. Bring to a boil. Reduce heat to medium-low, cover and cook for 4-6 minutes. Stir in tomatoes and heat through. Top with crumbled bacon.


Shared on The Country Cook Dec. 6, 2013

Green Beans at Very Good Recipes


********Giveaway********
Rules:
1. This contest is open to US Residents 18 and older ONLY.

2. The winner will be chosen by Random.org 

3. The winner will be notified by email and Facebook. He/she will have 48 hours to respond or another winner will be chosen. 

4. When leaving comments for entries, they MUST BE SEPARATE ones AND include an email address so it's easy for me to find the winner. If entries are together, it will only count as (1) and if no email, entry will not be considered.

5. If any of the extra entries are items you are already doing, please just remind me!


6. Contest Ends: Friday Dec. 13, 2013


(1) Lucky Winner will receive Hometown Christmas


Mandatory Entry:
1.Leave a comment telling me your favorite Christmas side dish!

Extra Entry:
1. Become a Gooseberry Patch fan on Facebook. Leave me a comment when you have. 

2.  Follow Gooseberry Patch on Twitter. Leave a comment saying you've done so.

GOOD LUCK!


And if you would like to purchase this fabulous cookbook (maybe for a foodie on your shopping list) check out Gooseberry Patch online or on Amazon.

Disclaimer: I was given a free cookbook to give away to a fan for this review. All thoughts and opinions are my own.


reade more... Résuméabuiyad

Soul Food Saturday #33

Good Morning! I hope ya'll had a fantastic Thanksgiving filled with family, love, memories made and yummy food! Is your fridge stuffed with leftovers? Want something to use that turkey for besides yet another sandwich? Bekki has just the answer today!


I hope that you all enjoyed your Thanksgiving and all of the wonderful things that surround us during the holidays; our families, friends, and time together. I have a huge soup addiction and the Fall and Winter are the perfect time to make big pots of the bubbly deliciousness. With all the left over turkey we all need new ways to use it up and make it stretch for a few more meals. This is just one more way. Along with my addiction to soup I have a new love for kale. It’s a peppery green leafy vegetable that is perfect in this soup. Add a few more veggies, some pasta, your remaining gobbler and voila dinner! Let’s continue our time of thanks giving, with something to warm you heart and soul. Enjoy!
 
Turkey and Kale Noodle Soup
6 c. low sodium chicken stock
3 c. carrots, sliced
1 medium onion, diced
1 orange bell pepper, chopped
3 c. cooked turkey, chopped
3 c. kale, chopped and stemmed
4 c. cooked pasta
1 tbs. olive oil
Salt and pepper to taste
 
In medium stock pot add olive oil, and onion. Cook until onions are softened. Add bell pepper, and carrots. Stir to combine. Add chicken stock and season with salt and pepper to taste. Bring to a boil and reduce to simmer. Cook until carrots are tender. Add kale, turkey and pasta. Taste for seasoning, add salt and pepper if desired. Soup is ready when kale is tender and turkey is warmed through.


Good Morning! I hope ya'll had a fantastic Thanksgiving filled with family, love, memories made and yummy food! Is your fridge stuffed with leftovers? Want something to use that turkey for besides yet another sandwich? Bekki has just the answer today!


I hope that you all enjoyed your Thanksgiving and all of the wonderful things that surround us during the holidays; our families, friends, and time together. I have a huge soup addiction and the Fall and Winter are the perfect time to make big pots of the bubbly deliciousness. With all the left over turkey we all need new ways to use it up and make it stretch for a few more meals. This is just one more way. Along with my addiction to soup I have a new love for kale. It’s a peppery green leafy vegetable that is perfect in this soup. Add a few more veggies, some pasta, your remaining gobbler and voila dinner! Let’s continue our time of thanks giving, with something to warm you heart and soul. Enjoy!
 
Turkey and Kale Noodle Soup
6 c. low sodium chicken stock
3 c. carrots, sliced
1 medium onion, diced
1 orange bell pepper, chopped
3 c. cooked turkey, chopped
3 c. kale, chopped and stemmed
4 c. cooked pasta
1 tbs. olive oil
Salt and pepper to taste
 
In medium stock pot add olive oil, and onion. Cook until onions are softened. Add bell pepper, and carrots. Stir to combine. Add chicken stock and season with salt and pepper to taste. Bring to a boil and reduce to simmer. Cook until carrots are tender. Add kale, turkey and pasta. Taste for seasoning, add salt and pepper if desired. Soup is ready when kale is tender and turkey is warmed through.


reade more... Résuméabuiyad

First Time In My Kitchen

I am so super excited to share today's recipe with you. One, because it is a first time here on EMM. Two, it is a first in my kitchen whatsoever. Three, it would make a fantastic alternative to the traditional turkey or ham this upcoming holiday season. And most of all, because it is seriously one of the most delicious things I've made in a long time, not to mention gorgeous, making me very proud of it!

Have you ever had duck? I know sometimes it gets a bad wrap of being a greasy meat, but I can attest to the fact, if it is prepared correctly, it is no more greasy than chicken. I have had it a couple times, and loved it; just never prepared it myself. My husband has had it many times, and loves it. So when dear friends, and fellow foodies, treated me with some fresh (frozen) duck legs, I could not wait to get into the kitchen and start cooking!

Now, I realize if you're feeding a huge crowd for Thanksgiving or Christmas, this might not be the most economical choice. But maybe your holiday celebration is a little trimmed back this year, with not everyone being able to make it, and a huge turkey just doesn't make sense. Or maybe you just want to try something different and totally wow your guests. These will definitely do that!

The pre-browning step is a must! Don't skip it. And yes, leave the skin on. It locks all the moisture into the meat, making it juicy, tender and flavorful. Then to slow roast them laying on all those veggies just adds more yumminess! Then the "icing on the cake" per say, is this simple, yet delicious and unique glaze. It really puts them over the top.

If you're looking for something new to try for your family's holiday, or want to maybe have something a little extra special hit your holiday table, these are the perfect idea. I hope you enjoy them as much as we did!

Roasted Duck Legs with Apricot Glaze
6 whole duck legs, trimmed and dried
1 TBS olive oil
1 carrot, cut into large pieces
1 rib celery, cut into large pieces
1 medium white onion, sliced
6 garlic cloves, crushed
1 c. chicken broth
1 c. apricot preserves
1 tsp. dried thyme, divided
2 TBS rice wine vinegar
2 TBS water
Salt and Pepper to taste

Preheat oven to 325. In a large skillet, heat oil over medium-high heat. Season duck liberally with salt and pepper, on both sides. Place in skillet, skin side down in pan. Brown for 6-7 minutes. Flip and brown meat side for 3-4 minutes. In a large roasting pan place carrots, celery, and onion. Add broth. Sprinkle with 3/4 tsp. thyme. Lay browned duck, skin side up, over veggies. Cover and roast for 1 hour 15 minutes. Increase heat to 425 and uncover. Roast for another 20 minutes to crisp skin. In a small saucepan combine preserves, vinegar, water, 1/4 tsp. thyme, salt and pepper. Bring to a boil, stirring constantly. When duck is done, transfer to serving platter and liberally baste in apricot glaze. Sprinkle with extra thyme.


Shared on The Country Cook Nov. 22, 2013

Duck at Very Good Recipes
I am so super excited to share today's recipe with you. One, because it is a first time here on EMM. Two, it is a first in my kitchen whatsoever. Three, it would make a fantastic alternative to the traditional turkey or ham this upcoming holiday season. And most of all, because it is seriously one of the most delicious things I've made in a long time, not to mention gorgeous, making me very proud of it!

Have you ever had duck? I know sometimes it gets a bad wrap of being a greasy meat, but I can attest to the fact, if it is prepared correctly, it is no more greasy than chicken. I have had it a couple times, and loved it; just never prepared it myself. My husband has had it many times, and loves it. So when dear friends, and fellow foodies, treated me with some fresh (frozen) duck legs, I could not wait to get into the kitchen and start cooking!

Now, I realize if you're feeding a huge crowd for Thanksgiving or Christmas, this might not be the most economical choice. But maybe your holiday celebration is a little trimmed back this year, with not everyone being able to make it, and a huge turkey just doesn't make sense. Or maybe you just want to try something different and totally wow your guests. These will definitely do that!

The pre-browning step is a must! Don't skip it. And yes, leave the skin on. It locks all the moisture into the meat, making it juicy, tender and flavorful. Then to slow roast them laying on all those veggies just adds more yumminess! Then the "icing on the cake" per say, is this simple, yet delicious and unique glaze. It really puts them over the top.

If you're looking for something new to try for your family's holiday, or want to maybe have something a little extra special hit your holiday table, these are the perfect idea. I hope you enjoy them as much as we did!

Roasted Duck Legs with Apricot Glaze
6 whole duck legs, trimmed and dried
1 TBS olive oil
1 carrot, cut into large pieces
1 rib celery, cut into large pieces
1 medium white onion, sliced
6 garlic cloves, crushed
1 c. chicken broth
1 c. apricot preserves
1 tsp. dried thyme, divided
2 TBS rice wine vinegar
2 TBS water
Salt and Pepper to taste

Preheat oven to 325. In a large skillet, heat oil over medium-high heat. Season duck liberally with salt and pepper, on both sides. Place in skillet, skin side down in pan. Brown for 6-7 minutes. Flip and brown meat side for 3-4 minutes. In a large roasting pan place carrots, celery, and onion. Add broth. Sprinkle with 3/4 tsp. thyme. Lay browned duck, skin side up, over veggies. Cover and roast for 1 hour 15 minutes. Increase heat to 425 and uncover. Roast for another 20 minutes to crisp skin. In a small saucepan combine preserves, vinegar, water, 1/4 tsp. thyme, salt and pepper. Bring to a boil, stirring constantly. When duck is done, transfer to serving platter and liberally baste in apricot glaze. Sprinkle with extra thyme.


Shared on The Country Cook Nov. 22, 2013

Duck at Very Good Recipes
reade more... Résuméabuiyad

Soul Food Saturday #31

We have officially made it to the middle of the month! Thanksgiving is less than 2 weeks away, and the days are flying by. Today Bekki is sharing a great twist on that traditional corn side dish for your holiday table.


As the weather gets cooler the thoughts of this past summer’s bounty comes to mind. Visions of fresh corn on the cob with butter, comes dancing through my head. You can almost smell it can’t you? So why not bring that memory into right now, and make it part of your Thanksgiving table? Or part of that pot luck you were invited to? Whether it’s a celebration with your family or get togethers with friends, your going to need this printed a few times its sure to be one more tradition on your table! Enjoy!
 
Fried Corn with Tomatoes and Onions
1 tbs. unsalted butter
1 medium onion sliced
3 c. frozen corn kernels
1 10oz. can Hot Rotel tomatoes
1 tsp granulated garlic
½ tsp. salt
 
Add butter to a medium sized pan and allow to melt. Add sliced onions, cook until clear. Add corn kernels and tomatoes with their juice, salt and garlic. Stir to combine, and cook 15-20 minutes or until juices are nearly gone and corn is cooked through. Stir occasionally. Serve hot with your favorite holiday meal or on a busy weeknight. Either way you choose, it’s sure to be a hit.


We have officially made it to the middle of the month! Thanksgiving is less than 2 weeks away, and the days are flying by. Today Bekki is sharing a great twist on that traditional corn side dish for your holiday table.


As the weather gets cooler the thoughts of this past summer’s bounty comes to mind. Visions of fresh corn on the cob with butter, comes dancing through my head. You can almost smell it can’t you? So why not bring that memory into right now, and make it part of your Thanksgiving table? Or part of that pot luck you were invited to? Whether it’s a celebration with your family or get togethers with friends, your going to need this printed a few times its sure to be one more tradition on your table! Enjoy!
 
Fried Corn with Tomatoes and Onions
1 tbs. unsalted butter
1 medium onion sliced
3 c. frozen corn kernels
1 10oz. can Hot Rotel tomatoes
1 tsp granulated garlic
½ tsp. salt
 
Add butter to a medium sized pan and allow to melt. Add sliced onions, cook until clear. Add corn kernels and tomatoes with their juice, salt and garlic. Stir to combine, and cook 15-20 minutes or until juices are nearly gone and corn is cooked through. Stir occasionally. Serve hot with your favorite holiday meal or on a busy weeknight. Either way you choose, it’s sure to be a hit.


reade more... Résuméabuiyad

Seasonal Addiction

This time of year I'm pretty sure I could eat soup every single night. And if all of those soups could be cooked in the slow cooker, even better. There is something so comforting about being inside all day, watching the leaves blow around outside, knowing there is a chill in the air, with a big pot of soup cooking on the counter all day long. Then when the family gathers around the table tired and cold, they are warmed and satisfied instantly.

So, why don't I just plan on soup every night of the week? Well, because we are very much an "anti-rut" family when it comes to our food. We want to make sure we never tire of the things we love. Who wants to ruin such a good thing by over doing it? It's kind of like the child who wished Christmas could be every day, and by about a month into it, regretted the wish, realizing something so special can only come once per year. 

When I saw first saw this soup, it reminded me of another one I make, only it is prepared on the stove top, my Italian White Bean Soup. Something I've been making for years, it has now become a favorite of my friends who have tried it too. In fact, it reminded me of it so much, I decided to add spinach to this one to resemble it a little more. 

This is a hearty soup that eats like a meal. Bake up some corn bread, and call it a day. It's rich, cooked all day flavor will make it one you go back to again and again, over the next few months as the cold sets in. 

If you're addicted to soup this time of year too, I guess you can call me your enabler. That's okay. There are worse things we could be addicted to!

Crock Pot White Bean and Sausage Soup Adapted from The Southern Lady Cooks
1 lb. pork sausage
1 c. dried northern white beans
1 small white onion, finely chopped
1 (14 oz.) can chicken broth
1 (10 3/4 oz.) can cream of celery soup
1 (14.5 oz.) can diced tomatoes, undrained
1 1/2 c. water
1 (8 oz.) can tomato sauce
3 medium carrots, finely chopped
1 TBS dried basil
2 garlic cloves, minced
3 c. fresh spinach
Salt and Pepper to taste

In a large skillet over medium heat, brown sausage with onion. Season with basil. Drain fat. Place in Crock Pot. Add all other ingredients, except spinach. Cook on LOW 7 hours. About 20 minutes before finished, add spinach and stir well. Cook until spinach is wilted, but still vibrant green.


Shared on The Country Cook Nov. 15, 2013

Soups at Very Good Recipes

This time of year I'm pretty sure I could eat soup every single night. And if all of those soups could be cooked in the slow cooker, even better. There is something so comforting about being inside all day, watching the leaves blow around outside, knowing there is a chill in the air, with a big pot of soup cooking on the counter all day long. Then when the family gathers around the table tired and cold, they are warmed and satisfied instantly.

So, why don't I just plan on soup every night of the week? Well, because we are very much an "anti-rut" family when it comes to our food. We want to make sure we never tire of the things we love. Who wants to ruin such a good thing by over doing it? It's kind of like the child who wished Christmas could be every day, and by about a month into it, regretted the wish, realizing something so special can only come once per year. 

When I saw first saw this soup, it reminded me of another one I make, only it is prepared on the stove top, my Italian White Bean Soup. Something I've been making for years, it has now become a favorite of my friends who have tried it too. In fact, it reminded me of it so much, I decided to add spinach to this one to resemble it a little more. 

This is a hearty soup that eats like a meal. Bake up some corn bread, and call it a day. It's rich, cooked all day flavor will make it one you go back to again and again, over the next few months as the cold sets in. 

If you're addicted to soup this time of year too, I guess you can call me your enabler. That's okay. There are worse things we could be addicted to!

Crock Pot White Bean and Sausage Soup Adapted from The Southern Lady Cooks
1 lb. pork sausage
1 c. dried northern white beans
1 small white onion, finely chopped
1 (14 oz.) can chicken broth
1 (10 3/4 oz.) can cream of celery soup
1 (14.5 oz.) can diced tomatoes, undrained
1 1/2 c. water
1 (8 oz.) can tomato sauce
3 medium carrots, finely chopped
1 TBS dried basil
2 garlic cloves, minced
3 c. fresh spinach
Salt and Pepper to taste

In a large skillet over medium heat, brown sausage with onion. Season with basil. Drain fat. Place in Crock Pot. Add all other ingredients, except spinach. Cook on LOW 7 hours. About 20 minutes before finished, add spinach and stir well. Cook until spinach is wilted, but still vibrant green.


Shared on The Country Cook Nov. 15, 2013

Soups at Very Good Recipes

reade more... Résuméabuiyad

Warning, This One Might Make You Cry

We love French Onion Soup, but it's one of those things I've never even attempted to make at home. I'm not sure why, but I probably had a good reason in my head, each time, but right now they escape me. But when I found a version that my slow cooker could help me out with, those reasons all disappeared and I was ready to give it a try.

Now here is when this story turns hilarious. I made this on a Friday when Alex was home, on fall break from school. So I'm standing in the kitchen peeling and slicing all these onions. My eyes are beginning to water a little, but not too bad. He's in the living room, adjacent to the kitchen, and pretty soon he asks "Mommy, are you chopping onions?" I answer "Yes, why? Can you smell them?" "No, my eyes are watering." Well, being in the next room, I was sure it couldn't be affecting him that badly, so I kept right on going. Pretty soon, I had all those onions in the skillet, cooking...and the smell only got worse. He finally came out to the kitchen to show me just how bad his eyes were. The poor kid!!! They were as red as fire, and the tears were streaming down his cheeks. It was so pathetic! Apparently, he has a much higher sensitivity to onions than we ever realized!

Well, of course cutting and cooking that many at a time, the odor kind of lingered in the house for a while, even after I had everything in the Crock Pot with the lid on. Luckily, we were already planning on going out to lunch and shopping, so I left the fans on and we got the heck out of dodge! It's pretty bad when you have to take your child out of the house because you're torturing him with onions! Thankfully, by the time we returned from our day, the smell had dissipated, and he could once again open his eyes inside the house without needing tissues and eye drops!

If you love French Onion Soup as much as we do, you're going to really enjoy this. It's super simple, takes little effort and tastes just like my favorite versions I get out at restaurants. The cheese melting down into the soup, almost creating a layer right under the surface, was our favorite part. That way with each bite, you get a big spoonful of ooey, gooey, yummy cheese.

I hope you make this for your family soon. Just be sure to have extra tissues on hand, and if they all start running for the doors, don't be insulted!

Crock Pot French Onion Soup 
8 large yellow onions, sliced thin
1/2 c. butter
3 dry bay leaves
6 (10 3/4 oz.) cans condensed beef broth
3 cups water
1 beef bouillon cube
Salt and Pepper to taste
8 oz. shredded mozzarella cheese

In a large skillet over medium heat, melt butter. Add onions (in batches if necessary) and saute' until tender and slightly golden. Transfer to Crock Pot. Add broth, water, bouillon, bay leaves, salt and pepper. Cook on low for 7-8 hours. Remove bay leaves. To serve, place some cheese in bottom of bowl. Ladle soup over and add more cheese to top. Wait just a minute for it to sink and melt. Serve with crusty bread on the side.


Shared on The Country Cook Nov. 8, 2013

Soup at Very Good Recipes

We love French Onion Soup, but it's one of those things I've never even attempted to make at home. I'm not sure why, but I probably had a good reason in my head, each time, but right now they escape me. But when I found a version that my slow cooker could help me out with, those reasons all disappeared and I was ready to give it a try.

Now here is when this story turns hilarious. I made this on a Friday when Alex was home, on fall break from school. So I'm standing in the kitchen peeling and slicing all these onions. My eyes are beginning to water a little, but not too bad. He's in the living room, adjacent to the kitchen, and pretty soon he asks "Mommy, are you chopping onions?" I answer "Yes, why? Can you smell them?" "No, my eyes are watering." Well, being in the next room, I was sure it couldn't be affecting him that badly, so I kept right on going. Pretty soon, I had all those onions in the skillet, cooking...and the smell only got worse. He finally came out to the kitchen to show me just how bad his eyes were. The poor kid!!! They were as red as fire, and the tears were streaming down his cheeks. It was so pathetic! Apparently, he has a much higher sensitivity to onions than we ever realized!

Well, of course cutting and cooking that many at a time, the odor kind of lingered in the house for a while, even after I had everything in the Crock Pot with the lid on. Luckily, we were already planning on going out to lunch and shopping, so I left the fans on and we got the heck out of dodge! It's pretty bad when you have to take your child out of the house because you're torturing him with onions! Thankfully, by the time we returned from our day, the smell had dissipated, and he could once again open his eyes inside the house without needing tissues and eye drops!

If you love French Onion Soup as much as we do, you're going to really enjoy this. It's super simple, takes little effort and tastes just like my favorite versions I get out at restaurants. The cheese melting down into the soup, almost creating a layer right under the surface, was our favorite part. That way with each bite, you get a big spoonful of ooey, gooey, yummy cheese.

I hope you make this for your family soon. Just be sure to have extra tissues on hand, and if they all start running for the doors, don't be insulted!

Crock Pot French Onion Soup 
8 large yellow onions, sliced thin
1/2 c. butter
3 dry bay leaves
6 (10 3/4 oz.) cans condensed beef broth
3 cups water
1 beef bouillon cube
Salt and Pepper to taste
8 oz. shredded mozzarella cheese

In a large skillet over medium heat, melt butter. Add onions (in batches if necessary) and saute' until tender and slightly golden. Transfer to Crock Pot. Add broth, water, bouillon, bay leaves, salt and pepper. Cook on low for 7-8 hours. Remove bay leaves. To serve, place some cheese in bottom of bowl. Ladle soup over and add more cheese to top. Wait just a minute for it to sink and melt. Serve with crusty bread on the side.


Shared on The Country Cook Nov. 8, 2013

Soup at Very Good Recipes

reade more... Résuméabuiyad

Soul Food Saturday #29

Welcome to November!! Yep, that's right, Halloween is behind us, and the downhill coast to Thanksgiving and Christmas is here! In case you aren't paying attention, Turkey Day is 26 days from today, and here on EMM we're going to try to give you some ideas over the next few weeks for all those meals you'll have to plan when guests are visiting. Today, Bekki has got one I think would make a great breakfast or brunch, perfect for a crowd, because they can add their favorite toppings to personalize!


What comes to mind when you think of comfort? Warm blankets straight from the dryer, a fuzzy pair of socks; oh wait, we were talking about food right? Yes. Well one thing that I really enjoyed growing up was breakfast with the family. Whether it was a scrambled egg dish, first thing Saturday morning or a big cinnamon roll after church; that’s was always comforting to me. So, with that said here is one of my favorite scrambled egg dishes. Loaded with spicy sausage, and cheese who wouldn't want to dive in? Grab a fork quick these will be gone before you can pour a second cup of coffee.
Loaded Spicy Scrambled Eggs 
1 medium onion, chopped
2 jalapenos, sliced
3 mini sweet peppers, sliced
6 Spicy Sausage Links –Precooked, sliced
6 eggs
1 c. grated cheddar jack cheese
1 tsp. granulated garlic
Salt and pepper to taste
Sour cream –optional
In a large skillet add oil, onion, jalapeno, and sweet peppers. Cook until onions are clear and peppers have softened, stirring often. In a small bowl crack eggs, and add garlic, salt and pepper. Set aside. Then add sausage to pan with onions, and allow to warm through, toasting the edges slightly.  Beat eggs in bowl, and mix to combine seasoning. Then add to the pan, stirring to combine.  Stir often and cook to desired egg doneness. Remove from heat and add cheese. Stir to combine and allow cheese to melt.
Serve with a dollop of sour cream, fresh salsa or extra cheese!


Welcome to November!! Yep, that's right, Halloween is behind us, and the downhill coast to Thanksgiving and Christmas is here! In case you aren't paying attention, Turkey Day is 26 days from today, and here on EMM we're going to try to give you some ideas over the next few weeks for all those meals you'll have to plan when guests are visiting. Today, Bekki has got one I think would make a great breakfast or brunch, perfect for a crowd, because they can add their favorite toppings to personalize!


What comes to mind when you think of comfort? Warm blankets straight from the dryer, a fuzzy pair of socks; oh wait, we were talking about food right? Yes. Well one thing that I really enjoyed growing up was breakfast with the family. Whether it was a scrambled egg dish, first thing Saturday morning or a big cinnamon roll after church; that’s was always comforting to me. So, with that said here is one of my favorite scrambled egg dishes. Loaded with spicy sausage, and cheese who wouldn't want to dive in? Grab a fork quick these will be gone before you can pour a second cup of coffee.
Loaded Spicy Scrambled Eggs 
1 medium onion, chopped
2 jalapenos, sliced
3 mini sweet peppers, sliced
6 Spicy Sausage Links –Precooked, sliced
6 eggs
1 c. grated cheddar jack cheese
1 tsp. granulated garlic
Salt and pepper to taste
Sour cream –optional
In a large skillet add oil, onion, jalapeno, and sweet peppers. Cook until onions are clear and peppers have softened, stirring often. In a small bowl crack eggs, and add garlic, salt and pepper. Set aside. Then add sausage to pan with onions, and allow to warm through, toasting the edges slightly.  Beat eggs in bowl, and mix to combine seasoning. Then add to the pan, stirring to combine.  Stir often and cook to desired egg doneness. Remove from heat and add cheese. Stir to combine and allow cheese to melt.
Serve with a dollop of sour cream, fresh salsa or extra cheese!


reade more... Résuméabuiyad

Our Veggie Bin

Last week I told you about our experience with Green BEAN Delivery; and how much we enjoyed the fresh produce we were provided. If you missed that review, or are totally intrigued, you can read about it here.

One of the things I added to our bin that wasn't initially included was acorn squash. We love all kinds of squash, and we love to eat it year round, but to me, there is just something about enjoying fresh squash during the fall months. Maybe it stems from my childhood when my dad used to have a pretty impressive garden, and the squash were always ready to be picked about the time the leaves were falling from the trees. Maybe it's simply because squash reminds me of pumpkin. Whatever the reason, this time of year is when squash begins to makes an appearance on our table more frequently.

I'm telling you, this recipe looks like autumn on a plate! From the squash to another of fall's best gifts, apples, this looks, smells and tastes like a celebration of the season! These would make a great Sunday supper on a brisk, fall day, or even a weeknight meal if you have a little extra time on your hands. (Don't let that scare you. It's not a difficult recipe, the squash just needs some time in the oven to get tender and delicious.)

If you are looking for more meals that include autumn's bounty, make sure to save this one. Celebrate the changing of the seasons with fresh ingredients that come together in a beautiful and tasty way!

Sausage and Apple Stuffed Acorn Squash
2 Acorn Squash, cut in half and seeded
1 lb. pork sausage
1 TBS butter, melted
1/4 tsp. garlic salt
3/4 tsp. ground sage, divided
1/2 c. onion, finely chopped
1 celery rib, finely chopped
6 button mushrooms, finely chopped
2 apples, cored and finely chopped
1 c. bread crumbs
1 egg, beaten
Salt and Pepper to taste
Grated Parmesan cheese for garnish

Preheat oven to 400. Place cut squash, cut side up, in a 9x13 baking dish. In a small bowl combine melted butter, garlic salt and 1/4 tsp. sage. Mix well. Brush the cavity of each squash with butter mixture, coating it well. Bake for 1 hour until squash is tender, but holds shape.

While squash is roasting, brown sausage over medium heat in a large skillet. Drain, reserving 2 TBS of drippings. Place drippings back in pan. Add onion, celery, and mushrooms. Saute for 4 minutes. Add apples and saute 2 more minutes. In a large bowl combine browned sausage, veggies, 1/2 tsp. sage, salt, pepper, bread crumbs and egg. Mix well to combine. Remove squash from oven. Fill each with sausage mixture, mounding slightly. Bake for 20 additional minutes until browned. Sprinkle with cheese before serving.


Shared on The Country Cook Oct. 18, 2013


Squash at Very Good Recipes
Last week I told you about our experience with Green BEAN Delivery; and how much we enjoyed the fresh produce we were provided. If you missed that review, or are totally intrigued, you can read about it here.

One of the things I added to our bin that wasn't initially included was acorn squash. We love all kinds of squash, and we love to eat it year round, but to me, there is just something about enjoying fresh squash during the fall months. Maybe it stems from my childhood when my dad used to have a pretty impressive garden, and the squash were always ready to be picked about the time the leaves were falling from the trees. Maybe it's simply because squash reminds me of pumpkin. Whatever the reason, this time of year is when squash begins to makes an appearance on our table more frequently.

I'm telling you, this recipe looks like autumn on a plate! From the squash to another of fall's best gifts, apples, this looks, smells and tastes like a celebration of the season! These would make a great Sunday supper on a brisk, fall day, or even a weeknight meal if you have a little extra time on your hands. (Don't let that scare you. It's not a difficult recipe, the squash just needs some time in the oven to get tender and delicious.)

If you are looking for more meals that include autumn's bounty, make sure to save this one. Celebrate the changing of the seasons with fresh ingredients that come together in a beautiful and tasty way!

Sausage and Apple Stuffed Acorn Squash
2 Acorn Squash, cut in half and seeded
1 lb. pork sausage
1 TBS butter, melted
1/4 tsp. garlic salt
3/4 tsp. ground sage, divided
1/2 c. onion, finely chopped
1 celery rib, finely chopped
6 button mushrooms, finely chopped
2 apples, cored and finely chopped
1 c. bread crumbs
1 egg, beaten
Salt and Pepper to taste
Grated Parmesan cheese for garnish

Preheat oven to 400. Place cut squash, cut side up, in a 9x13 baking dish. In a small bowl combine melted butter, garlic salt and 1/4 tsp. sage. Mix well. Brush the cavity of each squash with butter mixture, coating it well. Bake for 1 hour until squash is tender, but holds shape.

While squash is roasting, brown sausage over medium heat in a large skillet. Drain, reserving 2 TBS of drippings. Place drippings back in pan. Add onion, celery, and mushrooms. Saute for 4 minutes. Add apples and saute 2 more minutes. In a large bowl combine browned sausage, veggies, 1/2 tsp. sage, salt, pepper, bread crumbs and egg. Mix well to combine. Remove squash from oven. Fill each with sausage mixture, mounding slightly. Bake for 20 additional minutes until browned. Sprinkle with cheese before serving.


Shared on The Country Cook Oct. 18, 2013


Squash at Very Good Recipes
reade more... Résuméabuiyad

Indiana Made {A Review of Hurst Beans}

I am so excited to not only be bringing a fantastic recipe, perfect for fall, to you today, but also a company and their products from right here in my home state of Indiana, Hurst Beans!

The N.K. Hurst Company was established as a family business in 1938 beginning a long history in the food business with the trading and distribution of sugar. Since 1948, the Hurst name is recognized as being a first quality packager of dry edible beans; and the company is still proudly owned and operated by 2nd, 3rd, and 4th generation Hurst families!!! 

This is my favorite thing about this company. Sure, the beans are tasty and easy to use, and make a fantastic meal your family will love, but knowing they are coming from a truly family owned and operated business, doing things the right way for the past 75 years is simply too hard to come by in today's world not to be appreciated, admired and respected. 

Now I am going to be completely honest with you. I have passed Hurst packaged dry beans in the supermarket a thousand times. Heck, I've probably bought a package or two, and I never knew they were being made a mere 2 hours from me in Indianapolis. So, you can imagine my excitement when I was given the opportunity to do this review.

The folks at Hurst were kind enough to send me a few varieties of their beans to try, but the minute I opened the box I knew exactly which one I was going to cook with first. The 15 Bean Soup Mix. 

Why? Because this is the one I know with a shadow of a doubt I've seen in my stores before. In fact, I even watched someone cook with them about a year ago. Oh, and let's not forget the assortment of beans you can see just by glancing at the package. That means flavor like no other! 
Plus, I found this super easy recipe on their website, that utilized my favorite friend in the kitchen, my Crock Pot! 

I made this soup on a chilly day when I knew we would be busy all day long, and I wanted supper waiting to fill us up, and warm us up...Oh did it ever!! This has deep, rich, flavor that your family will love. And, it is a no soak method...making it even easier! 

If you don't know what foods and products are coming out of your state, please do some research and find out! Locally made products are so much fun to experience, and in this case, so delicious too! You can find Hurst Beans on Facebook, Twitter, and Pinterest for more information, tips and recipes. 


Crock Pot 15 Bean Soup From Hurst Beans
1 package Hurst Beans 15 Bean Soup Mix
1 lb. smoked sausage, chopped
8 c. water
1 large onion, diced
1 clove garlic, minced
1 tsp. red pepper flake
1 (15 oz.) can diced tomatoes 
Juice of 1 lemon

NO SOAK METHOD. Sort and rinse beans. Drain. Place in Crock Pot with 8 cups water, sausage, red pepper, onion and garlic. Cook on HIGH for 5 hours, or until beans are tender. Stir in tomatoes, flavoring packet from bean mix, and lemon juice. Cook for 30 additional minutes and keep warm until ready to serve. *NOTE* Make sure you don't add the tomatoes until the beans are tender. The acid in them will not allow the beans to become tender if added too soon. 


Shared on The Country Cook Oct. 11, 2013


Soup at Very Good Recipes

*Disclaimer* I was provided with free product in exchange for this review. All thoughts and opinions are my own.
I am so excited to not only be bringing a fantastic recipe, perfect for fall, to you today, but also a company and their products from right here in my home state of Indiana, Hurst Beans!

The N.K. Hurst Company was established as a family business in 1938 beginning a long history in the food business with the trading and distribution of sugar. Since 1948, the Hurst name is recognized as being a first quality packager of dry edible beans; and the company is still proudly owned and operated by 2nd, 3rd, and 4th generation Hurst families!!! 

This is my favorite thing about this company. Sure, the beans are tasty and easy to use, and make a fantastic meal your family will love, but knowing they are coming from a truly family owned and operated business, doing things the right way for the past 75 years is simply too hard to come by in today's world not to be appreciated, admired and respected. 

Now I am going to be completely honest with you. I have passed Hurst packaged dry beans in the supermarket a thousand times. Heck, I've probably bought a package or two, and I never knew they were being made a mere 2 hours from me in Indianapolis. So, you can imagine my excitement when I was given the opportunity to do this review.

The folks at Hurst were kind enough to send me a few varieties of their beans to try, but the minute I opened the box I knew exactly which one I was going to cook with first. The 15 Bean Soup Mix. 

Why? Because this is the one I know with a shadow of a doubt I've seen in my stores before. In fact, I even watched someone cook with them about a year ago. Oh, and let's not forget the assortment of beans you can see just by glancing at the package. That means flavor like no other! 
Plus, I found this super easy recipe on their website, that utilized my favorite friend in the kitchen, my Crock Pot! 

I made this soup on a chilly day when I knew we would be busy all day long, and I wanted supper waiting to fill us up, and warm us up...Oh did it ever!! This has deep, rich, flavor that your family will love. And, it is a no soak method...making it even easier! 

If you don't know what foods and products are coming out of your state, please do some research and find out! Locally made products are so much fun to experience, and in this case, so delicious too! You can find Hurst Beans on Facebook, Twitter, and Pinterest for more information, tips and recipes. 


Crock Pot 15 Bean Soup From Hurst Beans
1 package Hurst Beans 15 Bean Soup Mix
1 lb. smoked sausage, chopped
8 c. water
1 large onion, diced
1 clove garlic, minced
1 tsp. red pepper flake
1 (15 oz.) can diced tomatoes 
Juice of 1 lemon

NO SOAK METHOD. Sort and rinse beans. Drain. Place in Crock Pot with 8 cups water, sausage, red pepper, onion and garlic. Cook on HIGH for 5 hours, or until beans are tender. Stir in tomatoes, flavoring packet from bean mix, and lemon juice. Cook for 30 additional minutes and keep warm until ready to serve. *NOTE* Make sure you don't add the tomatoes until the beans are tender. The acid in them will not allow the beans to become tender if added too soon. 


Shared on The Country Cook Oct. 11, 2013


Soup at Very Good Recipes

*Disclaimer* I was provided with free product in exchange for this review. All thoughts and opinions are my own.
reade more... Résuméabuiyad

Retro Supper

Today's recipe is another one that has technically appeared on EMM...but long before most of you were here. One that I am "re-blogging" both so more of my readers can enjoy it; and also because my food photography skills have grown by leaps and bounds, and sometimes looking at those old photos literally makes my eyes hurt. 

I remember stuffed peppers being a huge treat when I was growing up. They were actually something we usually only had when my Grammy was visiting from Pennsylvania, and that was only once per year! Ironically enough though, their annual visit always happened about this time. The first weekend of October is when her and Popeye (that was what we called Grandpa) would make the 6 hour drive to visit for about a week. Why did they always come then? Well, because my dad's birthday (their youngest child) is October 2nd! So when I decided to re-share this recipe, it seemed only appropriate to do so now.

When I first decided I wanted to make these myself, I truly thought they were going to be complicated and time consuming. Well, thankfully they were much harder in my head than in reality. They could not be easier, and are even convenient for a weeknight supper! The oven almost does all the work for you. They are comforting and delicious, reminding us of our childhood. Perfect for a autumn evening supper. 

If you think stuffed peppers aren't something you can enjoy during the week, think again. This simple recipe proves a retro, scrumptious supper is 100% doable even on the busiest of days.


Easy Stuffed Peppers 
1 lb. ground beef
4 large green peppers
3/4 c. chopped onion
1/4 c. uncooked instant rice
3 TBS ketchup, divided
1 tsp. oregano, divided
1 (14.5 oz) can Italian stewed tomatoes
Salt and Pepper to taste

Preheat oven to 350. Cut tops off peppers; remove seeds and membrane. Combine ground beef, onion, rice, 2 TBS ketchup, 1/2 tsp oregano, salt and pepper. Mix lightly, but well. Spoon equal amount of beef mixture into each pepper. Place in 8x8 inch square baking dish. Combine tomatoes, remaining ketchup and oregano; pour over stuffed peppers. Cover tightly w/ foil. Bake for 1 1/2 hours. 

Shared on The Country Cook Oct. 4, 2013
Peppers at Very Good Recipes
Today's recipe is another one that has technically appeared on EMM...but long before most of you were here. One that I am "re-blogging" both so more of my readers can enjoy it; and also because my food photography skills have grown by leaps and bounds, and sometimes looking at those old photos literally makes my eyes hurt. 

I remember stuffed peppers being a huge treat when I was growing up. They were actually something we usually only had when my Grammy was visiting from Pennsylvania, and that was only once per year! Ironically enough though, their annual visit always happened about this time. The first weekend of October is when her and Popeye (that was what we called Grandpa) would make the 6 hour drive to visit for about a week. Why did they always come then? Well, because my dad's birthday (their youngest child) is October 2nd! So when I decided to re-share this recipe, it seemed only appropriate to do so now.

When I first decided I wanted to make these myself, I truly thought they were going to be complicated and time consuming. Well, thankfully they were much harder in my head than in reality. They could not be easier, and are even convenient for a weeknight supper! The oven almost does all the work for you. They are comforting and delicious, reminding us of our childhood. Perfect for a autumn evening supper. 

If you think stuffed peppers aren't something you can enjoy during the week, think again. This simple recipe proves a retro, scrumptious supper is 100% doable even on the busiest of days.


Easy Stuffed Peppers 
1 lb. ground beef
4 large green peppers
3/4 c. chopped onion
1/4 c. uncooked instant rice
3 TBS ketchup, divided
1 tsp. oregano, divided
1 (14.5 oz) can Italian stewed tomatoes
Salt and Pepper to taste

Preheat oven to 350. Cut tops off peppers; remove seeds and membrane. Combine ground beef, onion, rice, 2 TBS ketchup, 1/2 tsp oregano, salt and pepper. Mix lightly, but well. Spoon equal amount of beef mixture into each pepper. Place in 8x8 inch square baking dish. Combine tomatoes, remaining ketchup and oregano; pour over stuffed peppers. Cover tightly w/ foil. Bake for 1 1/2 hours. 

Shared on The Country Cook Oct. 4, 2013
Peppers at Very Good Recipes
reade more... Résuméabuiyad

Soul Food Saturday #24

Good Morning! Can you believe it's the last weekend of September? I can't believe October will be here in a few short days!! In my mind, as soon as the calendar reads Oct. 1st, it's simply a downhill race to the holidays. Ha Ha. But let's not get ahead of ourselves because Bekki is here with a great recipe for any autumn evening you need to warm up! She has actually taken my Crock Pot Corn and Cheese Chowder, and come up with a quick stove top version, when you need supper on the table and fast!


With Fall just started to show her face, it brings thoughts of warm comfort food to my mind. Being a California grown girl I love corn. Fresh corn is always best in summer, and how can it be a bad idea to mix the words comfort and corn together? That is exactly what this soup is comfort in a bowl. With the evenings beginning to get cooler and the crop of fresh corn almost gone, this is my last hurrah for summer.  Some time ago, I stumbled over a recipe of Mrs. E’s that I have held close since the first time making it. It’s Crock Pot Corn Chowder, taken to the stove. Yes! I wanted it right now! So my impatience took the recipe straight to a pot on the stove top. After making it several times, I put my own spin on it. Changing this here and there to suit what I had on hand. I hope you fall in love with this soup just like we did. Enjoy!

Corn Chowder, In a Hurry! 
2 TBS unsalted butter
1 large onion, chopped
2 c. potatoes, sliced
1 Anaheim chile pepper, diced
3 sweet mini peppers
4 c. fresh corn, off the cob (4-5 ears)
2 ½ c. diced ham
1 can cream of mushroom soup
2 ¼ c. half and half
2 tsp dried parsley
Salt and Pepper to taste


In a medium pot add unsalted butter to melt. Add onion, and peppers. Cook until onion is clear and peppers are softened slightly.  Add sliced potatoes, corn, ham, soup and half and half. Stir to combine. Add parsley and salt and pepper to taste. Cover and simmer until potatoes are tender about 20 minutes, stirring often.
Serve hot with your favorite bread or alone. Which ever way you choose, this one will be around for a long time.


Good Morning! Can you believe it's the last weekend of September? I can't believe October will be here in a few short days!! In my mind, as soon as the calendar reads Oct. 1st, it's simply a downhill race to the holidays. Ha Ha. But let's not get ahead of ourselves because Bekki is here with a great recipe for any autumn evening you need to warm up! She has actually taken my Crock Pot Corn and Cheese Chowder, and come up with a quick stove top version, when you need supper on the table and fast!


With Fall just started to show her face, it brings thoughts of warm comfort food to my mind. Being a California grown girl I love corn. Fresh corn is always best in summer, and how can it be a bad idea to mix the words comfort and corn together? That is exactly what this soup is comfort in a bowl. With the evenings beginning to get cooler and the crop of fresh corn almost gone, this is my last hurrah for summer.  Some time ago, I stumbled over a recipe of Mrs. E’s that I have held close since the first time making it. It’s Crock Pot Corn Chowder, taken to the stove. Yes! I wanted it right now! So my impatience took the recipe straight to a pot on the stove top. After making it several times, I put my own spin on it. Changing this here and there to suit what I had on hand. I hope you fall in love with this soup just like we did. Enjoy!

Corn Chowder, In a Hurry! 
2 TBS unsalted butter
1 large onion, chopped
2 c. potatoes, sliced
1 Anaheim chile pepper, diced
3 sweet mini peppers
4 c. fresh corn, off the cob (4-5 ears)
2 ½ c. diced ham
1 can cream of mushroom soup
2 ¼ c. half and half
2 tsp dried parsley
Salt and Pepper to taste


In a medium pot add unsalted butter to melt. Add onion, and peppers. Cook until onion is clear and peppers are softened slightly.  Add sliced potatoes, corn, ham, soup and half and half. Stir to combine. Add parsley and salt and pepper to taste. Cover and simmer until potatoes are tender about 20 minutes, stirring often.
Serve hot with your favorite bread or alone. Which ever way you choose, this one will be around for a long time.


reade more... Résuméabuiyad

Still Time For A Picnic

We are a picnic loving family. It's one of our favorite summertime rituals. But with Labor Day behind us, and the stores filling up with pumpkins and scarecrows, I have got to face the fact autumn is well on it's way. It's knocking on the door, just waiting for us to answer.

But there is no doubt we've still got some warm, sunny days ahead of us (I love Indian Summer days!!), so why not enjoy a picnic then too? Sounds like a great idea to me; and I've got the perfect dish for you picnic basket.

My mom and grandma have been making this macaroni salad for as long as I can remember. And I must admit, while I'm happy to be continuing the tradition, no matter how many times I make it myself, it will never taste as good as theirs. Never. I've given up!

If you love hard boiled eggs, or you love green olives, this pasta salad is going to become your new favorite. They are definitely what makes it unique and stand out from others I've had before. I can tell you first hand, I've seen this sitting on a table at a pot-luck, with other pasta salads, and it is always the first to go. Everyone loves it. Simple but scrumptious, those are the two perfect words to describe it.

Now, many of you might read this and say "I don't use Miracle Whip, will mayo work." Quite frankly, no. I am a mayo lover and 99% of the time it is all I have in the house, but when I know I'm going to be making this, I have to buy the other. Why? Well, first off, it is what grandma and mom have always used, and that means I don't mess with it. But I actually have tried it with mayo before, and it just doesn't taste the same. The "whip" has a little more tangy flavor, marrying so well with the mustard and briny olives. I guess to be fair though, you won't have anything to compare it to, so if you want to use mayo, I'm sure it will still be yummy, it's just not what our family is used to; and I always want to be completely honest with you.

If you live in an area of the country where it is picnic weather year round...lucky you! You can enjoy this anytime. But if you're like us, just trying to fit in a final picnic or backyard barbecue of the season before the autumn leaves begin to fall, be sure to add this to your menu!

Mom's Macaroni Salad
1 lb. rotini pasta, cooked, rinsed and drained
1 ( 10 oz.) jar green olives, sliced
1 small onion, finely chopped
6 hard boiled eggs, chopped
1 1/2 c. Miracle Whip (mayo does NOT taste the same in this dish)
3 TBS mustard
3 TBS sweet relish
1 tsp. celery seed
Salt and Pepper to taste
Paprika, for garnish

In a large bowl combine pasta, olives,  eggs and onions. In a small bowl whisk together Miracle Whip, mustard, relish, celery seed, salt and pepper. Pour over pasta mixture. Stir well to combine. Cover and chill until serving, at least 2 hours. Before serving, stir again and sprinkle with paprika.


Shared on The Country Cook Sept. 13, 2013
Pasta Salad at Very Good Recipes
We are a picnic loving family. It's one of our favorite summertime rituals. But with Labor Day behind us, and the stores filling up with pumpkins and scarecrows, I have got to face the fact autumn is well on it's way. It's knocking on the door, just waiting for us to answer.

But there is no doubt we've still got some warm, sunny days ahead of us (I love Indian Summer days!!), so why not enjoy a picnic then too? Sounds like a great idea to me; and I've got the perfect dish for you picnic basket.

My mom and grandma have been making this macaroni salad for as long as I can remember. And I must admit, while I'm happy to be continuing the tradition, no matter how many times I make it myself, it will never taste as good as theirs. Never. I've given up!

If you love hard boiled eggs, or you love green olives, this pasta salad is going to become your new favorite. They are definitely what makes it unique and stand out from others I've had before. I can tell you first hand, I've seen this sitting on a table at a pot-luck, with other pasta salads, and it is always the first to go. Everyone loves it. Simple but scrumptious, those are the two perfect words to describe it.

Now, many of you might read this and say "I don't use Miracle Whip, will mayo work." Quite frankly, no. I am a mayo lover and 99% of the time it is all I have in the house, but when I know I'm going to be making this, I have to buy the other. Why? Well, first off, it is what grandma and mom have always used, and that means I don't mess with it. But I actually have tried it with mayo before, and it just doesn't taste the same. The "whip" has a little more tangy flavor, marrying so well with the mustard and briny olives. I guess to be fair though, you won't have anything to compare it to, so if you want to use mayo, I'm sure it will still be yummy, it's just not what our family is used to; and I always want to be completely honest with you.

If you live in an area of the country where it is picnic weather year round...lucky you! You can enjoy this anytime. But if you're like us, just trying to fit in a final picnic or backyard barbecue of the season before the autumn leaves begin to fall, be sure to add this to your menu!

Mom's Macaroni Salad
1 lb. rotini pasta, cooked, rinsed and drained
1 ( 10 oz.) jar green olives, sliced
1 small onion, finely chopped
6 hard boiled eggs, chopped
1 1/2 c. Miracle Whip (mayo does NOT taste the same in this dish)
3 TBS mustard
3 TBS sweet relish
1 tsp. celery seed
Salt and Pepper to taste
Paprika, for garnish

In a large bowl combine pasta, olives,  eggs and onions. In a small bowl whisk together Miracle Whip, mustard, relish, celery seed, salt and pepper. Pour over pasta mixture. Stir well to combine. Cover and chill until serving, at least 2 hours. Before serving, stir again and sprinkle with paprika.


Shared on The Country Cook Sept. 13, 2013
Pasta Salad at Very Good Recipes
reade more... Résuméabuiyad

My Mom, His Grandma

I'm going to start today's post off with a preface. I know many of you are going to read this recipe and say "That's not traditional goulash." I am well aware of this, and respect the fact that for those of you enjoy a more traditional version, this is nothing similar to that. Please do not fill my inbox with the differences. In fact, I'm so aware of this, there will be another recipe posted on Friday that might be a little closer to what you consider the "real thing", and I will even be discussing why the difference.

Okay, with that out of the way, let me tell you about this dish. This is something I grew up on. My mom made this at least a couple times per month. It was simple, fast and tasty, 3 things she needed after working all day and having my dad and I starving, waiting impatiently to be fed. She was taught how to make it by her mother, so it's been in our family for many, many years.

Now, here is where the story takes an ironic, but very special twist. When Adam and I were first married, and I was looking for new recipes to cook for him, he told me he loved his grandma's goulash and asked me to get her recipe. Well, I'm not going to lie, I forgot. I did however, mention to my mom I needed supper ideas and she suggested I make her goulash, so I did. Adam came home from work, sat down to dinner and was so excited. "You got Grandma's recipe??!!" Confused I looked at him and replied, "No, I made it like my mom." Yep...they were the exact same recipe!! We had both been eating the same dish for years, loving it, but from two different sources, only making it all the more special! I like to say it's a family tradition, any which way you look at it!

This is a fantastic weeknight meal for those evening your butt is really dragging and cooking is the last thing you want to do. It comes together in almost no time at all. It's also perfect for those nights when every member of the family is eating at a different time. It reheats beautifully, and almost tastes better the longer it sits.

If this is like the goulash you grew up on, welcome to the club. If yours was nothing like this, then come back on Friday to see another version I made, and read all about why they are at completely opposite ends of the food scale!

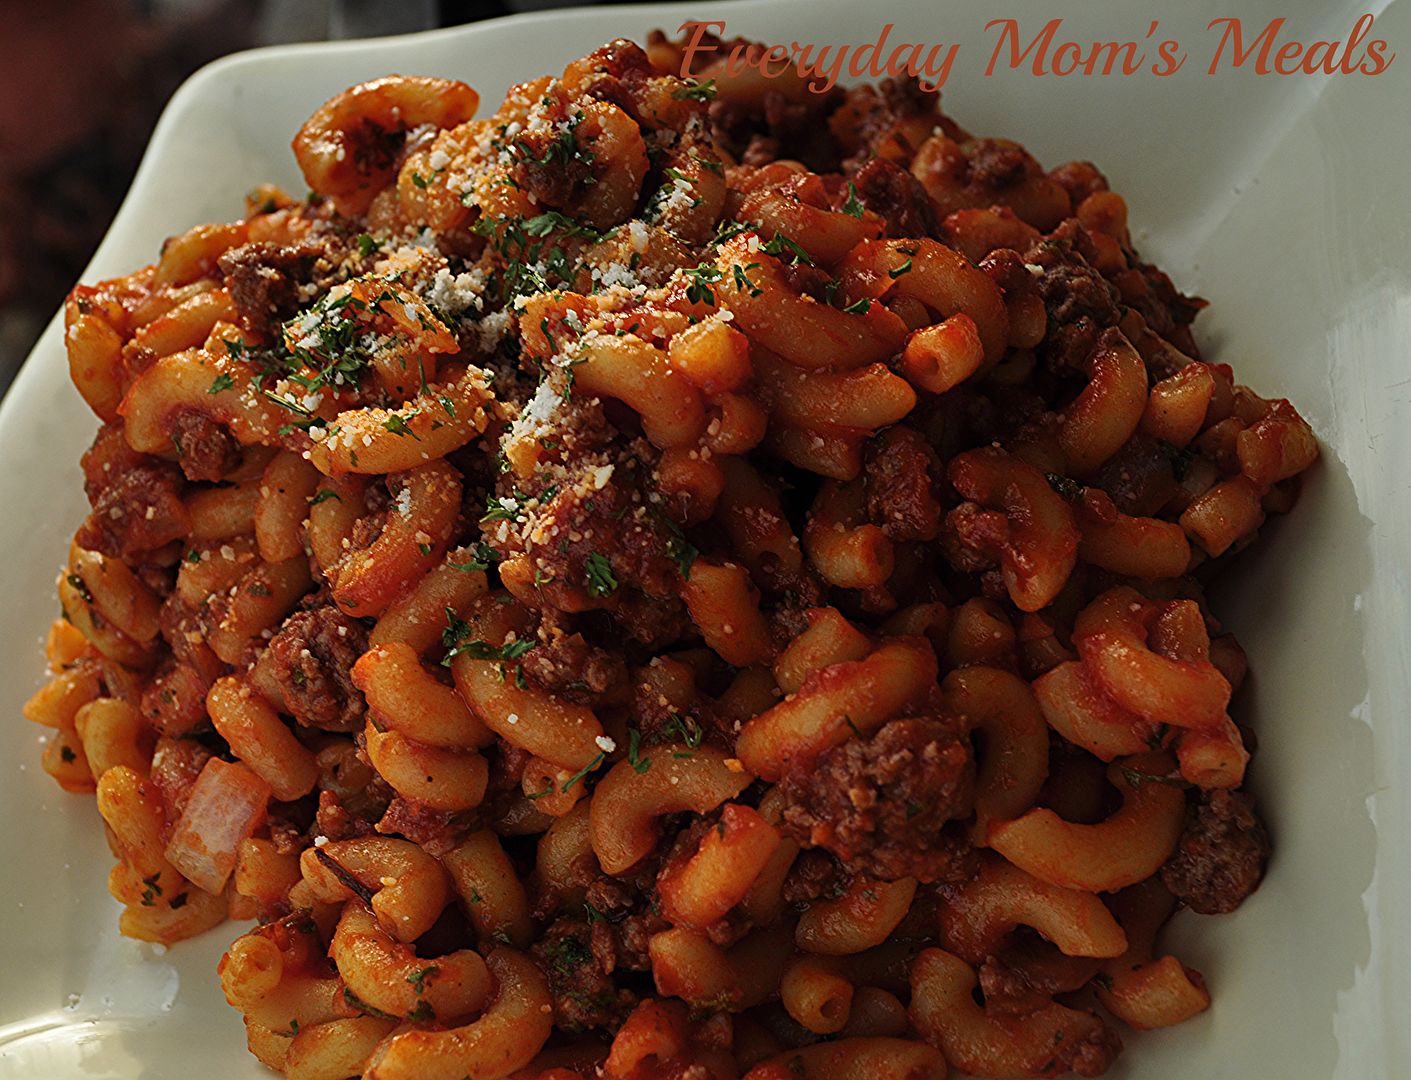
Mom's Goulash
1 lb. elbow macaroni, cooked and drained
1 lb. ground beef
1 small onion, chopped
1 tsp. garlic powder
1 (26 oz.) jar spaghetti sauce
1 TBS dried parsley, extra for garnish
Salt and Pepper to taste.
Grated Parmesan cheese

In a large skillet, brown ground beef and onion until no longer pink. Drain if necessary. Reduce heat, season with garlic powder, salt and pepper. When macaroni is cooked, add to meat mixture. Add spaghetti sauce. Stir to combine. Sprinkle with parsley and stir. Cook on low for 10-15 minutes to allow flavors to combine and thicken slightly. Serve with extra parsley and Parmesan cheese.


Shared on Lady Behind The Curtain Sept. 4, 2013
Shared on The Country Cook Sept. 6, 2013
Macaroni at Very Good Recipes
I'm going to start today's post off with a preface. I know many of you are going to read this recipe and say "That's not traditional goulash." I am well aware of this, and respect the fact that for those of you enjoy a more traditional version, this is nothing similar to that. Please do not fill my inbox with the differences. In fact, I'm so aware of this, there will be another recipe posted on Friday that might be a little closer to what you consider the "real thing", and I will even be discussing why the difference.

Okay, with that out of the way, let me tell you about this dish. This is something I grew up on. My mom made this at least a couple times per month. It was simple, fast and tasty, 3 things she needed after working all day and having my dad and I starving, waiting impatiently to be fed. She was taught how to make it by her mother, so it's been in our family for many, many years.

Now, here is where the story takes an ironic, but very special twist. When Adam and I were first married, and I was looking for new recipes to cook for him, he told me he loved his grandma's goulash and asked me to get her recipe. Well, I'm not going to lie, I forgot. I did however, mention to my mom I needed supper ideas and she suggested I make her goulash, so I did. Adam came home from work, sat down to dinner and was so excited. "You got Grandma's recipe??!!" Confused I looked at him and replied, "No, I made it like my mom." Yep...they were the exact same recipe!! We had both been eating the same dish for years, loving it, but from two different sources, only making it all the more special! I like to say it's a family tradition, any which way you look at it!

This is a fantastic weeknight meal for those evening your butt is really dragging and cooking is the last thing you want to do. It comes together in almost no time at all. It's also perfect for those nights when every member of the family is eating at a different time. It reheats beautifully, and almost tastes better the longer it sits.

If this is like the goulash you grew up on, welcome to the club. If yours was nothing like this, then come back on Friday to see another version I made, and read all about why they are at completely opposite ends of the food scale!

Mom's Goulash
1 lb. elbow macaroni, cooked and drained
1 lb. ground beef
1 small onion, chopped
1 tsp. garlic powder
1 (26 oz.) jar spaghetti sauce
1 TBS dried parsley, extra for garnish
Salt and Pepper to taste.
Grated Parmesan cheese

In a large skillet, brown ground beef and onion until no longer pink. Drain if necessary. Reduce heat, season with garlic powder, salt and pepper. When macaroni is cooked, add to meat mixture. Add spaghetti sauce. Stir to combine. Sprinkle with parsley and stir. Cook on low for 10-15 minutes to allow flavors to combine and thicken slightly. Serve with extra parsley and Parmesan cheese.


Shared on Lady Behind The Curtain Sept. 4, 2013
Shared on The Country Cook Sept. 6, 2013
Macaroni at Very Good Recipes
reade more... Résuméabuiyad

Soul Food Saturday #17

Good Morning! I know kids everywhere have already headed back to the classroom, and in another week mine will too, but it's still summer and we've got to enjoy it's bounty while we can! Now here in the Hoosier state that means fresh corn on the cob, straight from the fields to our dinner table. And this week Bekki is channeling her inner Hoosier with a great new way to use some of that fresh, sweet gold on a cob!

What screams summer to me? Fresh corn, cooked any way I can get it. Last summer I stumbled over a recipe somewhere that took fresh corn off the cob and fried it. Yes! They used those words. The demo I saw looked delicious. I just had to try my own versions. Yep, versions! This one has a bit of heat with Rotel’s hot tomatoes. So, grab a few ears and get shucking, because this one you will want to make over and over again.

Loaded Spicy Fried Corn
2 TBS unsalted butter
1 medium onion, sliced
6 slices think cut bacon, chopped
2 jalapenos, sliced
3 ears corn off the cob
1 (10oz.) can Hot Rotel tomatoes
1 tsp. granulated garlic
½ tsp. salt

Add butter to a medium sized pan and allow to melt. Add sliced onions, cook until brown and caramelized around the edges. Add bacon and jalapenos. Stir to combine, allow to cook until bacon has cooked through. Add corn kernels and tomatoes with their juice, salt and garlic. Stir to combine, and cook 20-30 minutes or until juices are nearly gone and corn is cooked through.
Stir occasionally. Serve hot with your favorite meat or fish.

Note: To tame heat, use Rotel Mild tomatoes with jalapenos and omit fresh sliced jalapenos. Or remove ribs and seeds before slicing and adding to the pan.


Good Morning! I know kids everywhere have already headed back to the classroom, and in another week mine will too, but it's still summer and we've got to enjoy it's bounty while we can! Now here in the Hoosier state that means fresh corn on the cob, straight from the fields to our dinner table. And this week Bekki is channeling her inner Hoosier with a great new way to use some of that fresh, sweet gold on a cob!

What screams summer to me? Fresh corn, cooked any way I can get it. Last summer I stumbled over a recipe somewhere that took fresh corn off the cob and fried it. Yes! They used those words. The demo I saw looked delicious. I just had to try my own versions. Yep, versions! This one has a bit of heat with Rotel’s hot tomatoes. So, grab a few ears and get shucking, because this one you will want to make over and over again.

Loaded Spicy Fried Corn
2 TBS unsalted butter
1 medium onion, sliced
6 slices think cut bacon, chopped
2 jalapenos, sliced
3 ears corn off the cob
1 (10oz.) can Hot Rotel tomatoes
1 tsp. granulated garlic
½ tsp. salt

Add butter to a medium sized pan and allow to melt. Add sliced onions, cook until brown and caramelized around the edges. Add bacon and jalapenos. Stir to combine, allow to cook until bacon has cooked through. Add corn kernels and tomatoes with their juice, salt and garlic. Stir to combine, and cook 20-30 minutes or until juices are nearly gone and corn is cooked through.
Stir occasionally. Serve hot with your favorite meat or fish.

Note: To tame heat, use Rotel Mild tomatoes with jalapenos and omit fresh sliced jalapenos. Or remove ribs and seeds before slicing and adding to the pan.


reade more... Résuméabuiyad

Coney 3.0

I would not describe my recipes as famous. My recipes are for myself, my family and of course you, my faithful foodie family. But there are two dishes that are the exception. One, my Deviled Eggs, which are what I like to call "family famous", because they are the one thing I am always required to bring to family parties and holidays. And two, my Coney Sauce...which is now almost famous because of all the times my Coney Dogs and Coney Nachos have been shared on Facebook. I can't say they've gone "viral" but it's the closet thing I will probably ever get to one doing so, and I will take it! So for all of you that loved both of those recipes. and like me would like to find more ways to use that yummy sauce...I am back today with yet another!

We love sliders in this house. Burgers are great, but there is something about a mini burger that tastes even better. Maybe that old adage of "the best things come in small packages" is why. We don't know, we just know they are a favorite around here, and I love finding new ones to try.

I was lucky enough to receive a free package of frozen slider patties from Kroger through BzzAgent, and wanted to do something extra fun with them. (If you have never heard of BzzAgent, be sure to click on the link to see how you can get in on the fun!) I love these patties!! They are the perfect slider size, and can be thrown on the grill completely frozen, no need to thaw, making them so convenient for a busy night! 

So when we got back from Florida the beginning of July and I was still getting back into the swing of things, they were the perfect meal. Well, it just so happened to be the same night I had made a batch of my Coney Sauce to give to our friend/neighbor for watching our house and mowing our lawn while we were gone. She was the one that inspired the name Crack Nachos; and since she won't let us pay her for her 3 weeks of hard work, I make a big pot of her favorite hot dog topping to show our gratitude. 

Anyway, I was standing there stirring the pot and brain storming about what I was going to do with these slider patties when lightning struck. Why not top the burgers with Coney Sauce and our favorite Coney Dog toppings, turning an everyday slider patty into something new, fun and 100% delicious?? Well, it sounded like a great plan to me, and by the end of supper we all agreed it certainly was. Oh my goodness are these good! They are the perfect little bite sized burger combining two American classics. 

If you are looking for a new burger to treat you family with that can be on the table in almost no time at all, that they will flip for, these are the perfect idea. There are so many uses for this Coney Sauce, I can't wait to see what version 4.0 brings!

Coney Sliders
6 frozen slider patties, grilled to likeness
6 slider buns
Extra Diced Onion
Extra Mustard

Sauce: 
1/2 cup finely chopped onion
1 clove garlic minced
2 TBS butter
1 lb. lean ground beef
2 TBS yellow mustard
2 TBS cider vinegar
1 tsp. Worcestershire sauce
1/2 tsp hot pepper sauce
1 cup ketchup
2 tsp paprika
2 tsp chili powder

 In a large skillet, saute the onions and garlic in butter. Add ground beef and break up until fine.(I use my potato masher.) Cook until brown and drain fat. In a medium bowl combine all other ingredients and whisk well. Add to beef mixture. Stir well and heat. Let simmer for at least 30 minutes. If dries out, add a little water, scrape bottom of pan to get pan drippings off and continue simmering. Spread mustard on both sides of bun. Place slider patty on bottom. Top with about 2 TBS of Coney Sauce, extra mustard and diced onion. 


Shared on The Country Cook Aug. 9 2013
Shared on Mandy's Recipe Box Aug. 13, 2013

Ground Beef at Very Good Recipes
I would not describe my recipes as famous. My recipes are for myself, my family and of course you, my faithful foodie family. But there are two dishes that are the exception. One, my Deviled Eggs, which are what I like to call "family famous", because they are the one thing I am always required to bring to family parties and holidays. And two, my Coney Sauce...which is now almost famous because of all the times my Coney Dogs and Coney Nachos have been shared on Facebook. I can't say they've gone "viral" but it's the closet thing I will probably ever get to one doing so, and I will take it! So for all of you that loved both of those recipes. and like me would like to find more ways to use that yummy sauce...I am back today with yet another!

We love sliders in this house. Burgers are great, but there is something about a mini burger that tastes even better. Maybe that old adage of "the best things come in small packages" is why. We don't know, we just know they are a favorite around here, and I love finding new ones to try.

I was lucky enough to receive a free package of frozen slider patties from Kroger through BzzAgent, and wanted to do something extra fun with them. (If you have never heard of BzzAgent, be sure to click on the link to see how you can get in on the fun!) I love these patties!! They are the perfect slider size, and can be thrown on the grill completely frozen, no need to thaw, making them so convenient for a busy night! 

So when we got back from Florida the beginning of July and I was still getting back into the swing of things, they were the perfect meal. Well, it just so happened to be the same night I had made a batch of my Coney Sauce to give to our friend/neighbor for watching our house and mowing our lawn while we were gone. She was the one that inspired the name Crack Nachos; and since she won't let us pay her for her 3 weeks of hard work, I make a big pot of her favorite hot dog topping to show our gratitude. 

Anyway, I was standing there stirring the pot and brain storming about what I was going to do with these slider patties when lightning struck. Why not top the burgers with Coney Sauce and our favorite Coney Dog toppings, turning an everyday slider patty into something new, fun and 100% delicious?? Well, it sounded like a great plan to me, and by the end of supper we all agreed it certainly was. Oh my goodness are these good! They are the perfect little bite sized burger combining two American classics. 

If you are looking for a new burger to treat you family with that can be on the table in almost no time at all, that they will flip for, these are the perfect idea. There are so many uses for this Coney Sauce, I can't wait to see what version 4.0 brings!

Coney Sliders
6 frozen slider patties, grilled to likeness
6 slider buns
Extra Diced Onion
Extra Mustard

Sauce: 
1/2 cup finely chopped onion
1 clove garlic minced
2 TBS butter
1 lb. lean ground beef
2 TBS yellow mustard
2 TBS cider vinegar
1 tsp. Worcestershire sauce
1/2 tsp hot pepper sauce
1 cup ketchup
2 tsp paprika
2 tsp chili powder

 In a large skillet, saute the onions and garlic in butter. Add ground beef and break up until fine.(I use my potato masher.) Cook until brown and drain fat. In a medium bowl combine all other ingredients and whisk well. Add to beef mixture. Stir well and heat. Let simmer for at least 30 minutes. If dries out, add a little water, scrape bottom of pan to get pan drippings off and continue simmering. Spread mustard on both sides of bun. Place slider patty on bottom. Top with about 2 TBS of Coney Sauce, extra mustard and diced onion. 


Shared on The Country Cook Aug. 9 2013
Shared on Mandy's Recipe Box Aug. 13, 2013

Ground Beef at Very Good Recipes
reade more... Résuméabuiyad

Slow Cooker Side Dish

Potatoes. Cheese. Bacon. Do I have you drooling yet? Let's face it, just the sound of those 3 words can get most of our taste buds working over time. Now imagine all three in a fabulous new side dish perfect for breakfast, brunch or supper. Now take that and add in the fact it cooked in the Crock Pot, and you should be super excited!

Hasbrown casserole is one of those things I think everyone has a recipe for. I have a fantastic one that I blogged a while ago that's cooked in the oven. (If you would like to see it, click here.) But it uses the frozen diced potatoes, and this time I wanted to use the more traditional shredded variety. Why? Because one of my favorite versions of this dish comes from Cracker Barrel and that's what they use.

I will be perfectly honest with you, this recipe didn't start out containing bacon. But there I was, looking in the fridge when I found a rogue bag of bacon bits I forget was in there and somehow, they found their way over to the counter and jumped into the Crock Pot. Ha! Come on....if you find bacon you have to use it. Especially when what's cooking contains some its best friends, potatoes and cheese! They are kind of like the Three Musketeers!

If you are looking for a new side dish for dinner that can be waiting on you after a hot day (I hear those moans about turning on the oven!) or are hosting a fun summer time brunch, you will be so happy you logged on today! Just be sure you have sneaky bacon in your house too...it will find its way into the pot, I guarantee!

Crock Pot Hashbrown Casserole
32 oz. frozen shredded potatoes, thawed
1 (10 3/4 oz.) can cream of celery soup
1 (10 3/4 oz.) can fiesta nacho cheese soup
8 oz. sour cream
6 TBS melted butter
1/4 c. dried onions
1/4 c. real bacon bits
Salt and pepper to taste
Shredded Sharp Cheddar cheese, if desired

Grease inside of Crock Pot. Place all ingredients inside and mix well. Cook on LOW 5-6 hours. Garnish with shredded cheese, if desired.


Shared on Make Ahead Meals July 15, 2013
Shared on Mandy's Recipe Box July 16, 2013
Shared on Lady Behind The Curtain July 17, 2013
Shared on The Country Cook July 19, 2013
Potatoes at Very Good Recipes
Pin It
Potatoes. Cheese. Bacon. Do I have you drooling yet? Let's face it, just the sound of those 3 words can get most of our taste buds working over time. Now imagine all three in a fabulous new side dish perfect for breakfast, brunch or supper. Now take that and add in the fact it cooked in the Crock Pot, and you should be super excited!

Hasbrown casserole is one of those things I think everyone has a recipe for. I have a fantastic one that I blogged a while ago that's cooked in the oven. (If you would like to see it, click here.) But it uses the frozen diced potatoes, and this time I wanted to use the more traditional shredded variety. Why? Because one of my favorite versions of this dish comes from Cracker Barrel and that's what they use.

I will be perfectly honest with you, this recipe didn't start out containing bacon. But there I was, looking in the fridge when I found a rogue bag of bacon bits I forget was in there and somehow, they found their way over to the counter and jumped into the Crock Pot. Ha! Come on....if you find bacon you have to use it. Especially when what's cooking contains some its best friends, potatoes and cheese! They are kind of like the Three Musketeers!

If you are looking for a new side dish for dinner that can be waiting on you after a hot day (I hear those moans about turning on the oven!) or are hosting a fun summer time brunch, you will be so happy you logged on today! Just be sure you have sneaky bacon in your house too...it will find its way into the pot, I guarantee!

Crock Pot Hashbrown Casserole
32 oz. frozen shredded potatoes, thawed
1 (10 3/4 oz.) can cream of celery soup
1 (10 3/4 oz.) can fiesta nacho cheese soup
8 oz. sour cream
6 TBS melted butter
1/4 c. dried onions
1/4 c. real bacon bits
Salt and pepper to taste
Shredded Sharp Cheddar cheese, if desired

Grease inside of Crock Pot. Place all ingredients inside and mix well. Cook on LOW 5-6 hours. Garnish with shredded cheese, if desired.


Shared on Make Ahead Meals July 15, 2013
Shared on Mandy's Recipe Box July 16, 2013
Shared on Lady Behind The Curtain July 17, 2013
Shared on The Country Cook July 19, 2013
Potatoes at Very Good Recipes
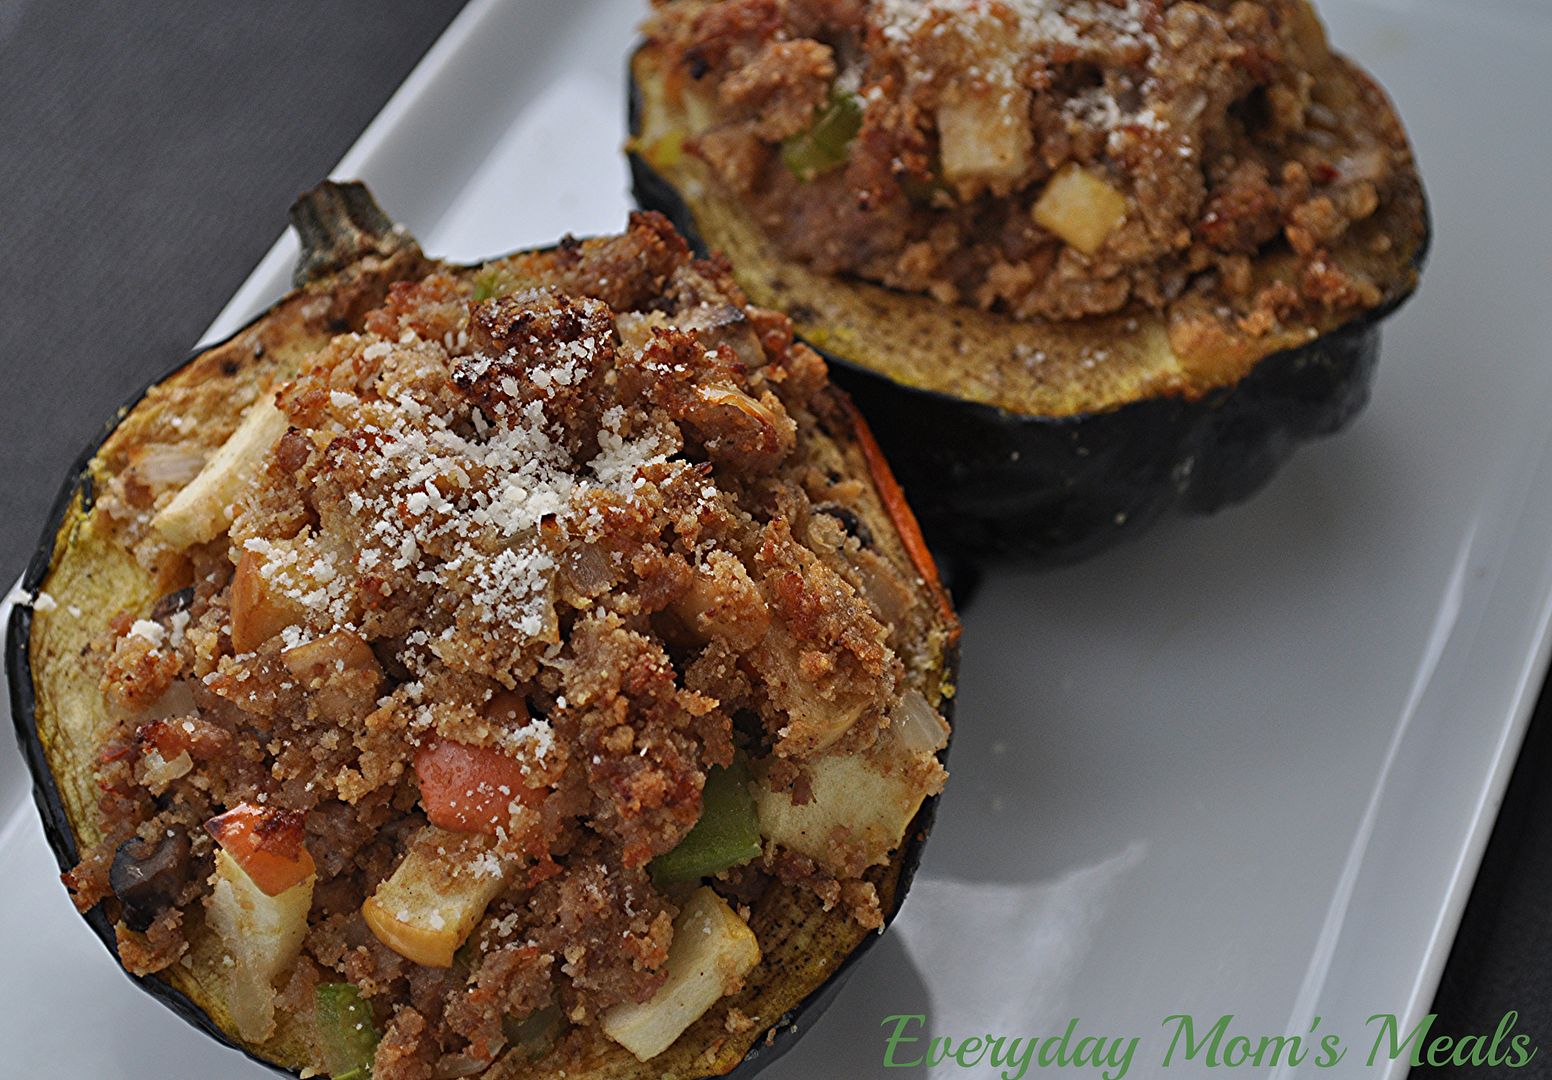
Pin It
reade more... Résuméabuiyad

Poor Man's Risotto

Do you have something you always see on a menu, or on television, or in cookbooks,that looks and sounds delicious, but you've yet to try it yourself? If the answer is yes, take a seat next to me, because I'm about to tell you about mine...risotto.

I have seen so many varieties prepared on some of my favorite cooking shows and it always looks so yummy, but I will be totally honest with you, it's one of the few dishes left that intimidates the heck outta me! I'm serious! I've heard so much about how it can be easy, if you're easy and pay attention, but if you don't, watch out because it can turn into a total disaster too. Well, I love myself enough to be able to admit, I'm not always the most patient person...especially in the kitchen. So I just have visions of me going to all the trouble, only to be disappointed in the end.

Plus, I've only seen it on the menu of a few restaurants we go to. One was this high end, very pricey private club, and since it was filled with black truffles, I'm not even going to tell you how much it was, but needless to say I wasn't going to pay it! And the other happens to be at my favorite Italian place, and anytime we are there, I want one of my favorites, not something new. What can I say? I'm a creature of habit.

But when I first saw this recipe (which had a photo with it) risotto is exactly what it reminded me of, only a budget friendly, impatient friendly version. Put everything in the Crock Pot, and let it do the work, instead of standing over the stove hoping for the best.

Now of course, since I've never had actual risotto, I have nothing to compare this to, so I might be totally off the mark, but either way, I can attest to the fact that it's not only simple, but absolutely delicious, filled with amazing flavors and very hearty! This will feed a crowd, and they will walk away full!

I'm sure one of these days I will overcome my intimidation and attempt risotto in my own kitchen; or maybe even order it out somewhere. But for the time being, I'm okay leaving it on my "foodie bucket list"!

Creamy Sausage and Wild Rice Pilaf Adapted from Crock Pot
12 oz. applewood smoked sausages, cut into 1/2" slices
1 (4 oz.) box wild rice (with seasonings)
1/2 c. basmati rice
3 medium carrots, diced
1 medium onion, chopped
1/2 c. dried cranberries
1/2 tsp. dried oregano
3/4 tsp. salt
1/4 tsp. pepper
3 c. water
1/2 c. half and half
Dried Parsley for garnish

Combine all ingredients except half and half and parsley in Crock Pot. Stir to combine. Cook on LOW 7-8 hours until rice is tender. Turn off heat. Add half and half. Allow to sit 10 minutes. Transfer to serving platter and garnish with parsley.


Rice at Very Good Recipes
Pin It
Do you have something you always see on a menu, or on television, or in cookbooks,that looks and sounds delicious, but you've yet to try it yourself? If the answer is yes, take a seat next to me, because I'm about to tell you about mine...risotto.

I have seen so many varieties prepared on some of my favorite cooking shows and it always looks so yummy, but I will be totally honest with you, it's one of the few dishes left that intimidates the heck outta me! I'm serious! I've heard so much about how it can be easy, if you're easy and pay attention, but if you don't, watch out because it can turn into a total disaster too. Well, I love myself enough to be able to admit, I'm not always the most patient person...especially in the kitchen. So I just have visions of me going to all the trouble, only to be disappointed in the end.

Plus, I've only seen it on the menu of a few restaurants we go to. One was this high end, very pricey private club, and since it was filled with black truffles, I'm not even going to tell you how much it was, but needless to say I wasn't going to pay it! And the other happens to be at my favorite Italian place, and anytime we are there, I want one of my favorites, not something new. What can I say? I'm a creature of habit.

But when I first saw this recipe (which had a photo with it) risotto is exactly what it reminded me of, only a budget friendly, impatient friendly version. Put everything in the Crock Pot, and let it do the work, instead of standing over the stove hoping for the best.

Now of course, since I've never had actual risotto, I have nothing to compare this to, so I might be totally off the mark, but either way, I can attest to the fact that it's not only simple, but absolutely delicious, filled with amazing flavors and very hearty! This will feed a crowd, and they will walk away full!

I'm sure one of these days I will overcome my intimidation and attempt risotto in my own kitchen; or maybe even order it out somewhere. But for the time being, I'm okay leaving it on my "foodie bucket list"!

Creamy Sausage and Wild Rice Pilaf Adapted from Crock Pot
12 oz. applewood smoked sausages, cut into 1/2" slices
1 (4 oz.) box wild rice (with seasonings)
1/2 c. basmati rice
3 medium carrots, diced
1 medium onion, chopped
1/2 c. dried cranberries
1/2 tsp. dried oregano
3/4 tsp. salt
1/4 tsp. pepper
3 c. water
1/2 c. half and half
Dried Parsley for garnish

Combine all ingredients except half and half and parsley in Crock Pot. Stir to combine. Cook on LOW 7-8 hours until rice is tender. Turn off heat. Add half and half. Allow to sit 10 minutes. Transfer to serving platter and garnish with parsley.


Rice at Very Good Recipes
Pin It
reade more... Résuméabuiyad

Crack Nachos

Ha! That got your attention, didn't it??!! Hey, I have to suck you in somehow! I will explain the inspiration for that title in just a minute!

I love taking things I know how to cook blindfolded, and turn them into something brand new. It's a great way to create brand new things in the kitchen with some of the pressure taken away. If part of a new dish is something that is "tried and true" it takes some of the anxiety of  "will it turn out" away! Not all, but some!

So when I was thinking of new ways to use my now almost famous Coney Sauce, I was talking to a friend who loves it as much as we do; and she mentioned she loves making nachos out of it when I make it for her. How perfect! And since she refers to it as "Crack Sauce", the name of this post was born.

If you love Coney Dogs, or even Chili Dogs, you will love these nachos. The flavor of the sauce is only enhanced by your topping choices. I decided to go with things we top our Coney Dogs with, plus a few extra nacho must haves. The combination was definitely a winner! They make a fun, tasty, light summer supper, or make a huge platter for your next backyard party! But don't forget to tell your friends they are eating "crack nachos"...the look on their faces is worth the price of admission!

Coney Nachos
1 lb. ground beef
1/2 c. chopped onion
1 clove garlic, minced
2 TBS butter
2 TBS yellow mustard
2 TBS cider vinegar
1 tsp. Worcestershire sauce
1/2 tsp. hot pepper sauce
1 c. ketchup
2 tsp. paprika
2 tsp. chili powder
Salt and Pepper to taste
Tortilla Chips
Toppings:
Sliced Black Olives
Finely Chopped White Onion
Shredded Cheese
Sour Cream
Jalapeno Peppers

In a medium bowl combine ketchup, mustard, vinegar, Worcestershire, hot sauce, paprika, chili powder,  salt and pepper. In a skillet over medium heat, melt butter. Add ground beef, onion and garlic. Cook until meat is no longer pink, breaking up very fine. (I like to use a potato masher.) Add ketchup mixture. Reduce heat to low and allow to simmer 20-25 minutes until thickened. Lay tortilla chips on plate, top with coney sauce. Garnish with favorite toppings.


Pin It
Ha! That got your attention, didn't it??!! Hey, I have to suck you in somehow! I will explain the inspiration for that title in just a minute!

I love taking things I know how to cook blindfolded, and turn them into something brand new. It's a great way to create brand new things in the kitchen with some of the pressure taken away. If part of a new dish is something that is "tried and true" it takes some of the anxiety of  "will it turn out" away! Not all, but some!

So when I was thinking of new ways to use my now almost famous Coney Sauce, I was talking to a friend who loves it as much as we do; and she mentioned she loves making nachos out of it when I make it for her. How perfect! And since she refers to it as "Crack Sauce", the name of this post was born.

If you love Coney Dogs, or even Chili Dogs, you will love these nachos. The flavor of the sauce is only enhanced by your topping choices. I decided to go with things we top our Coney Dogs with, plus a few extra nacho must haves. The combination was definitely a winner! They make a fun, tasty, light summer supper, or make a huge platter for your next backyard party! But don't forget to tell your friends they are eating "crack nachos"...the look on their faces is worth the price of admission!

Coney Nachos
1 lb. ground beef
1/2 c. chopped onion
1 clove garlic, minced
2 TBS butter
2 TBS yellow mustard
2 TBS cider vinegar
1 tsp. Worcestershire sauce
1/2 tsp. hot pepper sauce
1 c. ketchup
2 tsp. paprika
2 tsp. chili powder
Salt and Pepper to taste
Tortilla Chips
Toppings:
Sliced Black Olives
Finely Chopped White Onion
Shredded Cheese
Sour Cream
Jalapeno Peppers

In a medium bowl combine ketchup, mustard, vinegar, Worcestershire, hot sauce, paprika, chili powder,  salt and pepper. In a skillet over medium heat, melt butter. Add ground beef, onion and garlic. Cook until meat is no longer pink, breaking up very fine. (I like to use a potato masher.) Add ketchup mixture. Reduce heat to low and allow to simmer 20-25 minutes until thickened. Lay tortilla chips on plate, top with coney sauce. Garnish with favorite toppings.


Pin It
reade more... Résuméabuiyad