Pages

Showing posts with label Cookies. Show all posts

Andes Mint Cookies


These yummy cookies are just as easy to whip up as your basic chocolate chip, but are more interesting because they use Andes mints! There's just something so holiday festive-y about chocolate and mint, don't you think?

Start by creaming together the butter, yogurt, brown sugar and white sugar. Then add the eggs and vanilla


and beat until combined. Gradually add flour, baking powder, baking soda and salt and mix until blended. With a wooden spoon, stir in the Andes mint chips.


Chill the dough in the fridge for about an hour. Scoop the dough by tablespoonfuls onto parchment or silpat lined baking sheets.


Bake for 10 minutes, then cool on the sheet for 2 minutes before removing to a wire rack to cool completely.


One year ago: Caramel Toffee Crunch Cheesecake
Two years ago: Kris Kringle Fudge Cookies
Three years ago: Cranberry Apple Cake
Four years ago: Caramel Chomeur

Find more great stuff at Hearth and Soul, Cast Party, What's Cooking, What's Cooking #2, Full Plate Thursday, Showcase your Talent, Foodie Friday, Foodie Friday #2, Foodtastic Friday, Friday Flash, Blog Strut.

Andes Mint Cookies

1/2 cup salted butter, softened
1/4 cup plain or vanilla yogurt
3/4 cup brown sugar
1/2 cup sugar
2 tsp. vanilla
2 eggs
2 2/3 cup flour
1 tsp. baking soda
1 tsp. baking powder
1/4 tsp. salt
1 1/2 cups Andes Creme de Menthe Baking Chips

Cream together butter, yogurt and sugars. Add eggs and vanilla and mix until well combined. Gradually add flour, baking powder, baking soda and salt and mix until blended. Stir in chopped candy. Chill at least one hour in refrigerator.

Scoop dough onto parchment or silpat lined baking sheets. Bake at 350 degrees for approximately 10 minutes.

Cool on pans for two minutes before removing to a wire rack to cool completely. Makes 4 dozen.

Recipe Source: Adapted from Check it Out

These yummy cookies are just as easy to whip up as your basic chocolate chip, but are more interesting because they use Andes mints! There's just something so holiday festive-y about chocolate and mint, don't you think?

Start by creaming together the butter, yogurt, brown sugar and white sugar. Then add the eggs and vanilla


and beat until combined. Gradually add flour, baking powder, baking soda and salt and mix until blended. With a wooden spoon, stir in the Andes mint chips.


Chill the dough in the fridge for about an hour. Scoop the dough by tablespoonfuls onto parchment or silpat lined baking sheets.


Bake for 10 minutes, then cool on the sheet for 2 minutes before removing to a wire rack to cool completely.


One year ago: Caramel Toffee Crunch Cheesecake
Two years ago: Kris Kringle Fudge Cookies
Three years ago: Cranberry Apple Cake
Four years ago: Caramel Chomeur

Find more great stuff at Hearth and Soul, Cast Party, What's Cooking, What's Cooking #2, Full Plate Thursday, Showcase your Talent, Foodie Friday, Foodie Friday #2, Foodtastic Friday, Friday Flash, Blog Strut.

Andes Mint Cookies

1/2 cup salted butter, softened
1/4 cup plain or vanilla yogurt
3/4 cup brown sugar
1/2 cup sugar
2 tsp. vanilla
2 eggs
2 2/3 cup flour
1 tsp. baking soda
1 tsp. baking powder
1/4 tsp. salt
1 1/2 cups Andes Creme de Menthe Baking Chips

Cream together butter, yogurt and sugars. Add eggs and vanilla and mix until well combined. Gradually add flour, baking powder, baking soda and salt and mix until blended. Stir in chopped candy. Chill at least one hour in refrigerator.

Scoop dough onto parchment or silpat lined baking sheets. Bake at 350 degrees for approximately 10 minutes.

Cool on pans for two minutes before removing to a wire rack to cool completely. Makes 4 dozen.

Recipe Source: Adapted from Check it Out
reade more... Résuméabuiyad

Pie In A Glass

Having a big barbecue tomorrow? Or maybe a poolside or lake party? If so, and the dessert portion isn't planned yet, you're going to be SO happy you logged onto EMM today! 

I've said it time and time again, but for anyone who doesn't know yet, I am a lemon freak! From my hand soap to my water, I love all things lemon! Truly I am a huge citrus fan in general, but there is no doubt which is my favorite. And when it comes to yummy lemon things, summer time is my favorite season to enjoy them all! 

This recipe came about quite simply. I was hungry for lemon meringue pie, but had not desire to make one. I wanted that tangy and sweet flavor...but with almost no effort on my part. Enter the parfait. Let's face it. There aren't many desserts that are easier. You spoon multiple ingredients in a glass, layer flavor after flavor, and in about 10 minutes, dessert is done!

These would be great for your Independence Day party because they are so user friendly, spoon-able in the pool, or on the boat, or just from a comfy lounge chair. 

Pies are fantastic, but deconstructed pies in a glass that are both easy and delicious are sometimes even better! 
~From our family to yours, Happy July 4th! May it be safe, happy and most of all, filled with yumminess~

Lemon Pie Parfaits Makes 3-4 large parfaits
1 (21 oz.) can lemon pie filling
1 1/2 c. lemon wafer cookies, crushed
1 (8 oz. tub) Cool Whip
1/4 c. sugar
Lemon Slices

In bottom of glasses or dishes, sprinkle a few of the crushed cookies. Carefully layer lemon filling. Place Cool Whip in a plastic bag and cut off corner. Pipe Cool Whip on top of pie filling. Add more cookies. Repeat layers, ending with Cool Whip. Top each with a dusting of cookies. Dip lemon slices in sugar, coating both sides. Garnish each parfait with a lemon slice. Chill about an hour before serving. *NOTE* If you can't find the lemon wafer cookies, vanilla wafers would work just as well.


Lemon at Very Good Recipes
Pin It
Having a big barbecue tomorrow? Or maybe a poolside or lake party? If so, and the dessert portion isn't planned yet, you're going to be SO happy you logged onto EMM today! 

I've said it time and time again, but for anyone who doesn't know yet, I am a lemon freak! From my hand soap to my water, I love all things lemon! Truly I am a huge citrus fan in general, but there is no doubt which is my favorite. And when it comes to yummy lemon things, summer time is my favorite season to enjoy them all! 

This recipe came about quite simply. I was hungry for lemon meringue pie, but had not desire to make one. I wanted that tangy and sweet flavor...but with almost no effort on my part. Enter the parfait. Let's face it. There aren't many desserts that are easier. You spoon multiple ingredients in a glass, layer flavor after flavor, and in about 10 minutes, dessert is done!

These would be great for your Independence Day party because they are so user friendly, spoon-able in the pool, or on the boat, or just from a comfy lounge chair. 

Pies are fantastic, but deconstructed pies in a glass that are both easy and delicious are sometimes even better! 
~From our family to yours, Happy July 4th! May it be safe, happy and most of all, filled with yumminess~

Lemon Pie Parfaits Makes 3-4 large parfaits
1 (21 oz.) can lemon pie filling
1 1/2 c. lemon wafer cookies, crushed
1 (8 oz. tub) Cool Whip
1/4 c. sugar
Lemon Slices

In bottom of glasses or dishes, sprinkle a few of the crushed cookies. Carefully layer lemon filling. Place Cool Whip in a plastic bag and cut off corner. Pipe Cool Whip on top of pie filling. Add more cookies. Repeat layers, ending with Cool Whip. Top each with a dusting of cookies. Dip lemon slices in sugar, coating both sides. Garnish each parfait with a lemon slice. Chill about an hour before serving. *NOTE* If you can't find the lemon wafer cookies, vanilla wafers would work just as well.


Lemon at Very Good Recipes
Pin It
reade more... Résuméabuiyad

Soul Food Saturday #10


Good Morning! How about a sweet treat to start the weekend? Bekki is here today with a simple cookie that includes one of my favorite flavors...butterscotch!!


Yes, last week I gave the oven a break. But this week I decided, let’s use it early in the day. Yep, I said early. A little secret to baking in the summer in my kitchen is baking in the morning before the heat sneaks up and warms up the house. This cookie is one of my husband’s absolute favorites. The photo clearly shows big piles of these cookies don’t stick around very long. It won’t be any different in your kitchen either. When vacation time comes around, we tend to pull a few extra treat recipes out. This is definitely one of those! So, grab a cup of coffee and hang out with me at the table while these oh so good cookies bake up for the ones we love most.
Oatmeal Butterscotch Cookies Adapted from Incredibly Easy Cookies
¾ c. butter or margarine, softened
¾ c. granulated sugar
¾ c. packed light brown sugar
2 eggs
1 tsp. vanilla extract
1 ¼ c. all purpose flour
1 tsp.  Baking soda
½ tsp. salt
½ tsp ground cinnamon
3 c. quick cooking or regular rolled oats, uncooked
1 ¾ c. (11 oz. package) Hershey’s Butterscotch chips
1 Heat oven to 375 degrees.
2. Beat butter, granulated sugar, and brown sugar with electric mixer on medium speed in large bowl until well blended. Add eggs, and vanilla; blend thoroughly. Stir together flour, baking soda, salt and cinnamon; gradually add to butter mixture, beating until well blended. Stir in oats and butterscotch chips; mix well. Drop by teaspoons onto ungreased cookie sheet.
3. Bake 8 to 10 minutes or until golden brown. Cool slightly. Remove to wire rack and cool completely.


Pin It


Good Morning! How about a sweet treat to start the weekend? Bekki is here today with a simple cookie that includes one of my favorite flavors...butterscotch!!


Yes, last week I gave the oven a break. But this week I decided, let’s use it early in the day. Yep, I said early. A little secret to baking in the summer in my kitchen is baking in the morning before the heat sneaks up and warms up the house. This cookie is one of my husband’s absolute favorites. The photo clearly shows big piles of these cookies don’t stick around very long. It won’t be any different in your kitchen either. When vacation time comes around, we tend to pull a few extra treat recipes out. This is definitely one of those! So, grab a cup of coffee and hang out with me at the table while these oh so good cookies bake up for the ones we love most.
Oatmeal Butterscotch Cookies Adapted from Incredibly Easy Cookies
¾ c. butter or margarine, softened
¾ c. granulated sugar
¾ c. packed light brown sugar
2 eggs
1 tsp. vanilla extract
1 ¼ c. all purpose flour
1 tsp.  Baking soda
½ tsp. salt
½ tsp ground cinnamon
3 c. quick cooking or regular rolled oats, uncooked
1 ¾ c. (11 oz. package) Hershey’s Butterscotch chips
1 Heat oven to 375 degrees.
2. Beat butter, granulated sugar, and brown sugar with electric mixer on medium speed in large bowl until well blended. Add eggs, and vanilla; blend thoroughly. Stir together flour, baking soda, salt and cinnamon; gradually add to butter mixture, beating until well blended. Stir in oats and butterscotch chips; mix well. Drop by teaspoons onto ungreased cookie sheet.
3. Bake 8 to 10 minutes or until golden brown. Cool slightly. Remove to wire rack and cool completely.


Pin It
reade more... Résuméabuiyad

Mud Cookies or No-Bake Chocolate Cookies

Since I have been blogging on subjects beyond cooking and housekeeping over at The Family Dance, I have taken a few walks down memory lane to revisit my childhood days. In the post That's Just the Way I Like It, I recently recalled some stories I had heard of my mother's lack of cooking knowledge when she was a new bride. That got me to thinking of my own first experiences with cooking. Fortunately, my mother put me to work in the kitchen learning to cook when I was very young. Mud Cookies were probably the first cookies that I made when I was a little girl, and I remember making them pretty regularly. I decided to pull out that old recipe today and make up a retro batch of Mud Cookies. I felt like a kid again; my taste buds remembered everything.


Mud Cookies or Chocolate No-Bake Cookies

1/4 cup butter
1/2 cup milk
2 cups sugar
1/2 cup unsweetened cocoa powder
1 cup peanut butter (can use either smooth or crunchy)
1 teaspoon vanilla extract
2 cups quick cooking oats

Line two large sheet pans with wax paper; set aside. In a heavy saucepan, melt butter. Add milk, sugar, and cocoa; stir until combined. Bring to a boil, then cook for 1 minute. Remove from heat and immediately stir in peanut butter, vanilla extract, and oats. Drop by teaspoonfuls onto prepared pans. Allow cookies to cool before removing from pans.


These cookies are flavored with cocoa powder and peanut butter, and they even have oats thrown into the mix for some extra goodness.  


Drop the cookies by teaspoonfuls onto wax paper and allow to cool.


With all the nostalgia going on, I think Desert Rose would be the appropriate serving piece for these Mud Cookies.


This recipe was shared with:
Weekend Potluck
Full Plate Thursday
Since I have been blogging on subjects beyond cooking and housekeeping over at The Family Dance, I have taken a few walks down memory lane to revisit my childhood days. In the post That's Just the Way I Like It, I recently recalled some stories I had heard of my mother's lack of cooking knowledge when she was a new bride. That got me to thinking of my own first experiences with cooking. Fortunately, my mother put me to work in the kitchen learning to cook when I was very young. Mud Cookies were probably the first cookies that I made when I was a little girl, and I remember making them pretty regularly. I decided to pull out that old recipe today and make up a retro batch of Mud Cookies. I felt like a kid again; my taste buds remembered everything.


Mud Cookies or Chocolate No-Bake Cookies

1/4 cup butter
1/2 cup milk
2 cups sugar
1/2 cup unsweetened cocoa powder
1 cup peanut butter (can use either smooth or crunchy)
1 teaspoon vanilla extract
2 cups quick cooking oats

Line two large sheet pans with wax paper; set aside. In a heavy saucepan, melt butter. Add milk, sugar, and cocoa; stir until combined. Bring to a boil, then cook for 1 minute. Remove from heat and immediately stir in peanut butter, vanilla extract, and oats. Drop by teaspoonfuls onto prepared pans. Allow cookies to cool before removing from pans.


These cookies are flavored with cocoa powder and peanut butter, and they even have oats thrown into the mix for some extra goodness.  


Drop the cookies by teaspoonfuls onto wax paper and allow to cool.


With all the nostalgia going on, I think Desert Rose would be the appropriate serving piece for these Mud Cookies.


This recipe was shared with:
Weekend Potluck
Full Plate Thursday
reade more... Résuméabuiyad

Dipped Chocolate Chip Heart Cookies

Sometimes I buy ingredients before I know what I'm going to make with them. I knew I wanted to make something with the colorful Nestle's limited edition Valentine chips, I just wasn't sure what that would be when I bought them. They rested in my pantry alongside my red Wilton candy melts until I finally got my inspiration from some pretty cookies I saw over at Vanessa's Values. Regular chocolate chip cookie dough is too soft to be rolled and cut into shaped cookies, but this recipe is a stiffer shortbread type dough that can be rolled out, and it makes a super delicious cookie. Here's the homemade treat that my sweeties got for Valentine's Day this year.


Print Recipe

Dipped Chocolate Chip Heart Cookies

1 cup butter, softened
1/2 cup packed brown sugar
1/3 cup granulated sugar
2 teaspoons vanilla extract
1/2 teaspoon salt
1 large egg yolk
2 1/2 cups all purpose flour
1 cup Valentine chocolate chips
1 (14 ounce) bag red Wilton candy melts, melted (I used about 1/2 of the bag)

Preheat oven to 350 degrees F. Prepare a baking sheet by lining with parchment paper. In the bowl of a stand mixer, beat butter, brown sugar, granulated sugar, vanilla, and salt until creamy. Beat in egg yolk and gradually add flour. Stir in chocolate chips. Divide the dough in half, cover with plastic wrap, and chill for at least 1 hour. Roll the dough out to 1/4-inch thickness on a lightly floured silicone mat with a piece of wax paper over the top (or can be rolled between two pieces of wax paper).  Cut into heart shapes with a 3-inch cutter. Bake on prepared pan for 9 - 10 minutes. Cool cookies on baking sheet for a few minutes, then remove to a wire rack to finish cooling. When cookies are COMPLETELY cooled dip edge in candy coating that has been melted according to package directions. Lay dipped cookies on parchment paper until candy coating has hardened.

Note: If a different size cookie cutter is used the baking time will need to be adjusted.


These limited edition chips and candy melts waited in my pantry until I found just the right Valentine's Day treat recipe.


Roll out the chilled dough and cut into heart shapes.


My cookies were 3-inch hearts, and the recipe made 21 of this size. Smaller cookies would probably be easier to work with, but I wanted to make these larger ones today. Just be sure to adjust your baking time if you use a smaller cookie cutter.


Also, dip them in the melted candy coating only after they are completely cooled.


Happy Valentine's Day to all my sweeties!


I have received no compensation for writing this post.


This recipe was shared with:
Full Plate Thursday
All My Bloggy Friends
Weekend Potluck
Sometimes I buy ingredients before I know what I'm going to make with them. I knew I wanted to make something with the colorful Nestle's limited edition Valentine chips, I just wasn't sure what that would be when I bought them. They rested in my pantry alongside my red Wilton candy melts until I finally got my inspiration from some pretty cookies I saw over at Vanessa's Values. Regular chocolate chip cookie dough is too soft to be rolled and cut into shaped cookies, but this recipe is a stiffer shortbread type dough that can be rolled out, and it makes a super delicious cookie. Here's the homemade treat that my sweeties got for Valentine's Day this year.


Print Recipe

Dipped Chocolate Chip Heart Cookies

1 cup butter, softened
1/2 cup packed brown sugar
1/3 cup granulated sugar
2 teaspoons vanilla extract
1/2 teaspoon salt
1 large egg yolk
2 1/2 cups all purpose flour
1 cup Valentine chocolate chips
1 (14 ounce) bag red Wilton candy melts, melted (I used about 1/2 of the bag)

Preheat oven to 350 degrees F. Prepare a baking sheet by lining with parchment paper. In the bowl of a stand mixer, beat butter, brown sugar, granulated sugar, vanilla, and salt until creamy. Beat in egg yolk and gradually add flour. Stir in chocolate chips. Divide the dough in half, cover with plastic wrap, and chill for at least 1 hour. Roll the dough out to 1/4-inch thickness on a lightly floured silicone mat with a piece of wax paper over the top (or can be rolled between two pieces of wax paper).  Cut into heart shapes with a 3-inch cutter. Bake on prepared pan for 9 - 10 minutes. Cool cookies on baking sheet for a few minutes, then remove to a wire rack to finish cooling. When cookies are COMPLETELY cooled dip edge in candy coating that has been melted according to package directions. Lay dipped cookies on parchment paper until candy coating has hardened.

Note: If a different size cookie cutter is used the baking time will need to be adjusted.


These limited edition chips and candy melts waited in my pantry until I found just the right Valentine's Day treat recipe.


Roll out the chilled dough and cut into heart shapes.


My cookies were 3-inch hearts, and the recipe made 21 of this size. Smaller cookies would probably be easier to work with, but I wanted to make these larger ones today. Just be sure to adjust your baking time if you use a smaller cookie cutter.


Also, dip them in the melted candy coating only after they are completely cooled.


Happy Valentine's Day to all my sweeties!


I have received no compensation for writing this post.


This recipe was shared with:
Full Plate Thursday
All My Bloggy Friends
Weekend Potluck
reade more... Résuméabuiyad

I Finally Did It...Just In Time

For a very long time now I have been wanting to try making my own buttercream frosting. See, I have this tiny obsession with good frosting. Cookies and cakes are great, but for me, they are simply a vessel to carry the frosting into my mouth. Yep, I was the kid that would eat the piece of birthday cake and inevitably leave behind cake after all the yummy frosting was gone.

However, I am kind of a frosting snob. I don't like whipped frosting at all. And for me to enjoy a buttercream, it has to be smooth. Those grainy ones you sometimes find on things from the supermarket bakery, well that just makes me mad. It looks great, but the minute I take a bite my sweet tooth is totally disappointed. The canned varieties are okay, and some flavors are even close, but there just isn't anything like the made from scratch, tastes like grandma's, kind.

After reading the recipe that has been collecting dust in the back of my recipe box for years now about 100 times over, I finally convinced myself I could do it. Plus, I had extra motivation. Our local Kroger market has these sugar sandwich cookies that are filled with some of the yummiest frosting I've ever had; and I'm a little addicted to them. I seriously can NOT step into that store without walking out with one. But I'm not there a lot...maybe once every couple weeks...so I needed to be able to sustain in between those visits. (I told you...I'm addicted)

This frosting is so super simple, I honestly felt like saying to myself "Really? That's it?" I can't believe I always thought it would be too involved. Especially now that I have my stand mixer. It literally did all the work for me.

Now this recipe will make enough to frost a 2 layer (8 inches each) cake, about a dozen cupcakes, or about 12-14 of these sandwich cookies. Since I was making the frosting from scratch, I took some help from the store with some cute Valentine's sugar cookies, but feel free to bake your own!

Be warned though. This stuff is dangerous. You will find yourself eating it straight from the bowl with a spoon, it's that delicious! Don't worry though, my lips are sealed....sealed with frosting!

Buttercream Frosting
1/3 c. softened butter
1 lb. powdered sugar
1/4 tsp salt
1 tsp vanilla extract
3-4 TBS milk

Using an electric or stand mixer, cream butter, salt and vanilla together until light and fluffy. Add powdered sugar a little at time, mixing between each. (Don't worry, it's going to appear very thick) Add milk and mix until creamy, and spreadable.

To make cookies, spread frosting onto bottom cookie. Top with another. Gently push down so frosting comes out sides. Using a butter knife, remove excess and smooth. Roll in sprinkles.


Shared on Lady Behind The Curtain Feb. 13, 2013
Shared on Miz Helne's Country Cottage Feb. 14, 2013
Shared on The Country Cook Feb. 15, 2013
Dessert at Very Good Recipes
Pin It
For a very long time now I have been wanting to try making my own buttercream frosting. See, I have this tiny obsession with good frosting. Cookies and cakes are great, but for me, they are simply a vessel to carry the frosting into my mouth. Yep, I was the kid that would eat the piece of birthday cake and inevitably leave behind cake after all the yummy frosting was gone.

However, I am kind of a frosting snob. I don't like whipped frosting at all. And for me to enjoy a buttercream, it has to be smooth. Those grainy ones you sometimes find on things from the supermarket bakery, well that just makes me mad. It looks great, but the minute I take a bite my sweet tooth is totally disappointed. The canned varieties are okay, and some flavors are even close, but there just isn't anything like the made from scratch, tastes like grandma's, kind.

After reading the recipe that has been collecting dust in the back of my recipe box for years now about 100 times over, I finally convinced myself I could do it. Plus, I had extra motivation. Our local Kroger market has these sugar sandwich cookies that are filled with some of the yummiest frosting I've ever had; and I'm a little addicted to them. I seriously can NOT step into that store without walking out with one. But I'm not there a lot...maybe once every couple weeks...so I needed to be able to sustain in between those visits. (I told you...I'm addicted)

This frosting is so super simple, I honestly felt like saying to myself "Really? That's it?" I can't believe I always thought it would be too involved. Especially now that I have my stand mixer. It literally did all the work for me.

Now this recipe will make enough to frost a 2 layer (8 inches each) cake, about a dozen cupcakes, or about 12-14 of these sandwich cookies. Since I was making the frosting from scratch, I took some help from the store with some cute Valentine's sugar cookies, but feel free to bake your own!

Be warned though. This stuff is dangerous. You will find yourself eating it straight from the bowl with a spoon, it's that delicious! Don't worry though, my lips are sealed....sealed with frosting!

Buttercream Frosting
1/3 c. softened butter
1 lb. powdered sugar
1/4 tsp salt
1 tsp vanilla extract
3-4 TBS milk

Using an electric or stand mixer, cream butter, salt and vanilla together until light and fluffy. Add powdered sugar a little at time, mixing between each. (Don't worry, it's going to appear very thick) Add milk and mix until creamy, and spreadable.

To make cookies, spread frosting onto bottom cookie. Top with another. Gently push down so frosting comes out sides. Using a butter knife, remove excess and smooth. Roll in sprinkles.


Shared on Lady Behind The Curtain Feb. 13, 2013
Shared on Miz Helne's Country Cottage Feb. 14, 2013
Shared on The Country Cook Feb. 15, 2013
Dessert at Very Good Recipes
Pin It
reade more... Résuméabuiyad

Learning to Decorate Sugar Cookies with Royal Icing

I've been in awe for some time of the ability of the decorators who create the beautiful cookies with royal icing. Blogger Bridget of Bake at 350 is one of those awesome cookie decorators, and my sister Helen is another one. This weekend I visited my sister at her home in Texas, and she gave me a hands-on cookie decorating lesson. Since it was my first time to work with the techniques of outlining and flooding the icing, it took a little practice to get the hang of it, but I got a batch of cookies decorated.


The cookie recipe we used is the one that Bridget recommends for basic decorated cookies, and it is a very tasty sugar cookie recipe.


Read more »
I've been in awe for some time of the ability of the decorators who create the beautiful cookies with royal icing. Blogger Bridget of Bake at 350 is one of those awesome cookie decorators, and my sister Helen is another one. This weekend I visited my sister at her home in Texas, and she gave me a hands-on cookie decorating lesson. Since it was my first time to work with the techniques of outlining and flooding the icing, it took a little practice to get the hang of it, but I got a batch of cookies decorated.


The cookie recipe we used is the one that Bridget recommends for basic decorated cookies, and it is a very tasty sugar cookie recipe.


Read more »
reade more... Résuméabuiyad

Weekend Company {Guest Blogger Bekki}

Whew...3 days people! We are down to the wire! Are you ready for Christmas? Are the cookies baked, presents wrapped? Are the kids bouncing off the walls yet? Monkey is so excited for the 2 week vacation from school and the holidays, he can barely contain himself. I can't say I blame him though! Today I'm happy to have a returning guest, and loyal friend to EMM, Bekki back in the kitchen with me. She is such a sweet gal, because she stepped up when I needed this holiday guest blogger, and then she agreed to do next week's too! So, be sure to come back then to see what other yummy thing she is sharing, but for now, here she is with not one, but two holiday treats!


I am married to my wonderful husband Josh, have a beautiful 12 year old step daughter Amy and 2 furbaby sweethearts Minnie and Shadow. I am a self taught baker/cook. I taught Wilton cake decorating for a while, worked in a grocery store bakery and have even spent time baking wedding/birthday cakes as a hobby on the side. My love for cooking has been since childhood. Spending time with my mother, aunts, and grandmothers. Aiding in their recipes or just being there for the conversation. Its always been a source of calm, peace, and ultimate fulfillment. The idea that you add your love to each recipe and share it with the people you care about is such an amazing blessing to me in more ways then I can ever put on paper. I have decided writing a cookbook was something I could do to share my love of food with family, friends, and whomever else comes my way. I hope your day is blessed with all your favorite things.

Here we are, ready and waiting for parties with our families, long time traditions and warm evenings by the fire with a Christmas Story. Here’s a spin on milk and cookies for Santa. How about something warm with a little kick to keep him going. These candy cane cookies mix the idea of a powdered donut, a candy cane and a cookie all in one! Who wouldn't love to share that? These cookies along with a little grown up hot chocolate, add the flavor of coffee but nothing that will have you or your little ones flying through the house all through the night. I hope you all have a joyous Christmas, blessed to God’s fullest. Merry Christmas!


Christmas Candy Cane Crispers  Adapted by A Family Christmas
1c. butter, room temperature
1 1/4c. confectioners' sugar plus additional for coating
1 1/2tsp. vanilla
1 1/3c. flour
1c. rolled oats
1/2 tsp. salt
3/4 coarsley crushed candy canes
Preheat oven to 325 degrees. Grease and lightly flour a baking sheet.
In a large bowl beat together butter, confectioners' sugar and vanilla.
In another another bowl, stir together flour, rolled oats and salt; blend with butter mixture. Roll dough into 3/4 inch balls; roll in confectioners' sugar to coat. Place about 2 inches apart on prepare baking sheet. Flatten cookies with a fork, making a crisscross pattern with the fork tines. Sprinkle each with about 1/2tsp. crushed candy canes. Bake 18-20 minutes, or until edges are lighty browned. Cool on baking sheet for 2-3 minutes; transfer to wire rack to cool completely. Makes about 4 dozen.
Photo from A Family Christmas Cookbook

Fiesta Mexican Hot Chocolate Adapted from A family Christmas
2 c. hot milk
1/2 c. semi-sweet chocolate chips
1 tbs. instant coffee granules
1/2 tsp Vanilla
1/4 tsp. cinnamon
 Place hot milk, chocolate chips, coffee granules, vanilla and cinnamon
in a blender. Cover; mix thoroughly until chocolate chips are incorporated.
Beat with mixer until light and frothy. Makes 2 cups. 


Pin It
Whew...3 days people! We are down to the wire! Are you ready for Christmas? Are the cookies baked, presents wrapped? Are the kids bouncing off the walls yet? Monkey is so excited for the 2 week vacation from school and the holidays, he can barely contain himself. I can't say I blame him though! Today I'm happy to have a returning guest, and loyal friend to EMM, Bekki back in the kitchen with me. She is such a sweet gal, because she stepped up when I needed this holiday guest blogger, and then she agreed to do next week's too! So, be sure to come back then to see what other yummy thing she is sharing, but for now, here she is with not one, but two holiday treats!


I am married to my wonderful husband Josh, have a beautiful 12 year old step daughter Amy and 2 furbaby sweethearts Minnie and Shadow. I am a self taught baker/cook. I taught Wilton cake decorating for a while, worked in a grocery store bakery and have even spent time baking wedding/birthday cakes as a hobby on the side. My love for cooking has been since childhood. Spending time with my mother, aunts, and grandmothers. Aiding in their recipes or just being there for the conversation. Its always been a source of calm, peace, and ultimate fulfillment. The idea that you add your love to each recipe and share it with the people you care about is such an amazing blessing to me in more ways then I can ever put on paper. I have decided writing a cookbook was something I could do to share my love of food with family, friends, and whomever else comes my way. I hope your day is blessed with all your favorite things.

Here we are, ready and waiting for parties with our families, long time traditions and warm evenings by the fire with a Christmas Story. Here’s a spin on milk and cookies for Santa. How about something warm with a little kick to keep him going. These candy cane cookies mix the idea of a powdered donut, a candy cane and a cookie all in one! Who wouldn't love to share that? These cookies along with a little grown up hot chocolate, add the flavor of coffee but nothing that will have you or your little ones flying through the house all through the night. I hope you all have a joyous Christmas, blessed to God’s fullest. Merry Christmas!


Christmas Candy Cane Crispers  Adapted by A Family Christmas
1c. butter, room temperature
1 1/4c. confectioners' sugar plus additional for coating
1 1/2tsp. vanilla
1 1/3c. flour
1c. rolled oats
1/2 tsp. salt
3/4 coarsley crushed candy canes
Preheat oven to 325 degrees. Grease and lightly flour a baking sheet.
In a large bowl beat together butter, confectioners' sugar and vanilla.
In another another bowl, stir together flour, rolled oats and salt; blend with butter mixture. Roll dough into 3/4 inch balls; roll in confectioners' sugar to coat. Place about 2 inches apart on prepare baking sheet. Flatten cookies with a fork, making a crisscross pattern with the fork tines. Sprinkle each with about 1/2tsp. crushed candy canes. Bake 18-20 minutes, or until edges are lighty browned. Cool on baking sheet for 2-3 minutes; transfer to wire rack to cool completely. Makes about 4 dozen.
Photo from A Family Christmas Cookbook

Fiesta Mexican Hot Chocolate Adapted from A family Christmas
2 c. hot milk
1/2 c. semi-sweet chocolate chips
1 tbs. instant coffee granules
1/2 tsp Vanilla
1/4 tsp. cinnamon
 Place hot milk, chocolate chips, coffee granules, vanilla and cinnamon
in a blender. Cover; mix thoroughly until chocolate chips are incorporated.
Beat with mixer until light and frothy. Makes 2 cups. 


Pin It
reade more... Résuméabuiyad

Grateful With A Heavy Heart

One week ago today evil found a small town in Connecticut. One week ago small children were taken from this earth much too soon; and adults gave their lives trying to protect them. One week ago parents in that small town got the news that no parent should ever have to hear~ their babies would not be coming home. Like many of you, I sat in horror watching the images on the television not able to comprehend or wrap my mind around how someone could take the lives of innocent children with no regard to basic human emotions. I literally sat in my living room staring out the window with tears rolling down my face.

What was I staring at? My son's school. We are blessed to live only 5 doors from his elementary school, and I can see his classroom window from my front porch. I will be honest and say part of me wanted to rush up to the school, take him out early and bring him home. Not because I thought this could happen here too, but because I just needed to see his face, hold him close and tell him I love him. That he is the most precious gift I've ever received and I would never let anything or anyone harm him. I'm sure many parents out there felt the same exact thing. However, I knew disrupting his day would only be selfish on my part, and frightening him wasn't the answer.

But let's face it, there are no answers. There are so many questions surrounding this massacre, and most will always go left unanswered. So how do we as a nation, which when something like this happens, gets very small, begin to heal? For my family it means prayer. We lift those affected up in prayer and ask God to place them in His loving arms of peace and love, showing them the light of tomorrow. We pray for the families who were left behind because we know there will always be an empty chair at the dinner table and an empty bed at night. We pray for too many families who on Christmas morning will be left with so many unwrapped presents under their tree. We pray for the children who were taken from their loved ones, knowing they are safe and loved in Heaven above, resting in the arms of their Father.

And we also look at our lives. We take a minute to realize how very blessed we are. I don't think I have ever been so happy to pick my son up from school, as I was last Friday. I looked into his eyes and said a silent prayer for all those Mommies who no longer could do so with their babies. I decided right there and then that the plans I had with Monkey for that evening would continue as planned. As I said on my Facebook page, "Baking cookies will never mean more. Something so trivial is so precious." I got up, put one foot in front of the other, attempted to get my head out of the fog of despair, and I spent the evening with my child loving him, laughing with him, enjoying him. Not because I could forget what was happening in that small New England town, but because I could not. None of us will ever forget; but if we stop living, evil wins. I knew I needed that special time with my son to help my broken heart, and to show God "I know just how blessed I am, how precious he is, and I will be thankful each second I am with him."

My heart still aches for those mommies and daddies in Newtown. With Christmas around the corner, I know the time of year only magnifies what they are feeling  and will continue to feel every Christmas in the future. May God somehow begin to heal their hearts, souls and minds. May they know His love and peace, remembering we all grieve with them. And may they know their little ones now fly with the angels, and watch over them every single day.

So, here is what Alex and I made last Friday~ made together, with love and gratitude .

Gingerbread Cookies
1/2 c. shortening
1/2 c. packed brown sugar
3 1/4 c. sifted all purpose flour
1 tsp salt                                                                                   
1 tsp baking soda
1/2 tsp ground cinnamon
1/2 tsp ground ginger
3/4 c. molasses
1/4 c. water
Cinnamon Candies if desired
Icing if desired

Cream shortening and sugar. Sift flour with salt, soda and spices. Blend flour mixture into creamed mixture alternately with molasses and water. Chill at least 1 hour.Preheat oven to 350. Roll dough to 1/4 inch thick. Cut with cookie cutters of your choice. Lift onto lightly greased cookie sheet (Or Silpat or Parchment paper) with spatula. Add candies if desired. Bake above oven center for about 12 minutes or until cookies spring back lightly in center. Do not overcook, they won't stay soft. Remove from sheets. Cool on wire racks. 

Rolling out the dough

Adding buttons

So proud of his baking skills!

The official taste test complete with Egg Nog!


Shared on The Country Cook Dec. 21, 2012
One week ago today evil found a small town in Connecticut. One week ago small children were taken from this earth much too soon; and adults gave their lives trying to protect them. One week ago parents in that small town got the news that no parent should ever have to hear~ their babies would not be coming home. Like many of you, I sat in horror watching the images on the television not able to comprehend or wrap my mind around how someone could take the lives of innocent children with no regard to basic human emotions. I literally sat in my living room staring out the window with tears rolling down my face.

What was I staring at? My son's school. We are blessed to live only 5 doors from his elementary school, and I can see his classroom window from my front porch. I will be honest and say part of me wanted to rush up to the school, take him out early and bring him home. Not because I thought this could happen here too, but because I just needed to see his face, hold him close and tell him I love him. That he is the most precious gift I've ever received and I would never let anything or anyone harm him. I'm sure many parents out there felt the same exact thing. However, I knew disrupting his day would only be selfish on my part, and frightening him wasn't the answer.

But let's face it, there are no answers. There are so many questions surrounding this massacre, and most will always go left unanswered. So how do we as a nation, which when something like this happens, gets very small, begin to heal? For my family it means prayer. We lift those affected up in prayer and ask God to place them in His loving arms of peace and love, showing them the light of tomorrow. We pray for the families who were left behind because we know there will always be an empty chair at the dinner table and an empty bed at night. We pray for too many families who on Christmas morning will be left with so many unwrapped presents under their tree. We pray for the children who were taken from their loved ones, knowing they are safe and loved in Heaven above, resting in the arms of their Father.

And we also look at our lives. We take a minute to realize how very blessed we are. I don't think I have ever been so happy to pick my son up from school, as I was last Friday. I looked into his eyes and said a silent prayer for all those Mommies who no longer could do so with their babies. I decided right there and then that the plans I had with Monkey for that evening would continue as planned. As I said on my Facebook page, "Baking cookies will never mean more. Something so trivial is so precious." I got up, put one foot in front of the other, attempted to get my head out of the fog of despair, and I spent the evening with my child loving him, laughing with him, enjoying him. Not because I could forget what was happening in that small New England town, but because I could not. None of us will ever forget; but if we stop living, evil wins. I knew I needed that special time with my son to help my broken heart, and to show God "I know just how blessed I am, how precious he is, and I will be thankful each second I am with him."

My heart still aches for those mommies and daddies in Newtown. With Christmas around the corner, I know the time of year only magnifies what they are feeling  and will continue to feel every Christmas in the future. May God somehow begin to heal their hearts, souls and minds. May they know His love and peace, remembering we all grieve with them. And may they know their little ones now fly with the angels, and watch over them every single day.

So, here is what Alex and I made last Friday~ made together, with love and gratitude .

Gingerbread Cookies
1/2 c. shortening
1/2 c. packed brown sugar
3 1/4 c. sifted all purpose flour
1 tsp salt                                                                                   
1 tsp baking soda
1/2 tsp ground cinnamon
1/2 tsp ground ginger
3/4 c. molasses
1/4 c. water
Cinnamon Candies if desired
Icing if desired

Cream shortening and sugar. Sift flour with salt, soda and spices. Blend flour mixture into creamed mixture alternately with molasses and water. Chill at least 1 hour.Preheat oven to 350. Roll dough to 1/4 inch thick. Cut with cookie cutters of your choice. Lift onto lightly greased cookie sheet (Or Silpat or Parchment paper) with spatula. Add candies if desired. Bake above oven center for about 12 minutes or until cookies spring back lightly in center. Do not overcook, they won't stay soft. Remove from sheets. Cool on wire racks. 

Rolling out the dough

Adding buttons

So proud of his baking skills!

The official taste test complete with Egg Nog!


Shared on The Country Cook Dec. 21, 2012
reade more... Résuméabuiyad

Chocolate Kissed Gingerbread


It used to be that peanut butter blossoms were all the rage and the only "kissed" cookie - but now there are tons of variations. Last year I made a variation with a chocolate cookie and peppermint kisses - they were incredible and so addicting. Year before last it was macaroon kisses - and this year's variation is equally tantalizing; ginger cookies with a chocolate center.

At first thought, you may think that ginger and chocolate are an unlikely combination but it really works, and well! I brought these to a meeting at work and they disappeared QUICKLY. If you need a last minute treat for Christmas, run out and get a bag of kisses so you can whip these up!

Start by creaming together the butter and sugar. Add the egg, vanilla and molasses


and beat until combined. Gradually add the flour, cinnamon, ginger,


nutmeg,


baking soda and salt and mix until combined. Cover the dough with plastic wrap and refrigerate for at least two hours. Now scoop the dough and roll into 1 1/2 inch balls. Roll the balls in sugar


and place on ungreased baking sheets. (I am loving my new baking mat!)


Bake for 8-10 minutes or until edges begin to brown. Then remove the cookies from the oven and immediately press a kiss into the center.


Let the cookies stand for a few minutes (either on the sheet if you're using a mat, or on a wire rack) and then swirl the chocolate with a toothpick to make a nice center.


Let the cookies cool completely if you can, before completely devouring them!


One year ago: Sweet and Salty Breakfast Monte Cristos
Two years ago: Macaroon Kisses
Three years ago: Chocolate Coconut Neopolitans

Get more great ideas at Mop it Up Monday, Mix it Up Monday, Melt in Your Mouth Monday, On the Menu Monday, Meatless Monday Christmas Cookie Edition, Seasonal Inspiration, Tasty Tuesday, Tuesday at the Table, Tasty Tuesday (#2), Tempt my Tummy Tuesday, Totally Tasty Tuesday, Crazy Sweet Tuesday, Tuesday Talent Show, Clever Chicks, Hearth and Soul, Cast Party Wednesday, Whatcha Whipped Up, Wednesday Extravaganza, Wicked Good Wednesday, Recipe Box.

Chocolate Kissed Gingerbread

3 cups flour
2 tsp. ginger
1 tsp. cinnamon
1 tsp. baking soda
1/4 tsp. nutmeg
1/4 tsp. salt
3/4 cup unsalted butter, softened
3/4 cup brown sugar
1/2 cup molasses
1 tsp. vanilla
1 egg
1/4 cup sugar
Hershey's kisses or other chocolate candies (1 package is plenty)

Mix flour, ginger, cinnamon, baking soda, nutmeg and salt in large bowl.

Using a mixer, beat butter and brown sugar on medium speed until light and fluffy. Add molasses, egg and vanilla; beat well. Gradually beat in flour mixture on low speed until well mixed. Cover with plastic wrap and refrigerate at least 2 hours.

Shape dough into 1-inch balls. Roll in granulated sugar. Place 2 inches apart on ungreased baking sheets.

Bake at 350 for 8 to 10 minutes or until edges of cookies just begin to brown. Immediately press a kiss into the center of each cookie. Remove to wire racks; swirl chocolate with a toothpick when evenly melted. Cool completely. Store cookies in airtight container up to 5 days. Makes 4 dozen.

Recipe Source: Becky Bakes

It used to be that peanut butter blossoms were all the rage and the only "kissed" cookie - but now there are tons of variations. Last year I made a variation with a chocolate cookie and peppermint kisses - they were incredible and so addicting. Year before last it was macaroon kisses - and this year's variation is equally tantalizing; ginger cookies with a chocolate center.

At first thought, you may think that ginger and chocolate are an unlikely combination but it really works, and well! I brought these to a meeting at work and they disappeared QUICKLY. If you need a last minute treat for Christmas, run out and get a bag of kisses so you can whip these up!

Start by creaming together the butter and sugar. Add the egg, vanilla and molasses


and beat until combined. Gradually add the flour, cinnamon, ginger,


nutmeg,


baking soda and salt and mix until combined. Cover the dough with plastic wrap and refrigerate for at least two hours. Now scoop the dough and roll into 1 1/2 inch balls. Roll the balls in sugar


and place on ungreased baking sheets. (I am loving my new baking mat!)


Bake for 8-10 minutes or until edges begin to brown. Then remove the cookies from the oven and immediately press a kiss into the center.


Let the cookies stand for a few minutes (either on the sheet if you're using a mat, or on a wire rack) and then swirl the chocolate with a toothpick to make a nice center.


Let the cookies cool completely if you can, before completely devouring them!


One year ago: Sweet and Salty Breakfast Monte Cristos
Two years ago: Macaroon Kisses
Three years ago: Chocolate Coconut Neopolitans

Get more great ideas at Mop it Up Monday, Mix it Up Monday, Melt in Your Mouth Monday, On the Menu Monday, Meatless Monday Christmas Cookie Edition, Seasonal Inspiration, Tasty Tuesday, Tuesday at the Table, Tasty Tuesday (#2), Tempt my Tummy Tuesday, Totally Tasty Tuesday, Crazy Sweet Tuesday, Tuesday Talent Show, Clever Chicks, Hearth and Soul, Cast Party Wednesday, Whatcha Whipped Up, Wednesday Extravaganza, Wicked Good Wednesday, Recipe Box.

Chocolate Kissed Gingerbread

3 cups flour
2 tsp. ginger
1 tsp. cinnamon
1 tsp. baking soda
1/4 tsp. nutmeg
1/4 tsp. salt
3/4 cup unsalted butter, softened
3/4 cup brown sugar
1/2 cup molasses
1 tsp. vanilla
1 egg
1/4 cup sugar
Hershey's kisses or other chocolate candies (1 package is plenty)

Mix flour, ginger, cinnamon, baking soda, nutmeg and salt in large bowl.

Using a mixer, beat butter and brown sugar on medium speed until light and fluffy. Add molasses, egg and vanilla; beat well. Gradually beat in flour mixture on low speed until well mixed. Cover with plastic wrap and refrigerate at least 2 hours.

Shape dough into 1-inch balls. Roll in granulated sugar. Place 2 inches apart on ungreased baking sheets.

Bake at 350 for 8 to 10 minutes or until edges of cookies just begin to brown. Immediately press a kiss into the center of each cookie. Remove to wire racks; swirl chocolate with a toothpick when evenly melted. Cool completely. Store cookies in airtight container up to 5 days. Makes 4 dozen.

Recipe Source: Becky Bakes
reade more... Résuméabuiyad

Super-Duper Chocolate Kisses

Here's a recipe to add to the holiday cookie trays that will be sure to please the chocolate lovers. These little chocolate cookies are called Super-Duper for a very good reason; they are made with chocolate chip cookie dough that has cocoa powder added, then rolled in chocolate sprinkles and topped with a dark chocolate kiss! With all there is to do at this time of year, most everyone will appreciate that this recipe is simplified with a refrigerated cookie dough.


Recipe adapted from bhg.com

Super-Duper Chocolate Kisses

1 (16 1/2 ounce) package refrigerated chocolate chip cookie dough
1/3 cup unsweetened cocoa powder
2/3 cup chocolate sprinkles
2 tablespoons milk
40 dark chocolate Hershey's kisses, unwrapped

Preheat oven to 375 degrees F. Prepare a baking sheet by lining with parchment paper.
In a large resealable plastic bag, combine the cookie dough and cocoa powder. Seal bag; knead until dough and cocoa powder are well mixed. Remove dough from bag. Place chocolate sprinkles in a small dish or shallow plate. Place milk in another small dish. Shape the dough into 1-inch balls. Dip the balls in milk first to moisten, then roll in chocolate sprinkles to coat. Place balls 2 inches apart on prepared baking sheet. Bake in preheated oven for about 8 minutes or until edges are firm. Remove from oven and press a chocolate kiss into the center of each cookie. Transfer cookies to a wire rack to cool. Makes about 40 cookies. These cookies can be stored at room temperature for up to 3 days or can be frozen for up to 3 months.


The ingredients for these cookies are refrigerated chocolate chip cookie dough, cocoa powder, chocolate sprinkles, milk, and dark chocolate Hershey's kisses.


After mixing the cocoa powder with the chocolate chip cookie dough, form the dough into 1-inch balls.


Dip each ball in milk and roll in chocolate sprinkles before baking.


Press a chocolate kiss in the center of each cookie when they come out of the oven.


This recipe was shared with:
Mix it up Monday
Here's a recipe to add to the holiday cookie trays that will be sure to please the chocolate lovers. These little chocolate cookies are called Super-Duper for a very good reason; they are made with chocolate chip cookie dough that has cocoa powder added, then rolled in chocolate sprinkles and topped with a dark chocolate kiss! With all there is to do at this time of year, most everyone will appreciate that this recipe is simplified with a refrigerated cookie dough.


Recipe adapted from bhg.com

Super-Duper Chocolate Kisses

1 (16 1/2 ounce) package refrigerated chocolate chip cookie dough
1/3 cup unsweetened cocoa powder
2/3 cup chocolate sprinkles
2 tablespoons milk
40 dark chocolate Hershey's kisses, unwrapped

Preheat oven to 375 degrees F. Prepare a baking sheet by lining with parchment paper.
In a large resealable plastic bag, combine the cookie dough and cocoa powder. Seal bag; knead until dough and cocoa powder are well mixed. Remove dough from bag. Place chocolate sprinkles in a small dish or shallow plate. Place milk in another small dish. Shape the dough into 1-inch balls. Dip the balls in milk first to moisten, then roll in chocolate sprinkles to coat. Place balls 2 inches apart on prepared baking sheet. Bake in preheated oven for about 8 minutes or until edges are firm. Remove from oven and press a chocolate kiss into the center of each cookie. Transfer cookies to a wire rack to cool. Makes about 40 cookies. These cookies can be stored at room temperature for up to 3 days or can be frozen for up to 3 months.


The ingredients for these cookies are refrigerated chocolate chip cookie dough, cocoa powder, chocolate sprinkles, milk, and dark chocolate Hershey's kisses.


After mixing the cocoa powder with the chocolate chip cookie dough, form the dough into 1-inch balls.


Dip each ball in milk and roll in chocolate sprinkles before baking.


Press a chocolate kiss in the center of each cookie when they come out of the oven.


This recipe was shared with:
Mix it up Monday
reade more... Résuméabuiyad

After School During The Holidays

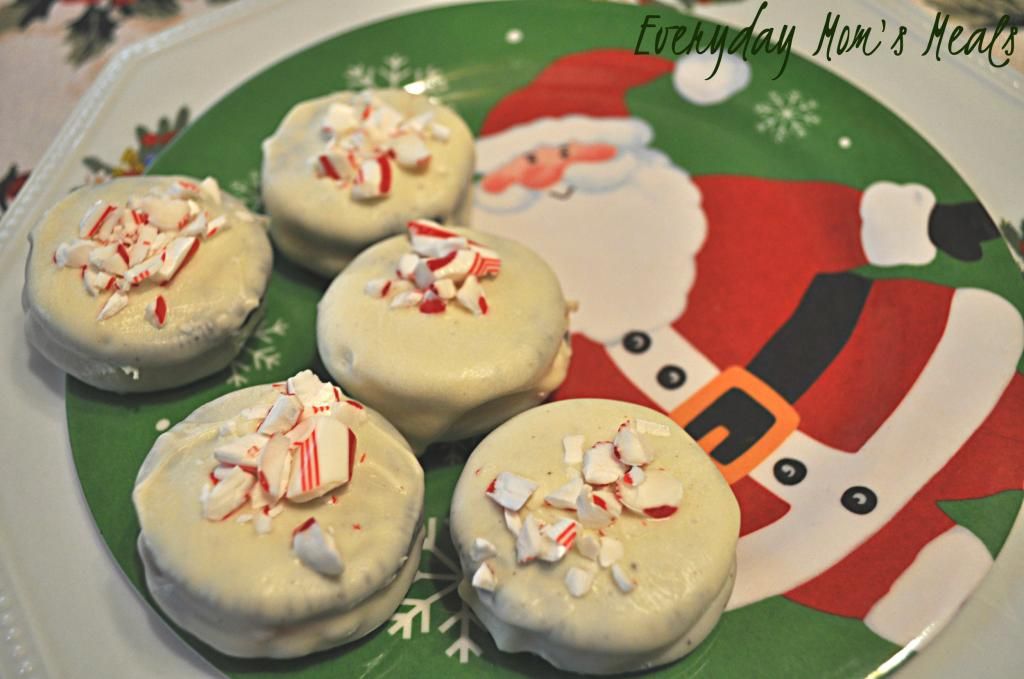
It wasn't so long ago I was so blessed to be at home every day, all day with my little man. Okay, I guess it has been almost 4 years ago, but that time has gone by in the blink of an eye. See, until he started preschool 3 days a week, it was just me and him. And I am so thankful for that time I had, and especially during the holiday season. During a typical day, I was always trying to find fun activities for us to do, and things to keep him busy, stimulated, learning, and entertained, and at Christmas time, that usually put us in the kitchen. Either at the counter and oven making something yummy to surprise Daddy with after work, or at the dining room table making a fun, festive craft. I can still hear him asking "Mommy, what are we making today" morning after morning. Well, these days, his teacher (lucky guy) gets to spend the majority of his week with him, and with homework, Taekwondo and other obligations, I have to fit in our special time together in other ways. And I don't want to wait for Christmas Break, because this year, that doesn't happen until 3 days before Christmas, and between the holiday gatherings and a family wedding, we're going to be a little too busy to be in the kitchen, at least together. So I have to split the fun holiday treat making into 2 categories. Those that I know he wants to help with, and would be crushed if I did on my own, and those that while fun, he's really going to be more interested in eating than anything else. And that's why these first appeared at our house last Friday as an after school treat for my Monkey. Even thought I did them on my own, kids would be terrific at helping and would love getting their hands into that melted chocolate! It's always a fun time getting your kids into the kitchen with you, but that fun is only multiplied during the holiday season. Make the memories while you can, because take it from me, they grow up way too fast!

 Double Candy Cane Oreos
1 package Winter Oreos (the ones with the red center)
1/4 tsp peppermint extract
2 c. white chocolate chips
2 TBS vegetable shortening
Candy Canes, crushed

In a glass bowl combine chips and shortening. Microwave 1 minute. Stir. Microwave 30 seconds more. Stir until completely melted. Add peppermint extract. Stir well.  Dip cookies into chocolate. Place on cooling racks on a cookie sheet and place in fridge for about 10 minutes to set. To remove lift racks from sheet, and using your fingers on the underside of them, gently pop cookies off. They will stick a bit, so just be patient. Keep refrigerated.


Shared on The Country Cook Dec. 14, 2012
Shared on Mandy's Recipe Box Dec. 18, 2012

Cookies at Very Good Recipes
Pin It
It wasn't so long ago I was so blessed to be at home every day, all day with my little man. Okay, I guess it has been almost 4 years ago, but that time has gone by in the blink of an eye. See, until he started preschool 3 days a week, it was just me and him. And I am so thankful for that time I had, and especially during the holiday season. During a typical day, I was always trying to find fun activities for us to do, and things to keep him busy, stimulated, learning, and entertained, and at Christmas time, that usually put us in the kitchen. Either at the counter and oven making something yummy to surprise Daddy with after work, or at the dining room table making a fun, festive craft. I can still hear him asking "Mommy, what are we making today" morning after morning. Well, these days, his teacher (lucky guy) gets to spend the majority of his week with him, and with homework, Taekwondo and other obligations, I have to fit in our special time together in other ways. And I don't want to wait for Christmas Break, because this year, that doesn't happen until 3 days before Christmas, and between the holiday gatherings and a family wedding, we're going to be a little too busy to be in the kitchen, at least together. So I have to split the fun holiday treat making into 2 categories. Those that I know he wants to help with, and would be crushed if I did on my own, and those that while fun, he's really going to be more interested in eating than anything else. And that's why these first appeared at our house last Friday as an after school treat for my Monkey. Even thought I did them on my own, kids would be terrific at helping and would love getting their hands into that melted chocolate! It's always a fun time getting your kids into the kitchen with you, but that fun is only multiplied during the holiday season. Make the memories while you can, because take it from me, they grow up way too fast!

 Double Candy Cane Oreos
1 package Winter Oreos (the ones with the red center)
1/4 tsp peppermint extract
2 c. white chocolate chips
2 TBS vegetable shortening
Candy Canes, crushed

In a glass bowl combine chips and shortening. Microwave 1 minute. Stir. Microwave 30 seconds more. Stir until completely melted. Add peppermint extract. Stir well.  Dip cookies into chocolate. Place on cooling racks on a cookie sheet and place in fridge for about 10 minutes to set. To remove lift racks from sheet, and using your fingers on the underside of them, gently pop cookies off. They will stick a bit, so just be patient. Keep refrigerated.


Shared on The Country Cook Dec. 14, 2012
Shared on Mandy's Recipe Box Dec. 18, 2012

Cookies at Very Good Recipes
Pin It
reade more... Résuméabuiyad

Cranberry Pistachio Shortbread


I love shortbread - and when it's studded with salty pistachios and sweet dried cranberries - um, yes please I'll have another. This is a beautiful treat for Christmastime with the green and red, and it is absolutely irresistable.

This comes together very quickly but the dough does need some time to chill, so plan accordingly.

Start by beating the butter until it is creamy, then add the sugar and beat until well combined. Add the vanilla


then the flour and salt and continue to mix until incorporated. The dough will be very crumbly. Toss in the pistachios


and the cranberries


and just stir with a wooden spoon or spatula to mix. You'll probably need to add a little water - just a tablespoon or so - until the dough comes together.


Transfer the dough to some parchment paper or cling wrap


and form into a log.


Wrap it completely in the paper or wrap and refrigerate for at least two hours or overnight.

When it's time to bake, remove the dough from the wrapping and cut into slices.


Place the dough slices on a parchment-lined cookie sheet, or use a baking mat.


Bake for about 15 minutes or until golden. Transfer the cookies to a wire rack to cool completely.


This doesn't make a very big batch so you might want to double the recipe! I was in danger of eating this all in one evening...and can you blame me?


One year ago: Gumdrops
Two years ago: Cranberry White Chocolate Cookies
Three years ago: Cinnamon Sugar Muffins

Find more great stuff at Full Plate Thursday, Recipe Box, Thursday's Treasures, Wicked Good Wednesdays, Foodie Friday, Food on Fridays, Friday Finds, Foodtastic Friday, Foodie Friday #2.

Cranberry Pistachio Shortbread

1/2 cup butter, softened
1/3 cup sugar
1/2 tsp. vanilla
1 1/4 cups flour
1/4 tsp. salt
1/2 cup pistachios, coarsely chopped
1/2 cup dried cranberries

Beat the butter on medium speed with an electric mixer until creamy. Add the sugar and mix until blended. Add the vanilla, flour and salt and mix until incorporated. Dough will be crumbly.

With a wooden spoon, stir in pistachios and cranberries. Add water, 1 teaspoon at a time, until dough comes together. Transfer dough to a sheet of parchment and form into a log. Refrigerate two hours or overnight.

Slice the dough into 1-centimeter slices and tranfer to a parchment or baking mat-lined cookie sheet. Bake at 325 for 14-16 minutes until golden. Transfer cookies to a wire rack to cool completely. Makes 2 dozen cookies.

I love shortbread - and when it's studded with salty pistachios and sweet dried cranberries - um, yes please I'll have another. This is a beautiful treat for Christmastime with the green and red, and it is absolutely irresistable.

This comes together very quickly but the dough does need some time to chill, so plan accordingly.

Start by beating the butter until it is creamy, then add the sugar and beat until well combined. Add the vanilla


then the flour and salt and continue to mix until incorporated. The dough will be very crumbly. Toss in the pistachios


and the cranberries


and just stir with a wooden spoon or spatula to mix. You'll probably need to add a little water - just a tablespoon or so - until the dough comes together.


Transfer the dough to some parchment paper or cling wrap


and form into a log.


Wrap it completely in the paper or wrap and refrigerate for at least two hours or overnight.

When it's time to bake, remove the dough from the wrapping and cut into slices.


Place the dough slices on a parchment-lined cookie sheet, or use a baking mat.


Bake for about 15 minutes or until golden. Transfer the cookies to a wire rack to cool completely.


This doesn't make a very big batch so you might want to double the recipe! I was in danger of eating this all in one evening...and can you blame me?


One year ago: Gumdrops
Two years ago: Cranberry White Chocolate Cookies
Three years ago: Cinnamon Sugar Muffins

Find more great stuff at Full Plate Thursday, Recipe Box, Thursday's Treasures, Wicked Good Wednesdays, Foodie Friday, Food on Fridays, Friday Finds, Foodtastic Friday, Foodie Friday #2.

Cranberry Pistachio Shortbread

1/2 cup butter, softened
1/3 cup sugar
1/2 tsp. vanilla
1 1/4 cups flour
1/4 tsp. salt
1/2 cup pistachios, coarsely chopped
1/2 cup dried cranberries

Beat the butter on medium speed with an electric mixer until creamy. Add the sugar and mix until blended. Add the vanilla, flour and salt and mix until incorporated. Dough will be crumbly.

With a wooden spoon, stir in pistachios and cranberries. Add water, 1 teaspoon at a time, until dough comes together. Transfer dough to a sheet of parchment and form into a log. Refrigerate two hours or overnight.

Slice the dough into 1-centimeter slices and tranfer to a parchment or baking mat-lined cookie sheet. Bake at 325 for 14-16 minutes until golden. Transfer cookies to a wire rack to cool completely. Makes 2 dozen cookies.
reade more... Résuméabuiyad