Pages

Showing posts with label Chocolate. Show all posts

Last Hurrah Of Summer

That's right, our world is going to be shocked back into reality come Monday morning. From the sound of the alarm, which we haven't heard for 2 months, to the fact my favorite side kick won't be with me all day, to the fact we have to get up on Tuesday and do it all over again, it's not going to be easy!

I'm very lucky that Monkey loves school, and I'm sure by the second week, he will be happy to be there, but for right now, he isn't ready for summer break to end, and I can't say I blame him. I feel like we barely got a summer, and now it's time for school which means autumn can't be far behind. I just want to find the pause button! But I'm sure some of that is the fact my baby is going to be a 3rd grader, and thus far I simply can't wrap my mind around it.

So we aren't quite ready to let summer go yet, and one of the things we've really enjoyed this year is making homemade ice cream in the new machine I got back in May. We've definitely put it to good use over the past few months, and this is our newest concoction. In fact, this was our dessert last week when we grilled some steaks and I had fresh corn on the cob too. As I told my friends "Summer mind be winding down, but it isn't over yet!!" And with a meal like that, it truly felt like it.

If you love mint...you are going to love this. It has such a smooth flavor and creamy texture. The combination of milk and cream give it a tad different texture than the other ice creams we've made thus far. And the tiny chocolate chips are like finding little treasures in every bite!

The school year is quickly approaching, but I'm determined to squeeze every little bit of fun, and deliciousness, out of this summer as I possibly can!

Mint Chocolate Chip Ice Cream 
2 c. 2 % milk
2 c.heavy cream
1 c. sugar
1/2 tsp. salt
1 tsp. vanilla
1 tsp. mint extract
1 c. mini chocolate chips
5 drops green food coloring

In a large bowl combine all ingredients and stir well, until sugar is dissolved. Pour into ice cream maker and freeze according to directions. For a harder ice cream, remove to a large bowl, cover and freeze for at least 2 hours. *NOTE* Mine is served in waffle bowls, which you can find with the other ice cream novelties.


Shared on Mandy's Recipe Box Aug. 20, 2013
Shared on Lady Behind The Curtain Aug. 21, 2013
Ice Cream at Very Good Recipes

That's right, our world is going to be shocked back into reality come Monday morning. From the sound of the alarm, which we haven't heard for 2 months, to the fact my favorite side kick won't be with me all day, to the fact we have to get up on Tuesday and do it all over again, it's not going to be easy!

I'm very lucky that Monkey loves school, and I'm sure by the second week, he will be happy to be there, but for right now, he isn't ready for summer break to end, and I can't say I blame him. I feel like we barely got a summer, and now it's time for school which means autumn can't be far behind. I just want to find the pause button! But I'm sure some of that is the fact my baby is going to be a 3rd grader, and thus far I simply can't wrap my mind around it.

So we aren't quite ready to let summer go yet, and one of the things we've really enjoyed this year is making homemade ice cream in the new machine I got back in May. We've definitely put it to good use over the past few months, and this is our newest concoction. In fact, this was our dessert last week when we grilled some steaks and I had fresh corn on the cob too. As I told my friends "Summer mind be winding down, but it isn't over yet!!" And with a meal like that, it truly felt like it.

If you love mint...you are going to love this. It has such a smooth flavor and creamy texture. The combination of milk and cream give it a tad different texture than the other ice creams we've made thus far. And the tiny chocolate chips are like finding little treasures in every bite!

The school year is quickly approaching, but I'm determined to squeeze every little bit of fun, and deliciousness, out of this summer as I possibly can!

Mint Chocolate Chip Ice Cream 
2 c. 2 % milk
2 c.heavy cream
1 c. sugar
1/2 tsp. salt
1 tsp. vanilla
1 tsp. mint extract
1 c. mini chocolate chips
5 drops green food coloring

In a large bowl combine all ingredients and stir well, until sugar is dissolved. Pour into ice cream maker and freeze according to directions. For a harder ice cream, remove to a large bowl, cover and freeze for at least 2 hours. *NOTE* Mine is served in waffle bowls, which you can find with the other ice cream novelties.


Shared on Mandy's Recipe Box Aug. 20, 2013
Shared on Lady Behind The Curtain Aug. 21, 2013
Ice Cream at Very Good Recipes

reade more... Résuméabuiyad

Mud, Snakes, and Birthday Cakes

When I think of birthdays I think of cakes, blowing out lighted candles, and getting a year older. When my grandson thinks of birthdays, he thinks of mud and snakes. Landon celebrated birthday number 8 last week, and he had some definite ideas about how he wanted me to decorate his cake.


The first cake I made for him was for a family party. This cake was all chocolate and was baked in an 11 x 15-inch sheet pan. The frosting was his favorite Chocolate Buttercream recipe, and he wanted it to have a Gator and a four wheeler playing in the "mud" on top. Once he chose the vehicles for the top, the rest of the cake was a cinch to put together. I used the wheels to "track" up the top of the cake icing and finished with a shell border made with a #22 tip. The script was also written using chocolate buttercream with a #4 round tip.


After the family party, Landon had another party with friends. For this party his idea was to have another chocolate cake with Chocolate Buttercream frosting, but this time he wanted it to be shaped like a snake. I thought cupcakes would be an easy serving solution for a group of children, so I put together this rattlesnake from cupcakes. The eyes are yellow M & M's and the tongue is cut from pink fondant.
The cupcakes are frosted with a #4B tip, the eyes are made from a #12 round tip, and the diamond shapes on the back are made by combining copper, black, and yellow coloring with white buttercream then piping through a #16 tip. The rattles on the end are made with a round #7 tip.


I also made a white snake for the children who didn't like chocolate, but for this one I had to alter the design that I had planned. The cupcakes were white, and I frosted them with a Classic Vanilla Buttercream Frosting. My plan was to use yellow, green, and blue tinted frosting to make polka dots on each cupcake, but I couldn't make them that way after reading the food coloring label.


All my colorings had the same warning on the label - "made in a facility that also processes peanuts, tree nuts," etc. Another grandson is very allergic to peanuts and all tree nuts, and I knew he liked the white cake. There was no way I could add the coloring to those cupcakes with this warning on the label. I did however, add a few colored lines for stripes, being very careful to leave many of the cupcakes untouched by the color so they would not be contaminated. Looks like I'm going to have to discard my current food coloring and look for a safe brand.


The cupcake snakes were kid-friendly and easy to serve at the party.


Eight-year-old boys are easy to please, it just takes a little mud and a couple of snakes.


This post was shared with:
Arkansas Women Bloggers
Weekend Potluck
When I think of birthdays I think of cakes, blowing out lighted candles, and getting a year older. When my grandson thinks of birthdays, he thinks of mud and snakes. Landon celebrated birthday number 8 last week, and he had some definite ideas about how he wanted me to decorate his cake.


The first cake I made for him was for a family party. This cake was all chocolate and was baked in an 11 x 15-inch sheet pan. The frosting was his favorite Chocolate Buttercream recipe, and he wanted it to have a Gator and a four wheeler playing in the "mud" on top. Once he chose the vehicles for the top, the rest of the cake was a cinch to put together. I used the wheels to "track" up the top of the cake icing and finished with a shell border made with a #22 tip. The script was also written using chocolate buttercream with a #4 round tip.


After the family party, Landon had another party with friends. For this party his idea was to have another chocolate cake with Chocolate Buttercream frosting, but this time he wanted it to be shaped like a snake. I thought cupcakes would be an easy serving solution for a group of children, so I put together this rattlesnake from cupcakes. The eyes are yellow M & M's and the tongue is cut from pink fondant.
The cupcakes are frosted with a #4B tip, the eyes are made from a #12 round tip, and the diamond shapes on the back are made by combining copper, black, and yellow coloring with white buttercream then piping through a #16 tip. The rattles on the end are made with a round #7 tip.


I also made a white snake for the children who didn't like chocolate, but for this one I had to alter the design that I had planned. The cupcakes were white, and I frosted them with a Classic Vanilla Buttercream Frosting. My plan was to use yellow, green, and blue tinted frosting to make polka dots on each cupcake, but I couldn't make them that way after reading the food coloring label.


All my colorings had the same warning on the label - "made in a facility that also processes peanuts, tree nuts," etc. Another grandson is very allergic to peanuts and all tree nuts, and I knew he liked the white cake. There was no way I could add the coloring to those cupcakes with this warning on the label. I did however, add a few colored lines for stripes, being very careful to leave many of the cupcakes untouched by the color so they would not be contaminated. Looks like I'm going to have to discard my current food coloring and look for a safe brand.


The cupcake snakes were kid-friendly and easy to serve at the party.


Eight-year-old boys are easy to please, it just takes a little mud and a couple of snakes.


This post was shared with:
Arkansas Women Bloggers
Weekend Potluck
reade more... Résuméabuiyad

Cake Recipe With Chocolate Flavor

Cooking has never been this easier with the introduction of the Internet. At first I thought that baking cakes was something that was hard and would take my whole day. This was short-lived as a friend of mine informed me that she was simply using the Internet to bake cakes for her family. This surprised me a lot since she was simply searching for a recipe that she thought she could manage. Once this was done, her work was simply to rush to the stores and find the ingredients that were recommended in the cake recipe that she was about to use. I thought over this and I knew it was time to try out my cooking skills. I tried this twice and the best recipe that I found to be easy was the chocolate one. I am quite certain that by following my way of cooking you would definitely prepare something that your family would enjoy. Below is how I cook my chocolate cake:

Ingredients of the cake recipe

1½ serving of butter - softenedSugar- 1¼ spoonfuls of sugarEggs - (number will vary)All-purpose flour - 2 cupsUnsweetened cocoa - 2 cupsBaking powder - 2 spoonfulsOne and a quarter servings of baking soda1½ spoonful of vanilla¾ cup of milk - buttermilk

Filling ingredients:

Pie fillings of cherry - 2 servings3-4 servings of cream that is chilled2 cups of confectioner's sugarMilk chocolate (shaved) - will help in garnishing the baked cake

Cooking tips and procedure for your cake recipe:

The first procedure of this cake recipe is to preheat your oven to 350 degrees Fahrenheit [should be done before you even start preparing your ingredients].

Using a non-sticking paper, you should line your cake pan to ensure that the cake does not stick on the sides of the pan.

Allow the butter that has been mixed with sugar to soften before you beat it using an electric mixer. Add the eggs to the mixture but make sure that you add an egg at a time as you mix well before adding another egg. You then need to add sifted flour, baking powder, buttermilk, cocoa, baking soda as you stir well to ensure that no lumps are formed. Once your oven has reached 350 degrees Fahrenheit, as mentioned earlier, slowly add the batter into the pan and allow it to bake till there is a middle set. Ensure that the bake time is about 40-45 minutes. Use a tooth pick to determine if it is ready or not. If it comes out with some crumbs in it then you will still need to place your cake in the oven for a few more minutes.

Serving

The best way to serve is when it is cold. Cut it into three or four layers for easy storage if the cake is big enough. This will ensure convenience in keeping it in a refrigerator.

Cooking has never been this easier with the introduction of the Internet. At first I thought that baking cakes was something that was hard and would take my whole day. This was short-lived as a friend of mine informed me that she was simply using the Internet to bake cakes for her family. This surprised me a lot since she was simply searching for a recipe that she thought she could manage. Once this was done, her work was simply to rush to the stores and find the ingredients that were recommended in the cake recipe that she was about to use. I thought over this and I knew it was time to try out my cooking skills. I tried this twice and the best recipe that I found to be easy was the chocolate one. I am quite certain that by following my way of cooking you would definitely prepare something that your family would enjoy. Below is how I cook my chocolate cake:

Ingredients of the cake recipe

1½ serving of butter - softenedSugar- 1¼ spoonfuls of sugarEggs - (number will vary)All-purpose flour - 2 cupsUnsweetened cocoa - 2 cupsBaking powder - 2 spoonfulsOne and a quarter servings of baking soda1½ spoonful of vanilla¾ cup of milk - buttermilk

Filling ingredients:

Pie fillings of cherry - 2 servings3-4 servings of cream that is chilled2 cups of confectioner's sugarMilk chocolate (shaved) - will help in garnishing the baked cake

Cooking tips and procedure for your cake recipe:

The first procedure of this cake recipe is to preheat your oven to 350 degrees Fahrenheit [should be done before you even start preparing your ingredients].

Using a non-sticking paper, you should line your cake pan to ensure that the cake does not stick on the sides of the pan.

Allow the butter that has been mixed with sugar to soften before you beat it using an electric mixer. Add the eggs to the mixture but make sure that you add an egg at a time as you mix well before adding another egg. You then need to add sifted flour, baking powder, buttermilk, cocoa, baking soda as you stir well to ensure that no lumps are formed. Once your oven has reached 350 degrees Fahrenheit, as mentioned earlier, slowly add the batter into the pan and allow it to bake till there is a middle set. Ensure that the bake time is about 40-45 minutes. Use a tooth pick to determine if it is ready or not. If it comes out with some crumbs in it then you will still need to place your cake in the oven for a few more minutes.

Serving

The best way to serve is when it is cold. Cut it into three or four layers for easy storage if the cake is big enough. This will ensure convenience in keeping it in a refrigerator.

reade more... Résuméabuiyad

Soul Food Saturday #12

Happy Saturday! I hope your holiday weekend is bringing you sun, fun and some relaxation too. Today Bekki is celebrating a special day in her family by jazzing up a store bought cake mix into a chocolate lover's dream dessert!


Tomorrow is my parents' 40th wedding anniversary! Its so amazing to see how beautiful marriage can be through the eyes of the ones that brought me into this world. It inspires me to give everything I've got to my marriage, and to everything I hold close to my heart. For this big celebration I am sharing my Daddy’s absolute favorite cake. Believe it or not it’s a box cake dolled up, just like I did for my wedding cupcakes. But this one goes over the top with a big side of vanilla ice cream on the side. 
Be careful who you share this cake with, because they will definitely be back for more! Happy Anniversary to the best parents on the planet, I pray that God gives you 50 more anniversaries just as beautiful as your hearts!!!! This one is just for you!!!
Daddy’s Ultimate German Chocolate Cake
Pillsbury German chocolate cake mix
3 eggs
½ c. apple sauce
1 c. water
1 can Pillsbury coconut pecan frosting
Preheat over to 350 degrees

Spray 13x9 inch pan with non stick cooking spray and set aside
Blend cake mix, eggs, apple sauce and water until moistened. Then blend on medium speed for several minutes or until completely combined.
Pour mixture into prepared pan, and bake for 34-38 minutes. Toothpick will come out clean when inserted in the cake’s center. Cool 10-15 minutes before removing from pan. Cool completely before frosting.
You can frost this beauty however you like, but for Daddy’s ultimate cake I used the store bought frosting. The entire can for one 13x9 cake. Don’t forget the ice cream on the side. That’s mom’s favorite part. Whether its natural vanilla or rocky road, I hope you enjoy this as much as my parents always have!

“Let them all be merry and eat cake”!!!!


Pin It
Happy Saturday! I hope your holiday weekend is bringing you sun, fun and some relaxation too. Today Bekki is celebrating a special day in her family by jazzing up a store bought cake mix into a chocolate lover's dream dessert!


Tomorrow is my parents' 40th wedding anniversary! Its so amazing to see how beautiful marriage can be through the eyes of the ones that brought me into this world. It inspires me to give everything I've got to my marriage, and to everything I hold close to my heart. For this big celebration I am sharing my Daddy’s absolute favorite cake. Believe it or not it’s a box cake dolled up, just like I did for my wedding cupcakes. But this one goes over the top with a big side of vanilla ice cream on the side. 
Be careful who you share this cake with, because they will definitely be back for more! Happy Anniversary to the best parents on the planet, I pray that God gives you 50 more anniversaries just as beautiful as your hearts!!!! This one is just for you!!!
Daddy’s Ultimate German Chocolate Cake
Pillsbury German chocolate cake mix
3 eggs
½ c. apple sauce
1 c. water
1 can Pillsbury coconut pecan frosting
Preheat over to 350 degrees

Spray 13x9 inch pan with non stick cooking spray and set aside
Blend cake mix, eggs, apple sauce and water until moistened. Then blend on medium speed for several minutes or until completely combined.
Pour mixture into prepared pan, and bake for 34-38 minutes. Toothpick will come out clean when inserted in the cake’s center. Cool 10-15 minutes before removing from pan. Cool completely before frosting.
You can frost this beauty however you like, but for Daddy’s ultimate cake I used the store bought frosting. The entire can for one 13x9 cake. Don’t forget the ice cream on the side. That’s mom’s favorite part. Whether its natural vanilla or rocky road, I hope you enjoy this as much as my parents always have!

“Let them all be merry and eat cake”!!!!


Pin It
reade more... Résuméabuiyad

Soul Food Saturday #8


Good Morning, Happy Saturday and for some like us, Welcome to the first weekend of Summer Vacation! Yep, yesterday was our last day of school, and I think I'm just as excited as Monkey. I can't help it. I love having him home with me all summer; and am looking for lots of fun in the sun with my favorite little man.

This week Bekki is celebrating graduates every where and the start to a great summer vacation!


I want to congratulate all of the new graduates of 2013! Whether it was middle school, high school or college. Congrats to you all! This one is for you! For the days that treats had to be on the go, this is a tribute. But because summer vacation has started, we can take things a little easier now.  Cut these up as you wish, but however you do it there's plenty for a party. Grab your favorite drink and have it however you would like. A snack, a dessert or just because we're celebrating our new grads and summer vacation!!!  

Caramel Popcorn Treats
3 TBS butter or margarine
1 (10oz.) package marshmallows
3 packages butter lovers’ microwave popcorn
½ c. mini chocolate chips
¼ c. butterscotch chips
Caramel sauce for drizzling
Cooking spray for lining pan

1. Follow package directions to pop microwave popcorn.

( *Note: To ensure you get no unpopped kernels in your dish; Allow popcorn to cool slightly. Before opening shake bag to allow kernels to fall to the bottom of bag. Tilt bag to the side and slowly drop kernels into another bowl.)
2. In a large saucepan or medium stockpot melt butter over medium heat. Add marshmallows and stir until completely melted. Remove from heat.
3. Add popcorn and stir until well coated.
4. With a buttered spatula evenly press mixture into a 9x13x2 pan lined with foil and coated with cooking spray.
5. Sprinkle chocolate and butterscotch chips over the top.
6. Drizzle caramel sauce over the top as desired. *a little extra is always great J
*Note : I used the one made for caramel milk, because of the ease of the squeeze bottle.

Cool completely and cut in desired size squares


Pin It


Good Morning, Happy Saturday and for some like us, Welcome to the first weekend of Summer Vacation! Yep, yesterday was our last day of school, and I think I'm just as excited as Monkey. I can't help it. I love having him home with me all summer; and am looking for lots of fun in the sun with my favorite little man.

This week Bekki is celebrating graduates every where and the start to a great summer vacation!


I want to congratulate all of the new graduates of 2013! Whether it was middle school, high school or college. Congrats to you all! This one is for you! For the days that treats had to be on the go, this is a tribute. But because summer vacation has started, we can take things a little easier now.  Cut these up as you wish, but however you do it there's plenty for a party. Grab your favorite drink and have it however you would like. A snack, a dessert or just because we're celebrating our new grads and summer vacation!!!  

Caramel Popcorn Treats
3 TBS butter or margarine
1 (10oz.) package marshmallows
3 packages butter lovers’ microwave popcorn
½ c. mini chocolate chips
¼ c. butterscotch chips
Caramel sauce for drizzling
Cooking spray for lining pan

1. Follow package directions to pop microwave popcorn.

( *Note: To ensure you get no unpopped kernels in your dish; Allow popcorn to cool slightly. Before opening shake bag to allow kernels to fall to the bottom of bag. Tilt bag to the side and slowly drop kernels into another bowl.)
2. In a large saucepan or medium stockpot melt butter over medium heat. Add marshmallows and stir until completely melted. Remove from heat.
3. Add popcorn and stir until well coated.
4. With a buttered spatula evenly press mixture into a 9x13x2 pan lined with foil and coated with cooking spray.
5. Sprinkle chocolate and butterscotch chips over the top.
6. Drizzle caramel sauce over the top as desired. *a little extra is always great J
*Note : I used the one made for caramel milk, because of the ease of the squeeze bottle.

Cool completely and cut in desired size squares


Pin It
reade more... Résuméabuiyad

Chocolate Cupcakes with Cream Filling

Simple chocolate cupcakes get bumped up a few notches with the addition of a luscious cream filling and chocolate buttercream frosting. I baked my cupcakes from a box mix to save some time today, but a home made version would be great too. The cream filling recipe is borrowed from Taste of Home, and I topped them off with my favorite chocolate frosting, a yummy buttercream made with cream cheese.


Print Recipe

Chocolate Cupcakes with Cream Filling

1 regular-sized box chocolate cake mix (I used milk chocolate)

Prepare and bake cupcakes according to package directions. Cool for 5 minutes before removing from pan to a wire rack to cool completely.

Cream Filling

2 teaspoons hot water
1/4 teaspoon salt
1 jar (7 ounces) marshmallow creme
1/2 cup shortening
1/3 cup powdered sugar
1/2 teaspoon vanilla extract

In a small bowl, combine water and salt, stir until salt is dissolved. Set aside to cool. In a mixing bowl, beat the marshmallow creme, shortening, powdered sugar, and vanilla together until fluffy. Add salt mixture, beat until light and fluffy. Use a round pastry tip to fill cupcakes with the cream filling. (I used tip #230).


Chocolate Buttercream Frosting

8 ounces cream cheese, softened
1 cup butter, softened
2/3 cup cocoa powder
6 cups powdered sugar
4 teaspoons vanilla extract
2 tablespoons milk or cream

In a large bowl, beat the cream cheese and butter together with an electric mixer until light and fluffy, about 4 minutes. Add cocoa, powdered sugar, and vanilla, beat until smooth. Beat in the milk or cream. Frost tops of filled cupcakes. Store cupcakes in refrigerator. 


Insert the pastry tip into the cupcake to pipe in the cream filling.


Frost the cupcakes with the Chocolate Buttercream Frosting. I used pastry tip #4B for these.


This recipe was shared with:
Thriving on Thursdays
All My Bloggy Friends
Weekend Potluck
Simple chocolate cupcakes get bumped up a few notches with the addition of a luscious cream filling and chocolate buttercream frosting. I baked my cupcakes from a box mix to save some time today, but a home made version would be great too. The cream filling recipe is borrowed from Taste of Home, and I topped them off with my favorite chocolate frosting, a yummy buttercream made with cream cheese.


Print Recipe

Chocolate Cupcakes with Cream Filling

1 regular-sized box chocolate cake mix (I used milk chocolate)

Prepare and bake cupcakes according to package directions. Cool for 5 minutes before removing from pan to a wire rack to cool completely.

Cream Filling

2 teaspoons hot water
1/4 teaspoon salt
1 jar (7 ounces) marshmallow creme
1/2 cup shortening
1/3 cup powdered sugar
1/2 teaspoon vanilla extract

In a small bowl, combine water and salt, stir until salt is dissolved. Set aside to cool. In a mixing bowl, beat the marshmallow creme, shortening, powdered sugar, and vanilla together until fluffy. Add salt mixture, beat until light and fluffy. Use a round pastry tip to fill cupcakes with the cream filling. (I used tip #230).


Chocolate Buttercream Frosting

8 ounces cream cheese, softened
1 cup butter, softened
2/3 cup cocoa powder
6 cups powdered sugar
4 teaspoons vanilla extract
2 tablespoons milk or cream

In a large bowl, beat the cream cheese and butter together with an electric mixer until light and fluffy, about 4 minutes. Add cocoa, powdered sugar, and vanilla, beat until smooth. Beat in the milk or cream. Frost tops of filled cupcakes. Store cupcakes in refrigerator. 


Insert the pastry tip into the cupcake to pipe in the cream filling.


Frost the cupcakes with the Chocolate Buttercream Frosting. I used pastry tip #4B for these.


This recipe was shared with:
Thriving on Thursdays
All My Bloggy Friends
Weekend Potluck
reade more... Résuméabuiyad

Chocolate Fiend I'm Not

I know hundreds of women are gasping right now as they read it. But alas, it's true. Now, don't get me wrong, I like chocolate. It's very yummy. But I'm just not one of those "If I were stranded on a desert island, I would have to chocolate" kinda girls. I'm more, give me some pasta and salt kinda island wanderer.

I like desserts and sweets as much as the next person, but a lot of times they include fruit or icing. Yes, I love fruit cobblers and pies; and anything with icing, frosting or a glaze will be promptly devoured. Now I will say one of my favorite desserts is brownies, so I do have certain chocolate favorites, it's just not something I crave.

But I know so many of you out there have to have the stuff. Can't live without it. Would dry up and blow away if someone took away your stash. (And don't try to hide it, or feel bad. Most of us have a stash of something hidden away to enjoy when nobody is looking!) I would say every year during Lent, I have more friends give up chocolate than anything else. And by the end, they are "jonesing for a fix" like no other! I get it. I might not relate to it, but I understand it.

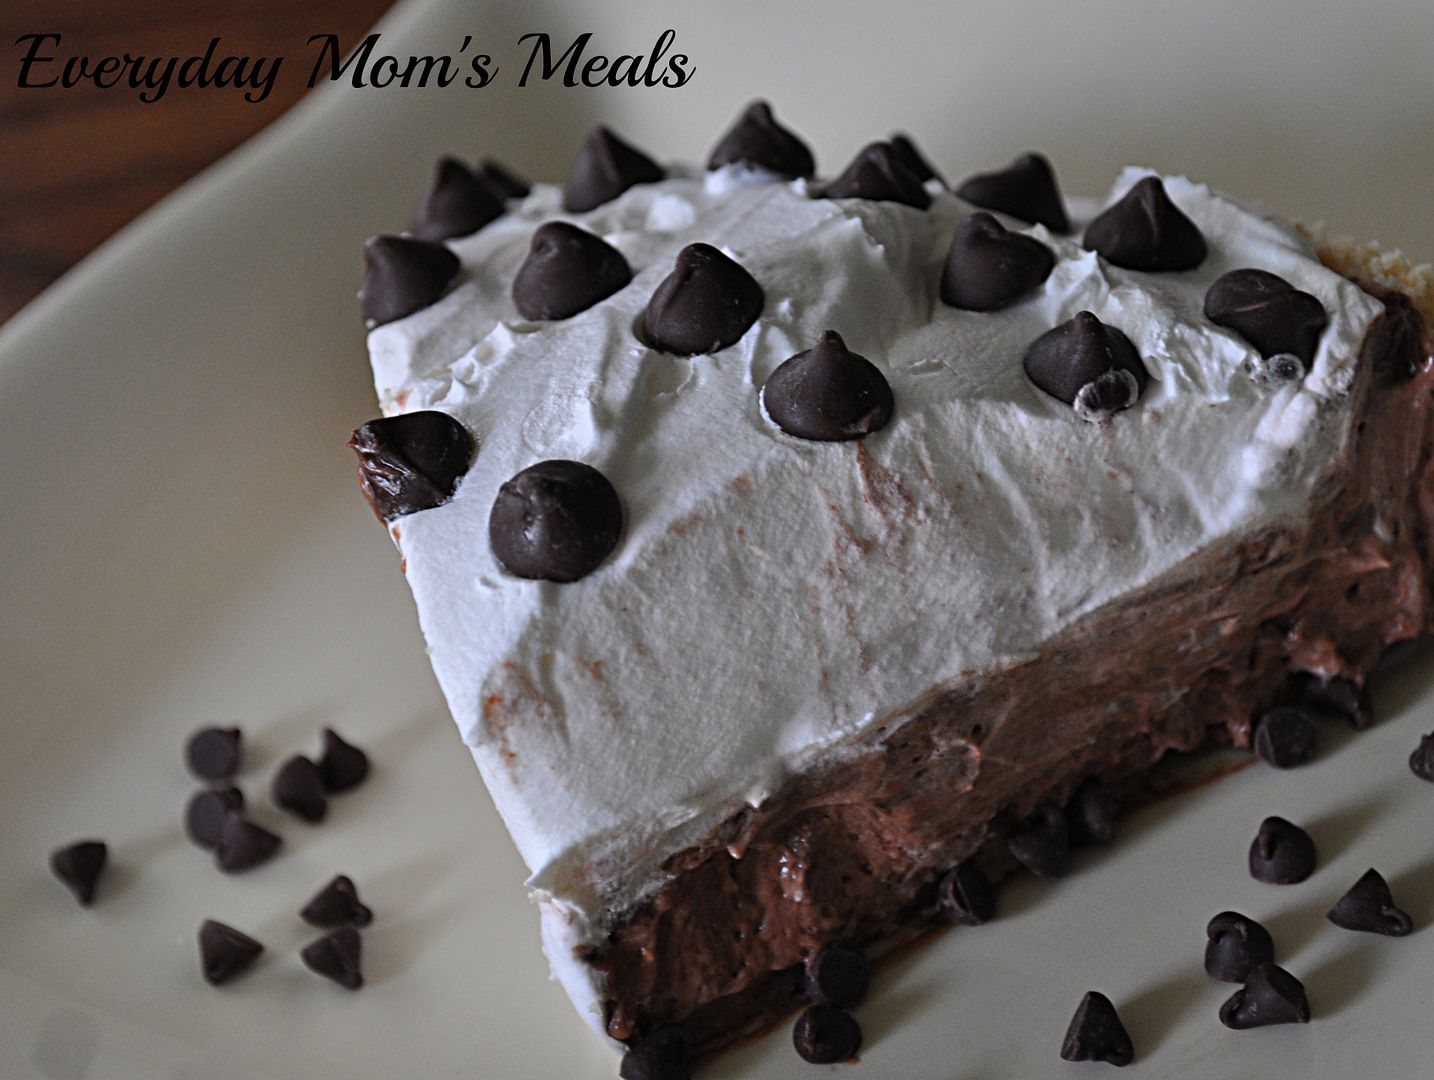
So, once again your everyday mom is here to the rescue. For all of you who need it like the grass needs the rain, I've got a real treat for you! This pie is super simple, and PACKED with chocolate flavor! We're talking a chocolate lover's dream!

Maybe this could be something easy you could whip up for mom this weekend. (If you don't know, Mother's Day is Sunday!) Get Daddy and the kids in the kitchen to make a special treat for their favorite lady!

If you are a chocolate fiend, embrace it! You are in very good company! And if you are at a support group meeting soon, walk a few doors down to "Carbs Anonymous"...where you'll find me!

Double Chocolate Chip Cream Pie
1 shortbread pie crust (found in the baking aisle with the other pre-made crusts)
2 ( 4 serving size) boxes instant chocolate pudding
3 1/2 c. milk
1 1/2 c. mini chocolate chips
1 ( 8 oz.) tub Cool Whip
3/4 c. regular chocolate chips, for topping

In a large mixing bowl combine pudding mixes and milk. Whisk for 2 minutes until well combined. Set in fridge for 5 minutes until soft set. Add 1/2 c. Cool Whip and fold gently. Add mini chocolate chips and fold again. Pour into crust and spread evenly. Top with remaining Cool Whip and spread to cover. Decorate top with regular chocolate chips. Chill for 4 hours before serving.


Shared on The Country Cook May 10, 2013
Shared on Make Ahead Meals May 13, 2013
Shared on Mandy's Recipe Box May 14, 2013
Shared on Lady Behind The Curtain May 15, 2013


Chocolate at Very Good Recipes
Pin It
I know hundreds of women are gasping right now as they read it. But alas, it's true. Now, don't get me wrong, I like chocolate. It's very yummy. But I'm just not one of those "If I were stranded on a desert island, I would have to chocolate" kinda girls. I'm more, give me some pasta and salt kinda island wanderer.

I like desserts and sweets as much as the next person, but a lot of times they include fruit or icing. Yes, I love fruit cobblers and pies; and anything with icing, frosting or a glaze will be promptly devoured. Now I will say one of my favorite desserts is brownies, so I do have certain chocolate favorites, it's just not something I crave.

But I know so many of you out there have to have the stuff. Can't live without it. Would dry up and blow away if someone took away your stash. (And don't try to hide it, or feel bad. Most of us have a stash of something hidden away to enjoy when nobody is looking!) I would say every year during Lent, I have more friends give up chocolate than anything else. And by the end, they are "jonesing for a fix" like no other! I get it. I might not relate to it, but I understand it.

So, once again your everyday mom is here to the rescue. For all of you who need it like the grass needs the rain, I've got a real treat for you! This pie is super simple, and PACKED with chocolate flavor! We're talking a chocolate lover's dream!

Maybe this could be something easy you could whip up for mom this weekend. (If you don't know, Mother's Day is Sunday!) Get Daddy and the kids in the kitchen to make a special treat for their favorite lady!

If you are a chocolate fiend, embrace it! You are in very good company! And if you are at a support group meeting soon, walk a few doors down to "Carbs Anonymous"...where you'll find me!

Double Chocolate Chip Cream Pie
1 shortbread pie crust (found in the baking aisle with the other pre-made crusts)
2 ( 4 serving size) boxes instant chocolate pudding
3 1/2 c. milk
1 1/2 c. mini chocolate chips
1 ( 8 oz.) tub Cool Whip
3/4 c. regular chocolate chips, for topping

In a large mixing bowl combine pudding mixes and milk. Whisk for 2 minutes until well combined. Set in fridge for 5 minutes until soft set. Add 1/2 c. Cool Whip and fold gently. Add mini chocolate chips and fold again. Pour into crust and spread evenly. Top with remaining Cool Whip and spread to cover. Decorate top with regular chocolate chips. Chill for 4 hours before serving.


Shared on The Country Cook May 10, 2013
Shared on Make Ahead Meals May 13, 2013
Shared on Mandy's Recipe Box May 14, 2013
Shared on Lady Behind The Curtain May 15, 2013


Chocolate at Very Good Recipes
Pin It
reade more... Résuméabuiyad

The Methods to Prepare a Chocolate Cake Recipe

Cakes are known worldwide for being the most highlighting components during a celebration. There is no such festivity or carnival being celebrated without the presence of a cake. Hence, this is one of the food items that are liked by young and old people equally. You can also serve cakes as desserts during the parties and it would be more appreciated if the dessert you serve is a chocolate cake. Chocolates remain one of the favorites of children and hence chocolate cakes are always a success among the kids and the youngsters. If you have been looking for a simple chocolate cake recipe to try at your home, here is the one that will make your wish come true. You can win the hearts of your loved ones through the preparation of a birthday cake at home.

The raw materials:

Here is a foolproof and simple chocolate cake recipe which can also be filled with jam and whipped cream by replacing the chocolate icing. The main ingredients that are required for the recipe include butter, caster sugar, free-range eggs, self-raising flour, baking powder, cocoa powder along with a little milk. However, if you have kids at home who love the sweet flavor, you can also try icing the cake with the help of dark chocolate, softened butter and icing sugar that can be easily obtained from any of the stores. The preparation of the chocolate cake recipe can be quite easy and can be finished within 30 minutes. Moreover, you need not spend money on the cakes that have been sold by your favorite baker and can instead cook the same with the help of economic components. If you talk about the nutritive value of the cake then you will be amazed to know that it contains about 51g fat, 728kcals, 6.5g protein, 55g sugar, 66.2g carbs, and 0.8g salt.

The method of preparation:

Before starting with the cooking of the chocolate cake recipe, you should preheat the oven to about 180°C. A sandwich tin that is about 2 x 20cm in size can be greased with butter on a butter paper baseline. The butter and sugar can be put in a bowl and the two can be blended together until you get a light and fluffy mixture. You can then add the eggs one after the other and continue the process of beating after adding each egg. Put the flour through a sieve along with cocoa and baking powder. You can also add milk to the mixture until you get a dripping consistency and the mixture can be poured into the respective tins. Bake them for 20-25 minutes in an oven until you get a clean skewer when inserted into the center of the cake. You can take the baked item out of the oven and let it cool for about 10 minutes. However, the cake is halfway ready and the next task is to make the icing over the cake.

For icing, you need to melt chocolate in a bowl kept over a pan of simmering water. When the chocolate melts entirely, you can cool it. In another bowl, beat the butter and the icing cream together with an electric hand whisk until they form a fluffy and light batter. You can then add the molten chocolate into the mixture. Your icing is ready and you can spread a little of it in the midst of your cake. The rest of the icing can be utilized for decorating the surface of the cake.

Cakes are known worldwide for being the most highlighting components during a celebration. There is no such festivity or carnival being celebrated without the presence of a cake. Hence, this is one of the food items that are liked by young and old people equally. You can also serve cakes as desserts during the parties and it would be more appreciated if the dessert you serve is a chocolate cake. Chocolates remain one of the favorites of children and hence chocolate cakes are always a success among the kids and the youngsters. If you have been looking for a simple chocolate cake recipe to try at your home, here is the one that will make your wish come true. You can win the hearts of your loved ones through the preparation of a birthday cake at home.

The raw materials:

Here is a foolproof and simple chocolate cake recipe which can also be filled with jam and whipped cream by replacing the chocolate icing. The main ingredients that are required for the recipe include butter, caster sugar, free-range eggs, self-raising flour, baking powder, cocoa powder along with a little milk. However, if you have kids at home who love the sweet flavor, you can also try icing the cake with the help of dark chocolate, softened butter and icing sugar that can be easily obtained from any of the stores. The preparation of the chocolate cake recipe can be quite easy and can be finished within 30 minutes. Moreover, you need not spend money on the cakes that have been sold by your favorite baker and can instead cook the same with the help of economic components. If you talk about the nutritive value of the cake then you will be amazed to know that it contains about 51g fat, 728kcals, 6.5g protein, 55g sugar, 66.2g carbs, and 0.8g salt.

The method of preparation:

Before starting with the cooking of the chocolate cake recipe, you should preheat the oven to about 180°C. A sandwich tin that is about 2 x 20cm in size can be greased with butter on a butter paper baseline. The butter and sugar can be put in a bowl and the two can be blended together until you get a light and fluffy mixture. You can then add the eggs one after the other and continue the process of beating after adding each egg. Put the flour through a sieve along with cocoa and baking powder. You can also add milk to the mixture until you get a dripping consistency and the mixture can be poured into the respective tins. Bake them for 20-25 minutes in an oven until you get a clean skewer when inserted into the center of the cake. You can take the baked item out of the oven and let it cool for about 10 minutes. However, the cake is halfway ready and the next task is to make the icing over the cake.

For icing, you need to melt chocolate in a bowl kept over a pan of simmering water. When the chocolate melts entirely, you can cool it. In another bowl, beat the butter and the icing cream together with an electric hand whisk until they form a fluffy and light batter. You can then add the molten chocolate into the mixture. Your icing is ready and you can spread a little of it in the midst of your cake. The rest of the icing can be utilized for decorating the surface of the cake.

reade more... Résuméabuiyad

Decorating a Chocolate Cake

A chocolate cake may be a delightful treat when served toward after taking a meal or at an afternoon which is pleasant, if you desire having something sweet. Use whimsical and fanciful garnishes to make your cake appealing. Select foods which look pretty if paired against dark chocolate backgrounds and are delicious. Ingredients needed for preparing your delicacy include chocolate, metal baking pan, butter, a cup of almonds, spatula, ribbon, fondant and one fruit pound. The others are one cup of wine, two sugar tablespoons, paper lace doily and powdered sugar.

To prepare your cake, make curls first. These comprise of chocolate bits that are folded up, resembling hair curls. Then chop a chocolate bar into minute pieces, thereafter putting these pieces into glass bowl. Introduce 1 tablespoon of butter for each 2 ounces of chocolate. Put glass bowl into pan containing little portion of water.

Next, use open flame to heat this water. Stir this gently until it melts entirely. Allow it to cool for around 30 seconds then pour chocolate over baking pan of metal till thin layer is formed. Let it stand until cooling is achieved. Employ a spatula of metal for pushing chocolate underneath at 45-degree angle. Doing this creates some chocolate curl which may be utilized for garnishing your cake.

Toast one cup almonds in oven for about two to three minutes in order to produce the most refined flavor. After chopping into small slivers, use frosting to ice your cake, which you then may top with chopped pieces of almond. The step following this is creating topping of fondant, which is any piece of rolled icing which one can turn into a desirable shape. Roll out your fondant layer on the cake top until it gets covered entirely. Use ribbon for decorating around cake bottom for a complete look.

Top your cake with alcohol-marinated fruit. Cut up one pound ripe peaches, pitted cherries or strawberries into huge chunks. Place chunks of fruit in 1 cup wine mixture and two tablespoon of sugar. Allow to sit for an hour at least. Chop up fruit into pieces which are smaller then spread across cake with spatula.

Make use of powdered sugar for making lacy pattern. Sugar in powdered form creates dramatic look if applied against dark background. Put paper doily on cake top, onto which also sprinkle some powdered sugar. Lift up doily gently and reveal the pattern underneath it. Blow on chocolate cake top mildly to clear away sugar accumulated on single spots excessively.

A chocolate cake may be a delightful treat when served toward after taking a meal or at an afternoon which is pleasant, if you desire having something sweet. Use whimsical and fanciful garnishes to make your cake appealing. Select foods which look pretty if paired against dark chocolate backgrounds and are delicious. Ingredients needed for preparing your delicacy include chocolate, metal baking pan, butter, a cup of almonds, spatula, ribbon, fondant and one fruit pound. The others are one cup of wine, two sugar tablespoons, paper lace doily and powdered sugar.

To prepare your cake, make curls first. These comprise of chocolate bits that are folded up, resembling hair curls. Then chop a chocolate bar into minute pieces, thereafter putting these pieces into glass bowl. Introduce 1 tablespoon of butter for each 2 ounces of chocolate. Put glass bowl into pan containing little portion of water.

Next, use open flame to heat this water. Stir this gently until it melts entirely. Allow it to cool for around 30 seconds then pour chocolate over baking pan of metal till thin layer is formed. Let it stand until cooling is achieved. Employ a spatula of metal for pushing chocolate underneath at 45-degree angle. Doing this creates some chocolate curl which may be utilized for garnishing your cake.

Toast one cup almonds in oven for about two to three minutes in order to produce the most refined flavor. After chopping into small slivers, use frosting to ice your cake, which you then may top with chopped pieces of almond. The step following this is creating topping of fondant, which is any piece of rolled icing which one can turn into a desirable shape. Roll out your fondant layer on the cake top until it gets covered entirely. Use ribbon for decorating around cake bottom for a complete look.

Top your cake with alcohol-marinated fruit. Cut up one pound ripe peaches, pitted cherries or strawberries into huge chunks. Place chunks of fruit in 1 cup wine mixture and two tablespoon of sugar. Allow to sit for an hour at least. Chop up fruit into pieces which are smaller then spread across cake with spatula.

Make use of powdered sugar for making lacy pattern. Sugar in powdered form creates dramatic look if applied against dark background. Put paper doily on cake top, onto which also sprinkle some powdered sugar. Lift up doily gently and reveal the pattern underneath it. Blow on chocolate cake top mildly to clear away sugar accumulated on single spots excessively.

reade more... Résuméabuiyad

How to Make Homemade Chocolate Icing

Everybody knows that the best part to any cake or cupcake is the icing. Everybody also knows that homemade icing wins over those sold at stores. That is why every cook should have their very own homemade chocolate icing recipe to whip up on a moment's notice. Once you have this basic chocolate icing mastered, you can play with it a bit to make variations like mint chocolate, mocha coffee, and more!

This simple and basic chocolate recipe will surely be a favorite of yours for years to come. The only things you need are a saucepan, a stove, a mixer, and a few quality ingredients.

First, start with the following ingredients:

Granulated sugar - 1 cup

Cocoa - ¼ cup

Butter - ¼ cup

Milk - ¼ cup

Vanilla extract - 1 teaspoon

For best results, always use quality ingredients. They make a big difference in a simple recipe like this one because there are so few ingredients. Try to use real butter, real vanilla, real cocoa, and whole milk if you can. It will taste the best this way.

If you absolutely need to cut calories, you can substitute the sugar for splenda, margarine for the butter, and use skim milk. The result will be slightly less creamy, but still tasty.

In a big bowl, mix all of the ingredients except for the vanilla. Transfer mixture to a large saucepan and bring to a boil. Boil for one minute then remove from heat. Add the vanilla extract after.

Let it cool partially for a few minutes, but be careful not let it cool all the way. You will need it a bit warm for the next part. For about three minutes, beat the mixture. You can do this manually, with a hand-held electric mixer, or a table top electric mixture, whichever you have available or prefer. You will want to continue until the icing is spreadable in texture.

Now you can move on to icing your cake, cupcakes, brownies, or cookies. This recipe for icing usually results in a thicker, creamier icing perfect for cupcakes and Brownies, but use it for whatever you like. No one will judge you if you only want to eat the frosting by itself. If you want to try the variations, add the flavoring like mint, coffee, hazelnut, etc. to the mixture at the same time you add the vanilla. The possibilities really are endless with this simple chocolate icing recipe.

Everybody knows that the best part to any cake or cupcake is the icing. Everybody also knows that homemade icing wins over those sold at stores. That is why every cook should have their very own homemade chocolate icing recipe to whip up on a moment's notice. Once you have this basic chocolate icing mastered, you can play with it a bit to make variations like mint chocolate, mocha coffee, and more!
This simple and basic chocolate recipe will surely be a favorite of yours for years to come. The only things you need are a saucepan, a stove, a mixer, and a few quality ingredients.
First, start with the following ingredients:

Granulated sugar - 1 cup

Cocoa - ¼ cup

Butter - ¼ cup

Milk - ¼ cup

Vanilla extract - 1 teaspoon

For best results, always use quality ingredients. They make a big difference in a simple recipe like this one because there are so few ingredients. Try to use real butter, real vanilla, real cocoa, and whole milk if you can. It will taste the best this way.

If you absolutely need to cut calories, you can substitute the sugar for splenda, margarine for the butter, and use skim milk. The result will be slightly less creamy, but still tasty.

In a big bowl, mix all of the ingredients except for the vanilla. Transfer mixture to a large saucepan and bring to a boil. Boil for one minute then remove from heat. Add the vanilla extract after.

Let it cool partially for a few minutes, but be careful not let it cool all the way. You will need it a bit warm for the next part. For about three minutes, beat the mixture. You can do this manually, with a hand-held electric mixer, or a table top electric mixture, whichever you have available or prefer. You will want to continue until the icing is spreadable in texture.

Now you can move on to icing your cake, cupcakes, brownies, or cookies. This recipe for icing usually results in a thicker, creamier icing perfect for cupcakes and Brownies, but use it for whatever you like. No one will judge you if you only want to eat the frosting by itself. If you want to try the variations, add the flavoring like mint, coffee, hazelnut, etc. to the mixture at the same time you add the vanilla. The possibilities really are endless with this simple chocolate icing recipe.

reade more... Résuméabuiyad

Just In Time

A couple weeks ago when I announced that I would only be posting 3 days a week, I could have never imagined the level of support and understanding I would get from my EMM family; and for that I thank all of you. You embraced this new chapter of the blog, and respected the fact I needed to cut back a bit for the good of my family. After the wonderful response and feed back I received, I thought the hard part of this change was over. But I didn't think about one thing: Making sure specific recipes are posted before certain days on the calendar. Hence why I'm literally sneaking this one in before St. Patty's Day weekend.

As I was scheduling things this was going to go live on March 22nd...sure these would taste just as great on March 23rd, but I meant for them to be an idea for everyone's favorite green holiday! A yummy chocolate treat with a nod to St. Patrick's Day lovers everywhere!

To be honest, if you are a chocolate and mint fiend like I am...you won't care what day of the year you're eating these, as long as someone doesn't try to take them away. They are super easy, and packed full of minty flavor. They are like combining one of everyone's favorite after dinner mints with chewy brownies, a match made in heaven.

If by chance you aren't reading this until after Sunday, then sure, wait another year before making them...but I don't suggest that. In fact, if I were you I would buy the ingredients today!

Creme De Menthe Brownies From Andes
1 (18.3 oz.) family size boxed brownie mix
2 eggs
1/4 c. water
2/3 c. vegetable oil
*This is what my mix called for. Check your box*
1 (10 oz.) package Creme De Menthe Chips (found in baking aisle)

Preheat oven to 350. Grease bottom of 9x13 pan. Prepare brownie mix according to package directions. Bake for 24-26 minutes until toothpick comes out clean. Pour chips over hot brownies. Let sit 2-3 minutes. Using a spatula or knife, spread around until evenly topped. Allow to cool 10 minutes and then chill to set. Keep refrigerated.

Shared on The Country Cook Mar. 15, 2013
Shared on Make Ahead Meals Mar. 18, 2013
Brownies at Very Good Recipes
Pin It
A couple weeks ago when I announced that I would only be posting 3 days a week, I could have never imagined the level of support and understanding I would get from my EMM family; and for that I thank all of you. You embraced this new chapter of the blog, and respected the fact I needed to cut back a bit for the good of my family. After the wonderful response and feed back I received, I thought the hard part of this change was over. But I didn't think about one thing: Making sure specific recipes are posted before certain days on the calendar. Hence why I'm literally sneaking this one in before St. Patty's Day weekend.

As I was scheduling things this was going to go live on March 22nd...sure these would taste just as great on March 23rd, but I meant for them to be an idea for everyone's favorite green holiday! A yummy chocolate treat with a nod to St. Patrick's Day lovers everywhere!

To be honest, if you are a chocolate and mint fiend like I am...you won't care what day of the year you're eating these, as long as someone doesn't try to take them away. They are super easy, and packed full of minty flavor. They are like combining one of everyone's favorite after dinner mints with chewy brownies, a match made in heaven.

If by chance you aren't reading this until after Sunday, then sure, wait another year before making them...but I don't suggest that. In fact, if I were you I would buy the ingredients today!

Creme De Menthe Brownies From Andes
1 (18.3 oz.) family size boxed brownie mix
2 eggs
1/4 c. water
2/3 c. vegetable oil
*This is what my mix called for. Check your box*
1 (10 oz.) package Creme De Menthe Chips (found in baking aisle)

Preheat oven to 350. Grease bottom of 9x13 pan. Prepare brownie mix according to package directions. Bake for 24-26 minutes until toothpick comes out clean. Pour chips over hot brownies. Let sit 2-3 minutes. Using a spatula or knife, spread around until evenly topped. Allow to cool 10 minutes and then chill to set. Keep refrigerated.

Shared on The Country Cook Mar. 15, 2013
Shared on Make Ahead Meals Mar. 18, 2013
Brownies at Very Good Recipes
Pin It
reade more... Résuméabuiyad

Chocolate Coffee Cake

This recipe is one that I just happened across in a little cookbook called The Best Muffins & Quick Breads by Gregg R. Gillespie. I'm so glad that I found this recipe for a coffee cake made rich with chocolate, cream cheese, and dried apricots. Whether you're serving it for breakfast, snack, or dessert, it's always the right time for chocolate.


Chocolate Coffee Cake

1/2 cup finely ground almonds, divided
2 1/2 cups all purpose flour
2 teaspoons baking powder
1 teaspoon baking soda
1/4 teaspoon salt
1/2 cup Dutch-processed cocoa powder
1 1/2 cups dried apricots, finely diced
1 cup vegetable shortening
1 package (8 ounce) cream cheese, at room temperature
2 1/4 cups granulated sugar
5 large eggs
1 1/2 teaspoons Amaretto liqueur (I substituted 1/2 teaspoon almond extract)

Preheat oven to 350 degrees F. Grease and flour a 10-inch pan. (I used a 10-inch springform pan.)
Press 1/4 cup of the ground almonds up the outer edges of the pan; set aside.

In a large bowl, blend together the remaining almonds, flour, baking powder, baking soda, salt, cocoa powder, and diced apricots. In a separate bowl, beat shortening, cream cheese, and sugar until smooth. Beat in the eggs one at a time, beating well after each addition. Beat in the Amaretto (or almond extract). Combine the two mixtures, blending until the dry ingredients are just moistened.

Spoon the batter into the prepared pan. Bake for 45 - 50 minutes, or until a wooden toothpick comes out clean. (My cake needed 60 minutes baking time). Remove the pan from the oven and cool on a wire rack for 5 to 7 minutes before removing from pan onto wire rack to continue cooling. Serve warm.


Some ingredients you'll need are Dutch-process cocoa, cream cheese, almonds, and dried apricots. I used a food processor to grind the almonds.


Press 1/4 cup of the ground almonds up the side of the pan before filling with batter.


This Chocolate Coffee Cake is very unique with the combination of chocolate and dried apricots, and can be enjoyed any time of day.


This recipe was shared with:
Weekend Potluck
Full Plate Thursday
All My Bloggy Friends
Jam Hands Recipe Sharing Monday
This recipe is one that I just happened across in a little cookbook called The Best Muffins & Quick Breads by Gregg R. Gillespie. I'm so glad that I found this recipe for a coffee cake made rich with chocolate, cream cheese, and dried apricots. Whether you're serving it for breakfast, snack, or dessert, it's always the right time for chocolate.


Chocolate Coffee Cake

1/2 cup finely ground almonds, divided
2 1/2 cups all purpose flour
2 teaspoons baking powder
1 teaspoon baking soda
1/4 teaspoon salt
1/2 cup Dutch-processed cocoa powder
1 1/2 cups dried apricots, finely diced
1 cup vegetable shortening
1 package (8 ounce) cream cheese, at room temperature
2 1/4 cups granulated sugar
5 large eggs
1 1/2 teaspoons Amaretto liqueur (I substituted 1/2 teaspoon almond extract)

Preheat oven to 350 degrees F. Grease and flour a 10-inch pan. (I used a 10-inch springform pan.)
Press 1/4 cup of the ground almonds up the outer edges of the pan; set aside.

In a large bowl, blend together the remaining almonds, flour, baking powder, baking soda, salt, cocoa powder, and diced apricots. In a separate bowl, beat shortening, cream cheese, and sugar until smooth. Beat in the eggs one at a time, beating well after each addition. Beat in the Amaretto (or almond extract). Combine the two mixtures, blending until the dry ingredients are just moistened.

Spoon the batter into the prepared pan. Bake for 45 - 50 minutes, or until a wooden toothpick comes out clean. (My cake needed 60 minutes baking time). Remove the pan from the oven and cool on a wire rack for 5 to 7 minutes before removing from pan onto wire rack to continue cooling. Serve warm.


Some ingredients you'll need are Dutch-process cocoa, cream cheese, almonds, and dried apricots. I used a food processor to grind the almonds.


Press 1/4 cup of the ground almonds up the side of the pan before filling with batter.


This Chocolate Coffee Cake is very unique with the combination of chocolate and dried apricots, and can be enjoyed any time of day.


This recipe was shared with:
Weekend Potluck
Full Plate Thursday
All My Bloggy Friends
Jam Hands Recipe Sharing Monday
reade more... Résuméabuiyad

Mud Cookies or No-Bake Chocolate Cookies

Since I have been blogging on subjects beyond cooking and housekeeping over at The Family Dance, I have taken a few walks down memory lane to revisit my childhood days. In the post That's Just the Way I Like It, I recently recalled some stories I had heard of my mother's lack of cooking knowledge when she was a new bride. That got me to thinking of my own first experiences with cooking. Fortunately, my mother put me to work in the kitchen learning to cook when I was very young. Mud Cookies were probably the first cookies that I made when I was a little girl, and I remember making them pretty regularly. I decided to pull out that old recipe today and make up a retro batch of Mud Cookies. I felt like a kid again; my taste buds remembered everything.


Mud Cookies or Chocolate No-Bake Cookies

1/4 cup butter
1/2 cup milk
2 cups sugar
1/2 cup unsweetened cocoa powder
1 cup peanut butter (can use either smooth or crunchy)
1 teaspoon vanilla extract
2 cups quick cooking oats

Line two large sheet pans with wax paper; set aside. In a heavy saucepan, melt butter. Add milk, sugar, and cocoa; stir until combined. Bring to a boil, then cook for 1 minute. Remove from heat and immediately stir in peanut butter, vanilla extract, and oats. Drop by teaspoonfuls onto prepared pans. Allow cookies to cool before removing from pans.


These cookies are flavored with cocoa powder and peanut butter, and they even have oats thrown into the mix for some extra goodness.  


Drop the cookies by teaspoonfuls onto wax paper and allow to cool.


With all the nostalgia going on, I think Desert Rose would be the appropriate serving piece for these Mud Cookies.


This recipe was shared with:
Weekend Potluck
Full Plate Thursday
Since I have been blogging on subjects beyond cooking and housekeeping over at The Family Dance, I have taken a few walks down memory lane to revisit my childhood days. In the post That's Just the Way I Like It, I recently recalled some stories I had heard of my mother's lack of cooking knowledge when she was a new bride. That got me to thinking of my own first experiences with cooking. Fortunately, my mother put me to work in the kitchen learning to cook when I was very young. Mud Cookies were probably the first cookies that I made when I was a little girl, and I remember making them pretty regularly. I decided to pull out that old recipe today and make up a retro batch of Mud Cookies. I felt like a kid again; my taste buds remembered everything.


Mud Cookies or Chocolate No-Bake Cookies

1/4 cup butter
1/2 cup milk
2 cups sugar
1/2 cup unsweetened cocoa powder
1 cup peanut butter (can use either smooth or crunchy)
1 teaspoon vanilla extract
2 cups quick cooking oats

Line two large sheet pans with wax paper; set aside. In a heavy saucepan, melt butter. Add milk, sugar, and cocoa; stir until combined. Bring to a boil, then cook for 1 minute. Remove from heat and immediately stir in peanut butter, vanilla extract, and oats. Drop by teaspoonfuls onto prepared pans. Allow cookies to cool before removing from pans.


These cookies are flavored with cocoa powder and peanut butter, and they even have oats thrown into the mix for some extra goodness.  


Drop the cookies by teaspoonfuls onto wax paper and allow to cool.


With all the nostalgia going on, I think Desert Rose would be the appropriate serving piece for these Mud Cookies.


This recipe was shared with:
Weekend Potluck
Full Plate Thursday
reade more... Résuméabuiyad

For My Sweets

Today I am sharing with you what I made for my boys for their Valentine's Day dessert. Well, to be truthful since the 14th fell on a Thursday- Which for us means work, school, Taekwondo and this year I had the added duty of retrieving my mom from the airport after a 3 week vacation in Florida (Yes, you can hiss at her now. We all did too.)- I made one of their favorite meals the Sunday prior, my Buffalo Chili, and this was our dessert.

I got the idea for this based on my Strawberry Cream Salad, another favorite. I was simply looking for something pink (have to be festive after all) to serve them, and since I've made the strawberry a thousand times, I thought using cherry as the base would be a good idea. Then I started playing around with things "cherry-ish". Chocolate covered cherries...okay, I'll add chocolate chips. (And since my boys love cherry cordials, this was an added bonus!) Nuts in a warm cherry cobbler, okay I'll add pecans. Marshmallows....well, I just had those in the cupboard!

I might have made this for Valentine's Day, but it is a easy as can be dessert for any night of the week. Plus, it's a great base to begin playing with and finding different flavor combos your family will love. Making something for my sweets is one of my favorite parts of the day of love...rather we are celebrating the day of...a few days before...or a few days after!

Cherry Bliss Salad
1 (20 oz) can cherry pie filling
1 (14 oz) can sweetened condensed milk
1/2 c. mini marshmallows
1/2 c. chopped pecans
1 (12 oz) tub Cool Whip, cooled
1/2 c. semi sweet morsels
Maraschino cherries, for garnish

In a large bowl combine pie filling and condensed milk. Stir well.  Add Cool Whip and mix well. Gently fold in marshmallows, chocolate chips and pecans. Stir well. Chill overnight to set. Top with extra chocolate chips and maraschino cherries if desired.


Shared on Make Ahead Meals Feb. 18, 2013
Shared on Lady Behind The Curtain Feb. 20, 2013
Shared on Miz Helen's Country Cottage Feb. 21, 2013
Shared on The Country Cook Feb. 22, 2013
Cherry at Very Good Recipes
Pin It
Today I am sharing with you what I made for my boys for their Valentine's Day dessert. Well, to be truthful since the 14th fell on a Thursday- Which for us means work, school, Taekwondo and this year I had the added duty of retrieving my mom from the airport after a 3 week vacation in Florida (Yes, you can hiss at her now. We all did too.)- I made one of their favorite meals the Sunday prior, my Buffalo Chili, and this was our dessert.

I got the idea for this based on my Strawberry Cream Salad, another favorite. I was simply looking for something pink (have to be festive after all) to serve them, and since I've made the strawberry a thousand times, I thought using cherry as the base would be a good idea. Then I started playing around with things "cherry-ish". Chocolate covered cherries...okay, I'll add chocolate chips. (And since my boys love cherry cordials, this was an added bonus!) Nuts in a warm cherry cobbler, okay I'll add pecans. Marshmallows....well, I just had those in the cupboard!

I might have made this for Valentine's Day, but it is a easy as can be dessert for any night of the week. Plus, it's a great base to begin playing with and finding different flavor combos your family will love. Making something for my sweets is one of my favorite parts of the day of love...rather we are celebrating the day of...a few days before...or a few days after!

Cherry Bliss Salad
1 (20 oz) can cherry pie filling
1 (14 oz) can sweetened condensed milk
1/2 c. mini marshmallows
1/2 c. chopped pecans
1 (12 oz) tub Cool Whip, cooled
1/2 c. semi sweet morsels
Maraschino cherries, for garnish

In a large bowl combine pie filling and condensed milk. Stir well.  Add Cool Whip and mix well. Gently fold in marshmallows, chocolate chips and pecans. Stir well. Chill overnight to set. Top with extra chocolate chips and maraschino cherries if desired.


Shared on Make Ahead Meals Feb. 18, 2013
Shared on Lady Behind The Curtain Feb. 20, 2013
Shared on Miz Helen's Country Cottage Feb. 21, 2013
Shared on The Country Cook Feb. 22, 2013
Cherry at Very Good Recipes
Pin It
reade more... Résuméabuiyad

Weekend Company {Guest Blogger Carla}

Happy Saturday! I hope you had a fabulous week! Did your sweetie treat you well on Valentine's Day? And of course Fat Tuesday...did everyone eat well?

I want to give a huge thank you to my guest today for stepping in at the last minute when my original guest had to cancel. I appreciate it so very much! Not to mention, she is here to share a yummy dessert! Please welcome for the first time to EMM, Carla~

Hi there Everyday Mom's Meals Readers! I'm Carla, authoress of fellow foodie blog Baking, not Banking! I am a twenty-something cupcake lover, baking and living in lovely sunny South Florida. I love Glee, red wine, Cosmopolitans, dancing, and cooking all sorts of goodies in my kitchen. I am happy to be here and share with you one of my favorite recipes, Mini Red Velvet Cheesecakes!

Everybody knows cheesecakes are delicious, but mini ones are not only easier to bake, but cuter too! They are the perfect centerpiece for any gathering and perfect for the office space. And who doesn't love red velvet? I do believe we are in the perfect season of love for such deliciousness as well. :)

The recipe is super easy and comes from Betty Crocker

Ingredients:
24 dark chocolate cookies (thin, to fill the bottom of a cupcake liner fully)
16 oz softened cream cheese
1 cup white sugar
1/4 cup unsweetened cocoa powder
2 tsp vanilla extract
2 tbsp red food coloring
2 eggs
1/2 cup heavy whipping cream
1 tbsp powdered sugar
white chocolate chips (optional)

Directions:
1. Place chocolate cookies at the bottom of cupcake tins in muffin pans.
2. In large bowl, beat cream cheese with electric mixer on medium speed until smooth. Gradually beat in the white sugar and the cocoa until fluffy. Beat in vanilla and food coloring. Beat in eggs, one at a time, until well blended. Divide batter evenly among cupcake liners.
3. Bake 20 to 25 minutes or until centers are firm. Cool 15 minutes (cheesecake centers will sink while cooling). Refrigerate for at least 2 hours before serving.
4. 
In a small bowl, beat whipping cream and sugar with electric mixer on high speed until stiff. Spoon whipped cream on chilled cheesecakes. Just before serving, garnish with white chocolate chips. Cover and refrigerate any remaining cheesecakes.
5. Smile and serve!


Happy Saturday! I hope you had a fabulous week! Did your sweetie treat you well on Valentine's Day? And of course Fat Tuesday...did everyone eat well?

I want to give a huge thank you to my guest today for stepping in at the last minute when my original guest had to cancel. I appreciate it so very much! Not to mention, she is here to share a yummy dessert! Please welcome for the first time to EMM, Carla~

Hi there Everyday Mom's Meals Readers! I'm Carla, authoress of fellow foodie blog Baking, not Banking! I am a twenty-something cupcake lover, baking and living in lovely sunny South Florida. I love Glee, red wine, Cosmopolitans, dancing, and cooking all sorts of goodies in my kitchen. I am happy to be here and share with you one of my favorite recipes, Mini Red Velvet Cheesecakes!

Everybody knows cheesecakes are delicious, but mini ones are not only easier to bake, but cuter too! They are the perfect centerpiece for any gathering and perfect for the office space. And who doesn't love red velvet? I do believe we are in the perfect season of love for such deliciousness as well. :)

The recipe is super easy and comes from Betty Crocker

Ingredients:
24 dark chocolate cookies (thin, to fill the bottom of a cupcake liner fully)
16 oz softened cream cheese
1 cup white sugar
1/4 cup unsweetened cocoa powder
2 tsp vanilla extract
2 tbsp red food coloring
2 eggs
1/2 cup heavy whipping cream
1 tbsp powdered sugar
white chocolate chips (optional)

Directions:
1. Place chocolate cookies at the bottom of cupcake tins in muffin pans.
2. In large bowl, beat cream cheese with electric mixer on medium speed until smooth. Gradually beat in the white sugar and the cocoa until fluffy. Beat in vanilla and food coloring. Beat in eggs, one at a time, until well blended. Divide batter evenly among cupcake liners.
3. Bake 20 to 25 minutes or until centers are firm. Cool 15 minutes (cheesecake centers will sink while cooling). Refrigerate for at least 2 hours before serving.
4. 
In a small bowl, beat whipping cream and sugar with electric mixer on high speed until stiff. Spoon whipped cream on chilled cheesecakes. Just before serving, garnish with white chocolate chips. Cover and refrigerate any remaining cheesecakes.
5. Smile and serve!


reade more... Résuméabuiyad

Dipped Chocolate Chip Heart Cookies

Sometimes I buy ingredients before I know what I'm going to make with them. I knew I wanted to make something with the colorful Nestle's limited edition Valentine chips, I just wasn't sure what that would be when I bought them. They rested in my pantry alongside my red Wilton candy melts until I finally got my inspiration from some pretty cookies I saw over at Vanessa's Values. Regular chocolate chip cookie dough is too soft to be rolled and cut into shaped cookies, but this recipe is a stiffer shortbread type dough that can be rolled out, and it makes a super delicious cookie. Here's the homemade treat that my sweeties got for Valentine's Day this year.


Print Recipe

Dipped Chocolate Chip Heart Cookies

1 cup butter, softened
1/2 cup packed brown sugar
1/3 cup granulated sugar
2 teaspoons vanilla extract
1/2 teaspoon salt
1 large egg yolk
2 1/2 cups all purpose flour
1 cup Valentine chocolate chips
1 (14 ounce) bag red Wilton candy melts, melted (I used about 1/2 of the bag)

Preheat oven to 350 degrees F. Prepare a baking sheet by lining with parchment paper. In the bowl of a stand mixer, beat butter, brown sugar, granulated sugar, vanilla, and salt until creamy. Beat in egg yolk and gradually add flour. Stir in chocolate chips. Divide the dough in half, cover with plastic wrap, and chill for at least 1 hour. Roll the dough out to 1/4-inch thickness on a lightly floured silicone mat with a piece of wax paper over the top (or can be rolled between two pieces of wax paper).  Cut into heart shapes with a 3-inch cutter. Bake on prepared pan for 9 - 10 minutes. Cool cookies on baking sheet for a few minutes, then remove to a wire rack to finish cooling. When cookies are COMPLETELY cooled dip edge in candy coating that has been melted according to package directions. Lay dipped cookies on parchment paper until candy coating has hardened.

Note: If a different size cookie cutter is used the baking time will need to be adjusted.


These limited edition chips and candy melts waited in my pantry until I found just the right Valentine's Day treat recipe.


Roll out the chilled dough and cut into heart shapes.


My cookies were 3-inch hearts, and the recipe made 21 of this size. Smaller cookies would probably be easier to work with, but I wanted to make these larger ones today. Just be sure to adjust your baking time if you use a smaller cookie cutter.


Also, dip them in the melted candy coating only after they are completely cooled.


Happy Valentine's Day to all my sweeties!


I have received no compensation for writing this post.


This recipe was shared with:
Full Plate Thursday
All My Bloggy Friends
Weekend Potluck
Sometimes I buy ingredients before I know what I'm going to make with them. I knew I wanted to make something with the colorful Nestle's limited edition Valentine chips, I just wasn't sure what that would be when I bought them. They rested in my pantry alongside my red Wilton candy melts until I finally got my inspiration from some pretty cookies I saw over at Vanessa's Values. Regular chocolate chip cookie dough is too soft to be rolled and cut into shaped cookies, but this recipe is a stiffer shortbread type dough that can be rolled out, and it makes a super delicious cookie. Here's the homemade treat that my sweeties got for Valentine's Day this year.


Print Recipe

Dipped Chocolate Chip Heart Cookies

1 cup butter, softened
1/2 cup packed brown sugar
1/3 cup granulated sugar
2 teaspoons vanilla extract
1/2 teaspoon salt
1 large egg yolk
2 1/2 cups all purpose flour
1 cup Valentine chocolate chips
1 (14 ounce) bag red Wilton candy melts, melted (I used about 1/2 of the bag)

Preheat oven to 350 degrees F. Prepare a baking sheet by lining with parchment paper. In the bowl of a stand mixer, beat butter, brown sugar, granulated sugar, vanilla, and salt until creamy. Beat in egg yolk and gradually add flour. Stir in chocolate chips. Divide the dough in half, cover with plastic wrap, and chill for at least 1 hour. Roll the dough out to 1/4-inch thickness on a lightly floured silicone mat with a piece of wax paper over the top (or can be rolled between two pieces of wax paper).  Cut into heart shapes with a 3-inch cutter. Bake on prepared pan for 9 - 10 minutes. Cool cookies on baking sheet for a few minutes, then remove to a wire rack to finish cooling. When cookies are COMPLETELY cooled dip edge in candy coating that has been melted according to package directions. Lay dipped cookies on parchment paper until candy coating has hardened.

Note: If a different size cookie cutter is used the baking time will need to be adjusted.


These limited edition chips and candy melts waited in my pantry until I found just the right Valentine's Day treat recipe.


Roll out the chilled dough and cut into heart shapes.


My cookies were 3-inch hearts, and the recipe made 21 of this size. Smaller cookies would probably be easier to work with, but I wanted to make these larger ones today. Just be sure to adjust your baking time if you use a smaller cookie cutter.


Also, dip them in the melted candy coating only after they are completely cooled.


Happy Valentine's Day to all my sweeties!


I have received no compensation for writing this post.


This recipe was shared with:
Full Plate Thursday
All My Bloggy Friends
Weekend Potluck
reade more... Résuméabuiyad

Sweet Treat For Your Sweetie

For all the men reading this who might not be paying attention to the calendar, you have 3 more days until Valentine's Day. There, I've done my civic duty and reminded you, so please don't be one of those husbands and boyfriends in the store on Thursday at 5pm wandering around trying to find the last box of chocolate and thumbing through the greeting cards that have all been picked over. Your wife or girlfriend doesn't want the generic "Happy Valentine's Day to a Great Person" Hallmark greeting!

This dessert is so easy, anyone can make it, even you guys out there racking your brains for something special to do for your sweetie. It's chocolate so the women in your life will be happy with that simple fact, and your evening will be off to a good start!

Or maybe you are a busy wife, and you still want something delicious for your hubby when he gets home from work. These work perfectly for that too! Or if you're like me and you have a little one and you want something fun and yummy for an after school treat. Or, you and the munchkin can make these together and surprise Daddy or Mommy when they get home! The possibilities are endless because they are easy enough for anyone to make~ man, woman or child!

I got this recipe the same day as my Strawberry Yogurt Bites, but with it being chocolate I saved it to share for this week for obvious reasons. However, speaking of those yummy yogurt bites, if you've got someone who can't have chocolate, those would be perfect come Thursday as well.

If you like Rocky Road ice cream, you're gonna love them. Plus, if you use the sugar free pudding mix, and the "lite" Cool Whip, they only have 130 calories each.

Whatever you have planned for Valentine's Day, include this simple dessert and you are well on your way to smiles, hugs and kisses!

Rocky Road Parfaits From JELL-O
1 (1.4 oz) package chocolate instant pudding
2 c. cold milk
1/2 c. Cool Whip, thawed
12 miniature marshmallows
2 TBS dry roasted peanuts, chopped

Combine milk and pudding mix in a medium bowl. Using a wire whisk, mix for 2 minutes. Remove 3/4 c. to another bowl. Combine that with Cool Whip. Mix well. Pour remaining pudding mix into 4 parfait or dessert cups. Top evenly with Cool Whip mixture. Refrigerate 15 minutes. Top each parfait with 3 marshmallows and even amounts of peanuts.


Shared on Make Ahead Meals Feb. 11, 2013
Shared on Lady Behind The Curtain Feb. 13, 2013
Shared on Miz Helen's Country Cottage Feb. 14, 2013
Shared on The Country Cook Feb. 15, 2013
Dessert at Very Good Recipes
Pin It
For all the men reading this who might not be paying attention to the calendar, you have 3 more days until Valentine's Day. There, I've done my civic duty and reminded you, so please don't be one of those husbands and boyfriends in the store on Thursday at 5pm wandering around trying to find the last box of chocolate and thumbing through the greeting cards that have all been picked over. Your wife or girlfriend doesn't want the generic "Happy Valentine's Day to a Great Person" Hallmark greeting!

This dessert is so easy, anyone can make it, even you guys out there racking your brains for something special to do for your sweetie. It's chocolate so the women in your life will be happy with that simple fact, and your evening will be off to a good start!

Or maybe you are a busy wife, and you still want something delicious for your hubby when he gets home from work. These work perfectly for that too! Or if you're like me and you have a little one and you want something fun and yummy for an after school treat. Or, you and the munchkin can make these together and surprise Daddy or Mommy when they get home! The possibilities are endless because they are easy enough for anyone to make~ man, woman or child!

I got this recipe the same day as my Strawberry Yogurt Bites, but with it being chocolate I saved it to share for this week for obvious reasons. However, speaking of those yummy yogurt bites, if you've got someone who can't have chocolate, those would be perfect come Thursday as well.

If you like Rocky Road ice cream, you're gonna love them. Plus, if you use the sugar free pudding mix, and the "lite" Cool Whip, they only have 130 calories each.

Whatever you have planned for Valentine's Day, include this simple dessert and you are well on your way to smiles, hugs and kisses!

Rocky Road Parfaits From JELL-O
1 (1.4 oz) package chocolate instant pudding
2 c. cold milk
1/2 c. Cool Whip, thawed
12 miniature marshmallows
2 TBS dry roasted peanuts, chopped

Combine milk and pudding mix in a medium bowl. Using a wire whisk, mix for 2 minutes. Remove 3/4 c. to another bowl. Combine that with Cool Whip. Mix well. Pour remaining pudding mix into 4 parfait or dessert cups. Top evenly with Cool Whip mixture. Refrigerate 15 minutes. Top each parfait with 3 marshmallows and even amounts of peanuts.


Shared on Make Ahead Meals Feb. 11, 2013
Shared on Lady Behind The Curtain Feb. 13, 2013
Shared on Miz Helen's Country Cottage Feb. 14, 2013
Shared on The Country Cook Feb. 15, 2013
Dessert at Very Good Recipes
Pin It
reade more... Résuméabuiyad

Baking With Love

Yep, that's right, I am already thinking about that day of love that is actually quickly approaching! But this year, the first treat I wanted to make that was Valentine's inspired, actually started at Christmas! Let me explain...

I have been wanting to try my hand at cake pops for a while now. Why? Because I've had them at Starbucks before and I quickly became addicted! So when I spotted a cake pop pan I immediately added it to my  wishlist; and on Christmas morning, Mr. Everyday came through with flying colors. I didn't want a machine to make them, just a simple pan to use in the oven. It's the perfect cake pop helper! I'm telling you, these are no fail! Mix, pour, bake! How much simpler could it be?

These would certainly please any valentine from young to old! Maybe a special after school treat on the festive day! Or, if you are lucky enough to be able to share home made treats with your child's class, these could make you a rock star mom! Or better yet, if your little ones are home with you, making these would be the perfect fun activity for the day!

I love treating my little valentine to something yummy and fun each February 14th, and for me, there is no better definition of "baking with love" than either surprising him with a sweet treat, or having him in the kitchen next to me making one! Plus, we always share with my other "big" valentine too, his Daddy!

Valentines Day is the perfect chance to show all those special people in your life just how much you care about them, and we all know the quickest way to anyone's heart is through their stomach, especially when it includes chocolate!

Fudge Cake Pops Adapted from Nordicware
3/4 c. semi sweet chocolate chips
1/2 c. butter
3/4 c. sugar
2 eggs
3/4 c. flour
1/4 tsp. salt
3 TBS cocoa
8 oz. semi sweet chocolate baking bar
8 oz. white chocolate baking bar
Sprinkles
Cake pop sticks

Preheat oven to 325. Grease cake pop pan. In a small sauce pan over low heat, melt chocolate chips and butter. Stir to combine until smooth. Remove and pour into a large mixing bowl. Add sugar and cocoa. Stir well. Add eggs, one at a time, stirring after each. Add flour and salt. Stir well until combined. Spoon mixture into pan and bake for 25 minutes or until a toothpick in the center comes out clean. Remove from oven, cool in pan for 5 minutes and then remove to cool completely. To melt baking bars, break into small pieces in glass bowls. Microwave for 30 second increments stirring after each until melted. Insert sticks into cake pops. Dip each into melted chocolate, swirling to remove excess. Decorate with various sprinkles.


Shared on Mandy's Recipe Box Jan. 22, 2013
Shared on Hun What's For Dinner Jan. 22, 2013
Shared on The Hopeless Housewife Jan. 23. 2013
Shared on Lady Behind The Curtain Jan. 23. 2013
Shared on Miz Helen's Country Cottage Jan. 24, 2013
Shared on The Country Cook Jan. 25, 2013

Disclaimer: This is NOT a paid endorsement for Nordicware. All thoughts and opinions are mine.

Chocolate at Very Good Recipes
Pin It
Yep, that's right, I am already thinking about that day of love that is actually quickly approaching! But this year, the first treat I wanted to make that was Valentine's inspired, actually started at Christmas! Let me explain...

I have been wanting to try my hand at cake pops for a while now. Why? Because I've had them at Starbucks before and I quickly became addicted! So when I spotted a cake pop pan I immediately added it to my  wishlist; and on Christmas morning, Mr. Everyday came through with flying colors. I didn't want a machine to make them, just a simple pan to use in the oven. It's the perfect cake pop helper! I'm telling you, these are no fail! Mix, pour, bake! How much simpler could it be?

These would certainly please any valentine from young to old! Maybe a special after school treat on the festive day! Or, if you are lucky enough to be able to share home made treats with your child's class, these could make you a rock star mom! Or better yet, if your little ones are home with you, making these would be the perfect fun activity for the day!

I love treating my little valentine to something yummy and fun each February 14th, and for me, there is no better definition of "baking with love" than either surprising him with a sweet treat, or having him in the kitchen next to me making one! Plus, we always share with my other "big" valentine too, his Daddy!

Valentines Day is the perfect chance to show all those special people in your life just how much you care about them, and we all know the quickest way to anyone's heart is through their stomach, especially when it includes chocolate!

Fudge Cake Pops Adapted from Nordicware
3/4 c. semi sweet chocolate chips
1/2 c. butter
3/4 c. sugar
2 eggs
3/4 c. flour
1/4 tsp. salt
3 TBS cocoa
8 oz. semi sweet chocolate baking bar
8 oz. white chocolate baking bar
Sprinkles
Cake pop sticks

Preheat oven to 325. Grease cake pop pan. In a small sauce pan over low heat, melt chocolate chips and butter. Stir to combine until smooth. Remove and pour into a large mixing bowl. Add sugar and cocoa. Stir well. Add eggs, one at a time, stirring after each. Add flour and salt. Stir well until combined. Spoon mixture into pan and bake for 25 minutes or until a toothpick in the center comes out clean. Remove from oven, cool in pan for 5 minutes and then remove to cool completely. To melt baking bars, break into small pieces in glass bowls. Microwave for 30 second increments stirring after each until melted. Insert sticks into cake pops. Dip each into melted chocolate, swirling to remove excess. Decorate with various sprinkles.


Shared on Mandy's Recipe Box Jan. 22, 2013
Shared on Hun What's For Dinner Jan. 22, 2013
Shared on The Hopeless Housewife Jan. 23. 2013
Shared on Lady Behind The Curtain Jan. 23. 2013
Shared on Miz Helen's Country Cottage Jan. 24, 2013
Shared on The Country Cook Jan. 25, 2013

Disclaimer: This is NOT a paid endorsement for Nordicware. All thoughts and opinions are mine.

Chocolate at Very Good Recipes
Pin It
reade more... Résuméabuiyad

Sundae In A Crust

I know I shared my Cranberry Orange Scones with you on Monday, but I feel like this is our first real sweet treat of the new year. Maybe because it's a pie. Maybe because unlike the scones which can also be a breakfast pastry, this is strictly dessert. Or maybe...just maybe it's because it contains chocolate! In fact, the main ingredient is indeed chocolate! So, if you are still trying to work off all the sweets you enjoyed during the holidays, you might want to save this for a later date (Maybe for your sweetie for Valentine's Day?) but if your sweet tooth is always in need of a boost, then you have come to the right place! To me, this remind me of two things. One, with the flavor of chocolate and the nuts scattered throughout, to me it resembles my Easy Chocolate Fudge (hence where the name comes from). And two, with the way I chose to garnish it, it was almost like eating an ice cream sundae inside of a pie crust; and for me, that's a very good thing. See, the older I get, the more milk and it's products, such as ice cream are not my friend. I do okay with small amounts, and cheese doesn't seem to bother me at all, but my days of big bowls of Rocky Road are over. Sad, I know. But for those who aren't deprived like me, this would taste fantastic ala mode! I know it's the new year and so many of us are trying even harder to watch what we eat and start 2013 on the right track, but I know deep down, even those of you who are hitting the gym every morning need a little pick me up now and again, so maybe one tiny piece of this would make a nice reward, or stay home from the gym and eat the whole pie...nobody will ever know!

Fudge Pie
1 9" deep dish pie shell, unbaked
1 c. sugar
1/4 c. flour
1/4 c. cocoa
2 eggs, beaten
1 stick butter, melted
1/4 tsp. vanilla
1/2 c. chopped pecans
Whipped Cream, optional
Maraschino Cherries, optional

Preheat oven to 350. If pie crust is frozen, place on a baking sheet and allow to thaw 15 minutes. In a large mixing bowl combine flour, sugar, cocoa, eggs, butter and vanilla. Stir well to combine. Fold in nuts and stir. Pour batter into shell. Place in oven (on baking sheet) and bake for 25 minutes or until toothpick inserted into center comes out clean. Garnish with whipped cream and cherries, if desired.


Shared on The Country Cook Jan. 11, 2013
Shared on Make Ahead Meals Jan. 14, 2013
Shared on Mandy's Recipe Box Jan. 15, 2013
Shared on Lady Behind The Curtain Jan. 16, 2013
Chocolate at Very Good Recipes
Pin It
I know I shared my Cranberry Orange Scones with you on Monday, but I feel like this is our first real sweet treat of the new year. Maybe because it's a pie. Maybe because unlike the scones which can also be a breakfast pastry, this is strictly dessert. Or maybe...just maybe it's because it contains chocolate! In fact, the main ingredient is indeed chocolate! So, if you are still trying to work off all the sweets you enjoyed during the holidays, you might want to save this for a later date (Maybe for your sweetie for Valentine's Day?) but if your sweet tooth is always in need of a boost, then you have come to the right place! To me, this remind me of two things. One, with the flavor of chocolate and the nuts scattered throughout, to me it resembles my Easy Chocolate Fudge (hence where the name comes from). And two, with the way I chose to garnish it, it was almost like eating an ice cream sundae inside of a pie crust; and for me, that's a very good thing. See, the older I get, the more milk and it's products, such as ice cream are not my friend. I do okay with small amounts, and cheese doesn't seem to bother me at all, but my days of big bowls of Rocky Road are over. Sad, I know. But for those who aren't deprived like me, this would taste fantastic ala mode! I know it's the new year and so many of us are trying even harder to watch what we eat and start 2013 on the right track, but I know deep down, even those of you who are hitting the gym every morning need a little pick me up now and again, so maybe one tiny piece of this would make a nice reward, or stay home from the gym and eat the whole pie...nobody will ever know!

Fudge Pie
1 9" deep dish pie shell, unbaked
1 c. sugar
1/4 c. flour
1/4 c. cocoa
2 eggs, beaten
1 stick butter, melted
1/4 tsp. vanilla
1/2 c. chopped pecans
Whipped Cream, optional
Maraschino Cherries, optional

Preheat oven to 350. If pie crust is frozen, place on a baking sheet and allow to thaw 15 minutes. In a large mixing bowl combine flour, sugar, cocoa, eggs, butter and vanilla. Stir well to combine. Fold in nuts and stir. Pour batter into shell. Place in oven (on baking sheet) and bake for 25 minutes or until toothpick inserted into center comes out clean. Garnish with whipped cream and cherries, if desired.


Shared on The Country Cook Jan. 11, 2013
Shared on Make Ahead Meals Jan. 14, 2013
Shared on Mandy's Recipe Box Jan. 15, 2013
Shared on Lady Behind The Curtain Jan. 16, 2013
Chocolate at Very Good Recipes
Pin It
reade more... Résuméabuiyad