Pages

Showing posts with label Green Onions. Show all posts

A Twist On a NYE Favorite

If you know me personally, or have been following the blog for a while now, you know we have a very fun tradition in this house for New Year's Eve. It doesn't involve getting all dressed up, or heading out with the masses. What it does involve is plenty of family time and yummy food. Each December 31st we ring in the new year here at home, just the 3 of us, watching movies or holiday specials, or even mixed martial arts on the tv, all while enjoying a buffet of our favorite appetizers. I filled the table with a huge variety of our most enjoyed "nibbly bits" (as Alex calls them) and we eat all night long, warm and safe in our home.

Today's recipe is a new twist on one of my husband's favorite things I put out on this buffet every year. Probably what is the most simple appetizer ever created. Dried Beef Rolls. You've had these, right?? Cream cheese spread on dried beef, rolled and cut into bite sized pieces. I still remember the first year I made them for him. I had all these amazing dishes sitting out, some kind of complicated, and these simple rolls that took me all of 10 minutes to make were the one thing he was most excited about. The thing he went on and on about. The thing he could not get enough of. I was like "All of this food, and that is what you are most excited about?" Hey, he likes the simple things, what can I say? So every year since they are always included in our New Year's Eve feast.

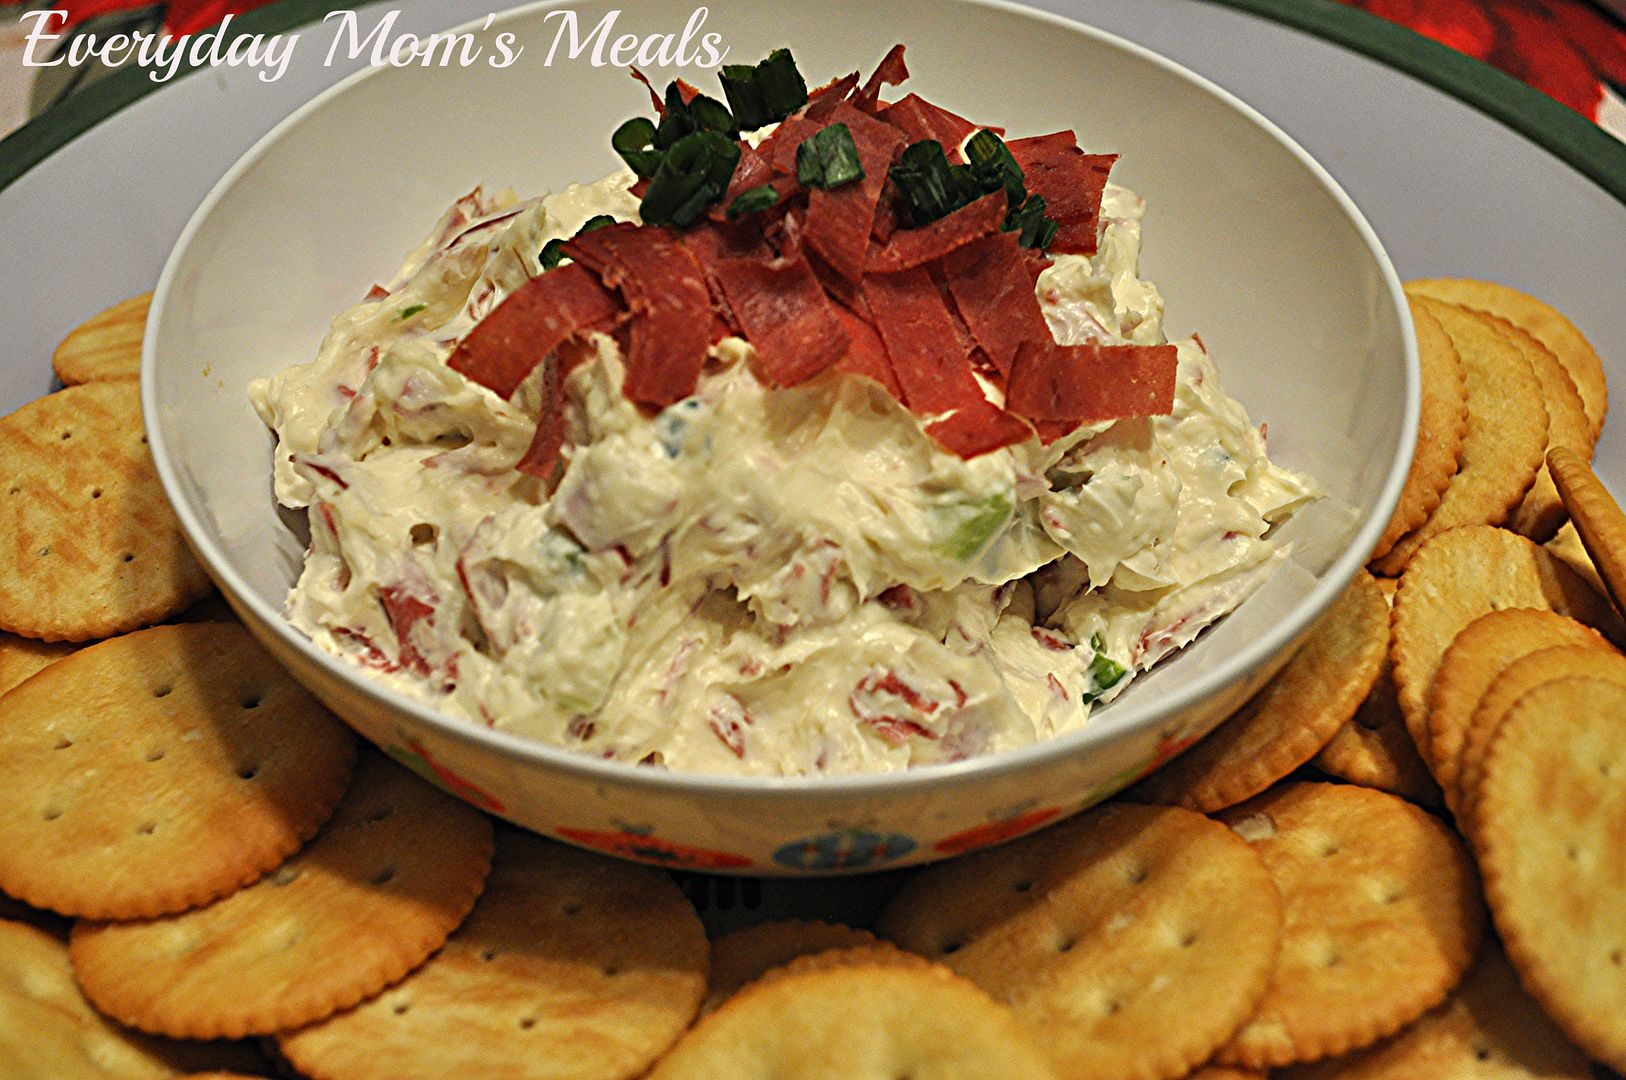
But this year I will be switching it up just a little, with this fantastic dip that is super tasty, and almost just as easy. It really doesn't take much more time and has incredible flavor. It would be perfect for any holiday party, rather it be next week for Christmas, or if like me you're already planning how to welcome in 2014. It will be here before we know it!

Creamy Beef Spread From Hometown Christmas
1 (8 oz.) package cream cheese, at room temperature
1/4 c. sour cream
1/4 c. mayo
1/4 c. grated Parmesan cheese
1 green onion, finely chopped, plus extra for garnish
1 (2.5 oz.) jar dried beefy, finely chopped and divided

In a bowl beat cream cheese until smooth. Add remaining ingredients, reserving 2 TBS dried beef. Mix well and transfer to a serving bowl. Sprinkle with reserved beef and extra onion. Cover and chill until serving. Serve with crackers.


Shared on The Country Cook Dec. 20, 2013

Appetizers at Very Good Recipes
If you know me personally, or have been following the blog for a while now, you know we have a very fun tradition in this house for New Year's Eve. It doesn't involve getting all dressed up, or heading out with the masses. What it does involve is plenty of family time and yummy food. Each December 31st we ring in the new year here at home, just the 3 of us, watching movies or holiday specials, or even mixed martial arts on the tv, all while enjoying a buffet of our favorite appetizers. I filled the table with a huge variety of our most enjoyed "nibbly bits" (as Alex calls them) and we eat all night long, warm and safe in our home.

Today's recipe is a new twist on one of my husband's favorite things I put out on this buffet every year. Probably what is the most simple appetizer ever created. Dried Beef Rolls. You've had these, right?? Cream cheese spread on dried beef, rolled and cut into bite sized pieces. I still remember the first year I made them for him. I had all these amazing dishes sitting out, some kind of complicated, and these simple rolls that took me all of 10 minutes to make were the one thing he was most excited about. The thing he went on and on about. The thing he could not get enough of. I was like "All of this food, and that is what you are most excited about?" Hey, he likes the simple things, what can I say? So every year since they are always included in our New Year's Eve feast.

But this year I will be switching it up just a little, with this fantastic dip that is super tasty, and almost just as easy. It really doesn't take much more time and has incredible flavor. It would be perfect for any holiday party, rather it be next week for Christmas, or if like me you're already planning how to welcome in 2014. It will be here before we know it!

Creamy Beef Spread From Hometown Christmas
1 (8 oz.) package cream cheese, at room temperature
1/4 c. sour cream
1/4 c. mayo
1/4 c. grated Parmesan cheese
1 green onion, finely chopped, plus extra for garnish
1 (2.5 oz.) jar dried beefy, finely chopped and divided

In a bowl beat cream cheese until smooth. Add remaining ingredients, reserving 2 TBS dried beef. Mix well and transfer to a serving bowl. Sprinkle with reserved beef and extra onion. Cover and chill until serving. Serve with crackers.

Shared on The Country Cook Dec. 20, 2013

Appetizers at Very Good Recipes
reade more... Résuméabuiyad

Don't Party In The Kitchen

Christmas is only a little over 1 week away! And I have one question for you. How many holiday parties have you been to thus far? Is your calendar over flowing? Is your dance card full? Have you been to many already, with many still to come? Have you hosted any yet? Are you trying to plan one for next week, or maybe even New Year's Eve? Tis the season for parties, parties and more parties, and today I've got a great appetizer/party food your guests will love and will keep you in the party, not watching from the kitchen.

I love party foods; but I especially love those that I can either make ahead of time and have waiting on me, or those that can be assembled as needed, as the night goes on, so hungry guest can easily be satisfied, without me missing out on all the fun! 

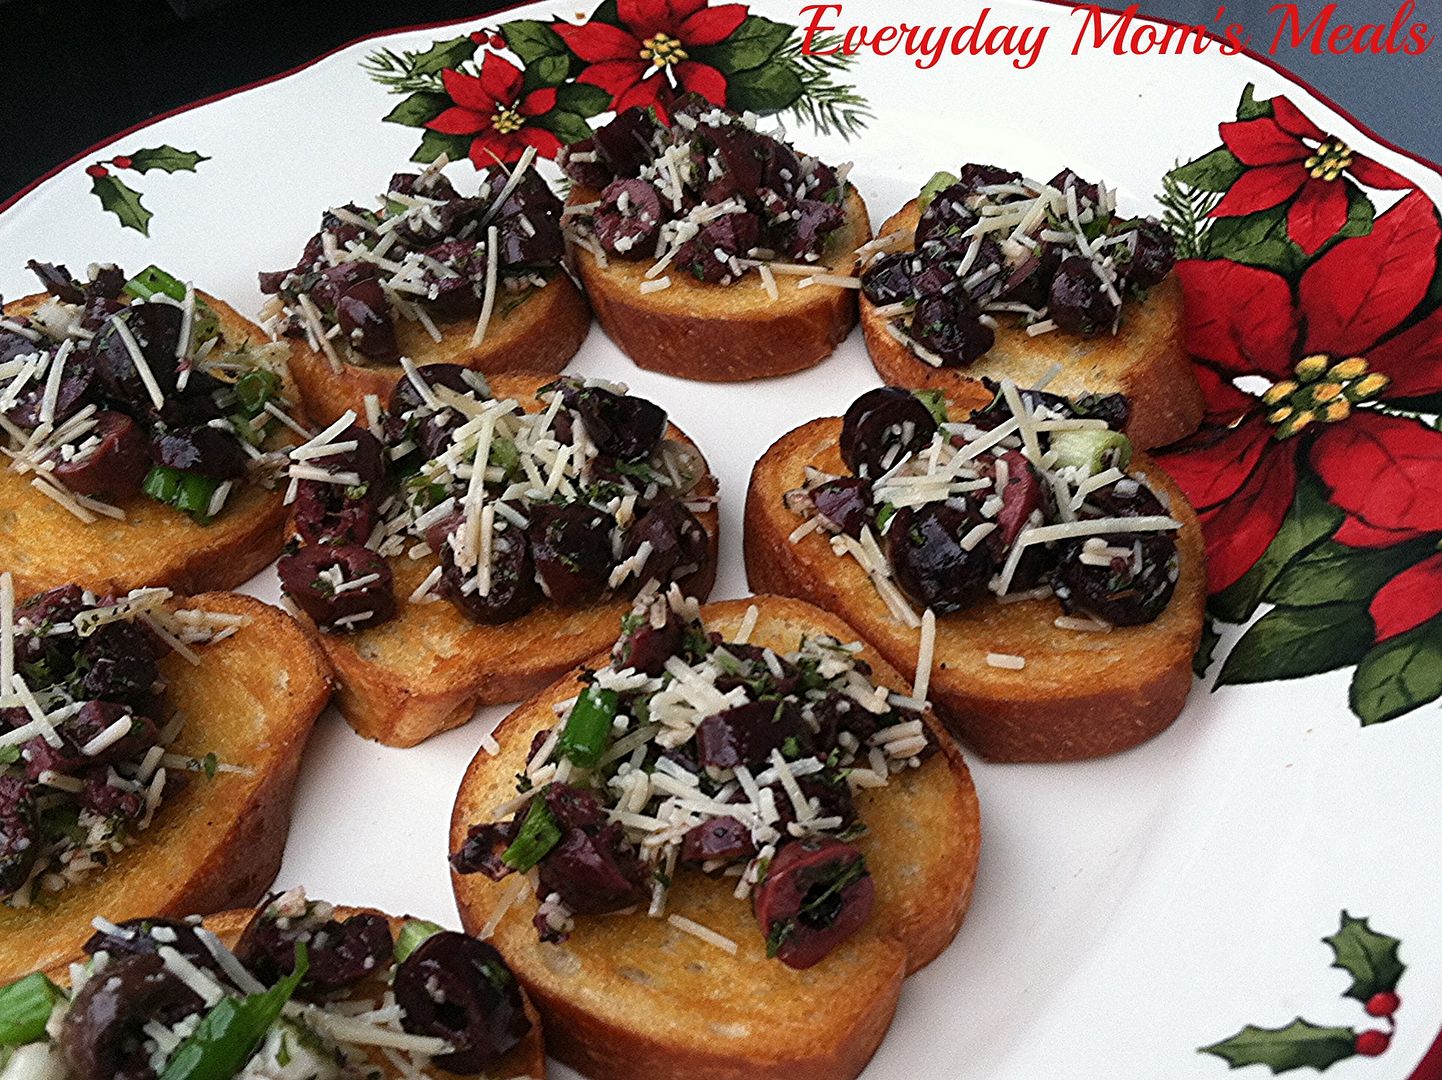
Bruschetta is one of my favorite appetizers of all time, but this time I wanted to switch it up a little and make one featuring olives instead of tomatoes. And not just every day olives, but kalamata olives! They are a little fancier in my mind, and it is the holiday season after all! 

Your guests will love the crisp bread, briny olives, and the salty nutty flavor of the Parmesan. It's a fantastic twist on a traditional bruschetta everyone will find refreshing and unique. Plus, you can make the olive mixture, keep it chilling in the fridge and then just bake off more bread as you need it, topping tray after tray all night long!

Holiday parties are meant to be enjoyed by all, and that includes the host/hostess! No where is there a rule saying if you are the "hostess with the mostess" you have to be in the kitchen all night, making sure everyone else is fed and having a good time while you miss out. Enjoy all those parties over the next couple weeks, it will be a whole year until they are here again!

Olive Bruschetta
20-24 Slices French bread or baguette about 1/4" thick
1 c. kalamata olives, pitted and chopped
2 green onions, chopped
1 garlic clove, finely minced
2 tsp. dried basil
2 tsp. dried parsley
1/4 c. olive oil, plus more for bread
1/4 c. shredded Parmesan cheese, plus extra for garnish
Salt and pepper

Preheat oven to 350. Brush both sides of bread with oil and season with salt and pepper. Place on rimmed baking sheets. Bake for 8-10 minutes, flip and bake 8-10 minutes more. (Watch carefully, these are times for my oven, but they can burn easily!)

In a medium bowl combine olive, garlic, green onions, basil, parsley, olive oil and cheese. Mix well. If not serving right away, chill. When bread is done, allow to cool. Top with olive mixture. Garnish with extra cheese.


Shared on The Country Cook Dec. 20, 2013

Appetizers at Very Good Recipes
Christmas is only a little over 1 week away! And I have one question for you. How many holiday parties have you been to thus far? Is your calendar over flowing? Is your dance card full? Have you been to many already, with many still to come? Have you hosted any yet? Are you trying to plan one for next week, or maybe even New Year's Eve? Tis the season for parties, parties and more parties, and today I've got a great appetizer/party food your guests will love and will keep you in the party, not watching from the kitchen.

I love party foods; but I especially love those that I can either make ahead of time and have waiting on me, or those that can be assembled as needed, as the night goes on, so hungry guest can easily be satisfied, without me missing out on all the fun! 

Bruschetta is one of my favorite appetizers of all time, but this time I wanted to switch it up a little and make one featuring olives instead of tomatoes. And not just every day olives, but kalamata olives! They are a little fancier in my mind, and it is the holiday season after all! 

Your guests will love the crisp bread, briny olives, and the salty nutty flavor of the Parmesan. It's a fantastic twist on a traditional bruschetta everyone will find refreshing and unique. Plus, you can make the olive mixture, keep it chilling in the fridge and then just bake off more bread as you need it, topping tray after tray all night long!

Holiday parties are meant to be enjoyed by all, and that includes the host/hostess! No where is there a rule saying if you are the "hostess with the mostess" you have to be in the kitchen all night, making sure everyone else is fed and having a good time while you miss out. Enjoy all those parties over the next couple weeks, it will be a whole year until they are here again!

Olive Bruschetta
20-24 Slices French bread or baguette about 1/4" thick
1 c. kalamata olives, pitted and chopped
2 green onions, chopped
1 garlic clove, finely minced
2 tsp. dried basil
2 tsp. dried parsley
1/4 c. olive oil, plus more for bread
1/4 c. shredded Parmesan cheese, plus extra for garnish
Salt and pepper

Preheat oven to 350. Brush both sides of bread with oil and season with salt and pepper. Place on rimmed baking sheets. Bake for 8-10 minutes, flip and bake 8-10 minutes more. (Watch carefully, these are times for my oven, but they can burn easily!)

In a medium bowl combine olive, garlic, green onions, basil, parsley, olive oil and cheese. Mix well. If not serving right away, chill. When bread is done, allow to cool. Top with olive mixture. Garnish with extra cheese.


Shared on The Country Cook Dec. 20, 2013

Appetizers at Very Good Recipes
reade more... Résuméabuiyad

Breakfast For A Crowd

Christmas morning breakfast or brunch. Is that something your family wants/needs? I will fully admit I'm relieved to know mine isn't. See, we get up super early, open presents, grab a quick bite and then head to my parents 20 minutes away, where my mom always has snacks for us before our huge meal in the afternoon. And Lord knows we don't want to be too full for it, so a big breakfast is not something I have to worry about!

But for those of you who need to plan on a big spread Christmas morning, or maybe hosting family for brunch, I've got a great recipe for you! One, it couldn't be easier. Two, it can bake in the oven while you enjoy time with the family. And three, it tastes amazing and can feed a crowd!

Plus, if you don't really like the ingredients, you can change them up to include your favorites, or even what you have on hand. But if you're up for it, I encourage you to make it as is. I love the sweet potato and spinach. Such great winter time flavors marrying in a brand new way!

Now, I'm not going to fib to you. When I tested this recipe, as is the case with most breakfast ones I do, this was a simple Sunday supper. So, keep that in mind too. If your family loves breakfast for dinner, it makes a simple weeknight meal too!

There are so many meals to be planned in the upcoming weeks. Wouldn't it be nice to know at least one is already on the menu? And the comfort of knowing you'll be starting your family's day off with something so delicious, filling and beautiful is just an added bonus!

Sweet Potato and Sausage Breakfast Casserole From Multiply Delicious
11 large eggs, beaten
3 c. fresh spinach, chopped
1 lb. breakfast sausage
1 TBS vegetable oil, optional
2 medium sweet potatoes, chopped
2 green onions, chopped, few reserved for garnish
Salt and Pepper to taste

Preheat oven to 375. Grease a 9x13 pan. In a large skillet brown sausage, drain and leave drippings. If not enough, add oil. Saute sweet potatoes until browned and tender, about 10-15 minutes. In a large bowl combine sausage, spinach, sweet potatoes and onions. Mix well. Beat eggs and season with salt and pepper. Pour spinach mixture into pan and spread evenly. Pour eggs over top. Allow to settle a couple minutes. Bake for 25-35 minutes until set. Remove and allow to sit 5 minutes before serving. Garnish with extra green onions.


Shared on The Country Cook Dec. 13, 2013

Breakfast at Very Good Recipes
Christmas morning breakfast or brunch. Is that something your family wants/needs? I will fully admit I'm relieved to know mine isn't. See, we get up super early, open presents, grab a quick bite and then head to my parents 20 minutes away, where my mom always has snacks for us before our huge meal in the afternoon. And Lord knows we don't want to be too full for it, so a big breakfast is not something I have to worry about!

But for those of you who need to plan on a big spread Christmas morning, or maybe hosting family for brunch, I've got a great recipe for you! One, it couldn't be easier. Two, it can bake in the oven while you enjoy time with the family. And three, it tastes amazing and can feed a crowd!

Plus, if you don't really like the ingredients, you can change them up to include your favorites, or even what you have on hand. But if you're up for it, I encourage you to make it as is. I love the sweet potato and spinach. Such great winter time flavors marrying in a brand new way!

Now, I'm not going to fib to you. When I tested this recipe, as is the case with most breakfast ones I do, this was a simple Sunday supper. So, keep that in mind too. If your family loves breakfast for dinner, it makes a simple weeknight meal too!

There are so many meals to be planned in the upcoming weeks. Wouldn't it be nice to know at least one is already on the menu? And the comfort of knowing you'll be starting your family's day off with something so delicious, filling and beautiful is just an added bonus!

Sweet Potato and Sausage Breakfast Casserole From Multiply Delicious
11 large eggs, beaten
3 c. fresh spinach, chopped
1 lb. breakfast sausage
1 TBS vegetable oil, optional
2 medium sweet potatoes, chopped
2 green onions, chopped, few reserved for garnish
Salt and Pepper to taste

Preheat oven to 375. Grease a 9x13 pan. In a large skillet brown sausage, drain and leave drippings. If not enough, add oil. Saute sweet potatoes until browned and tender, about 10-15 minutes. In a large bowl combine sausage, spinach, sweet potatoes and onions. Mix well. Beat eggs and season with salt and pepper. Pour spinach mixture into pan and spread evenly. Pour eggs over top. Allow to settle a couple minutes. Bake for 25-35 minutes until set. Remove and allow to sit 5 minutes before serving. Garnish with extra green onions.


Shared on The Country Cook Dec. 13, 2013

Breakfast at Very Good Recipes
reade more... Résuméabuiyad

Soul Food Saturday #25

Welcome to the first weekend of October! It's hard to believe, but in this house September was simply a blur due to how busy we were, so it kind of snuck up on me. Today Bekki has a great recipe, perfect for using the squash that is so beautiful this time of year. I can not wait to try this one myself!!


During a recent visit with my family, we were all completely engaged in our conversation until Rachael came back from commercial. As soon as she was back on we were glued to the TV waiting for her to reveal the recipe we had just heard her mention. Double stuffed Butternut squash! What? Yes! Just like a twice baked potato, loaded to the heavens with bacon and cheeses. How could to be bad? Of course it had my name written all over it. I had to try it as soon as I could get a hold of a butternut squash. But…to my dismay the recipe had been removed from her fan page, and seemed to have disappeared forever. With that thought still in my head and a butternut squash in hand my recipe was born. Just before writing this I did a search for her recipe and found it! Thank you Internet angels! I hope you enjoy this as much as I did. I never imagined it could really be THIS good! Enjoy!
 
 
Double Stuffed Butternut Squash Adapted from Rachael Ray
 2 Butternut squash
12 slices thick cut bacon
3 green onions, chopped
1 c. ricotta cheese
1 c. cheddar cheese blend
1 tsp. granulated garlic
Salt and pepper to taste
 
 
Preheat oven to 425 degrees. Place bacon slices on a slotted pan, bake until crisp. Remove and chop. Set aside. Cut squash in half lengthwise. Scoop out the seeds and season with salt and pepper. Place flesh side down in a baking dish. Roast until just tender. About 30 minutes. Carefully scoop the flesh into a bowl, keeping the skin intact. Mash with half of bacon, ¾ c. cheddar, ricotta and garlic. Adjust seasoning by adding additional salt and pepper if needed. Add filling back into skins and top with remaining cheddar. Bake until golden. Garnish with remaining bacon and chopped green onions.


Welcome to the first weekend of October! It's hard to believe, but in this house September was simply a blur due to how busy we were, so it kind of snuck up on me. Today Bekki has a great recipe, perfect for using the squash that is so beautiful this time of year. I can not wait to try this one myself!!


During a recent visit with my family, we were all completely engaged in our conversation until Rachael came back from commercial. As soon as she was back on we were glued to the TV waiting for her to reveal the recipe we had just heard her mention. Double stuffed Butternut squash! What? Yes! Just like a twice baked potato, loaded to the heavens with bacon and cheeses. How could to be bad? Of course it had my name written all over it. I had to try it as soon as I could get a hold of a butternut squash. But…to my dismay the recipe had been removed from her fan page, and seemed to have disappeared forever. With that thought still in my head and a butternut squash in hand my recipe was born. Just before writing this I did a search for her recipe and found it! Thank you Internet angels! I hope you enjoy this as much as I did. I never imagined it could really be THIS good! Enjoy!
 
 
Double Stuffed Butternut Squash Adapted from Rachael Ray
 2 Butternut squash
12 slices thick cut bacon
3 green onions, chopped
1 c. ricotta cheese
1 c. cheddar cheese blend
1 tsp. granulated garlic
Salt and pepper to taste
 
 
Preheat oven to 425 degrees. Place bacon slices on a slotted pan, bake until crisp. Remove and chop. Set aside. Cut squash in half lengthwise. Scoop out the seeds and season with salt and pepper. Place flesh side down in a baking dish. Roast until just tender. About 30 minutes. Carefully scoop the flesh into a bowl, keeping the skin intact. Mash with half of bacon, ¾ c. cheddar, ricotta and garlic. Adjust seasoning by adding additional salt and pepper if needed. Add filling back into skins and top with remaining cheddar. Bake until golden. Garnish with remaining bacon and chopped green onions.


reade more... Résuméabuiyad

Healthier Take Out Fake Out {A Review of San-J Sauces}

I love making our favorite take out dishes at home, using ingredients that I know exactly where they came from and exactly what is in them. And now I can do that easier, with a little help from my friends at San-J.

San-J is dedicated to manufacturing premium Tamari soy sauce and quality Asian inspired products. Their Mongolian Cooking Sauce is the perfect blend of sweet and savory, and works equally well with beef, chicken, shrimp or tofu. It's made from their Tamari sauce, containing 100% soybeans and no wheat content. Plus, it's certified gluten free and verified Non-GMO. It's great tasting and includes no guilt!


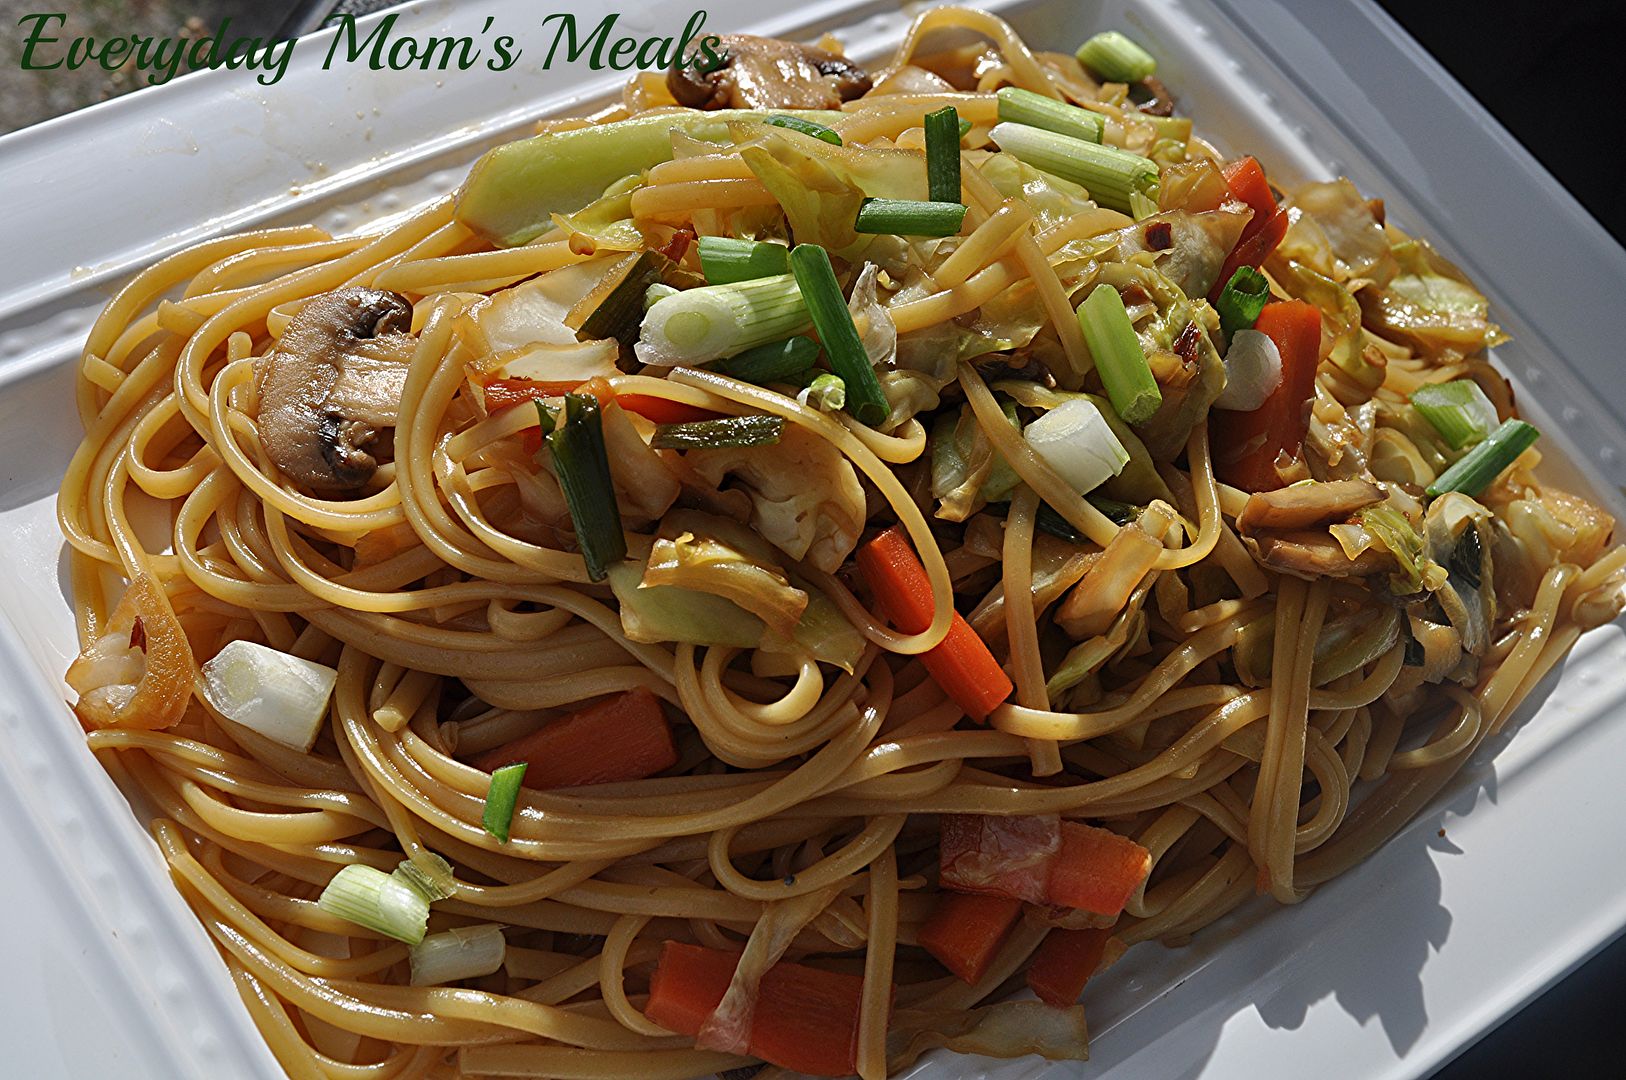
When I found this recipe on their website, I couldn't wait to try it. My favorite Asian take out treat is noodles, with meat, veggies, or both, in a sweet sauce, covering every bite! And these reminded me of those with every ingredient.

If you enjoy Asian food, and really love making it at home, you need to try San-J products today. They will give you the flavor and deliciousness you are looking for, without wondering what you are putting into your body. And if you're looking for a new side dish, try these noodles tonight!

Mongolian Noodles Adapted from San-J
1 lb. linguine, cooked and drained
8 oz. button mushrooms, sliced
1 bunch green onions, chopped, few reserved for garnish
2 medium carrots, jullienned
3 TBS vegetable oil
1 small head cabbage, sliced thin
1/2 tsp. red pepper flakes
1/2 c. San-J Mongolian Sauce

While pasta cooks, in a large skillet heat vegetable oil over medium heat. Add mushrooms and carrots. Cook for 5-7 minutes until mushrooms are brown and soft. Add red pepper flakes, cabbage and green onions. Saute for 5 minutes until cabbage begins to wilt. Add cooking sauce. Bring to a boil. Reduce heat to low and simmer for 2-3 minutes until slightly thickened. When pasta is cooked, drain well. Put in a large bowl. Add veggie and sauce mixture. Stir well to combine. Garnish with remaining green onions.


Shared on The Country Cook Oct. 4, 2013
Asian at Very Good Recipes

*Disclaimer* I was provided with free product for this review. All thoughts and opinions are my own.
I love making our favorite take out dishes at home, using ingredients that I know exactly where they came from and exactly what is in them. And now I can do that easier, with a little help from my friends at San-J.

San-J is dedicated to manufacturing premium Tamari soy sauce and quality Asian inspired products. Their Mongolian Cooking Sauce is the perfect blend of sweet and savory, and works equally well with beef, chicken, shrimp or tofu. It's made from their Tamari sauce, containing 100% soybeans and no wheat content. Plus, it's certified gluten free and verified Non-GMO. It's great tasting and includes no guilt!


When I found this recipe on their website, I couldn't wait to try it. My favorite Asian take out treat is noodles, with meat, veggies, or both, in a sweet sauce, covering every bite! And these reminded me of those with every ingredient.

If you enjoy Asian food, and really love making it at home, you need to try San-J products today. They will give you the flavor and deliciousness you are looking for, without wondering what you are putting into your body. And if you're looking for a new side dish, try these noodles tonight!

Mongolian Noodles Adapted from San-J
1 lb. linguine, cooked and drained
8 oz. button mushrooms, sliced
1 bunch green onions, chopped, few reserved for garnish
2 medium carrots, jullienned
3 TBS vegetable oil
1 small head cabbage, sliced thin
1/2 tsp. red pepper flakes
1/2 c. San-J Mongolian Sauce

While pasta cooks, in a large skillet heat vegetable oil over medium heat. Add mushrooms and carrots. Cook for 5-7 minutes until mushrooms are brown and soft. Add red pepper flakes, cabbage and green onions. Saute for 5 minutes until cabbage begins to wilt. Add cooking sauce. Bring to a boil. Reduce heat to low and simmer for 2-3 minutes until slightly thickened. When pasta is cooked, drain well. Put in a large bowl. Add veggie and sauce mixture. Stir well to combine. Garnish with remaining green onions.


Shared on The Country Cook Oct. 4, 2013
Asian at Very Good Recipes

*Disclaimer* I was provided with free product for this review. All thoughts and opinions are my own.
reade more... Résuméabuiyad

Another Hooiser Blogger

This blogging community I belong to is so wide, so varied, and so big I never have to look far to find something new I want to try in my kitchen. I love introducing ya'll to bloggers I love to read, and maybe ones you aren't familiar with yet, especially when it's a fellow Hooiser!

That's right, my good buddy Cris over at Goodeness Gracious, lives right here in Indiana, and blogs about her life, food, her family...her site really is a one stop shop for all things GOODe! 

A couple weeks ago her and I were talking about the "good ole' days" of blogging, before we really knew what we were doing, and how we wished we could go back and fix some of the photos are young blogger selves took. (I've actually been doing this all year long. You know, those recipes I've re-blogged from the days when only Adam and my mom read EMM!) What can I say? You live and learn, and in the early days of food photography, you're just happy to get a shot, and not really worried about what it looks like. She shared this recipe with me as an example of her early days, and honestly, I wasn't even looking at the photo after seeing the food! Oh my blog! It sounded fan-freakin-tastic, and she actually described it as the BEST chicken EVER. With a description like that, and how much I love chicken on the grill, you know I had to try it. (Oh, and if you click on the link above, you can see Cris's original post she was telling me about, but don't be critical, remember she was a young food blogger!) 

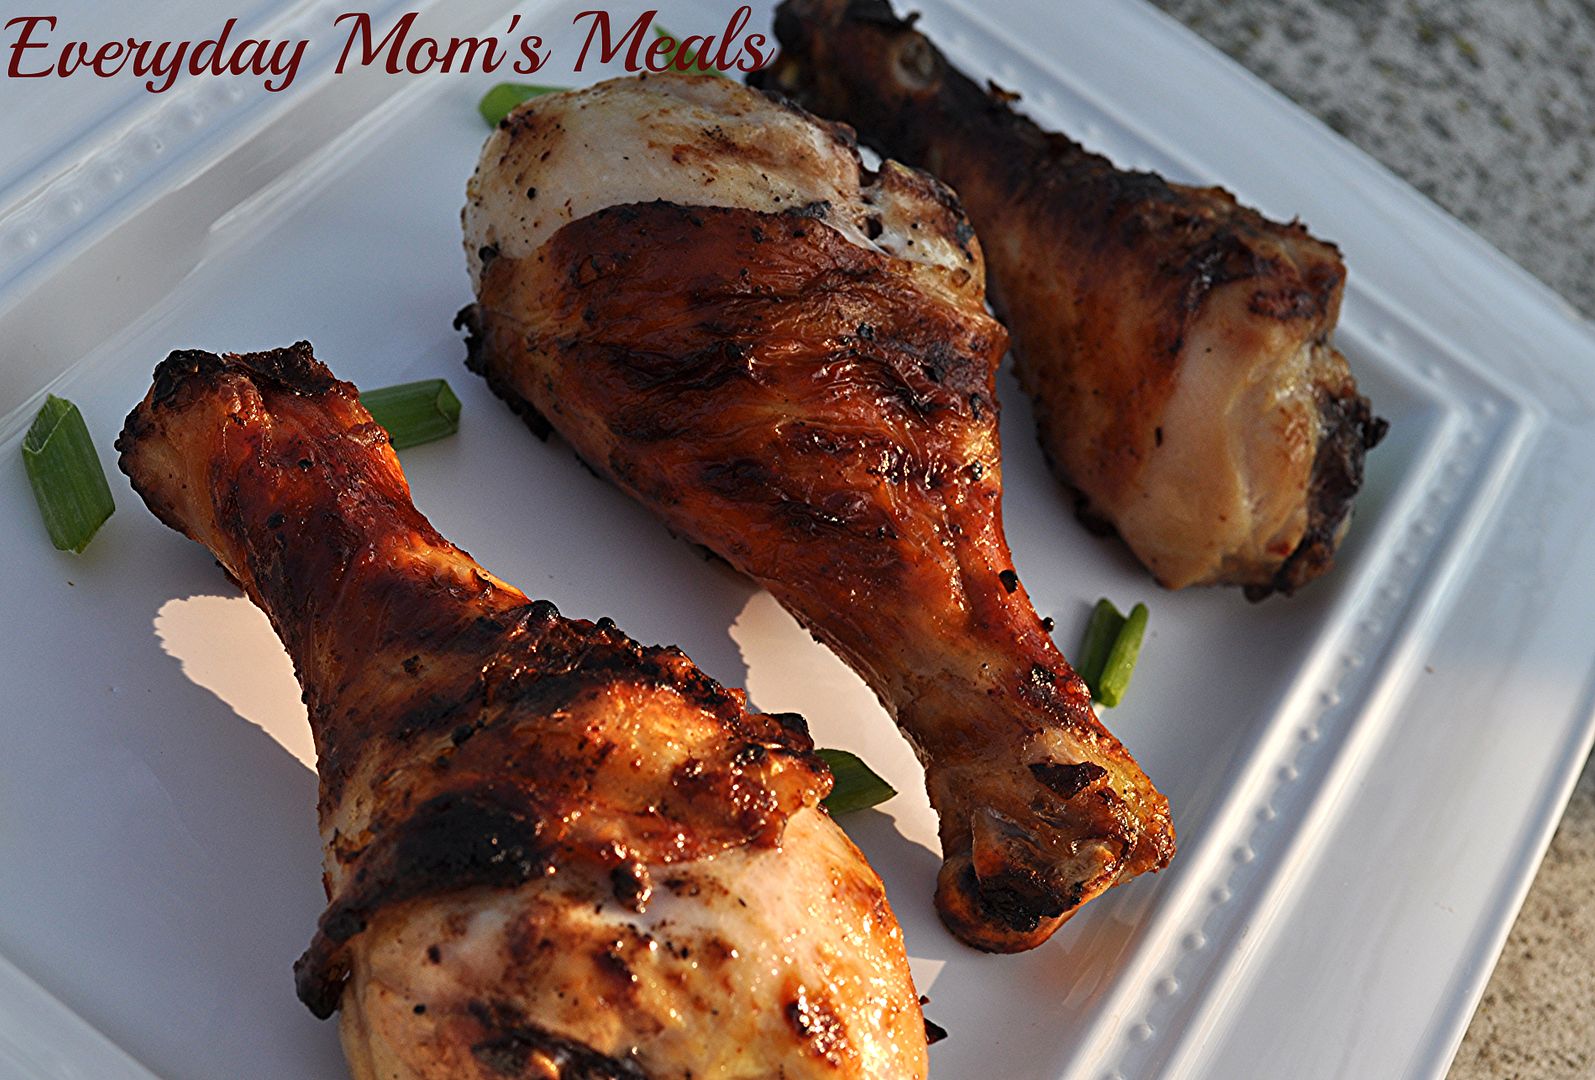
We grill year round, but if you're grilling season is winding down, do NOT let it close without making this! The marinade is so flavorful, and the chicken itself is juicy, tender and exactly what you want from grilled meat! And for those looking at it thinking "Oh, can I take the skin off?" You can, I'm not going to know, but I'm going to warn you, the skin is what absorbs the huge flavor of the marinade, gets crispy on the grill and makes this extra finger lickin'. But I realize it's not everyone's cup of tea, and I'm sure it would be delicious either way! 

If you aren't a reader of Cris's blog yet, I highly encourage you to become one. She always has something yummy cooking in her kitchen. We Hoosiers gotta stick together, and share some chicken when we can!


Grilled Beer and Mustard Chicken Inspired by Goodeness Gracious
10 chicken drumsticks, skin trimmed, but left on
1 (16 oz.) bottle beer (I used Bud Light)
1 bunch green onions, chopped
1/4 c. spicy brown mustard
1 TBS hot sauce
2 TBS Worcestershire sauce
1 1/2 TBS grill seasoning
4 cloves garlic, minced 
Cooking Spray for grilling

In a large bowl combine beer, onions, mustard, hot sauce, Worcestershire, garlic and grill seasoning. Mix well. Add chicken. Toss to coat. Cover and marinade in fridge or 6 hours. When ready preheat grill to high. Spray with cooking spray. Place chicken on grill to sear, about 2 minutes. Reduce heat to medium and continue cooking, turning every 5 minutes for 25-30 minutes until juices run clear. 


Shared on The Counry Cook Sept. 13, 2013
Chicken at Very Good Recipes
This blogging community I belong to is so wide, so varied, and so big I never have to look far to find something new I want to try in my kitchen. I love introducing ya'll to bloggers I love to read, and maybe ones you aren't familiar with yet, especially when it's a fellow Hooiser!

That's right, my good buddy Cris over at Goodeness Gracious, lives right here in Indiana, and blogs about her life, food, her family...her site really is a one stop shop for all things GOODe! 

A couple weeks ago her and I were talking about the "good ole' days" of blogging, before we really knew what we were doing, and how we wished we could go back and fix some of the photos are young blogger selves took. (I've actually been doing this all year long. You know, those recipes I've re-blogged from the days when only Adam and my mom read EMM!) What can I say? You live and learn, and in the early days of food photography, you're just happy to get a shot, and not really worried about what it looks like. She shared this recipe with me as an example of her early days, and honestly, I wasn't even looking at the photo after seeing the food! Oh my blog! It sounded fan-freakin-tastic, and she actually described it as the BEST chicken EVER. With a description like that, and how much I love chicken on the grill, you know I had to try it. (Oh, and if you click on the link above, you can see Cris's original post she was telling me about, but don't be critical, remember she was a young food blogger!) 

We grill year round, but if you're grilling season is winding down, do NOT let it close without making this! The marinade is so flavorful, and the chicken itself is juicy, tender and exactly what you want from grilled meat! And for those looking at it thinking "Oh, can I take the skin off?" You can, I'm not going to know, but I'm going to warn you, the skin is what absorbs the huge flavor of the marinade, gets crispy on the grill and makes this extra finger lickin'. But I realize it's not everyone's cup of tea, and I'm sure it would be delicious either way! 

If you aren't a reader of Cris's blog yet, I highly encourage you to become one. She always has something yummy cooking in her kitchen. We Hoosiers gotta stick together, and share some chicken when we can!


Grilled Beer and Mustard Chicken Inspired by Goodeness Gracious
10 chicken drumsticks, skin trimmed, but left on
1 (16 oz.) bottle beer (I used Bud Light)
1 bunch green onions, chopped
1/4 c. spicy brown mustard
1 TBS hot sauce
2 TBS Worcestershire sauce
1 1/2 TBS grill seasoning
4 cloves garlic, minced 
Cooking Spray for grilling

In a large bowl combine beer, onions, mustard, hot sauce, Worcestershire, garlic and grill seasoning. Mix well. Add chicken. Toss to coat. Cover and marinade in fridge or 6 hours. When ready preheat grill to high. Spray with cooking spray. Place chicken on grill to sear, about 2 minutes. Reduce heat to medium and continue cooking, turning every 5 minutes for 25-30 minutes until juices run clear. 


Shared on The Counry Cook Sept. 13, 2013
Chicken at Very Good Recipes
reade more... Résuméabuiyad

Doesn't Get Fresher

Having a big barbecue this Labor Day weekend? Have fresh veggies from the garden you would like to use? How about a cool, creamy, crunchy and most of all flavorful salad you and your guests will love? Your everyday mom is here with the perfect idea!

I love summer for so many reasons, too many to even list, but the foodie in me loves being able to eat foods we grow ourselves in our backyard. Or should I say, foods my boys grow in our backyard. Because besides picking them, I don't have much to do with it. It's better that way. My thumbs are not green in any way!

But when they come inside with a big bowl filled with beautiful tomatoes, cucumbers, blackberries, grapes, etc...that's when it's my job to find ways to use them all in a yummy, and sometimes new way.

When I first saw this recipe, it reminded me of other creamy veggie salads I've made in the past, except for one thing: the radishes. We are huge radish fans. Even little man loves them, so I was happy to find a new way to use them. Plus, I loved the use of lemon and seasoning salt in the dressing. They really took the basic sour cream dressing and took it to a whole other flavor level. Oh, and I have to tell you, I was extremely pleased with it's consistency after sitting in the fridge for a few hours. The vegetables were still crisp, not mushy at all.

Since we're going into the "last weekend of summer" (the quotations are because I don't consider it to be, but I know society says different) there is no better time than to head outside, fire up the grill, invite friends and family over, and enjoy a backyard bash. And this salad would be great with anything you're pulling off the fire. Enjoy summer's bounty while you still can because it doesn't get fresher, and in about 3 months when we're knee deep in snow, we will be missing it profusely!

Creamy Vegetable Salad Adapted From Taste of Home
2 large tomatoes, seeded and chopped
2 large cucumbers, seeded and chopped
3-4 green onions, chopped, reserve a few for garnish
6 radishes, finely chopped
1 c. sour cream
1/2 tsp. seasoning salt
1/8 c. lemon juice
1/4 tsp. pepper
1/2 tsp. celery seed, extra for garnish

In a large bowl combine tomatoes, cucumbers, green onions, and radishes. Toss to combine. In a small bowl whisk together sour cream, seasoning salt, lemon juice, pepper and celery seed. Pour over veggies. Mix well. Cover and refrigerate at least 2 hours. Serve with a slotted spoon.


Shared on The Country Cook Aug. 30, 2013
Salad at Very Good Recipes
Having a big barbecue this Labor Day weekend? Have fresh veggies from the garden you would like to use? How about a cool, creamy, crunchy and most of all flavorful salad you and your guests will love? Your everyday mom is here with the perfect idea!

I love summer for so many reasons, too many to even list, but the foodie in me loves being able to eat foods we grow ourselves in our backyard. Or should I say, foods my boys grow in our backyard. Because besides picking them, I don't have much to do with it. It's better that way. My thumbs are not green in any way!

But when they come inside with a big bowl filled with beautiful tomatoes, cucumbers, blackberries, grapes, etc...that's when it's my job to find ways to use them all in a yummy, and sometimes new way.

When I first saw this recipe, it reminded me of other creamy veggie salads I've made in the past, except for one thing: the radishes. We are huge radish fans. Even little man loves them, so I was happy to find a new way to use them. Plus, I loved the use of lemon and seasoning salt in the dressing. They really took the basic sour cream dressing and took it to a whole other flavor level. Oh, and I have to tell you, I was extremely pleased with it's consistency after sitting in the fridge for a few hours. The vegetables were still crisp, not mushy at all.

Since we're going into the "last weekend of summer" (the quotations are because I don't consider it to be, but I know society says different) there is no better time than to head outside, fire up the grill, invite friends and family over, and enjoy a backyard bash. And this salad would be great with anything you're pulling off the fire. Enjoy summer's bounty while you still can because it doesn't get fresher, and in about 3 months when we're knee deep in snow, we will be missing it profusely!

Creamy Vegetable Salad Adapted From Taste of Home
2 large tomatoes, seeded and chopped
2 large cucumbers, seeded and chopped
3-4 green onions, chopped, reserve a few for garnish
6 radishes, finely chopped
1 c. sour cream
1/2 tsp. seasoning salt
1/8 c. lemon juice
1/4 tsp. pepper
1/2 tsp. celery seed, extra for garnish

In a large bowl combine tomatoes, cucumbers, green onions, and radishes. Toss to combine. In a small bowl whisk together sour cream, seasoning salt, lemon juice, pepper and celery seed. Pour over veggies. Mix well. Cover and refrigerate at least 2 hours. Serve with a slotted spoon.


Shared on The Country Cook Aug. 30, 2013
Salad at Very Good Recipes
reade more... Résuméabuiyad

Perfect (Asian) Side Dish

When I plan an Asian inspired meal, sometimes the main dish is just the beginning. I want sides that match the "star" of the meal in deliciousness, bite for bite. And sometimes, that is a challenge in itself. Not because I can't find anything to make, but because I find myself making the same things over and over because we enjoy them so much. So when can take something I know we love, like noodles, and switch them up a little bit with a new recipe, I am almost insured a success.

I have never had Thai food, but I've been wanting to try it for quite some time now. And one of the things I hear about over and over in Thai cuisine are "peanut noodles." But usual, those two words are preceded by another which doesn't go well into my vocabulary....spicy. I've shared with you before how Mr. Everyday loves spicy food. In fact the hotter, the better. And yes, Little Everyday definitely inherited the "hot" gene from his Daddy. Which is funny because Adam inherited it from his grandpa, so I guess the tradition lives on. But mama just can't handle it...at all!

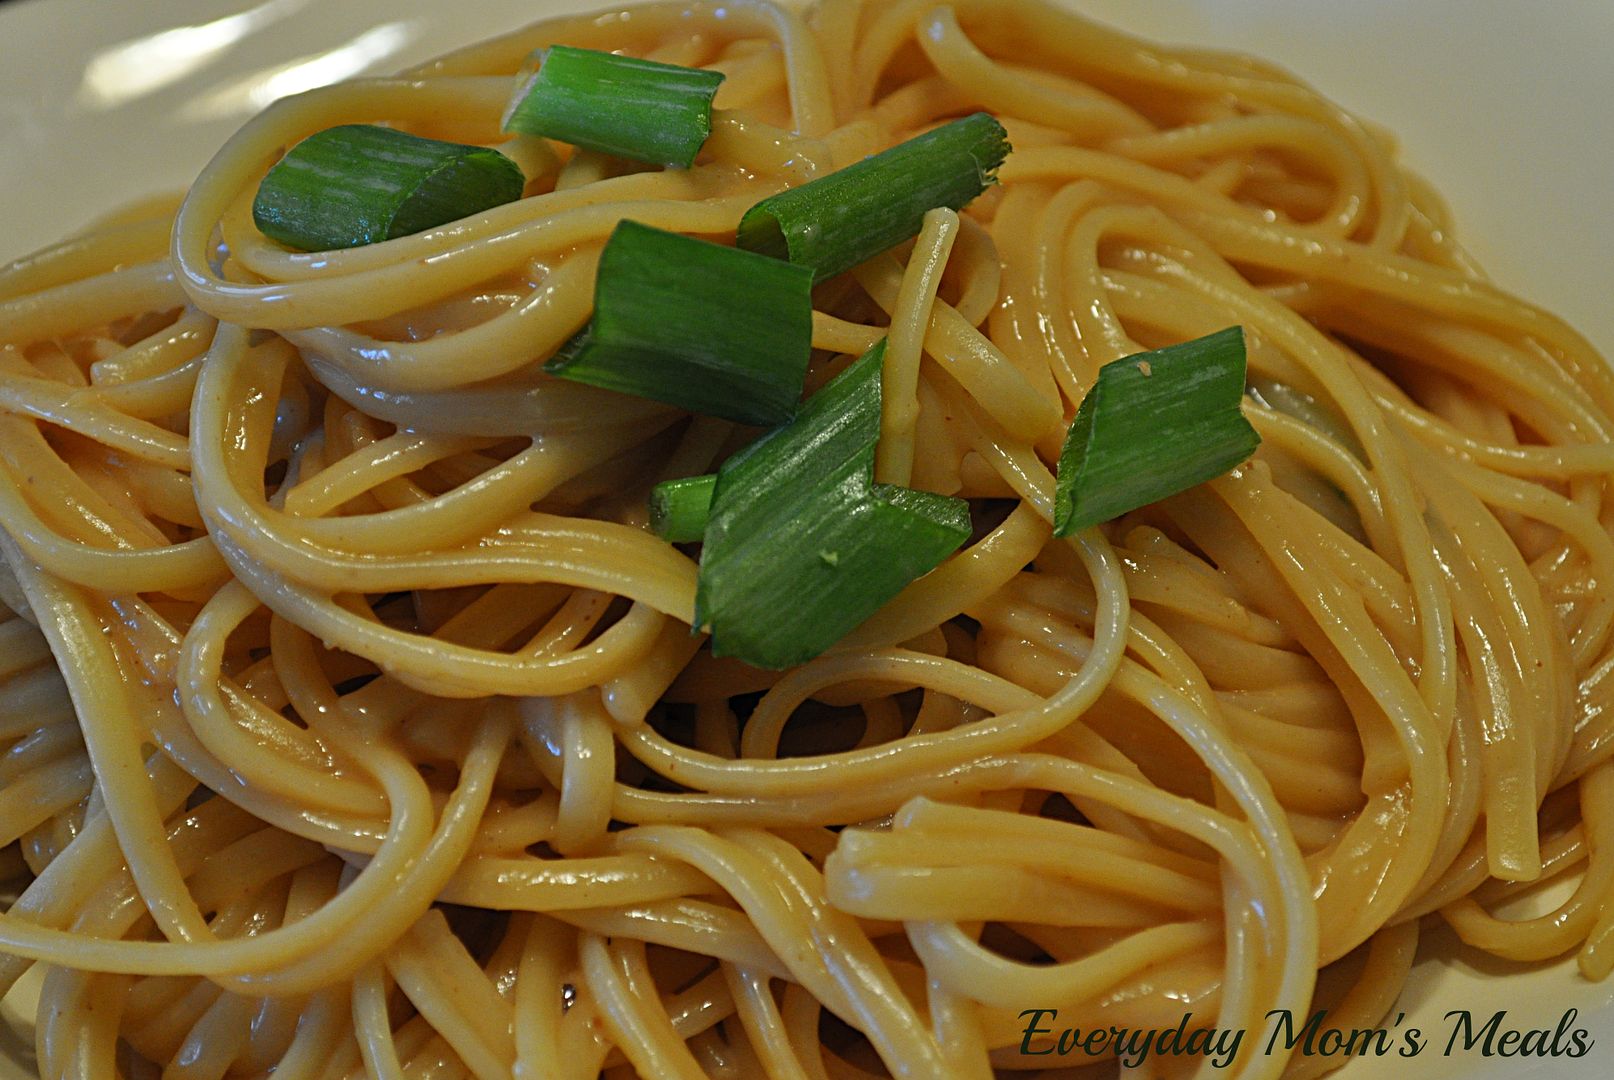
So you can understand how excited I was when I found a peanut noodle recipe that in no way included the word spicy, or after looking at the ingredient list, anything that could even be considered spicy! This recipe couldn't be easier. We're talking boiling water, stirring pasta, making a quick sauce and wah-lah...a side dish is born.

If your family loves Asian food, I know they will adore these noodles. Such great flavor, and the perfect compliment to any Asian inspired meal!

Easy Peanut Noodles Adapted from Food Network
12 oz. linguine, cooked and drained
1/4 c. creamy peanut butter
2 TBS rice vinegar
3 TBS soy sauce
1 TBS vegetable oil
1 TBS honey
1 TBS grated fresh ginger
4 green onions, chopped on a diagonal, a few left for garnish

While pasta is cooking, add peanut butter to medium glass bowl. Microwave for 15 seconds until soft. Whisk in vinegar, soy, oil, honey and ginger. Mix until well combined. Before draining pasta, add 2 TBS starchy cooking water to peanut sauce. (It should be thick but pourable) Stir well. Add noodles to a large bowl. Add green onions. Pour sauce over. Combine well, coating all noodles with sauce. Garnish with green onions. Serve warm, room temp or cold!
*NOTE* When measuring ingredients, use the same TBS for the oil, and then the honey, it will slide right out!


Shared on Make Ahead Meals Apr. 22, 2013
Shared on Mandy's Recipe Box Apr. 23. 2013
Shared on Lady Behind The Curtain Apr. 24, 2013
Shared on Miz Helen's Country Cottage Apr. 25, 2013
Shared on The Country Cook Apr. 26, 2013
Asian at Very Good Recipes
Pin It
When I plan an Asian inspired meal, sometimes the main dish is just the beginning. I want sides that match the "star" of the meal in deliciousness, bite for bite. And sometimes, that is a challenge in itself. Not because I can't find anything to make, but because I find myself making the same things over and over because we enjoy them so much. So when can take something I know we love, like noodles, and switch them up a little bit with a new recipe, I am almost insured a success.

I have never had Thai food, but I've been wanting to try it for quite some time now. And one of the things I hear about over and over in Thai cuisine are "peanut noodles." But usual, those two words are preceded by another which doesn't go well into my vocabulary....spicy. I've shared with you before how Mr. Everyday loves spicy food. In fact the hotter, the better. And yes, Little Everyday definitely inherited the "hot" gene from his Daddy. Which is funny because Adam inherited it from his grandpa, so I guess the tradition lives on. But mama just can't handle it...at all!

So you can understand how excited I was when I found a peanut noodle recipe that in no way included the word spicy, or after looking at the ingredient list, anything that could even be considered spicy! This recipe couldn't be easier. We're talking boiling water, stirring pasta, making a quick sauce and wah-lah...a side dish is born.

If your family loves Asian food, I know they will adore these noodles. Such great flavor, and the perfect compliment to any Asian inspired meal!

Easy Peanut Noodles Adapted from Food Network
12 oz. linguine, cooked and drained
1/4 c. creamy peanut butter
2 TBS rice vinegar
3 TBS soy sauce
1 TBS vegetable oil
1 TBS honey
1 TBS grated fresh ginger
4 green onions, chopped on a diagonal, a few left for garnish

While pasta is cooking, add peanut butter to medium glass bowl. Microwave for 15 seconds until soft. Whisk in vinegar, soy, oil, honey and ginger. Mix until well combined. Before draining pasta, add 2 TBS starchy cooking water to peanut sauce. (It should be thick but pourable) Stir well. Add noodles to a large bowl. Add green onions. Pour sauce over. Combine well, coating all noodles with sauce. Garnish with green onions. Serve warm, room temp or cold!
*NOTE* When measuring ingredients, use the same TBS for the oil, and then the honey, it will slide right out!


Shared on Make Ahead Meals Apr. 22, 2013
Shared on Mandy's Recipe Box Apr. 23. 2013
Shared on Lady Behind The Curtain Apr. 24, 2013
Shared on Miz Helen's Country Cottage Apr. 25, 2013
Shared on The Country Cook Apr. 26, 2013
Asian at Very Good Recipes
Pin It
reade more... Résuméabuiyad

Okay, So Maybe It's A Small Problem

A couple days ago I told you about the recent oven issues at our house. In fact, I included that fact that this dilemma was "no problem" in the title of my last post. Well, guess what...when baked enchiladas are on the menu...it becomes a problem, and a big one, very quickly. 

Yep, that was me. Never thinking about the fact that I was supposed to be baking our supper, until it was too late. Almost. Thank goodness I'm a planner. In this case, I was trying to figure out how long said enchiladas would have to cook and what time I would need to put them in the oven in order to be done for Alex to eat before Taekwondo. That's when the light bulb went off. "Um, hello Remember...your oven doesn't heat. Going to be kinda hard isn't it?" 

So it was time to improvise, and quickly. The filling for the enchiladas could easily be used in a different dish, along with the soft tortillas. I was actually headed to the grocery store when this brainstorm happened, so I picked up a couple extra ingredients and started concocting this dish in my mind. By the time supper rolled around, I had a plan of action. Whew....crisis averted. 

Boy am I glad I can think on my feet. These were a huge hit with all of us! They are great because you can change them to fit everyone's tastes. Use my version as a starting platform. The flavor combinations are endless!  Now, as a note, the amounts of the ingredients I'm giving you would make 4 total, and we could only eat one each, so they are economical too! 

Having an oven that doesn't heat is indeed not "no problem at all". But at least it's giving me an opportunity to become crafty in creating new things to share with all of you.

Mexi-Stacks
12 six inch flour tortillas
8 corn tostada shells
1 (15 oz.) can refried beans
1 lb. ground beef
1/2 c. picante sauce
8 oz. sharp cheddar cheese
4 green onions, chopped
Sour cream, optional

In a large skillet, brown meat and drain if necessary. Add picante sauce and 1 c. cheese. Stir until well combined. Remove and set aside. Wipe out skillet. Place beans in a bowl and microwave two minutes to soften. Starting with a flour tortilla, spread with beans. Set tostada shell on. Sprinkle with cheese. Add about 2 TBS meat mixture. Sprinkle with more cheese. Spread another tostada shell with beans and add it bean side down. Sprinkle with cheese, add more meat and onions. Spread beans on another flour tortilla and place it bean side down. Repeat until you have 4 stacks. Spray skillet with non stick spray and carefully brown stacks on both sides for about 2 minutes per side. (Use a large flat spatula to move them to and from the skillet) Top with extra picante and sour cream if desired.


Shared on Mandy's Recipe Box Apr. 10, 2013
Shared on Lady Behind The Curtain Apr. 10, 2013
Shared on Miz Helen's Country Cottage Apr. 11, 2013
Shared on The Country Cook Apr. 12, 2013
Mexican at Very Good Recipes
Pin It
A couple days ago I told you about the recent oven issues at our house. In fact, I included that fact that this dilemma was "no problem" in the title of my last post. Well, guess what...when baked enchiladas are on the menu...it becomes a problem, and a big one, very quickly. 

Yep, that was me. Never thinking about the fact that I was supposed to be baking our supper, until it was too late. Almost. Thank goodness I'm a planner. In this case, I was trying to figure out how long said enchiladas would have to cook and what time I would need to put them in the oven in order to be done for Alex to eat before Taekwondo. That's when the light bulb went off. "Um, hello Remember...your oven doesn't heat. Going to be kinda hard isn't it?" 

So it was time to improvise, and quickly. The filling for the enchiladas could easily be used in a different dish, along with the soft tortillas. I was actually headed to the grocery store when this brainstorm happened, so I picked up a couple extra ingredients and started concocting this dish in my mind. By the time supper rolled around, I had a plan of action. Whew....crisis averted. 

Boy am I glad I can think on my feet. These were a huge hit with all of us! They are great because you can change them to fit everyone's tastes. Use my version as a starting platform. The flavor combinations are endless!  Now, as a note, the amounts of the ingredients I'm giving you would make 4 total, and we could only eat one each, so they are economical too! 

Having an oven that doesn't heat is indeed not "no problem at all". But at least it's giving me an opportunity to become crafty in creating new things to share with all of you.

Mexi-Stacks
12 six inch flour tortillas
8 corn tostada shells
1 (15 oz.) can refried beans
1 lb. ground beef
1/2 c. picante sauce
8 oz. sharp cheddar cheese
4 green onions, chopped
Sour cream, optional

In a large skillet, brown meat and drain if necessary. Add picante sauce and 1 c. cheese. Stir until well combined. Remove and set aside. Wipe out skillet. Place beans in a bowl and microwave two minutes to soften. Starting with a flour tortilla, spread with beans. Set tostada shell on. Sprinkle with cheese. Add about 2 TBS meat mixture. Sprinkle with more cheese. Spread another tostada shell with beans and add it bean side down. Sprinkle with cheese, add more meat and onions. Spread beans on another flour tortilla and place it bean side down. Repeat until you have 4 stacks. Spray skillet with non stick spray and carefully brown stacks on both sides for about 2 minutes per side. (Use a large flat spatula to move them to and from the skillet) Top with extra picante and sour cream if desired.


Shared on Mandy's Recipe Box Apr. 10, 2013
Shared on Lady Behind The Curtain Apr. 10, 2013
Shared on Miz Helen's Country Cottage Apr. 11, 2013
Shared on The Country Cook Apr. 12, 2013
Mexican at Very Good Recipes
Pin It
reade more... Résuméabuiyad

No Oven? No problem!

Yep, that's right. This food blogger had the unthinkable happen a couple weeks ago. I turned the oven to bake, set the temp for 350 and 15 minutes when I went back to pop in the baking tray of scones....it was still ice cold. After much inspection Mr. Everyday determined it was probably the ignitor and would indeed need replaced. 

Well, not only did I not get to bake those scones, but I immediately started to think about the week's upcoming meals and just what I would need to adapt. Luckily I only had 2 things that were going to need the oven over the next few days, but of course one of those was that evening. Talk about no time to prepare! But I guess in adversity your brain starts to find ways to adjust and sometimes those brainstorms can lead to new possibilities, and in this case, delicious things!

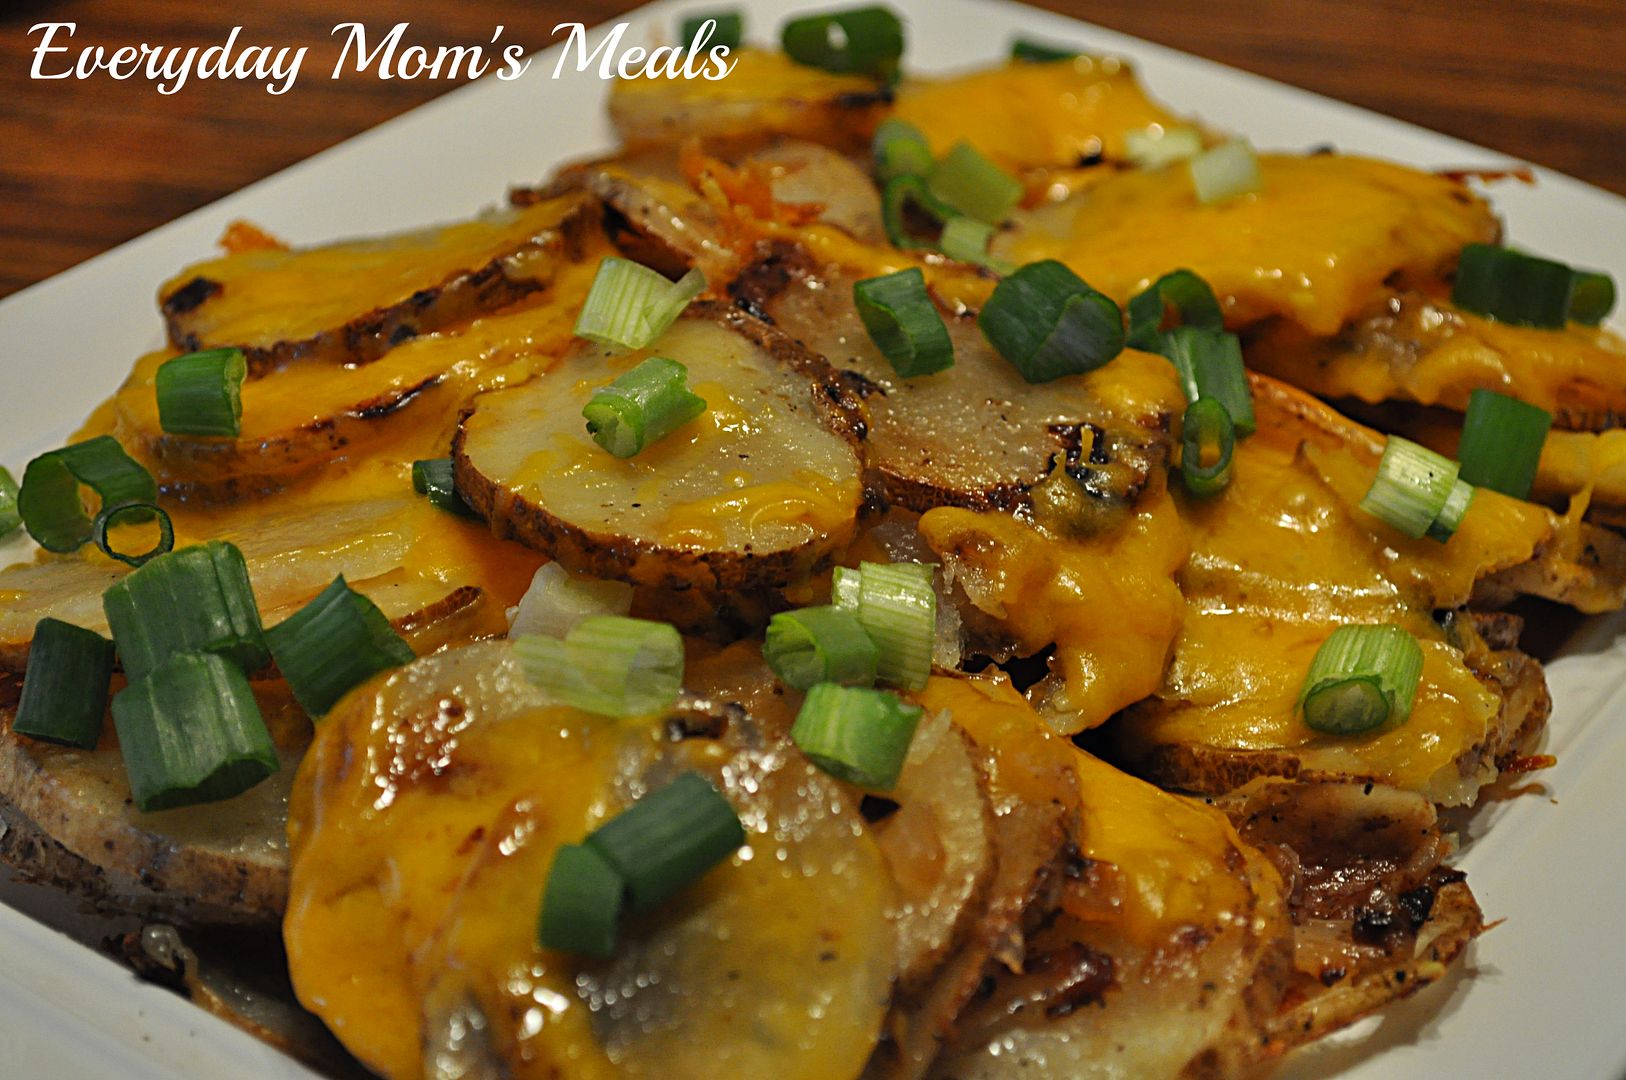
So what started out as a new roasted potato recipe quickly became this incredible skillet potato dish. These would be absolutely perfect for breakfast, brunch or dinner! They go just as well with eggs as they do sandwiches. (In fact, I served them with BLTs!) They can easily be changed to fit your family's favorite flavors. Not to mention, they allowed me to use one of my new favorite kitchen gadgets, the mandolin

If someone from GE, Sears or Frigidaire happens to be reading this and would like to donate a hard working food blogger a new oven, she would forever be grateful and find you a very nice advertising space! HA HA HA But in the mean time, I'm going to keep cooking away, finding new ways to use other kitchen appliances. I wonder what I can do with the dishwasher???!!! Just kidding....


Skillet Cheesy Potatoes
3 large Russet potatoes, scrubbed and dried (figure 1 potato per person)
1 c. sharp cheddar cheese
1 small yellow onion, finely chopped
Salt and Pepper to taste
2 TBS vegetable oil
1 green onion, chopped

Heat oil to medium in a large nonstick skillet. Using a mandolin or very sharp knife slice potatoes about 1/4" thick. Add onion to oil and saute for 3 minutes until soft. Add potatoes, season with salt/pepper and saute, while stirring for 5-6 minutes. Cover and reduce heat to medium low. Cook 20-25 minutes until tender, stirring often. Sprinkle with cheese and replace lid. Turn heat off. Allow cheese to melt, about 5 minutes. Remove to platter and garnish with green onions. 


Shared on Make Ahead Meals Apr. 8, 2013
Shared on Mandy's Recipe Box Apr. 10, 2013
Shared on Lady Behind The Curtain Apr. 10, 2013
Shared on Miz Helen's Country Cottage Apr. 11, 2013
Shared on The Country Cook Apr. 12, 2013
Potatoes at Very Good Recipes
Pin It
Yep, that's right. This food blogger had the unthinkable happen a couple weeks ago. I turned the oven to bake, set the temp for 350 and 15 minutes when I went back to pop in the baking tray of scones....it was still ice cold. After much inspection Mr. Everyday determined it was probably the ignitor and would indeed need replaced. 

Well, not only did I not get to bake those scones, but I immediately started to think about the week's upcoming meals and just what I would need to adapt. Luckily I only had 2 things that were going to need the oven over the next few days, but of course one of those was that evening. Talk about no time to prepare! But I guess in adversity your brain starts to find ways to adjust and sometimes those brainstorms can lead to new possibilities, and in this case, delicious things!

So what started out as a new roasted potato recipe quickly became this incredible skillet potato dish. These would be absolutely perfect for breakfast, brunch or dinner! They go just as well with eggs as they do sandwiches. (In fact, I served them with BLTs!) They can easily be changed to fit your family's favorite flavors. Not to mention, they allowed me to use one of my new favorite kitchen gadgets, the mandolin

If someone from GE, Sears or Frigidaire happens to be reading this and would like to donate a hard working food blogger a new oven, she would forever be grateful and find you a very nice advertising space! HA HA HA But in the mean time, I'm going to keep cooking away, finding new ways to use other kitchen appliances. I wonder what I can do with the dishwasher???!!! Just kidding....


Skillet Cheesy Potatoes
3 large Russet potatoes, scrubbed and dried (figure 1 potato per person)
1 c. sharp cheddar cheese
1 small yellow onion, finely chopped
Salt and Pepper to taste
2 TBS vegetable oil
1 green onion, chopped

Heat oil to medium in a large nonstick skillet. Using a mandolin or very sharp knife slice potatoes about 1/4" thick. Add onion to oil and saute for 3 minutes until soft. Add potatoes, season with salt/pepper and saute, while stirring for 5-6 minutes. Cover and reduce heat to medium low. Cook 20-25 minutes until tender, stirring often. Sprinkle with cheese and replace lid. Turn heat off. Allow cheese to melt, about 5 minutes. Remove to platter and garnish with green onions. 


Shared on Make Ahead Meals Apr. 8, 2013
Shared on Mandy's Recipe Box Apr. 10, 2013
Shared on Lady Behind The Curtain Apr. 10, 2013
Shared on Miz Helen's Country Cottage Apr. 11, 2013
Shared on The Country Cook Apr. 12, 2013
Potatoes at Very Good Recipes
Pin It
reade more... Résuméabuiyad

Mexican Night Via Crock Pot

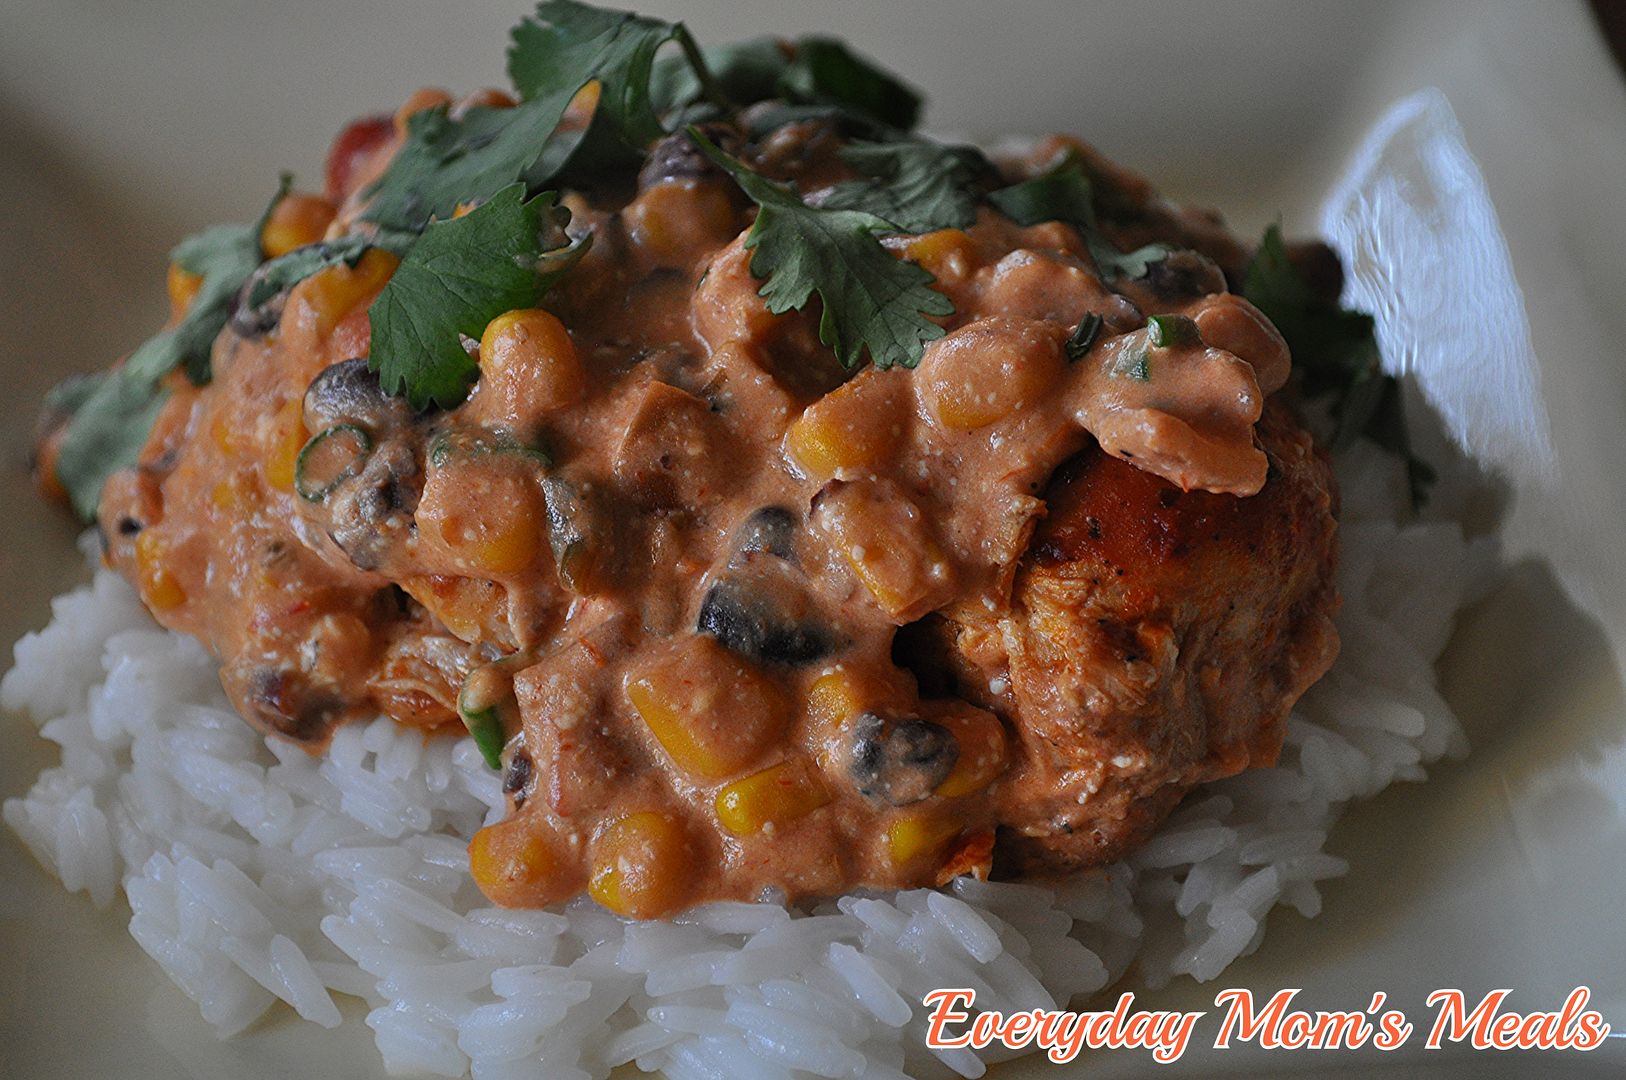
We love Mexican food, but I will admit not many of the recipes I make include the words Crock Pot. Honestly, with the exception of my Taco Soup and Chicken Enchiladas, I can't think of any others! So when a friend told me about this "go-to" recipe she makes, I figured it was worth a try to add another to that short list. She couldn't remember the entire recipe off the top of her head, but she did know it had cream cheese and black beans in it. Well, with the Internet, there really is nothing you can't find. Just by typing those two ingredients plus chicken into a search engine, I found something I had to believe was close to what she makes...and indeed I was right.

Now I will be honest with you. The original recipe calls for the chicken breasts to be added to the Crock Pot frozen, and while I can understand the convenience of that, (Heck, I forget to thaw meat out all the time!), I'm just not comfortable with it. I think it will cook more evenly, and to a safer temperature if it's thawed beforehand. But that is my hang up, so if it's something you do and feel okay about, then by all means, skip the browning steps below and throw those suckers in rock solid!

This is a great Mexican dish as is, or served over rice, which is what I did. Or you could shred the chicken and have a fantastic filling for tortillas! It truly is very versatile. I could even see shredding the chicken, mixing everything together and keeping it warm for a party. Set out a stack of tortillas or chips and let your guests make their own burrito or nachos.

Mexican nights at our house are always a good time, and something we look forward to. But I especially look forward to them when they are this easy and turn out so incredibly delicious!

Crock Pot Creamy Chicken and Black Beans Adapted from Food.com
4 boneless chicken breasts, thawed
2 TBS olive oil
Garlic Salt
Shallot-Pepper Seasoning Blend (Any grill seasoning would work)
1 (15 oz.) can black beans, drained and rinsed
1 (15 oz.) can corn, drained
1 (15 oz.) jar salsa
Salt and Pepper to taste
8 oz. cream cheese, cubed
3 green onions, chopped
1/4 c. cilantro, chopped
Cooked Rice, optional

In a large skillet, heat oil to medium heat. Season both sides of chicken with garlic salt, seasoning blend, salt and pepper. Brown chicken in oil for 2-3 minutes on both sides. Combine corn, black beans and salsa in Crock Pot. Lay chicken on top. Cook on HIGH for 1 hour. Reduce to LOW and cook for 4-5 hours until chicken in cooked through. Remove chicken from Crock Pot. Stir in cream cheese and mix well to combine. Replace chicken and cook for 20-30 minutes until cream cheese melted and mixture is smooth. About 5 minutes before serving remove chicken, add green onions and mix well. To serve, divide cooked rice among 4 plates. Top each with a chicken breast. Spoon bean mixture over chicken and garnish with cilantro.


Shared on Mandy's Recipe Box Feb. 26, 2013
Shared on Lady Behind The Curtain Feb. 27, 2013
Shared on Miz Helen's Country Cottage Feb. 28, 2013
Shared on The Country Cook Mar. 1, 2013
Mexican at Very Good Recipes
Pin It
We love Mexican food, but I will admit not many of the recipes I make include the words Crock Pot. Honestly, with the exception of my Taco Soup and Chicken Enchiladas, I can't think of any others! So when a friend told me about this "go-to" recipe she makes, I figured it was worth a try to add another to that short list. She couldn't remember the entire recipe off the top of her head, but she did know it had cream cheese and black beans in it. Well, with the Internet, there really is nothing you can't find. Just by typing those two ingredients plus chicken into a search engine, I found something I had to believe was close to what she makes...and indeed I was right.

Now I will be honest with you. The original recipe calls for the chicken breasts to be added to the Crock Pot frozen, and while I can understand the convenience of that, (Heck, I forget to thaw meat out all the time!), I'm just not comfortable with it. I think it will cook more evenly, and to a safer temperature if it's thawed beforehand. But that is my hang up, so if it's something you do and feel okay about, then by all means, skip the browning steps below and throw those suckers in rock solid!

This is a great Mexican dish as is, or served over rice, which is what I did. Or you could shred the chicken and have a fantastic filling for tortillas! It truly is very versatile. I could even see shredding the chicken, mixing everything together and keeping it warm for a party. Set out a stack of tortillas or chips and let your guests make their own burrito or nachos.

Mexican nights at our house are always a good time, and something we look forward to. But I especially look forward to them when they are this easy and turn out so incredibly delicious!

Crock Pot Creamy Chicken and Black Beans Adapted from Food.com
4 boneless chicken breasts, thawed
2 TBS olive oil
Garlic Salt
Shallot-Pepper Seasoning Blend (Any grill seasoning would work)
1 (15 oz.) can black beans, drained and rinsed
1 (15 oz.) can corn, drained
1 (15 oz.) jar salsa
Salt and Pepper to taste
8 oz. cream cheese, cubed
3 green onions, chopped
1/4 c. cilantro, chopped
Cooked Rice, optional

In a large skillet, heat oil to medium heat. Season both sides of chicken with garlic salt, seasoning blend, salt and pepper. Brown chicken in oil for 2-3 minutes on both sides. Combine corn, black beans and salsa in Crock Pot. Lay chicken on top. Cook on HIGH for 1 hour. Reduce to LOW and cook for 4-5 hours until chicken in cooked through. Remove chicken from Crock Pot. Stir in cream cheese and mix well to combine. Replace chicken and cook for 20-30 minutes until cream cheese melted and mixture is smooth. About 5 minutes before serving remove chicken, add green onions and mix well. To serve, divide cooked rice among 4 plates. Top each with a chicken breast. Spoon bean mixture over chicken and garnish with cilantro.


Shared on Mandy's Recipe Box Feb. 26, 2013
Shared on Lady Behind The Curtain Feb. 27, 2013
Shared on Miz Helen's Country Cottage Feb. 28, 2013
Shared on The Country Cook Mar. 1, 2013
Mexican at Very Good Recipes
Pin It
reade more... Résuméabuiyad

Meatless Monday....Um, Nevermind

So here is a delightful story to illustrate just how fried my brain has become. LOL My girlfriend and I have a saying "We used to be smart. We were braniacs. Then we had kids. Now our brains our mush." It's just a basic fact. Not only do we, as mothers, give some of our brain cells to our children in the womb, but then between the cartoons, silly songs, talking to ourselves, endless conversations about pee, poop, wee-wees and ding dings, we kind of "dumb" ourselves down a bit. (I am in NO way calling moms dumb or stupid...so please don't email me!) I think most parents out there will understand what I'm trying to say. When you are around kids all day, and think on their level, the adult part of our brain gets a little smaller each hour.

I am no exception to this phenomenon. I know for a fact that while I was an honors student, and a math whiz...it's only a matter of time before my child surpasses me. Why? Because there have been homework problems now in 2nd grade that I had to resort to using the calculator on my iPhone!

There was no real inspiration to this recipe other than I was looking for something different for a meal idea, and for whatever reason these popped into my head. So I made them, we ate them, we loved them and I sat down to blog them. That's where this post took a comical turn. I was typing along, talking about the idea of "Meatless Mondays" and how I know many people who do this every week, and while it isn't something we do all the time, I do enjoy it. Heck, I even took that idea and segwayed into Lent and how I know so many of you don't eat meat on Fridays. I then began to type the ingredient list...and that's when it happened. I typed the word bacon. It was like someone took a giant slice of the crispy pork fat and slapped me right upside the head with it. I stopped, reread it and waited for my brain to catch up. Yep, my brain is officially mush. How embarrassing would that have been? I can just see the comments now "Excuse me, I realize I'm not a food blogger, but you do realize bacon counts as meat, right?"

So never mind the meatless part, of course unless you decide to omit the bacon and then you're all set! These make a fantastic filling main dish, or a fun side dish. No matter what day of the week, or combination of ingredients, these will be delicious...and are so simple, we half brain dead parents can make them too!

Broccoli and Bacon Stuffed Potatoes
4 large baking potatoes, rinsed and dried
12 oz. frozen broccoli
2 c. shredded cheddar cheese, small amont reserved for top
2 green onions, chopped
9 slices precooked bacon, small amount reserved for top
Salt and Pepper to taste

 Preheat oven to 400. Wrap potatoes in foil, poke a few times to vent and bake 1 hour or until fork tender. Allow to cool 10 minutes. Combine frozen broccoli with 3 TBS water and microwave for 5 minutes until crisp tender. Drain well.  Slice off a small portion, lengthwise, on top. Gently scrape out inside potato leaving a 1/4 inch shell. (I use a pointed iced tea spoon for this) In a large bowl combine potato, broccoli, onions, cheese, bacon, salt and pepper. In a small bowl combine reserved cheese and bacon, making about 1/4 c. total. Mix potato mixture until well combined. Carefully spoon potato mixture back into potato shells, pressing down a little. Top each with cheese/bacon mixture. Bake for 20 minutes until golden and cheese is melted.


Shared on Miz Helen's Country Cottage Feb. 21, 2013
Shared on The Country Cook Feb. 22, 2013

Broccoli at Very Good Recipes
Pin It
So here is a delightful story to illustrate just how fried my brain has become. LOL My girlfriend and I have a saying "We used to be smart. We were braniacs. Then we had kids. Now our brains our mush." It's just a basic fact. Not only do we, as mothers, give some of our brain cells to our children in the womb, but then between the cartoons, silly songs, talking to ourselves, endless conversations about pee, poop, wee-wees and ding dings, we kind of "dumb" ourselves down a bit. (I am in NO way calling moms dumb or stupid...so please don't email me!) I think most parents out there will understand what I'm trying to say. When you are around kids all day, and think on their level, the adult part of our brain gets a little smaller each hour.

I am no exception to this phenomenon. I know for a fact that while I was an honors student, and a math whiz...it's only a matter of time before my child surpasses me. Why? Because there have been homework problems now in 2nd grade that I had to resort to using the calculator on my iPhone!

There was no real inspiration to this recipe other than I was looking for something different for a meal idea, and for whatever reason these popped into my head. So I made them, we ate them, we loved them and I sat down to blog them. That's where this post took a comical turn. I was typing along, talking about the idea of "Meatless Mondays" and how I know many people who do this every week, and while it isn't something we do all the time, I do enjoy it. Heck, I even took that idea and segwayed into Lent and how I know so many of you don't eat meat on Fridays. I then began to type the ingredient list...and that's when it happened. I typed the word bacon. It was like someone took a giant slice of the crispy pork fat and slapped me right upside the head with it. I stopped, reread it and waited for my brain to catch up. Yep, my brain is officially mush. How embarrassing would that have been? I can just see the comments now "Excuse me, I realize I'm not a food blogger, but you do realize bacon counts as meat, right?"

So never mind the meatless part, of course unless you decide to omit the bacon and then you're all set! These make a fantastic filling main dish, or a fun side dish. No matter what day of the week, or combination of ingredients, these will be delicious...and are so simple, we half brain dead parents can make them too!

Broccoli and Bacon Stuffed Potatoes
4 large baking potatoes, rinsed and dried
12 oz. frozen broccoli
2 c. shredded cheddar cheese, small amont reserved for top
2 green onions, chopped
9 slices precooked bacon, small amount reserved for top
Salt and Pepper to taste

 Preheat oven to 400. Wrap potatoes in foil, poke a few times to vent and bake 1 hour or until fork tender. Allow to cool 10 minutes. Combine frozen broccoli with 3 TBS water and microwave for 5 minutes until crisp tender. Drain well.  Slice off a small portion, lengthwise, on top. Gently scrape out inside potato leaving a 1/4 inch shell. (I use a pointed iced tea spoon for this) In a large bowl combine potato, broccoli, onions, cheese, bacon, salt and pepper. In a small bowl combine reserved cheese and bacon, making about 1/4 c. total. Mix potato mixture until well combined. Carefully spoon potato mixture back into potato shells, pressing down a little. Top each with cheese/bacon mixture. Bake for 20 minutes until golden and cheese is melted.


Shared on Miz Helen's Country Cottage Feb. 21, 2013
Shared on The Country Cook Feb. 22, 2013

Broccoli at Very Good Recipes
Pin It
reade more... Résuméabuiyad

Snow or Sun

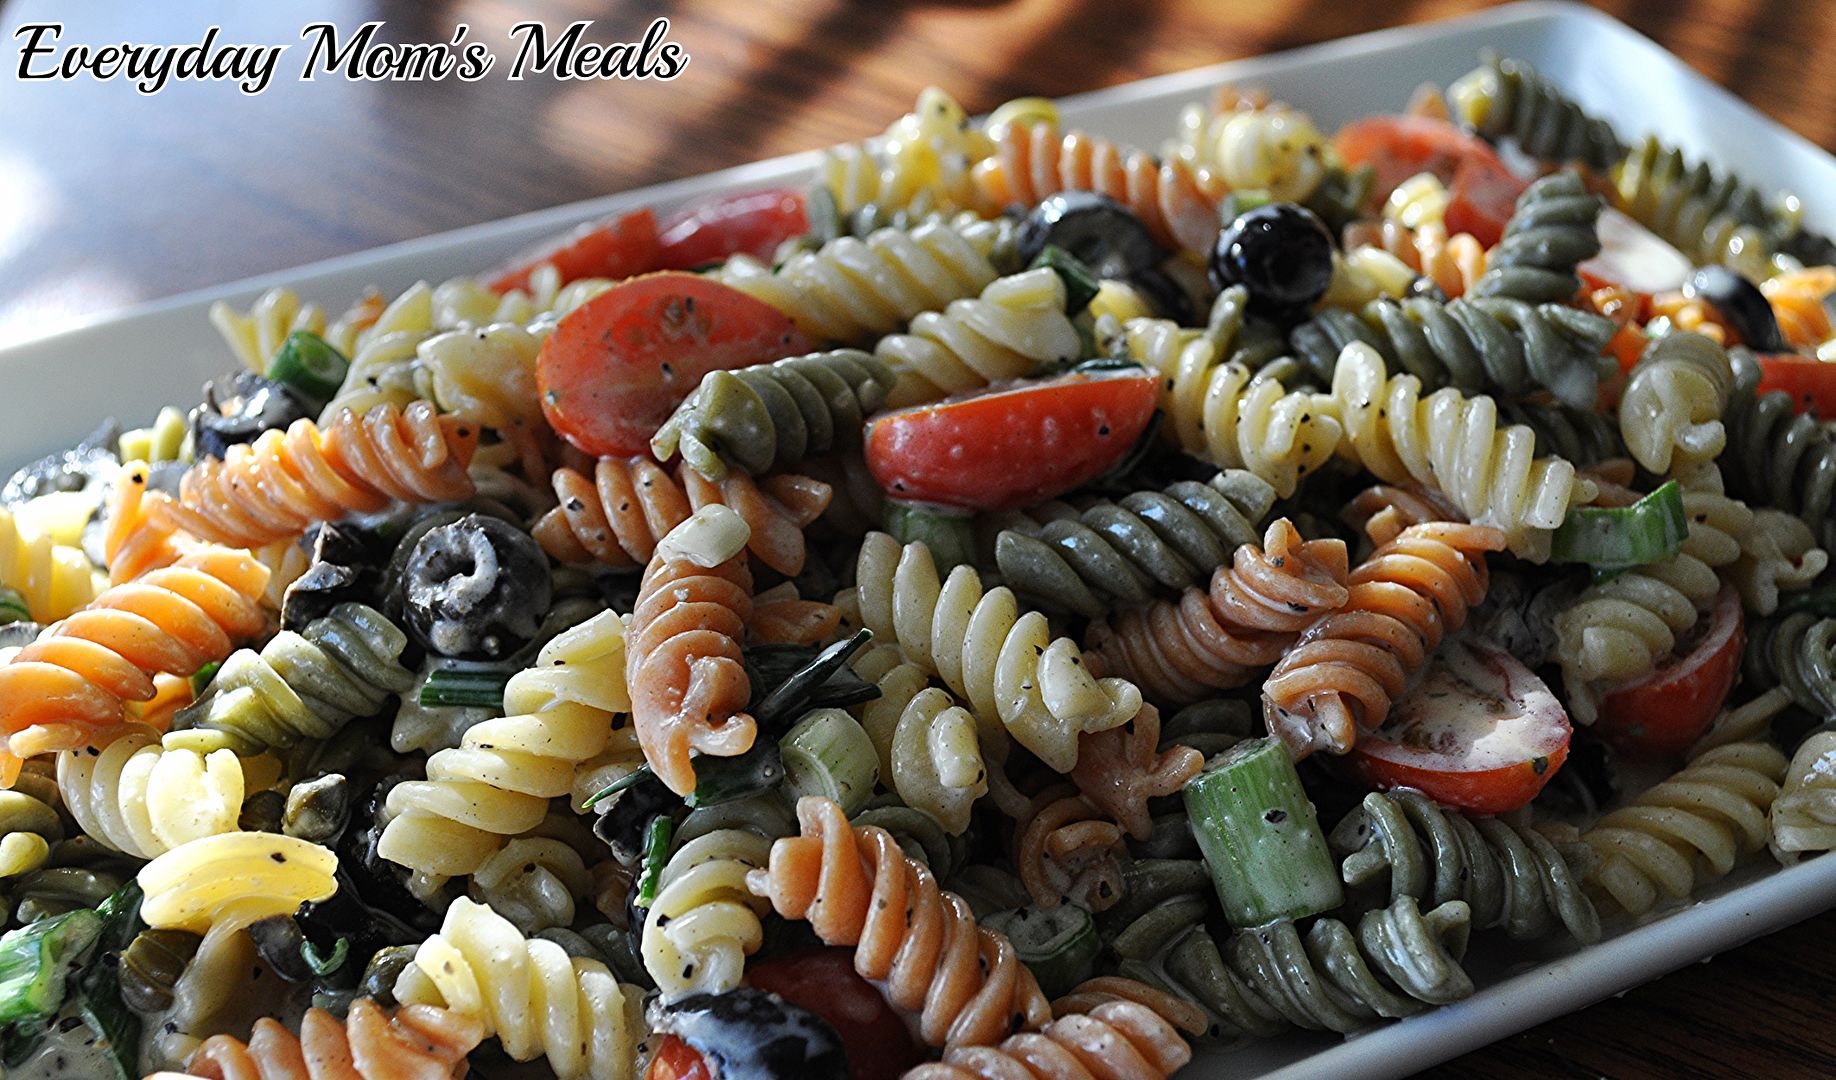
I don't care if there is 3 feet of snow on the ground or if there is a month long heat wave happening, it's a good time for a new pasta salad recipe. Any time. All the time! We love the stuff. I have so many varieties I make I sometimes lose track of them; and now I have yet another to add to the list.

A couple weeks ago our aunt was cleaning out her pantry and found a Greek Seasoning blend she had bought for one recipe, never used again, and since she won't be making that recipe again (let's just say it wasn't her favorite) she asked if I could use it. Sure I can! I have a bunch of recipes that call for Greek Seasoning, and even if I didn't, it's a free seasoning blend. I'll take it.

Well, I had never heard of this particular brand, so I looked them up online. Cavender's All Purpose Greek Seasoning. And while I was on their site, I found some great recipe ideas, including this pasta salad. I guess if I didn't have enough recipes to use it in, now I do! 

This makes a great side dish any night of the week and is bursting with an unique Mediterranean flavor. Plus, it's easily adaptable to include the veggies you love. I added some, and took a couple away from the original recipe to use what I had on hand. 

If you want to wait until warmer weather to enjoy this, that's your choice. To each their own. But me...I will be enjoying this for dinner, watching the snow flakes gather on the frozen grass!

Greek Pasta Salad Adapted from Cavender's
12 oz. garden rotini pasta
5 green onions, chopped
1 (2.5) oz. can sliced black olives
1/3 c. grape tomatoes, halved
2 TBS capers
1/2 c. mayo
4 1/4 TBS lemon juice
1/4 c. olive oil
3 TBS Greek Seasoning

Boil pasta, drain and rinse with cold water. Drain again. In a medium bowl combine olive oil, seasoning, lemon juice and mayo. Whisk well to combine. In a large bowl combine pasta, olives, capers, green onions and tomatoes. Stir well. Pour dressing over. Mix well to combine. Chill until serving, at least 2 hours. 


Shared on The Country Cook Feb. 15, 2013
Shared on Make Ahead Meals Feb. 18, 2013
Greek at Very Good Recipes
Pin It
I don't care if there is 3 feet of snow on the ground or if there is a month long heat wave happening, it's a good time for a new pasta salad recipe. Any time. All the time! We love the stuff. I have so many varieties I make I sometimes lose track of them; and now I have yet another to add to the list.

A couple weeks ago our aunt was cleaning out her pantry and found a Greek Seasoning blend she had bought for one recipe, never used again, and since she won't be making that recipe again (let's just say it wasn't her favorite) she asked if I could use it. Sure I can! I have a bunch of recipes that call for Greek Seasoning, and even if I didn't, it's a free seasoning blend. I'll take it.

Well, I had never heard of this particular brand, so I looked them up online. Cavender's All Purpose Greek Seasoning. And while I was on their site, I found some great recipe ideas, including this pasta salad. I guess if I didn't have enough recipes to use it in, now I do! 

This makes a great side dish any night of the week and is bursting with an unique Mediterranean flavor. Plus, it's easily adaptable to include the veggies you love. I added some, and took a couple away from the original recipe to use what I had on hand. 

If you want to wait until warmer weather to enjoy this, that's your choice. To each their own. But me...I will be enjoying this for dinner, watching the snow flakes gather on the frozen grass!

Greek Pasta Salad Adapted from Cavender's
12 oz. garden rotini pasta
5 green onions, chopped
1 (2.5) oz. can sliced black olives
1/3 c. grape tomatoes, halved
2 TBS capers
1/2 c. mayo
4 1/4 TBS lemon juice
1/4 c. olive oil
3 TBS Greek Seasoning

Boil pasta, drain and rinse with cold water. Drain again. In a medium bowl combine olive oil, seasoning, lemon juice and mayo. Whisk well to combine. In a large bowl combine pasta, olives, capers, green onions and tomatoes. Stir well. Pour dressing over. Mix well to combine. Chill until serving, at least 2 hours. 


Shared on The Country Cook Feb. 15, 2013
Shared on Make Ahead Meals Feb. 18, 2013
Greek at Very Good Recipes
Pin It
reade more... Résuméabuiyad

Simple Chinese New Year {Thai Kitchen and Simply Asia}

Did you know there is another way to celebrate the New Year? Nope, we aren't going back to Times Square to watch the ball drop again. I'm talking about The Chinese New Year!

The traditional 15-day celebration kicked off February 10th, and what better way to enjoy the party than with some delicious new dishes using products from Thai Kitchen and Simply Asia?


At Thai Kitchen and Simply Asia, they have made your favorite Asian flavors available to enjoy anytime and anywhere. From noodles to sauces and seasonings, coconut milk to fish sauce, their premium products deliver restaurant-quality Asian cuisine in minutes. The ingredients and recipes offer simple solutions to spice up any celebration - and what better time to “thai” new dishes than Chinese New Year? It is a perfect reason to gather a group of friends and try tasty Asian cuisine. From mild to spicy, appetizers to dessert, Thai Kitchen and Simply Asia have something for every taste bud, sure to please even the most discerning palates.

The aromatic essences. The exotic flavors. The abundant texture. There’s no culinary experience that compares to Asian cuisine – whether you’re preparing a meal for the whole family or looking for a quick snack, we’re here to bring the adventure to your kitchen.


Thai Kitchen and Simply Asia offer a complete line of Asian ingredients and convenience items, including sauces, curry pastes, rice noodles, fish sauce, coconut milk, noodle bowls, and more. Most items are free of gluten, artificial colors/flavors and MSG – more reason to celebrate a New Year, and new you! Their ingredients and recipes offer simple solutions to spice up any celebration, or weeknight supper!


Need some inspiration? Check out these ideas from the experts themselves:

For entertaining, why not try a Satay Partay - a delicious chicken dish featuring Thai Kitchen'sCoconut Milk, Premium Fish Sauce, Red Curry Paste, Lemongrass and Peanut Satay Sauce.

Or, add a little zing to traditional party favorites with Thai Kitchen dipping sauces. Our Spicy Thai Mango dipping sauce puts a fruity twist on traditional spring rolls in this Zing Rolls recipe featuring Thai Kitchen's Red Rice Noodles.

Whether entertaining a crowd or an everyday dinner with the family, Simply Asia Stir-Fry Sauces are the perfect way to create Real Asia, Real Fast at home. Try our mild, flavorful General Tsao Stir-Fry Sauce in Restaurant Style General Tsao Chicken or General Tsao's Meatballs. Fans of ginger will enjoy the flavor our Ginger Teriyaki Stir-Fry Sauce brings to these Ginger Teriyaki Lettuce Wraps. Looking for a little more heat? Serve up these "Kung Wow" chicken wings with our Thai Kitchen Kung Pao Stir-Fry Sauce.


I love the fact their products help me bring some Asian flare into my kitchen with ease and convenience, making an unique dinner experience achievable after a busy day. This stir fry is both tasty and simple, making it a great Monday through Friday supper...you don't have to wait for a party! I served it over their Jasmine Rice for a complete dish full of fresh veggies and fantastic flavor.

Chicken and Vegetable Stir Fry From Thai Kitchen
1 lb. chicken tenders, cut into thin strips
3 c. assorted cut up vegetables (I used broccoli florets, snow peas, 1 red pepper, 2 carrots and 3 green onions)
2 TBS vegetable oil
4 tsp. cornstarch
2 TBS soy sauce
1 c. water
2 TBS Simply Asia Sweet Ginger and Garlic Seasoning

Mix water, soy sauce, cornstarch and seasoning in a small bowl until smooth. Set aside. Heat one TBS oil in large nonstick skillet on medium high heat. Add vegetables. Stir fry for 3 minutes. Remove from skillet. Heat remaining one TBS oil in skillet. Add chicken. Stir fry 5 minutes or until cooked through. Return veggies to skillet. Stir sauce mixture. Add to skillet. Stirring constantly, bring to a boil on medium heat. Boil 1 minute until sauce is slightly thickened. Serve over rice if desired. 


Shared on Miz Helen's Country Cottage Feb. 14, 2013
Shared on The Country Cook Feb. 15, 2013

For more information, products and great ideas you can find find them on social media too:

Facebook:


Disclaimer: This sponsorship is brought to you by Foodie Blogroll who we have partnered with for this promotion.
Did you know there is another way to celebrate the New Year? Nope, we aren't going back to Times Square to watch the ball drop again. I'm talking about The Chinese New Year!

The traditional 15-day celebration kicked off February 10th, and what better way to enjoy the party than with some delicious new dishes using products from Thai Kitchen and Simply Asia?


At Thai Kitchen and Simply Asia, they have made your favorite Asian flavors available to enjoy anytime and anywhere. From noodles to sauces and seasonings, coconut milk to fish sauce, their premium products deliver restaurant-quality Asian cuisine in minutes. The ingredients and recipes offer simple solutions to spice up any celebration - and what better time to “thai” new dishes than Chinese New Year? It is a perfect reason to gather a group of friends and try tasty Asian cuisine. From mild to spicy, appetizers to dessert, Thai Kitchen and Simply Asia have something for every taste bud, sure to please even the most discerning palates.

The aromatic essences. The exotic flavors. The abundant texture. There’s no culinary experience that compares to Asian cuisine – whether you’re preparing a meal for the whole family or looking for a quick snack, we’re here to bring the adventure to your kitchen.


Thai Kitchen and Simply Asia offer a complete line of Asian ingredients and convenience items, including sauces, curry pastes, rice noodles, fish sauce, coconut milk, noodle bowls, and more. Most items are free of gluten, artificial colors/flavors and MSG – more reason to celebrate a New Year, and new you! Their ingredients and recipes offer simple solutions to spice up any celebration, or weeknight supper!


Need some inspiration? Check out these ideas from the experts themselves:

For entertaining, why not try a Satay Partay - a delicious chicken dish featuring Thai Kitchen'sCoconut Milk, Premium Fish Sauce, Red Curry Paste, Lemongrass and Peanut Satay Sauce.

Or, add a little zing to traditional party favorites with Thai Kitchen dipping sauces. Our Spicy Thai Mango dipping sauce puts a fruity twist on traditional spring rolls in this Zing Rolls recipe featuring Thai Kitchen's Red Rice Noodles.

Whether entertaining a crowd or an everyday dinner with the family, Simply Asia Stir-Fry Sauces are the perfect way to create Real Asia, Real Fast at home. Try our mild, flavorful General Tsao Stir-Fry Sauce in Restaurant Style General Tsao Chicken or General Tsao's Meatballs. Fans of ginger will enjoy the flavor our Ginger Teriyaki Stir-Fry Sauce brings to these Ginger Teriyaki Lettuce Wraps. Looking for a little more heat? Serve up these "Kung Wow" chicken wings with our Thai Kitchen Kung Pao Stir-Fry Sauce.


I love the fact their products help me bring some Asian flare into my kitchen with ease and convenience, making an unique dinner experience achievable after a busy day. This stir fry is both tasty and simple, making it a great Monday through Friday supper...you don't have to wait for a party! I served it over their Jasmine Rice for a complete dish full of fresh veggies and fantastic flavor.

Chicken and Vegetable Stir Fry From Thai Kitchen
1 lb. chicken tenders, cut into thin strips
3 c. assorted cut up vegetables (I used broccoli florets, snow peas, 1 red pepper, 2 carrots and 3 green onions)
2 TBS vegetable oil
4 tsp. cornstarch
2 TBS soy sauce
1 c. water
2 TBS Simply Asia Sweet Ginger and Garlic Seasoning

Mix water, soy sauce, cornstarch and seasoning in a small bowl until smooth. Set aside. Heat one TBS oil in large nonstick skillet on medium high heat. Add vegetables. Stir fry for 3 minutes. Remove from skillet. Heat remaining one TBS oil in skillet. Add chicken. Stir fry 5 minutes or until cooked through. Return veggies to skillet. Stir sauce mixture. Add to skillet. Stirring constantly, bring to a boil on medium heat. Boil 1 minute until sauce is slightly thickened. Serve over rice if desired. 


Shared on Miz Helen's Country Cottage Feb. 14, 2013
Shared on The Country Cook Feb. 15, 2013

For more information, products and great ideas you can find find them on social media too:

Facebook:


Disclaimer: This sponsorship is brought to you by Foodie Blogroll who we have partnered with for this promotion.
reade more... Résuméabuiyad

Weekend Company {Guest Blogger Kristi}

Good Morning. I hope this week was a nice one for you. If you were in the part of the country, like we were, that experienced the arctic blast, I hope you have thawed from the deep freeze too!

Today we welcome back a fellow blogger who always has something yummy to share, so let's sit down, grab a snack and see what she's cooking up today!

Thanks to Krista for welcoming me back to EMM!  I always enjoy sharing recipes with all of you!!  My name is Kristi and I’m the author of Kristi’s Recipe Box.  I live in central Illinois with my husband Danny and two children.  We have a daughter Madelyn who is 2 ½ and a son Morgan who is almost 9 months old.


2012 was a busy but wonderful year for us and we are looking forward to an even better 2013.  Hope everyone’s year is off to a great start!  I can’t believe it’s the end of January already!  Where does the time go?  As I was trying to decide what recipe to share with you today, it occurred to me that the Super Bowl is just a few days away so I thought I would share one of my favorite party recipes- Ranch Party Spirals.  My mom gave me this recipe a few years back and it’s so easy and delicious!  I make these pretty frequently when I’m asked to bring an appetizer to a family gathering or other celebration.  These would also be perfect as an appetizer for all those upcoming spring and summer celebrations!  Hope you enjoy this one!


Ranch Party Spirals
2 - 8 oz. pkgs. cream cheese
1 pkg. dry Hidden Valley Ranch Salad dressing mix
2 green onions, chopped (both white and green parts)
12 - 8 inch flour tortillas
thin-sliced deli ham
In a small bowl, beat the cream cheese and salad dressing mix until smooth.  Add onions and mix well.  Spread about 2 T. of the mixture over each tortilla and top with ham slices.  Roll each tortilla tightly.  Cover and refrigerate until firm.  They should be refrigerated for at least an hour but could also set overnight.  Cut each tortilla into 3/4 inch slices.  Keep refrigerated!


Thanks to Krista for allowing me to share a favorite recipe with you today!  Hope you’ll stop by and visit me at www.kristisrecipebox.blogspot.com.


Pin It
Good Morning. I hope this week was a nice one for you. If you were in the part of the country, like we were, that experienced the arctic blast, I hope you have thawed from the deep freeze too!

Today we welcome back a fellow blogger who always has something yummy to share, so let's sit down, grab a snack and see what she's cooking up today!

Thanks to Krista for welcoming me back to EMM!  I always enjoy sharing recipes with all of you!!  My name is Kristi and I’m the author of Kristi’s Recipe Box.  I live in central Illinois with my husband Danny and two children.  We have a daughter Madelyn who is 2 ½ and a son Morgan who is almost 9 months old.


2012 was a busy but wonderful year for us and we are looking forward to an even better 2013.  Hope everyone’s year is off to a great start!  I can’t believe it’s the end of January already!  Where does the time go?  As I was trying to decide what recipe to share with you today, it occurred to me that the Super Bowl is just a few days away so I thought I would share one of my favorite party recipes- Ranch Party Spirals.  My mom gave me this recipe a few years back and it’s so easy and delicious!  I make these pretty frequently when I’m asked to bring an appetizer to a family gathering or other celebration.  These would also be perfect as an appetizer for all those upcoming spring and summer celebrations!  Hope you enjoy this one!


Ranch Party Spirals
2 - 8 oz. pkgs. cream cheese
1 pkg. dry Hidden Valley Ranch Salad dressing mix
2 green onions, chopped (both white and green parts)
12 - 8 inch flour tortillas
thin-sliced deli ham
In a small bowl, beat the cream cheese and salad dressing mix until smooth.  Add onions and mix well.  Spread about 2 T. of the mixture over each tortilla and top with ham slices.  Roll each tortilla tightly.  Cover and refrigerate until firm.  They should be refrigerated for at least an hour but could also set overnight.  Cut each tortilla into 3/4 inch slices.  Keep refrigerated!


Thanks to Krista for allowing me to share a favorite recipe with you today!  Hope you’ll stop by and visit me at www.kristisrecipebox.blogspot.com.


Pin It
reade more... Résuméabuiyad

Lower Sodium Lunch


This is a Sponsored post written by me on behalf of Boar's Head for SocialSpark. All opinions are 100% mine.

It's a new year. And so many of us are trying to fit food goals into our resolutions. Now, as I've said before, I don't make resolutions because I simply think they set us up to fail and then feel guilty. And as far as diet plans go, I live by the "all things in moderation" mantra. However, I too am always looking for ways to sneak healthier foods into our meals. No because we won't eat them if we know they are a tad better for us, but "sneak in" as far as taste goes. When something touches my tongue I don't want my first thought to be "Oh this must be the healthier version." So when I had the chance to try the new Boar's Head lower sodium deli meats and cheeses I jumped at the opportunity.

Boar's Head is a name synonymous with great tasting deli items, many of which I used for simple lunches. And now they have over 20 Lower Sodium products to choose from. I decided to work with The Branded Deluxe Ham, which is 42% less sodium and the White American Cheese which is 25% lower sodium. Plus, both are gluten free! The ham is also milk free, and is certified by the American Heart Association as a heart healthy food! From Bologna and Turkey to Provolone and Swiss, there is something for everyone in the lower sodium choices!

This salad makes a great lunch or brunch. Serve it as is, or with some crackers or pita chips on the side. How many times a week do you hit a drive-thru on your lunch break? This makes a great take along meal or even a quick snack. It's light yet filling and satisfying. And knowing you're eating something with less sodium, only adds to the satisfaction! Be sure to look for the new Boar's Head Lower Sodium products the next time you visit your local deli counter!

Ham and Cheese Salad Adapted from Boar's Head
1/2 lb. Boar's Head Lower Sodium Deluxe Ham, sliced thick and diced
1/2 lb. Boar's Head Lower Sodium White American cheese, sliced thick and diced
3-4 large radishes, thinly sliced
2 celery stalks, diced
2 green onions, finely chopped
1/4 c. Honey Dijon salad dressing
1 tsp. dried parsley, plus extra for garnish
Salt and Pepper to taste
In a large bowl combine all ingredients except dressing. Gently toss to combine. Pour dressing over, and mix well until coated. Chill until serving, at least 15 minutes. Garnish with extra parsley.


Shared on Miz Helen's Country Cottage Jan. 17, 2013
Shared on The Country Cook Jan. 18, 2013
Visit Sponsor's Site

This is a Sponsored post written by me on behalf of Boar's Head for SocialSpark. All opinions are 100% mine.

It's a new year. And so many of us are trying to fit food goals into our resolutions. Now, as I've said before, I don't make resolutions because I simply think they set us up to fail and then feel guilty. And as far as diet plans go, I live by the "all things in moderation" mantra. However, I too am always looking for ways to sneak healthier foods into our meals. No because we won't eat them if we know they are a tad better for us, but "sneak in" as far as taste goes. When something touches my tongue I don't want my first thought to be "Oh this must be the healthier version." So when I had the chance to try the new Boar's Head lower sodium deli meats and cheeses I jumped at the opportunity.

Boar's Head is a name synonymous with great tasting deli items, many of which I used for simple lunches. And now they have over 20 Lower Sodium products to choose from. I decided to work with The Branded Deluxe Ham, which is 42% less sodium and the White American Cheese which is 25% lower sodium. Plus, both are gluten free! The ham is also milk free, and is certified by the American Heart Association as a heart healthy food! From Bologna and Turkey to Provolone and Swiss, there is something for everyone in the lower sodium choices!

This salad makes a great lunch or brunch. Serve it as is, or with some crackers or pita chips on the side. How many times a week do you hit a drive-thru on your lunch break? This makes a great take along meal or even a quick snack. It's light yet filling and satisfying. And knowing you're eating something with less sodium, only adds to the satisfaction! Be sure to look for the new Boar's Head Lower Sodium products the next time you visit your local deli counter!

Ham and Cheese Salad Adapted from Boar's Head
1/2 lb. Boar's Head Lower Sodium Deluxe Ham, sliced thick and diced
1/2 lb. Boar's Head Lower Sodium White American cheese, sliced thick and diced
3-4 large radishes, thinly sliced
2 celery stalks, diced
2 green onions, finely chopped
1/4 c. Honey Dijon salad dressing
1 tsp. dried parsley, plus extra for garnish
Salt and Pepper to taste
In a large bowl combine all ingredients except dressing. Gently toss to combine. Pour dressing over, and mix well until coated. Chill until serving, at least 15 minutes. Garnish with extra parsley.


Shared on Miz Helen's Country Cottage Jan. 17, 2013
Shared on The Country Cook Jan. 18, 2013
Visit Sponsor's Site
reade more... Résuméabuiyad

Weekend Company {Guest Blogger Angie}

Welcome to the weekend! Even though it was a short work week, I'm sure many of you felt it dragged on far too long, and are happy to see Saturday roll around once again. I truly can't believe the holidays are behind us, and we are at the end of the first week of 2013! I am always so sad after Christmas is over, and my living room looks so empty without all the decorations and sparkling tree. Not to mention Christmas vacation is over and Monkey heads back to school on Monday; and I don't know who is more upset, him or me!

But I am happy you joined us today for the first Guest Blogger of the New Year, and I'm so excited it is Angie. She always has something so yummy to share, and this recipe is probably my favorite thus far! So grab a cup of coffee, put a log on the fire, and join us in the kitchen~


I want to thank Krista for extending the offer for me to be a weekend guest again. My name is Angie Cupp, from Northern Indiana.  I am a busy wife, mom & teachers aide during the week.  Recently, I just went back to work full-time and that has added more craziness to a family of 5. 
The recipe I am sharing with you today has lots of memories with it.  More than 10 years ago my husband worked with a guy who was married to a lady from the Philippines.  She so kindly made Lumpia Egg Rolls for the staff at the office.  One day while visiting my husband at the office, Malou stopped by with some egg rolls. Once I had tasted them, I knew I needed the recipe.  Malou was so kind to share this with me.  After tweaking it to my families likings and many egg rolls later, here it is for you!  I always end up making a double batch so that we have plenty in the freezer. I hope you enjoy!


Lumpia Egg Rolls
1 lb ground beef
1 med carrot sliced
1 bundle of green onions (chopped finely)
1 egg
1/2 tsp salt
1 tsp pepper
2 TBS of soy sauce
1 1/2 cups of cabbage (shredded)
1 pkg Spring Roll Pastry Wrappers (25ct)

Fry ground beef until no longer pink and drain grease.  Add the remaining ingredients to your skillet and saute until carrots & cabbage are tender or cooked thru.  Let cool in skillet.  Put in mixing bowl and refrigerate for a couple hours to cool mixture.  Once mixture is cooled, take 2 TBS of mixture and put on a Spring Roll Wrapper, tuck in the sides and roll.  I use a mixture of flour and a bit of water to seal each wrapper.  You can deep fry them immediately or later from a frozen state.  We deep fry ours for 4-5 minutes at 400 degrees.


Pin It
Welcome to the weekend! Even though it was a short work week, I'm sure many of you felt it dragged on far too long, and are happy to see Saturday roll around once again. I truly can't believe the holidays are behind us, and we are at the end of the first week of 2013! I am always so sad after Christmas is over, and my living room looks so empty without all the decorations and sparkling tree. Not to mention Christmas vacation is over and Monkey heads back to school on Monday; and I don't know who is more upset, him or me!

But I am happy you joined us today for the first Guest Blogger of the New Year, and I'm so excited it is Angie. She always has something so yummy to share, and this recipe is probably my favorite thus far! So grab a cup of coffee, put a log on the fire, and join us in the kitchen~


I want to thank Krista for extending the offer for me to be a weekend guest again. My name is Angie Cupp, from Northern Indiana.  I am a busy wife, mom & teachers aide during the week.  Recently, I just went back to work full-time and that has added more craziness to a family of 5. 
The recipe I am sharing with you today has lots of memories with it.  More than 10 years ago my husband worked with a guy who was married to a lady from the Philippines.  She so kindly made Lumpia Egg Rolls for the staff at the office.  One day while visiting my husband at the office, Malou stopped by with some egg rolls. Once I had tasted them, I knew I needed the recipe.  Malou was so kind to share this with me.  After tweaking it to my families likings and many egg rolls later, here it is for you!  I always end up making a double batch so that we have plenty in the freezer. I hope you enjoy!


Lumpia Egg Rolls
1 lb ground beef
1 med carrot sliced
1 bundle of green onions (chopped finely)
1 egg
1/2 tsp salt
1 tsp pepper
2 TBS of soy sauce
1 1/2 cups of cabbage (shredded)
1 pkg Spring Roll Pastry Wrappers (25ct)

Fry ground beef until no longer pink and drain grease.  Add the remaining ingredients to your skillet and saute until carrots & cabbage are tender or cooked thru.  Let cool in skillet.  Put in mixing bowl and refrigerate for a couple hours to cool mixture.  Once mixture is cooled, take 2 TBS of mixture and put on a Spring Roll Wrapper, tuck in the sides and roll.  I use a mixture of flour and a bit of water to seal each wrapper.  You can deep fry them immediately or later from a frozen state.  We deep fry ours for 4-5 minutes at 400 degrees.


Pin It
reade more... Résuméabuiyad

Chicken? Again? Yes!

As far as I'm concerned nobody can have enough chicken recipes. From the restaurant chef to the home cook, we all turn to the most versatile protein whenever we are stumped as to what to make for dinner. But I think most of us consider it a "go to" when we want to experiment, or try something new. It takes on flavor so well, and can be cooked a hundred different ways, it's a great spring board for creating new dishes. I think a lot of moms think "If it's chicken I know they will eat it." So they are more open to playing around with it.  This recipe was inspired by one I found at Taste of Home, one of my favorite sources for new yummy dishes! Nine times out of ten, I know if the recipe comes from them, even if I adapt it a little, change a few things, and stray from the original a bit, it will be successful and something my family will enjoy. Plus, this includes mushrooms, which only enhances the likability factor for us! This would make a great dish to fix with all the family that might be descending on your home over the next week! You could easily double the recipe, make two pans, and have them cooking at the same time. And if you are in need of a simple new side to serve along with it, be sure to come back tomorrow because I have the perfect one! In fact, I can guarantee each time I make this, the other will be on the plate next to it every single time!

Baked Mushroom Chicken Adapted from Taste of Home
1 package (8-9 pieces) chicken tenders
1/4 c. flour
8 oz. mushrooms, sliced
3 TBS butter, divided
3 green onions, chopped
1 tsp. garlic powder
1/2 c. chicken broth
1/2 c. shredded Parmesan cheese
Salt and Pepper to taste

Preheat oven to 375. In a large plastic storage bag, place flour and season with salt and pepper. Place chicken in bag, a few pieces at a time and shake until coated. In a large skillet, melt 2 TBS butter. Brown chicken on both sides. Remove and place in a greased 11x15 baking dish. In the same skillet, add 1 TBS butter, mushrooms and garlic powder. Cook until mushrooms are brown, about 7 minutes. Season with salt and pepper. Add chicken broth. Bring to a boil. Reduce heat and let simmer until about 1/2 c. liquid remains. Spoon over chicken. Baked uncovered for 25-30 minutes until chicken is cooked through. Sprinkle with cheese and onions. Bake for an additional 5 minutes until cheese is melted.


Shared on Lady Behind The Curtain Dec. 19, 2012
Shared on Miz Helen's Country Cottage Dec. 20, 2012
Shared on The Country Cook Dec. 21, 2012

Chicken at Very Good Recipes
Pin It
As far as I'm concerned nobody can have enough chicken recipes. From the restaurant chef to the home cook, we all turn to the most versatile protein whenever we are stumped as to what to make for dinner. But I think most of us consider it a "go to" when we want to experiment, or try something new. It takes on flavor so well, and can be cooked a hundred different ways, it's a great spring board for creating new dishes. I think a lot of moms think "If it's chicken I know they will eat it." So they are more open to playing around with it.  This recipe was inspired by one I found at Taste of Home, one of my favorite sources for new yummy dishes! Nine times out of ten, I know if the recipe comes from them, even if I adapt it a little, change a few things, and stray from the original a bit, it will be successful and something my family will enjoy. Plus, this includes mushrooms, which only enhances the likability factor for us! This would make a great dish to fix with all the family that might be descending on your home over the next week! You could easily double the recipe, make two pans, and have them cooking at the same time. And if you are in need of a simple new side to serve along with it, be sure to come back tomorrow because I have the perfect one! In fact, I can guarantee each time I make this, the other will be on the plate next to it every single time!

Baked Mushroom Chicken Adapted from Taste of Home
1 package (8-9 pieces) chicken tenders
1/4 c. flour
8 oz. mushrooms, sliced
3 TBS butter, divided
3 green onions, chopped
1 tsp. garlic powder
1/2 c. chicken broth
1/2 c. shredded Parmesan cheese
Salt and Pepper to taste

Preheat oven to 375. In a large plastic storage bag, place flour and season with salt and pepper. Place chicken in bag, a few pieces at a time and shake until coated. In a large skillet, melt 2 TBS butter. Brown chicken on both sides. Remove and place in a greased 11x15 baking dish. In the same skillet, add 1 TBS butter, mushrooms and garlic powder. Cook until mushrooms are brown, about 7 minutes. Season with salt and pepper. Add chicken broth. Bring to a boil. Reduce heat and let simmer until about 1/2 c. liquid remains. Spoon over chicken. Baked uncovered for 25-30 minutes until chicken is cooked through. Sprinkle with cheese and onions. Bake for an additional 5 minutes until cheese is melted.


Shared on Lady Behind The Curtain Dec. 19, 2012
Shared on Miz Helen's Country Cottage Dec. 20, 2012
Shared on The Country Cook Dec. 21, 2012

Chicken at Very Good Recipes
Pin It
reade more... Résuméabuiyad

Great Sale Sandwich

When I'm at the grocery store, I am a woman on a mission. I have my list in hand, know exactly what I need to get and I'm going to do my best to find the best deals possible. And that's why even though I only buy what is on my list 99% of the time, I am still able to snag a great sale item when my eye catches it. And that is exactly how this sandwich came to be. All because pork tenderloins were a great price a few weeks ago. There I was looking in the meat case and I found a little over 2 pound pork loin for $5!! Well, I immediately knew it was going home with me, I just wasn't sure what I would do with it. I love pork loin, but let's be honest, it shrinks when it cooks, and a 2 lb. roast was not going to feed my family if just sliced. But a great way to stretch that meat (and this is a fantastic tip) is to find a way to shred it and make sandwiches! Sure, I could do barbecue pulled pork, but I was in the mood for something a little different. So I decided to let some Asian inspiration be my guide on this and I'm so glad I did because I got a delicious meal for not a lot of "dough". Now, the Asian Crunch Coleslaw that I used with these (which I've already shared, but will include the recipe here too)  is a great side dish to these sandwiches, but I actually prefer a small amount right on top of my meat as a condiment. If you are on a budget, going to the grocery store with a list is a must; but be sure to keep your eyes open for those indoor specials that will save you even more money, and lead to something very yummy!

Crock Pot Teriyaki Pork with Asian Crunch Slaw
2 lb. pork loin
1 c. soy sauce
1/2 tsp garlic powder
6 TBS rice wine vinegar
4 TBS brown sugar
2 TBS honey
1 tsp ground ginger
1 package coleslaw mix
4 green onions, chopped
1 pkg. Chicken flavored Ramen Noodles, seasoning packet set aside and noodles crushed
1/2 c. sunflower kernels
2/3 c. sliced almonds
Salt and Pepper to taste
Hamburger Buns, toasted if desired

Dressing:
2 TBS sugar
3 TBS white vinegar
1/2 c. vegetable oil
Seasoning Packet
Pepper to taste

Season pork with salt and pepper. Place in Crock Pot. In a medium bowl combine soy, rice vinegar, garlic, ginger, honey and brown sugar. Whisk well until combined. Pour over pork. Cook on low 2 hours. Flip pork over. Cook 2 more hours. Remove meat from Crock Pot and shred with 2 forks, or in Kitchen Aid Mix with paddle attachment. (See how here.) Place meat back in Crock Pot and cook 3 additional hours. About 30 minutes before serving, mix coleslaw, green onions, crushed noodles, sunflower kernels, and almonds. Whisk dressing ingredients and pour over coleslaw, stirring well. Chill until serving. To assemble, spoon meat out of Crock Pot with slotted spoon. Place on bottom bun. Top with about 1/4 c. coleslaw.

~Join me for Tasty Tuesday on Formula Mom~

Shared on Mandy's Recipe Box Nov. 6, 2012
Shared on Lady Behind The Curtain Nov. 7, 2012
Shared on Miz Helen's Country Cottage Nov. 8, 2012
Shared on The Country Cook Nov. 9, 2012

Pork at Very Good Recipes
Pin It
When I'm at the grocery store, I am a woman on a mission. I have my list in hand, know exactly what I need to get and I'm going to do my best to find the best deals possible. And that's why even though I only buy what is on my list 99% of the time, I am still able to snag a great sale item when my eye catches it. And that is exactly how this sandwich came to be. All because pork tenderloins were a great price a few weeks ago. There I was looking in the meat case and I found a little over 2 pound pork loin for $5!! Well, I immediately knew it was going home with me, I just wasn't sure what I would do with it. I love pork loin, but let's be honest, it shrinks when it cooks, and a 2 lb. roast was not going to feed my family if just sliced. But a great way to stretch that meat (and this is a fantastic tip) is to find a way to shred it and make sandwiches! Sure, I could do barbecue pulled pork, but I was in the mood for something a little different. So I decided to let some Asian inspiration be my guide on this and I'm so glad I did because I got a delicious meal for not a lot of "dough". Now, the Asian Crunch Coleslaw that I used with these (which I've already shared, but will include the recipe here too)  is a great side dish to these sandwiches, but I actually prefer a small amount right on top of my meat as a condiment. If you are on a budget, going to the grocery store with a list is a must; but be sure to keep your eyes open for those indoor specials that will save you even more money, and lead to something very yummy!

Crock Pot Teriyaki Pork with Asian Crunch Slaw
2 lb. pork loin
1 c. soy sauce
1/2 tsp garlic powder
6 TBS rice wine vinegar
4 TBS brown sugar
2 TBS honey
1 tsp ground ginger
1 package coleslaw mix
4 green onions, chopped
1 pkg. Chicken flavored Ramen Noodles, seasoning packet set aside and noodles crushed
1/2 c. sunflower kernels
2/3 c. sliced almonds
Salt and Pepper to taste
Hamburger Buns, toasted if desired

Dressing:
2 TBS sugar
3 TBS white vinegar
1/2 c. vegetable oil
Seasoning Packet
Pepper to taste

Season pork with salt and pepper. Place in Crock Pot. In a medium bowl combine soy, rice vinegar, garlic, ginger, honey and brown sugar. Whisk well until combined. Pour over pork. Cook on low 2 hours. Flip pork over. Cook 2 more hours. Remove meat from Crock Pot and shred with 2 forks, or in Kitchen Aid Mix with paddle attachment. (See how here.) Place meat back in Crock Pot and cook 3 additional hours. About 30 minutes before serving, mix coleslaw, green onions, crushed noodles, sunflower kernels, and almonds. Whisk dressing ingredients and pour over coleslaw, stirring well. Chill until serving. To assemble, spoon meat out of Crock Pot with slotted spoon. Place on bottom bun. Top with about 1/4 c. coleslaw.

~Join me for Tasty Tuesday on Formula Mom~

Shared on Mandy's Recipe Box Nov. 6, 2012
Shared on Lady Behind The Curtain Nov. 7, 2012
Shared on Miz Helen's Country Cottage Nov. 8, 2012
Shared on The Country Cook Nov. 9, 2012

Pork at Very Good Recipes
Pin It
reade more... Résuméabuiyad

Frozen Is My Friend

In a perfect world I would have a fish market just down the street where I could go and get fresh seafood any day I wanted, every day if I wanted. But alas, this is northern Indiana and while some of our supermarkets have a nice seafood counter, it's just not quite the same. Yes, I can go to the nearest Kroger and get some fine looking fish and seafood out of their case, and it tastes great, but sometimes I wish for what we were lucky enough to have in Florida during our summer beach vacation. When I shared my Fried Oysters and Crispy Cajun Shrimp with you I told the story of how we love visiting the market as soon as the boats come in with the fresh catch of the day~ it doesn't get more fresh than that! Not to mention taking out the "middle man" makes it so much more affordable. In fact, the only problem with using my supermarket's seafood counter is that it can get a bit pricey. But I have found one way around this...bagged frozen shrimp. I can find various sizes, tail on or off, EZ peel, already deveined, etc at an economical price to feed our family of 3. Yes, I still buy fresh, but I save that for special occasions when we are home in the Hoosier State. Other nights when I just want shrimp for an "everyday" supper I turn to the frozen and they work really great in recipes. And I have found that since I discovered this little trick we are able to eat shrimp more often because I'm not waiting for those special occasions or trying to find room in the grocery budget for them. If you are blessed to live on a coastline where seafood is at your fingertips any time you wish, I am green with envy. But if you are like me and want to cook with shrimp but not break the bank, check out the frozen section the next time you are at your store. You might be just as pleasantly surprised as I was!

Shrimp Stir Fry
1 12 oz bag (71/80ct) frozen deveined shrimp, thawed
1 c. frozen broccoli, thawed
1 c. frozen asparagus, thawed and cut into 1 inch pieces
3 medium carrots, peeled and julienned into 1 inch pieces
4 scallions, greens only, cut on a diagonal into 1 inch pieces
2 small green bell peppers, seeded and julienned into 1 inch pieces
2 (4 oz) cans mushrooms, drained
1/4 c. teriyaki sauce
Soy sauce to taste
3-4 TBS vegetable oil
Salt and Pepper to taste

To begin, make sure all thawed veggies and shrimp are VERY dry. Preheat vegetable oil in an electric skillet to 375. The key to this is making sure the oil is screaming hot and the ingredients are super dry. You don't want spatter if water hits the oil. When oil is hot, add carrots, mushrooms, peppers and broccoli. Stir and cook for 5 minutes. Add asparagus and scallions. After about 2 minutes, add shrimp, season with salt and pepper and cook until pink and opaque. At this point, turn heat down to 325. Add teriyaki sauce and soy. Stir and let flavors combine until veggies are completely cooked and flavors are combined, about 5-7 more minutes. Serve over rice, noodles or on the side with some egg rolls.


Shared on Mandy's Recipe Box Oct. 16, 2012
Shared on Lady Behind The Curtain Oct. 17, 2012
Shared on The Country Cook Oct. 19, 2012
Shrimp at Very Good Recipes
Pin It
In a perfect world I would have a fish market just down the street where I could go and get fresh seafood any day I wanted, every day if I wanted. But alas, this is northern Indiana and while some of our supermarkets have a nice seafood counter, it's just not quite the same. Yes, I can go to the nearest Kroger and get some fine looking fish and seafood out of their case, and it tastes great, but sometimes I wish for what we were lucky enough to have in Florida during our summer beach vacation. When I shared my Fried Oysters and Crispy Cajun Shrimp with you I told the story of how we love visiting the market as soon as the boats come in with the fresh catch of the day~ it doesn't get more fresh than that! Not to mention taking out the "middle man" makes it so much more affordable. In fact, the only problem with using my supermarket's seafood counter is that it can get a bit pricey. But I have found one way around this...bagged frozen shrimp. I can find various sizes, tail on or off, EZ peel, already deveined, etc at an economical price to feed our family of 3. Yes, I still buy fresh, but I save that for special occasions when we are home in the Hoosier State. Other nights when I just want shrimp for an "everyday" supper I turn to the frozen and they work really great in recipes. And I have found that since I discovered this little trick we are able to eat shrimp more often because I'm not waiting for those special occasions or trying to find room in the grocery budget for them. If you are blessed to live on a coastline where seafood is at your fingertips any time you wish, I am green with envy. But if you are like me and want to cook with shrimp but not break the bank, check out the frozen section the next time you are at your store. You might be just as pleasantly surprised as I was!

Shrimp Stir Fry
1 12 oz bag (71/80ct) frozen deveined shrimp, thawed
1 c. frozen broccoli, thawed
1 c. frozen asparagus, thawed and cut into 1 inch pieces
3 medium carrots, peeled and julienned into 1 inch pieces
4 scallions, greens only, cut on a diagonal into 1 inch pieces
2 small green bell peppers, seeded and julienned into 1 inch pieces
2 (4 oz) cans mushrooms, drained
1/4 c. teriyaki sauce
Soy sauce to taste
3-4 TBS vegetable oil
Salt and Pepper to taste

To begin, make sure all thawed veggies and shrimp are VERY dry. Preheat vegetable oil in an electric skillet to 375. The key to this is making sure the oil is screaming hot and the ingredients are super dry. You don't want spatter if water hits the oil. When oil is hot, add carrots, mushrooms, peppers and broccoli. Stir and cook for 5 minutes. Add asparagus and scallions. After about 2 minutes, add shrimp, season with salt and pepper and cook until pink and opaque. At this point, turn heat down to 325. Add teriyaki sauce and soy. Stir and let flavors combine until veggies are completely cooked and flavors are combined, about 5-7 more minutes. Serve over rice, noodles or on the side with some egg rolls.


Shared on Mandy's Recipe Box Oct. 16, 2012
Shared on Lady Behind The Curtain Oct. 17, 2012
Shared on The Country Cook Oct. 19, 2012
Shrimp at Very Good Recipes
Pin It
reade more... Résuméabuiyad