Pages

Showing posts with label Tomato. Show all posts

Hometown Christmas {A Gooseberry Patch Review and Giveaway}

I'm very excited for today's post. One, it is a tasty recipe that is super simple, and oh so pretty on the plate (the perfect holiday colors too). And two, because it comes with a great cookbook I can't wait to introduce you to, and a giveaway so one of you can win it too!


Ya'll know how much I love Gooseberry Patch and their wonderful cookbooks filled with simple, yummy, down home recipes by every day cooks like you and me. Well, this year they have a new holiday one, Hometown Christmas and I'm so honored to be published in it! Yep, that's right check out the dessert section for my Mint Chocolate Chip Mousse! A delicious, simple dessert perfect for this holiday season.

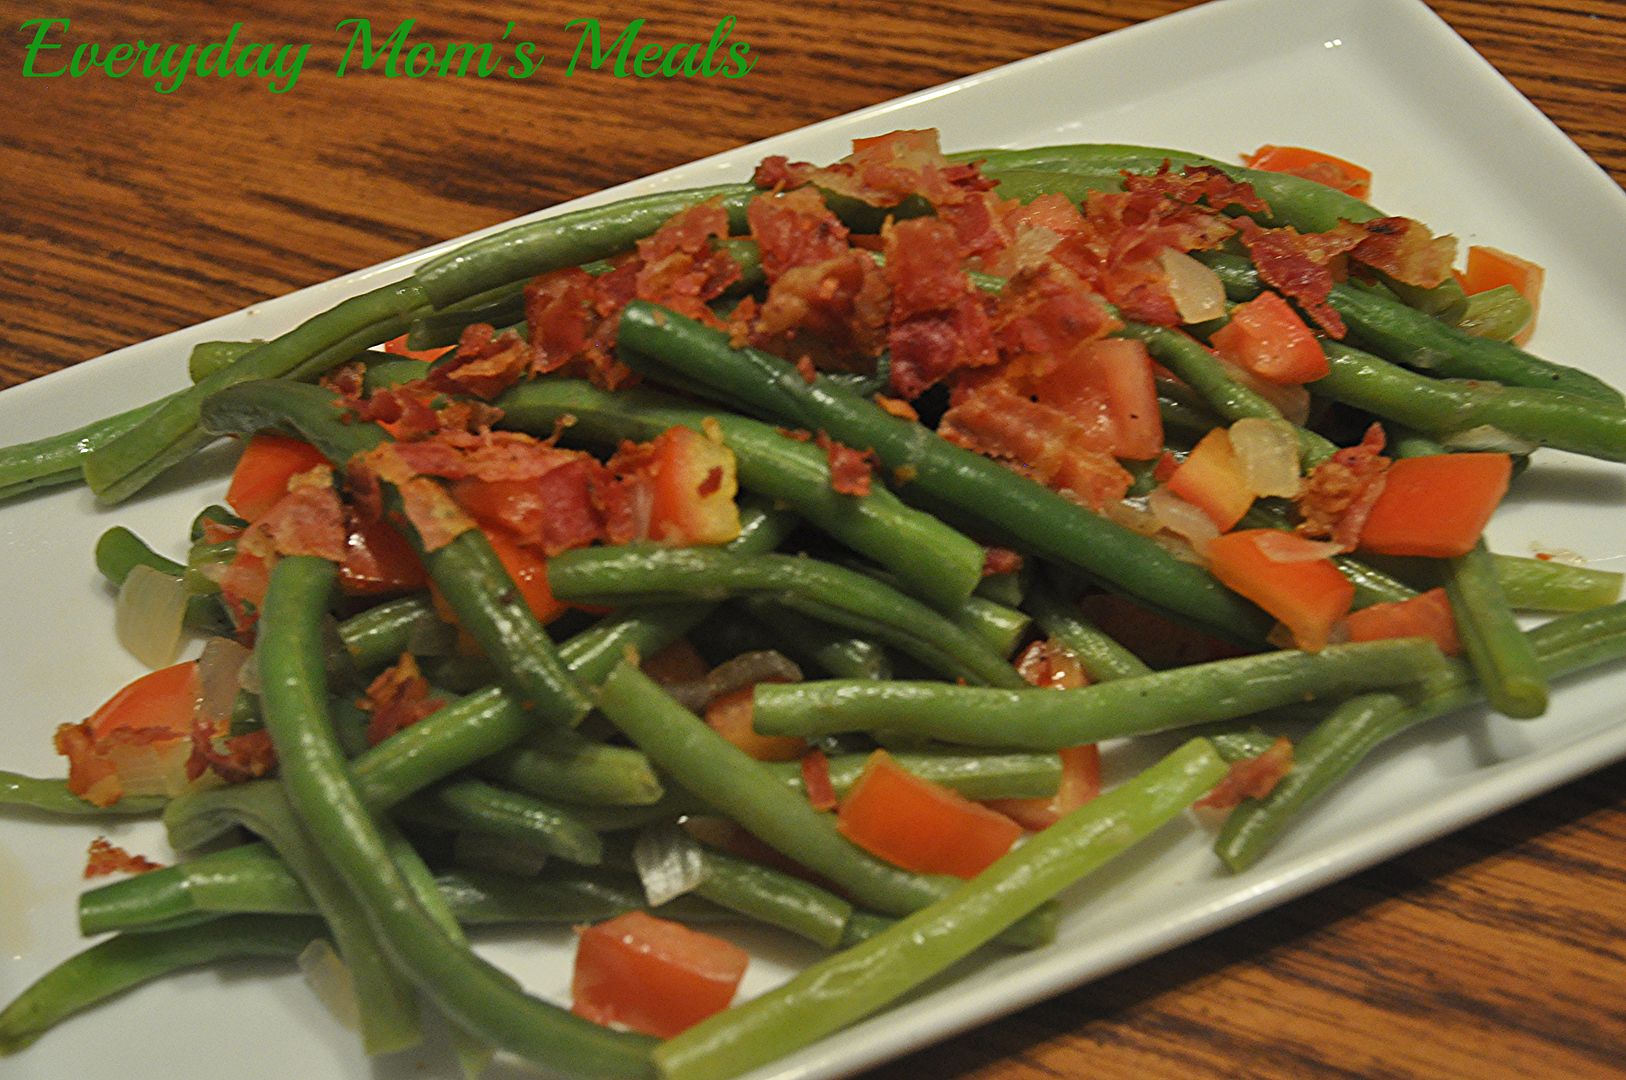
But today isn't about my recipe. It's about a great side dish that could not be easier, but turns out both beautiful to the eye and satisfying to the palate. Not to mention the perfect colors for your Christmas table! 

Are you looking for a new veggie side dish to include in your holiday meal? How about one that can be done in almost no time at all, but still uses fresh produce, easily found even in these cold winter months? Oh, and did I mention it includes bacon too? That should enough to entice your taste buds right there!

These have a "cooked all day" flavor with the ease of knowing you can have them ready quickly, something we can all appreciate this time of year. I don't know about you, but I want to enjoy time with my family, not have them playing and enjoying one another, with me stuck in the kitchen the whole time missing out on the festivities. 

If you're looking for something new to add to your holiday menu, I think you've found it. Or if you're simply looking for a simple side dish to use any night of the week, you've found that too. And don't forget to scroll down after the recipe for your chance to win a copy of Hometown Christmas for yourself, or give it away to the special foodie in your life!

Skillet Green Beans From Hometown Christmas
Submitted by Jen Thomas, Santa Rosa, CA Page 89
1 lb. green beans, trimmed and cut into 2 inch pieces
4 Roma tomatoes, chopped
1 small onion, chopped
3 slices bacon
1/2 c. chicken broth

In a large skillet, cook bacon until crisp. Remove, but leave drippings. Add onion and cook until crisp-tender. Add beans, pepper and broth. Stir. Bring to a boil. Reduce heat to medium-low, cover and cook for 4-6 minutes. Stir in tomatoes and heat through. Top with crumbled bacon.


Shared on The Country Cook Dec. 6, 2013

Green Beans at Very Good Recipes


********Giveaway********
Rules:
1. This contest is open to US Residents 18 and older ONLY.

2. The winner will be chosen by Random.org 

3. The winner will be notified by email and Facebook. He/she will have 48 hours to respond or another winner will be chosen. 

4. When leaving comments for entries, they MUST BE SEPARATE ones AND include an email address so it's easy for me to find the winner. If entries are together, it will only count as (1) and if no email, entry will not be considered.

5. If any of the extra entries are items you are already doing, please just remind me!


6. Contest Ends: Friday Dec. 13, 2013


(1) Lucky Winner will receive Hometown Christmas


Mandatory Entry:
1.Leave a comment telling me your favorite Christmas side dish!

Extra Entry:
1. Become a Gooseberry Patch fan on Facebook. Leave me a comment when you have. 

2.  Follow Gooseberry Patch on Twitter. Leave a comment saying you've done so.

GOOD LUCK!


And if you would like to purchase this fabulous cookbook (maybe for a foodie on your shopping list) check out Gooseberry Patch online or on Amazon.

Disclaimer: I was given a free cookbook to give away to a fan for this review. All thoughts and opinions are my own.


I'm very excited for today's post. One, it is a tasty recipe that is super simple, and oh so pretty on the plate (the perfect holiday colors too). And two, because it comes with a great cookbook I can't wait to introduce you to, and a giveaway so one of you can win it too!


Ya'll know how much I love Gooseberry Patch and their wonderful cookbooks filled with simple, yummy, down home recipes by every day cooks like you and me. Well, this year they have a new holiday one, Hometown Christmas and I'm so honored to be published in it! Yep, that's right check out the dessert section for my Mint Chocolate Chip Mousse! A delicious, simple dessert perfect for this holiday season.

But today isn't about my recipe. It's about a great side dish that could not be easier, but turns out both beautiful to the eye and satisfying to the palate. Not to mention the perfect colors for your Christmas table! 

Are you looking for a new veggie side dish to include in your holiday meal? How about one that can be done in almost no time at all, but still uses fresh produce, easily found even in these cold winter months? Oh, and did I mention it includes bacon too? That should enough to entice your taste buds right there!

These have a "cooked all day" flavor with the ease of knowing you can have them ready quickly, something we can all appreciate this time of year. I don't know about you, but I want to enjoy time with my family, not have them playing and enjoying one another, with me stuck in the kitchen the whole time missing out on the festivities. 

If you're looking for something new to add to your holiday menu, I think you've found it. Or if you're simply looking for a simple side dish to use any night of the week, you've found that too. And don't forget to scroll down after the recipe for your chance to win a copy of Hometown Christmas for yourself, or give it away to the special foodie in your life!

Skillet Green Beans From Hometown Christmas
Submitted by Jen Thomas, Santa Rosa, CA Page 89
1 lb. green beans, trimmed and cut into 2 inch pieces
4 Roma tomatoes, chopped
1 small onion, chopped
3 slices bacon
1/2 c. chicken broth

In a large skillet, cook bacon until crisp. Remove, but leave drippings. Add onion and cook until crisp-tender. Add beans, pepper and broth. Stir. Bring to a boil. Reduce heat to medium-low, cover and cook for 4-6 minutes. Stir in tomatoes and heat through. Top with crumbled bacon.

Shared on The Country Cook Dec. 6, 2013

Green Beans at Very Good Recipes


********Giveaway********
Rules:
1. This contest is open to US Residents 18 and older ONLY.

2. The winner will be chosen by Random.org 

3. The winner will be notified by email and Facebook. He/she will have 48 hours to respond or another winner will be chosen. 

4. When leaving comments for entries, they MUST BE SEPARATE ones AND include an email address so it's easy for me to find the winner. If entries are together, it will only count as (1) and if no email, entry will not be considered.

5. If any of the extra entries are items you are already doing, please just remind me!


6. Contest Ends: Friday Dec. 13, 2013


(1) Lucky Winner will receive Hometown Christmas


Mandatory Entry:
1.Leave a comment telling me your favorite Christmas side dish!

Extra Entry:
1. Become a Gooseberry Patch fan on Facebook. Leave me a comment when you have. 

2.  Follow Gooseberry Patch on Twitter. Leave a comment saying you've done so.

GOOD LUCK!


And if you would like to purchase this fabulous cookbook (maybe for a foodie on your shopping list) check out Gooseberry Patch online or on Amazon.

Disclaimer: I was given a free cookbook to give away to a fan for this review. All thoughts and opinions are my own.



reade more... Résuméabuiyad

Doesn't Get Fresher

Having a big barbecue this Labor Day weekend? Have fresh veggies from the garden you would like to use? How about a cool, creamy, crunchy and most of all flavorful salad you and your guests will love? Your everyday mom is here with the perfect idea!

I love summer for so many reasons, too many to even list, but the foodie in me loves being able to eat foods we grow ourselves in our backyard. Or should I say, foods my boys grow in our backyard. Because besides picking them, I don't have much to do with it. It's better that way. My thumbs are not green in any way!

But when they come inside with a big bowl filled with beautiful tomatoes, cucumbers, blackberries, grapes, etc...that's when it's my job to find ways to use them all in a yummy, and sometimes new way.

When I first saw this recipe, it reminded me of other creamy veggie salads I've made in the past, except for one thing: the radishes. We are huge radish fans. Even little man loves them, so I was happy to find a new way to use them. Plus, I loved the use of lemon and seasoning salt in the dressing. They really took the basic sour cream dressing and took it to a whole other flavor level. Oh, and I have to tell you, I was extremely pleased with it's consistency after sitting in the fridge for a few hours. The vegetables were still crisp, not mushy at all.

Since we're going into the "last weekend of summer" (the quotations are because I don't consider it to be, but I know society says different) there is no better time than to head outside, fire up the grill, invite friends and family over, and enjoy a backyard bash. And this salad would be great with anything you're pulling off the fire. Enjoy summer's bounty while you still can because it doesn't get fresher, and in about 3 months when we're knee deep in snow, we will be missing it profusely!

Creamy Vegetable Salad Adapted From Taste of Home
2 large tomatoes, seeded and chopped
2 large cucumbers, seeded and chopped
3-4 green onions, chopped, reserve a few for garnish
6 radishes, finely chopped
1 c. sour cream
1/2 tsp. seasoning salt
1/8 c. lemon juice
1/4 tsp. pepper
1/2 tsp. celery seed, extra for garnish

In a large bowl combine tomatoes, cucumbers, green onions, and radishes. Toss to combine. In a small bowl whisk together sour cream, seasoning salt, lemon juice, pepper and celery seed. Pour over veggies. Mix well. Cover and refrigerate at least 2 hours. Serve with a slotted spoon.


Shared on The Country Cook Aug. 30, 2013
Salad at Very Good Recipes
Having a big barbecue this Labor Day weekend? Have fresh veggies from the garden you would like to use? How about a cool, creamy, crunchy and most of all flavorful salad you and your guests will love? Your everyday mom is here with the perfect idea!

I love summer for so many reasons, too many to even list, but the foodie in me loves being able to eat foods we grow ourselves in our backyard. Or should I say, foods my boys grow in our backyard. Because besides picking them, I don't have much to do with it. It's better that way. My thumbs are not green in any way!

But when they come inside with a big bowl filled with beautiful tomatoes, cucumbers, blackberries, grapes, etc...that's when it's my job to find ways to use them all in a yummy, and sometimes new way.

When I first saw this recipe, it reminded me of other creamy veggie salads I've made in the past, except for one thing: the radishes. We are huge radish fans. Even little man loves them, so I was happy to find a new way to use them. Plus, I loved the use of lemon and seasoning salt in the dressing. They really took the basic sour cream dressing and took it to a whole other flavor level. Oh, and I have to tell you, I was extremely pleased with it's consistency after sitting in the fridge for a few hours. The vegetables were still crisp, not mushy at all.

Since we're going into the "last weekend of summer" (the quotations are because I don't consider it to be, but I know society says different) there is no better time than to head outside, fire up the grill, invite friends and family over, and enjoy a backyard bash. And this salad would be great with anything you're pulling off the fire. Enjoy summer's bounty while you still can because it doesn't get fresher, and in about 3 months when we're knee deep in snow, we will be missing it profusely!

Creamy Vegetable Salad Adapted From Taste of Home
2 large tomatoes, seeded and chopped
2 large cucumbers, seeded and chopped
3-4 green onions, chopped, reserve a few for garnish
6 radishes, finely chopped
1 c. sour cream
1/2 tsp. seasoning salt
1/8 c. lemon juice
1/4 tsp. pepper
1/2 tsp. celery seed, extra for garnish

In a large bowl combine tomatoes, cucumbers, green onions, and radishes. Toss to combine. In a small bowl whisk together sour cream, seasoning salt, lemon juice, pepper and celery seed. Pour over veggies. Mix well. Cover and refrigerate at least 2 hours. Serve with a slotted spoon.


Shared on The Country Cook Aug. 30, 2013
Salad at Very Good Recipes
reade more... Résuméabuiyad

New Smyrna Living


As many of you already know, we once again took our annual family vacation to New Smyrna Beach, Florida...loving every single minute!

For 3 weeks in June/July, we played in the waves, swam in the crystal clear pool, felt the sand between our toes, and most of all, enjoyed time together as a family, just the the three of us. 

One of our favorite things to take full advantage of while we are just yards away from the Atlantic Ocean is the incredibly fresh and delicious seafood! I love sending the boys to the local seafood market and knowing what they bring home just came in on the boat that morning! You can't get much better than that! And we've really learned over the years that for what it would cost for one meal at a restaurant, we can buy enough to feed all three of us, leaving us so full we could burst! 

This year one of the things I decided to make were Po'Boy Sandwiches because we got such an incredible deal on shrimp. They were practically giving the stuff away! 

If you have had an traditional Po'Boy down in Louisiana, you know just how delicious they are. Now I've never been lucky enough to experience the "real" thing, but Mr. Everyday has, and he said these were close...very close. They make a tasty, quick weeknight supper for summer. Plus, even if you're not getting the deal we did on shrimp, they allow you to make a little go a long way, so they make a seafood treat economical. 

We are still trying to get back into the swing of things...and we've been home two weeks! But hey, three weeks on the beautiful beach will do that to you, and the recovery is 100% worth it!


Shrimp Po' Boys Adapted from Simply Recipes
1 lb. medium shrimp, shelled, deveined and tails off
1 1/2 c. flour
1 TBS Cajun seasoning
1 TBS Old Bay seasoning
Salt and Pepper to taste
Vegetable oil for frying
Iceberg lettuce
Sliced tomatoes
Sliced dill pickles
Hoagie buns

Sauce: 
1/4 c. whole grain mustard
1 1/4 c. mayo
1 tsp. dill pickle juice
1 tsp. hot sauce
1/8 tsp. garlic powder
1-2 tsp. Cajun seasoning
1 TBS Old Bay seasoning

In a small bowl whisk together all ingredients for sauce. Mix well. Set in fridge to chill for about an hour. In a medium bowl combine flour, 1 TBS each Cajun and Old Bay seasoning, salt and pepper. Mix well. Dredge shrimp in flour and set on a plate for about 5 minutes. Heat oil over medium in a large pot or deep sided skillet. Fry shrimp in small batches for about 5-7 minutes each. Drain shrimp on paper towels. To assemble sandwiches, spread sauce on both sides of bun. Line with lettuce, tomatoes and pickles. Divide shrimp evenly among sandwiches, about five or six each. Makes 5 sandwiches


Shared on Make Ahead Meals July 22, 2013
Shared on Lady Behind The Curtain July 24, 2013
Shared on The Country Cook July 26, 2013
Shrimp at Very Good Recipes
Pin It

As many of you already know, we once again took our annual family vacation to New Smyrna Beach, Florida...loving every single minute!

For 3 weeks in June/July, we played in the waves, swam in the crystal clear pool, felt the sand between our toes, and most of all, enjoyed time together as a family, just the the three of us. 

One of our favorite things to take full advantage of while we are just yards away from the Atlantic Ocean is the incredibly fresh and delicious seafood! I love sending the boys to the local seafood market and knowing what they bring home just came in on the boat that morning! You can't get much better than that! And we've really learned over the years that for what it would cost for one meal at a restaurant, we can buy enough to feed all three of us, leaving us so full we could burst! 

This year one of the things I decided to make were Po'Boy Sandwiches because we got such an incredible deal on shrimp. They were practically giving the stuff away! 

If you have had an traditional Po'Boy down in Louisiana, you know just how delicious they are. Now I've never been lucky enough to experience the "real" thing, but Mr. Everyday has, and he said these were close...very close. They make a tasty, quick weeknight supper for summer. Plus, even if you're not getting the deal we did on shrimp, they allow you to make a little go a long way, so they make a seafood treat economical. 

We are still trying to get back into the swing of things...and we've been home two weeks! But hey, three weeks on the beautiful beach will do that to you, and the recovery is 100% worth it!


Shrimp Po' Boys Adapted from Simply Recipes
1 lb. medium shrimp, shelled, deveined and tails off
1 1/2 c. flour
1 TBS Cajun seasoning
1 TBS Old Bay seasoning
Salt and Pepper to taste
Vegetable oil for frying
Iceberg lettuce
Sliced tomatoes
Sliced dill pickles
Hoagie buns

Sauce: 
1/4 c. whole grain mustard
1 1/4 c. mayo
1 tsp. dill pickle juice
1 tsp. hot sauce
1/8 tsp. garlic powder
1-2 tsp. Cajun seasoning
1 TBS Old Bay seasoning

In a small bowl whisk together all ingredients for sauce. Mix well. Set in fridge to chill for about an hour. In a medium bowl combine flour, 1 TBS each Cajun and Old Bay seasoning, salt and pepper. Mix well. Dredge shrimp in flour and set on a plate for about 5 minutes. Heat oil over medium in a large pot or deep sided skillet. Fry shrimp in small batches for about 5-7 minutes each. Drain shrimp on paper towels. To assemble sandwiches, spread sauce on both sides of bun. Line with lettuce, tomatoes and pickles. Divide shrimp evenly among sandwiches, about five or six each. Makes 5 sandwiches


Shared on Make Ahead Meals July 22, 2013
Shared on Lady Behind The Curtain July 24, 2013
Shared on The Country Cook July 26, 2013
Shrimp at Very Good Recipes
Pin It
reade more... Résuméabuiyad

Oh Yes I Did!!

Are you grilling out this weekend? Tired of the same burger and dog routine? Want to jazz it up a little? Then you've come to the right place, because I'm about to blow your mind!

That was the exact reason why this recipe came to be. I always have hot dogs in the freezer. Anytime I see them on sale, I pick up a package, ignoring the fact I probably already have 2-3 packages at home. A good deal is a good deal, and they are something I can heat up quickly for Alex for lunch or plan a simple supper around. So a few weeks ago when I had thawed out a package for dinner that night, I challenged myself to come up with something new and fun to do with them.

I've told you many times before how much we love a good BLT. I mean, what's not to love? Crisp lettuce, ripe tomato, delicious bacon...they are one of our favorites, hands down. So I began to wonder. What if I took all the things from a BLT that we love, mixed them together into a salad, or relish if you will, and slap that on top of a grilled dog?? Well, I am here to testify...that was one of more genius ideas I've had in my life!

There is no other way to describe these other than a hot dog and a BLT got drunk on tequila one night and had a baby HA HA HA!!! The flavor of the "relish" on to doesn't over power that of the hot dog, but you still get the creamy, bacon explosion you love from a BLT. It's like the perfect summer time bite!

If you are grilling up some dogs this weekend and want the standard ketchup, mustard, onions and relish, go ahead! There is nothing wrong with that, and they are perfectly yummy. But if you want to blow minds and taste buds away, try these instead! You won't regret it. Just be careful who you make them for because I promise they will keep coming back for more!

BLT Hot Dogs 
8 hot dogs, grilled to likeness
8 buns
3/4 c. chopped Romaine lettuce
2 small tomatoes, seeded and chopped
6 slices bacon, cooked crisp and chopped
1/3 c. mayo

In a small bowl combine lettuce, tomato, bacon and mayo. Stir well. Allow to sit at room temperature about 15-20 minutes to allow flavors to combine. Top hot dogs equally with mixture.


Shared on The Country Cook July 12, 2013
Shared on Make Ahead Meals July 15, 2013
Shared on Mandy's Recipe Box July 16, 2013

Hot Dogs at Very Good Recipes
Pin It
Are you grilling out this weekend? Tired of the same burger and dog routine? Want to jazz it up a little? Then you've come to the right place, because I'm about to blow your mind!

That was the exact reason why this recipe came to be. I always have hot dogs in the freezer. Anytime I see them on sale, I pick up a package, ignoring the fact I probably already have 2-3 packages at home. A good deal is a good deal, and they are something I can heat up quickly for Alex for lunch or plan a simple supper around. So a few weeks ago when I had thawed out a package for dinner that night, I challenged myself to come up with something new and fun to do with them.

I've told you many times before how much we love a good BLT. I mean, what's not to love? Crisp lettuce, ripe tomato, delicious bacon...they are one of our favorites, hands down. So I began to wonder. What if I took all the things from a BLT that we love, mixed them together into a salad, or relish if you will, and slap that on top of a grilled dog?? Well, I am here to testify...that was one of more genius ideas I've had in my life!

There is no other way to describe these other than a hot dog and a BLT got drunk on tequila one night and had a baby HA HA HA!!! The flavor of the "relish" on to doesn't over power that of the hot dog, but you still get the creamy, bacon explosion you love from a BLT. It's like the perfect summer time bite!

If you are grilling up some dogs this weekend and want the standard ketchup, mustard, onions and relish, go ahead! There is nothing wrong with that, and they are perfectly yummy. But if you want to blow minds and taste buds away, try these instead! You won't regret it. Just be careful who you make them for because I promise they will keep coming back for more!

BLT Hot Dogs 
8 hot dogs, grilled to likeness
8 buns
3/4 c. chopped Romaine lettuce
2 small tomatoes, seeded and chopped
6 slices bacon, cooked crisp and chopped
1/3 c. mayo

In a small bowl combine lettuce, tomato, bacon and mayo. Stir well. Allow to sit at room temperature about 15-20 minutes to allow flavors to combine. Top hot dogs equally with mixture.


Shared on The Country Cook July 12, 2013
Shared on Make Ahead Meals July 15, 2013
Shared on Mandy's Recipe Box July 16, 2013

Hot Dogs at Very Good Recipes
Pin It
reade more... Résuméabuiyad

My Boys' Favorite

I am never shy about sharing favorites of mine with all of you. Heck, that's why I am here! To bring things I love into your home, and hope maybe you will love them too! But today I'm actually sharing a favorite of my "boys". Something they will both gobble down, rather it's my version or the original.

See, this is also a copycat recipe. I've told you before how our favorite Italian restaurant here in Fort Wayne is the family owned Casa's. (Plus, it is where Adam took me on our very first date, almost 16 years ago!) With a menu containing countless delicious dishes, sometimes it is hard to choose only one...or at least it is for me. I have 3-4 favorites that I usually alternate between each time we visit. But if you were to walk up to our table any given time we are eating, 9 times out of 10 you would find this dish in front of my husband. This wasn't something he always ordered, but once he did, it quickly became his favorite. And when Alex was little and still ordering off the kids' menu, Daddy was always nice enough to share a few bites with him. But now, as Alex has gotten older, and eats even more, he orders his own plate. 

They serve this dish with the option of mushrooms, olives, or both. Well, for my guys there is no question...it is always both! The salty, briny flavor of the olives compliments the deep flavor of the mushrooms and sauce so well, it is a match made in heaven. And while this isn't something I order there (I have too many other faves to add another!) I really love the flavor too.

Copycat recipes are so incredibly fun, not to mention affordable. Now I can make something I know my boys' adore, any night of the week, save a little money and treat them to a special meal without leaving our kitchen!

Cappellini con Pomodoro
1 lb. angel hair pasta, cooked according to package directions and drained
7 oz. jar pitted kalamata olives, drained and lightly chopped
8 oz. button mushrooms, thinly sliced
3 cloves garlic, minced
2 TBS butter
Salt and Pepper to taste

Sauce:
28 oz. can whole peeled tomatoes
1/2 c. olive oil
2 garlic cloves, minced
1/4 tsp. sugar
Salt to taste


Pulse tomatoes with juices in a food processor until pureed but still thick. Heat oil in a medium saucepan over medium heat. Add garlic and cook, stirring often, until beginning to brown, about 2 minutes. Add tomatoes,sugar and season with salt. Bring to a boil, reduce heat, and simmer gently until sauce is slightly thickened, 10-15 minutes. In a separate skillet, heat butter on medium. Add mushrooms and garlic and cook until starts to brown, about 5 minutes. Add olives, salt and pepper. Cook and stir until mushrooms are completely cooked, about 5 minutes more. Add mushroom mixture to sauce. When pasta is cooked, drain well. In a large bowl combine sauce and pasta. Toss to coat well. Garnish with dried parsley if desired.
*NOTE* I use angel hair because I can't find true cappellini. Also, this sauce recipe makes about 3 cups. For an even easier version, use 3 cups of your favorite spaghetti sauce.


Shared on Make Ahead Meals Apr. 29, 2013
Shared on Mandy's Recipe Box Apr. 30, 2013
Shared on Lady Behind The Curtain May 2, 2013
Shared on Miz Helen's Country Cottage May 2, 2013
Shared on The Country Cook May 3, 2013
Pasta at Very Good Recipes
Pin It

I am never shy about sharing favorites of mine with all of you. Heck, that's why I am here! To bring things I love into your home, and hope maybe you will love them too! But today I'm actually sharing a favorite of my "boys". Something they will both gobble down, rather it's my version or the original.

See, this is also a copycat recipe. I've told you before how our favorite Italian restaurant here in Fort Wayne is the family owned Casa's. (Plus, it is where Adam took me on our very first date, almost 16 years ago!) With a menu containing countless delicious dishes, sometimes it is hard to choose only one...or at least it is for me. I have 3-4 favorites that I usually alternate between each time we visit. But if you were to walk up to our table any given time we are eating, 9 times out of 10 you would find this dish in front of my husband. This wasn't something he always ordered, but once he did, it quickly became his favorite. And when Alex was little and still ordering off the kids' menu, Daddy was always nice enough to share a few bites with him. But now, as Alex has gotten older, and eats even more, he orders his own plate. 

They serve this dish with the option of mushrooms, olives, or both. Well, for my guys there is no question...it is always both! The salty, briny flavor of the olives compliments the deep flavor of the mushrooms and sauce so well, it is a match made in heaven. And while this isn't something I order there (I have too many other faves to add another!) I really love the flavor too.

Copycat recipes are so incredibly fun, not to mention affordable. Now I can make something I know my boys' adore, any night of the week, save a little money and treat them to a special meal without leaving our kitchen!

Cappellini con Pomodoro
1 lb. angel hair pasta, cooked according to package directions and drained
7 oz. jar pitted kalamata olives, drained and lightly chopped
8 oz. button mushrooms, thinly sliced
3 cloves garlic, minced
2 TBS butter
Salt and Pepper to taste

Sauce:
28 oz. can whole peeled tomatoes
1/2 c. olive oil
2 garlic cloves, minced
1/4 tsp. sugar
Salt to taste


Pulse tomatoes with juices in a food processor until pureed but still thick. Heat oil in a medium saucepan over medium heat. Add garlic and cook, stirring often, until beginning to brown, about 2 minutes. Add tomatoes,sugar and season with salt. Bring to a boil, reduce heat, and simmer gently until sauce is slightly thickened, 10-15 minutes. In a separate skillet, heat butter on medium. Add mushrooms and garlic and cook until starts to brown, about 5 minutes. Add olives, salt and pepper. Cook and stir until mushrooms are completely cooked, about 5 minutes more. Add mushroom mixture to sauce. When pasta is cooked, drain well. In a large bowl combine sauce and pasta. Toss to coat well. Garnish with dried parsley if desired.
*NOTE* I use angel hair because I can't find true cappellini. Also, this sauce recipe makes about 3 cups. For an even easier version, use 3 cups of your favorite spaghetti sauce.


Shared on Make Ahead Meals Apr. 29, 2013
Shared on Mandy's Recipe Box Apr. 30, 2013
Shared on Lady Behind The Curtain May 2, 2013
Shared on Miz Helen's Country Cottage May 2, 2013
Shared on The Country Cook May 3, 2013
Pasta at Very Good Recipes
Pin It

reade more... Résuméabuiyad

Two Days Before Spring

Technically the first day of spring this year was March 20, 2013...that's for those of you who were buried under snow, hence not realizing it! Or like us, had a frigid week, beginning with a school cancellation due to ice, only 2 days before spring was to arrive. We have had 3 school cancellations this year due to weather, two of which came in March! Apparently, Old Man Winter didn't know he had over stayed his welcome and needed to move on.

Anyway, on this cold, icy "no school" day, I decided it was the perfect opportunity to play with my menu plan a little. See, I was supposed to be testing a new Crock Pot soup recipe later in the week, but since I had some extra time on my hands in the morning, plus what goes better with ice, wind and freezing temps, I switched a couple meals around so we could be warming up with a big bowl of soup later in the day.

This soup is a veggie lover's dream! So many colors, varieties and textures, you won't even miss the meat! In fact, if you use vegetable stock instead of the chicken (I used it because I had it on hand) it would make a fantastic, filling, vegetarian meal. The one ingredient that first caught my eye was kale. I love this dark leafy green, but I don't cook with it enough. In fact, the last time I did so was another soup, my Creamy Chicken and Wild Rice soup...and that was in January 2012! See, I told you I don't cook with it enough! This is also a great recipe because you can mix up the veggies you add. Whatever you have in the crisper, or whichever ones are your family's favorites, throw them in too! In fact, the original recipe didn't call for green beans at all, but I had some beautiful fresh, organic ones just waiting to be used up, so I thought why not.

If it is looking more like Spring where you are, I am sure you are as happy as can be. But if you are in an area that winter has camped out a little extra longer, find some solace in this soup. Either way, it's a comforting, healthy and delicious meal to come home to!

Crock Pot Minestrone Soup Adapted from Fix It and Forget It
6 c. chicken broth
4 carrots, peeled and diced
4 ribs celery, diced
1 medium onion, chopped
1 small zucchini, diced
1 c. kale, chopped
1/2 c. fresh green beans, chopped
1/2 c. pearl barley
1 (15 oz.) can cannellini beans
1 (28 oz.) can crushed tomatoes
2 cloves garlic, minced
1 tsp. dried parsley
1 tsp. dried oregano
1/2 tsp. dried thyme
Salt and Pepper to taste
Grated Parmesan cheese, optional

Mix everything in Crock Pot. Cook on LOW 6-8 hours until veggies are tender. Garnish with cheese if desired.


Shared on Make Ahead Meals Apr.1, 2013
Shared on Mandy's Recipe Box Apr. 3, 2013
Shared on Lady Behind The Curtain Apr. 3, 2013
Shared on The Country Cook Apr. 5, 2013
Crock Pot at Very Good Recipes
Pin It
Technically the first day of spring this year was March 20, 2013...that's for those of you who were buried under snow, hence not realizing it! Or like us, had a frigid week, beginning with a school cancellation due to ice, only 2 days before spring was to arrive. We have had 3 school cancellations this year due to weather, two of which came in March! Apparently, Old Man Winter didn't know he had over stayed his welcome and needed to move on.

Anyway, on this cold, icy "no school" day, I decided it was the perfect opportunity to play with my menu plan a little. See, I was supposed to be testing a new Crock Pot soup recipe later in the week, but since I had some extra time on my hands in the morning, plus what goes better with ice, wind and freezing temps, I switched a couple meals around so we could be warming up with a big bowl of soup later in the day.

This soup is a veggie lover's dream! So many colors, varieties and textures, you won't even miss the meat! In fact, if you use vegetable stock instead of the chicken (I used it because I had it on hand) it would make a fantastic, filling, vegetarian meal. The one ingredient that first caught my eye was kale. I love this dark leafy green, but I don't cook with it enough. In fact, the last time I did so was another soup, my Creamy Chicken and Wild Rice soup...and that was in January 2012! See, I told you I don't cook with it enough! This is also a great recipe because you can mix up the veggies you add. Whatever you have in the crisper, or whichever ones are your family's favorites, throw them in too! In fact, the original recipe didn't call for green beans at all, but I had some beautiful fresh, organic ones just waiting to be used up, so I thought why not.

If it is looking more like Spring where you are, I am sure you are as happy as can be. But if you are in an area that winter has camped out a little extra longer, find some solace in this soup. Either way, it's a comforting, healthy and delicious meal to come home to!

Crock Pot Minestrone Soup Adapted from Fix It and Forget It
6 c. chicken broth
4 carrots, peeled and diced
4 ribs celery, diced
1 medium onion, chopped
1 small zucchini, diced
1 c. kale, chopped
1/2 c. fresh green beans, chopped
1/2 c. pearl barley
1 (15 oz.) can cannellini beans
1 (28 oz.) can crushed tomatoes
2 cloves garlic, minced
1 tsp. dried parsley
1 tsp. dried oregano
1/2 tsp. dried thyme
Salt and Pepper to taste
Grated Parmesan cheese, optional

Mix everything in Crock Pot. Cook on LOW 6-8 hours until veggies are tender. Garnish with cheese if desired.


Shared on Make Ahead Meals Apr.1, 2013
Shared on Mandy's Recipe Box Apr. 3, 2013
Shared on Lady Behind The Curtain Apr. 3, 2013
Shared on The Country Cook Apr. 5, 2013
Crock Pot at Very Good Recipes
Pin It
reade more... Résuméabuiyad

It's Not A Rut, It's A Trend

There are so many of us who find ourselves falling into the mealtime rut. We find dishes our families enjoy and we make them again and again. They are easy because they are tried and true, and they are pleasing because we know they will be successful each and every time. But in my opinion, if you find something that tastes great, is a simple "go-to", and you can switch it up even a little each time, then it becomes a trend, not a rut!

So even though this idea came to me not too long after we enjoyed my Crock Pot Italian Sloppy Joes, I decided we didn't need to wait. Sure, they were another sloppy joe, but beyond the ground beef, there wasn't many other similarities. But to be honest, with my "boys" I knew I wouldn't have to worry about them complaining about the new trend in my kitchen. After all, they love sloppy joes and they love Mexican food, so I knew these would be a hit. 

Topped with your favorite taco toppings, these can truly be "make your own". How fun for a family dinner, or group gathering! Everyone can have one made to exactly their tastes. So, if you've found yourself in another dinner rut, change it up tonight with these; and then in a couple nights, try the Italian ones above. Then you too can say "It's not a run, it's a trend!"

Mexican Sloppy Joes
1 lb. ground beef
1 (1.1 oz) packet taco seasoning, or 7 tsp. homemade
1 (4 oz) can diced green chilies
2/3 c. water
Salt and Pepper to taste
Shredded Cheddar
Chopped Tomatoes
Shredded Lettuce
Buns

In a large skillet, brown beef until no longer pink. Drain if necessary. Add taco seasoning and water. Bring to a boil. Reduce heat and simmer until slightly thickened. Add green chilies and mix well. Reduce heat to low and allow to cook 5 minutes until flavors develop. Using a slotted spoon, add meat to bun bottoms. Top with cheese, allowing it to melt for a few seconds. Top with lettuce and then tomato (I find this order is best to keep everything together.) or other favorite taco toppings. 


Shared on Make Ahead Meals Mar. 25, 2013
Shared on Mandy's Recipe Box Mar. 26, 2013
Shared on Lady Behind The Curtain Mar. 27, 2013
Shared on Miz Helen's Country Cottage Mar. 28, 2013
Shared on The Country Cook Mar. 29, 2013
Mexican at Very Good Recipes
Pin It
There are so many of us who find ourselves falling into the mealtime rut. We find dishes our families enjoy and we make them again and again. They are easy because they are tried and true, and they are pleasing because we know they will be successful each and every time. But in my opinion, if you find something that tastes great, is a simple "go-to", and you can switch it up even a little each time, then it becomes a trend, not a rut!

So even though this idea came to me not too long after we enjoyed my Crock Pot Italian Sloppy Joes, I decided we didn't need to wait. Sure, they were another sloppy joe, but beyond the ground beef, there wasn't many other similarities. But to be honest, with my "boys" I knew I wouldn't have to worry about them complaining about the new trend in my kitchen. After all, they love sloppy joes and they love Mexican food, so I knew these would be a hit. 

Topped with your favorite taco toppings, these can truly be "make your own". How fun for a family dinner, or group gathering! Everyone can have one made to exactly their tastes. So, if you've found yourself in another dinner rut, change it up tonight with these; and then in a couple nights, try the Italian ones above. Then you too can say "It's not a run, it's a trend!"

Mexican Sloppy Joes
1 lb. ground beef
1 (1.1 oz) packet taco seasoning, or 7 tsp. homemade
1 (4 oz) can diced green chilies
2/3 c. water
Salt and Pepper to taste
Shredded Cheddar
Chopped Tomatoes
Shredded Lettuce
Buns

In a large skillet, brown beef until no longer pink. Drain if necessary. Add taco seasoning and water. Bring to a boil. Reduce heat and simmer until slightly thickened. Add green chilies and mix well. Reduce heat to low and allow to cook 5 minutes until flavors develop. Using a slotted spoon, add meat to bun bottoms. Top with cheese, allowing it to melt for a few seconds. Top with lettuce and then tomato (I find this order is best to keep everything together.) or other favorite taco toppings. 


Shared on Make Ahead Meals Mar. 25, 2013
Shared on Mandy's Recipe Box Mar. 26, 2013
Shared on Lady Behind The Curtain Mar. 27, 2013
Shared on Miz Helen's Country Cottage Mar. 28, 2013
Shared on The Country Cook Mar. 29, 2013
Mexican at Very Good Recipes
Pin It
reade more... Résuméabuiyad

Party Or Dinner

Lately I've been finding myself stumbling up on more and more recipes that would be perfect for a party, made for a party in fact...but there's one problem. I don't have a party on our calendar in sight. I know many of you entertain or get entertained on a weekly basis, but that just doesn't happen around here. Special occasions, holidays, birthdays...that's when they party platters come out in my house, but I refuse to wait for some of these yummy things I'm finding, so I simply take the recipe, make more of it, add somethings on the side...and we've got ourselves a new meal idea. And today's recipe is the perfect example of that.

Now, if you are need of a party idea, I'm telling you, your guests will flip for these! A taco they can eat with one hand, and probably in one bite!! All the flavors they love of a taco bar, but in an easy to handle tiny package. Not to mention, they are as cute as all get out. When I first saw this idea on Pinterest, it was actually before the holiday party season in our house, and yep, I forgot about them. It wasn't until a few weeks ago when I was going through some of my "pins" looking for inspiration I happened to find them once again and then kick myself for not including them in any one of many get togethers I could have. But oh well...these things happen, and I still got a new, fun weeknight dinner out of it...one that I know your kids will love as much as mine did! 

So if it's a quick Tuesday night supper or a last minute party treat you're looking for, search no further. EMM has you covered! 

Mini Taco Bites
1 bag Scoops tortilla chips
1 lb. ground beef
3/4 c. water
1 (4.5 oz) can chopped black olives
1 (1.1 oz) packet taco seasoning
1 (15 oz.) can petite diced tomatoes, drained
1 c. shredded cheddar cheese
Sour cream, optional

In a large skillet brown beef. Drain if necessary. Add taco seasoning and water. Bring to a boil. Reduce heat and cook about 5 minutes until slightly thickened. Add olives and tomatoes. Stir until well combined. Add cheese and stir until melted. Allow to cook 5-7 minutes until mixture is thick and flavors develop. Carefully fill chips with beef mixture and top with sour cream.
*NOTE* This made enough for about 30 for us, 10 each, for a meal. Plus I had some extra filling leftover. 


Shared on Make Ahead Meals Mar. 18, 2013
Shared on Mandy's Recipe Box Mar. 19, 2013
Shared on Lady Behind The Curtain Mar. 20, 2013
Shared on Miz Helen's Country Cottage Mar. 21, 2013
Shared on The Country Cook Mar. 22, 2013
Mexican at Very Good Recipes
Pin It
Lately I've been finding myself stumbling up on more and more recipes that would be perfect for a party, made for a party in fact...but there's one problem. I don't have a party on our calendar in sight. I know many of you entertain or get entertained on a weekly basis, but that just doesn't happen around here. Special occasions, holidays, birthdays...that's when they party platters come out in my house, but I refuse to wait for some of these yummy things I'm finding, so I simply take the recipe, make more of it, add somethings on the side...and we've got ourselves a new meal idea. And today's recipe is the perfect example of that.

Now, if you are need of a party idea, I'm telling you, your guests will flip for these! A taco they can eat with one hand, and probably in one bite!! All the flavors they love of a taco bar, but in an easy to handle tiny package. Not to mention, they are as cute as all get out. When I first saw this idea on Pinterest, it was actually before the holiday party season in our house, and yep, I forgot about them. It wasn't until a few weeks ago when I was going through some of my "pins" looking for inspiration I happened to find them once again and then kick myself for not including them in any one of many get togethers I could have. But oh well...these things happen, and I still got a new, fun weeknight dinner out of it...one that I know your kids will love as much as mine did! 

So if it's a quick Tuesday night supper or a last minute party treat you're looking for, search no further. EMM has you covered! 

Mini Taco Bites
1 bag Scoops tortilla chips
1 lb. ground beef
3/4 c. water
1 (4.5 oz) can chopped black olives
1 (1.1 oz) packet taco seasoning
1 (15 oz.) can petite diced tomatoes, drained
1 c. shredded cheddar cheese
Sour cream, optional

In a large skillet brown beef. Drain if necessary. Add taco seasoning and water. Bring to a boil. Reduce heat and cook about 5 minutes until slightly thickened. Add olives and tomatoes. Stir until well combined. Add cheese and stir until melted. Allow to cook 5-7 minutes until mixture is thick and flavors develop. Carefully fill chips with beef mixture and top with sour cream.
*NOTE* This made enough for about 30 for us, 10 each, for a meal. Plus I had some extra filling leftover. 


Shared on Make Ahead Meals Mar. 18, 2013
Shared on Mandy's Recipe Box Mar. 19, 2013
Shared on Lady Behind The Curtain Mar. 20, 2013
Shared on Miz Helen's Country Cottage Mar. 21, 2013
Shared on The Country Cook Mar. 22, 2013
Mexican at Very Good Recipes
Pin It
reade more... Résuméabuiyad

I'm A Sloppy Girl

Okay, here is my confession. I love Sloppy Joes...every kind...all kinds...any day of the week and twice on Sunday. Okay, so maybe that last one is a bit of a stretch, but seriously, they are absolutely 100% one of my go-to meals. I think it's because they were one of mom's also. They remind me of my child hood. They are fun to eat, easy to make, and super satisfying. I've done them all kinds of ways, each one just a little different, but I'm always on the lookout for new ones to try. So when I came across this one day while strolling through the blogisphere...I knew it would be showing up on our dinner table very soon.

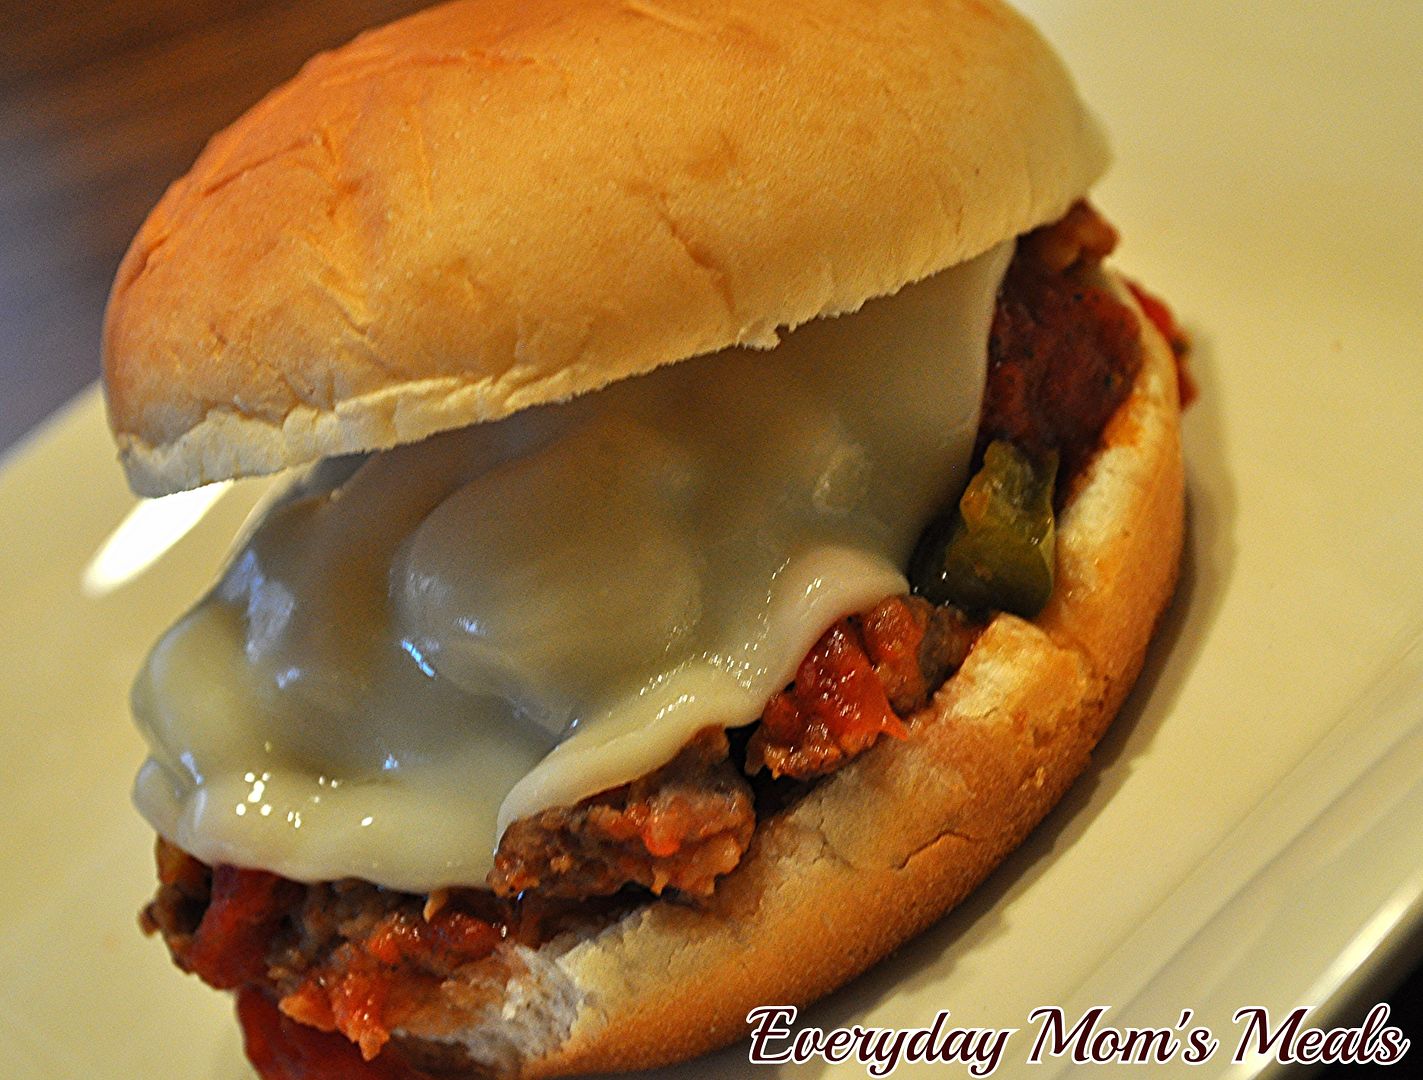
I already do an Italian spin on the "Joe" with my Pizza Joes, hands down one of Alex's favorites of all time. So when I first read that word-Italian- I almost dismissed it. Only because it was kind of a "been there, done that" mindset. But oh how happy am I that I kept reading! First off, my original version is done stove top, and that's perfectly fine. But these...these included 2 of my favorite words...Crock Pot. Oh, how my heart skips a beat reading those. Easy, cooked all day, deep flavored things come out of the slow cooker, and I'm always game! Not to mention, these used sausage instead of ground beef, and that was going to be a nice change. Something just a little different!

I guarantee your kids will love these. I mean...pizza on a bun...with melted cheese...what kid is going to turn that down? Heck, what adult is going to? And if you are a "pot-lucker" these would be a huge hit with any crowd! What can I say? I'm a sloppy kind of girl, and if you are to flip over this new version.

Crock Pot Italian Sloppy Joes From Skinny Taste
1 lb. ground Italian sausage
1/2 c. chopped onion
3 garlic cloves, minced
1 red bell pepper, chopped
1 green bell pepper, chopped
1 1/3 c. canned crushed tomatoes
1/2 tsp. Italian seasoning
Salt and Pepper to taste
Buns
Sliced Provolone Cheese

In a large skillet over medium heat, brown sausage, onions and garlic until no longer pink. Drain if necessary. Transfer to Crock Pot. Add peppers, tomatoes and seasonings. Cook on LOW for 4 hours. To serve, scoop onto bottom buns and add sliced cheese, allowing to sit for a few minutes to melt. 


Shared on Lady Behind The Curtain Mar. 13, 2013
Shared on Miz Helen's Country Cottage Mar. 14, 2013
Shared on The Country Cook Mar. 15, 2013
Italian at Very Good Recipes
Pin It
Okay, here is my confession. I love Sloppy Joes...every kind...all kinds...any day of the week and twice on Sunday. Okay, so maybe that last one is a bit of a stretch, but seriously, they are absolutely 100% one of my go-to meals. I think it's because they were one of mom's also. They remind me of my child hood. They are fun to eat, easy to make, and super satisfying. I've done them all kinds of ways, each one just a little different, but I'm always on the lookout for new ones to try. So when I came across this one day while strolling through the blogisphere...I knew it would be showing up on our dinner table very soon.

I already do an Italian spin on the "Joe" with my Pizza Joes, hands down one of Alex's favorites of all time. So when I first read that word-Italian- I almost dismissed it. Only because it was kind of a "been there, done that" mindset. But oh how happy am I that I kept reading! First off, my original version is done stove top, and that's perfectly fine. But these...these included 2 of my favorite words...Crock Pot. Oh, how my heart skips a beat reading those. Easy, cooked all day, deep flavored things come out of the slow cooker, and I'm always game! Not to mention, these used sausage instead of ground beef, and that was going to be a nice change. Something just a little different!

I guarantee your kids will love these. I mean...pizza on a bun...with melted cheese...what kid is going to turn that down? Heck, what adult is going to? And if you are a "pot-lucker" these would be a huge hit with any crowd! What can I say? I'm a sloppy kind of girl, and if you are to flip over this new version.

Crock Pot Italian Sloppy Joes From Skinny Taste
1 lb. ground Italian sausage
1/2 c. chopped onion
3 garlic cloves, minced
1 red bell pepper, chopped
1 green bell pepper, chopped
1 1/3 c. canned crushed tomatoes
1/2 tsp. Italian seasoning
Salt and Pepper to taste
Buns
Sliced Provolone Cheese

In a large skillet over medium heat, brown sausage, onions and garlic until no longer pink. Drain if necessary. Transfer to Crock Pot. Add peppers, tomatoes and seasonings. Cook on LOW for 4 hours. To serve, scoop onto bottom buns and add sliced cheese, allowing to sit for a few minutes to melt. 


Shared on Lady Behind The Curtain Mar. 13, 2013
Shared on Miz Helen's Country Cottage Mar. 14, 2013
Shared on The Country Cook Mar. 15, 2013
Italian at Very Good Recipes
Pin It
reade more... Résuméabuiyad

Leave It To The Kid To Simplify

Many of you know I am blessed with a child with a very wide palate when it comes to food, and he enjoys many things kids his age would never touch. But he is also a 8 year old boy, which means peanut butter & jelly, mac and cheese and hot dogs are also at the top of his list. He is the kid that will have a cheese and crackers for lunch but then request sushi for supper. He truly eats everything and anything; and it's because of this I believe he has started to ask more questions about the food that is in front of him. He watches what I do, and he is inquisitive beyond the typical "Mommy, what's for supper?" Now he wants to know what is in the dish, how did I cook it, what it's called etc. And it was during one of these conversations the title of this post came to me. 

Adam and I had watched an episode of Rachael Ray's daytime talk show during "Slow Cooker Week." As I've told you before, Mr. Everyday is not her biggest fan, and most of the food she makes, he turns up his nose at letting me know to not even try it. (And he's not a picky eater either, it's just the combinations she sometimes creates) But on this day she actually had a special guest showing one of her favorite slow cooker meals, Nigella Lawson, who he actually is a big fan of. (Personally I think he has a little crush on her, but that's our little secret.) I will admit, some of her recipes are a little complicated (or at least they seem to be) for my tastes, so I don't make a lot of Nigella's food, but when we saw this, I knew it would be easy as can be, and it looked incredibly delicious. Boy, am I glad we tuned in that morning!! 

If you haven't cooked with a lot of ground lamb, it's very lean and tender. In this dish, it gives it almost a silky quality and fantastic flavor. Plus the addition of red currant jelly offers a slight sweet note in the background. It really is the thing that makes them say "Hmmm...what is that?" 

So I was plating up supper, and little man walks out asking "What is this, Mommy?" I responded proudly with the name of the dish, thinking it sounded not only yummy but fancy! He looks down at his bowl and says "Oh, so it's goulash?" Well...yeah, I guess it does look like that. Leave it to the kid to take something and simplify it to the point that anybody could relate! 

If you are serving this to guests, use it's given name... it's certain to impress. However, if you are making this for your family, including little ones, take a tip from Alex and call it good ole' goulash! Whatever name you use, it's sure to please a hungry crowd!

Crock Pot Lamb Ragu Adapted from Nigella Lawson
1.5 lbs. ground lamb
1 large white onions, chopped
2 tsp. minced garlic
2 TBS olive oil
3 (15 oz.) cans diced tomatoes
2 TBS Worcestershire sauce
2 TBS red currant jelly
2 c. water
2 tsp. dried oregano
1 tsp. red pepper flakes
16 oz. elbow macaroni
Salt and Pepper to taste
Dried Parsley, for garnish

In a large skillet, heat olive oil to medium. Add onions and garlic. Saute until soft, about 5 minutes. Add lamb and break up. Continue cooking until meat is no longer pink, about 10 minutes. Season with oregano, red pepper flakes, salt and pepper. Add Worcestershire and jelly. Stir to combine. Add to Crock Pot. Pour diced tomatoes and water into mixture and stir well. Cook on LOW for 6 hours. 30 minutes before end, add macaroni and stir well. Cook for remaining 30 minutes until pasta is done. When ready to serve, garnish with dried parsley.


Shared on The Country Cook Mar.1, 2013
Shared on Make Ahead Meals Mar. 4, 2013
Shared on Miz Helen's Country Cottage Apr. 11, 2013
Lamb at Very Good Recipes
Pin It
Many of you know I am blessed with a child with a very wide palate when it comes to food, and he enjoys many things kids his age would never touch. But he is also a 8 year old boy, which means peanut butter & jelly, mac and cheese and hot dogs are also at the top of his list. He is the kid that will have a cheese and crackers for lunch but then request sushi for supper. He truly eats everything and anything; and it's because of this I believe he has started to ask more questions about the food that is in front of him. He watches what I do, and he is inquisitive beyond the typical "Mommy, what's for supper?" Now he wants to know what is in the dish, how did I cook it, what it's called etc. And it was during one of these conversations the title of this post came to me. 

Adam and I had watched an episode of Rachael Ray's daytime talk show during "Slow Cooker Week." As I've told you before, Mr. Everyday is not her biggest fan, and most of the food she makes, he turns up his nose at letting me know to not even try it. (And he's not a picky eater either, it's just the combinations she sometimes creates) But on this day she actually had a special guest showing one of her favorite slow cooker meals, Nigella Lawson, who he actually is a big fan of. (Personally I think he has a little crush on her, but that's our little secret.) I will admit, some of her recipes are a little complicated (or at least they seem to be) for my tastes, so I don't make a lot of Nigella's food, but when we saw this, I knew it would be easy as can be, and it looked incredibly delicious. Boy, am I glad we tuned in that morning!! 

If you haven't cooked with a lot of ground lamb, it's very lean and tender. In this dish, it gives it almost a silky quality and fantastic flavor. Plus the addition of red currant jelly offers a slight sweet note in the background. It really is the thing that makes them say "Hmmm...what is that?" 

So I was plating up supper, and little man walks out asking "What is this, Mommy?" I responded proudly with the name of the dish, thinking it sounded not only yummy but fancy! He looks down at his bowl and says "Oh, so it's goulash?" Well...yeah, I guess it does look like that. Leave it to the kid to take something and simplify it to the point that anybody could relate! 

If you are serving this to guests, use it's given name... it's certain to impress. However, if you are making this for your family, including little ones, take a tip from Alex and call it good ole' goulash! Whatever name you use, it's sure to please a hungry crowd!

Crock Pot Lamb Ragu Adapted from Nigella Lawson
1.5 lbs. ground lamb
1 large white onions, chopped
2 tsp. minced garlic
2 TBS olive oil
3 (15 oz.) cans diced tomatoes
2 TBS Worcestershire sauce
2 TBS red currant jelly
2 c. water
2 tsp. dried oregano
1 tsp. red pepper flakes
16 oz. elbow macaroni
Salt and Pepper to taste
Dried Parsley, for garnish

In a large skillet, heat olive oil to medium. Add onions and garlic. Saute until soft, about 5 minutes. Add lamb and break up. Continue cooking until meat is no longer pink, about 10 minutes. Season with oregano, red pepper flakes, salt and pepper. Add Worcestershire and jelly. Stir to combine. Add to Crock Pot. Pour diced tomatoes and water into mixture and stir well. Cook on LOW for 6 hours. 30 minutes before end, add macaroni and stir well. Cook for remaining 30 minutes until pasta is done. When ready to serve, garnish with dried parsley.


Shared on The Country Cook Mar.1, 2013
Shared on Make Ahead Meals Mar. 4, 2013
Shared on Miz Helen's Country Cottage Apr. 11, 2013
Lamb at Very Good Recipes
Pin It
reade more... Résuméabuiyad

Friday Night Tradition

For so many around this country Friday nights mean many things. The start to the weekend. Family time. Movie night. Date night. And one that seems to becoming more and more popular...Pizza Night! Maybe it's because by Friday night moms (and dads too) around America have cooked enough meals through the week to feed an army and are ready for a break. Maybe it's simply because it's a fun simple meal that is perfect for any of the occasions mentioned above. Whatever the reason, there is no doubt pizza delivery cars are out in droves in every neighborhood every single Friday night.

And like so many of you, we have included this tradition in our house too. But for us, it's not always delivered to our front door. In fact, most of the time it isn't. I have found different ways of incorporating pizza into our Friday meals that are still simple and fun, but made in my very own kitchen. From my Pizza Casserole to my Mini Pizzas we still feel like we're partaking in a fun trend, but not always ordering out.

This is yet another recipe to put on that list. I love margherita pizza but truly never realized just how easy it could be to make myself. I enjoy the fact it has familiar pizza flavors but without a heavy sauce, it's a little lighter and fresher to me. With simple ingredients, but intense flavor, this is sure to be a pizza that the whole family will love, even if it's served on a Tuesday instead of a Friday!

Garlic Butter Crusted Margherita Pizza Adapted from Pillsbury
1 can refrigerated pizza crust
1 10 oz. container grape tomatoes, halved
1/4 cup fresh basil, chopped
8 oz. mozzarella cheese
2 TBS olive oil
2 TBS butter, softened
1 TBS and 1/2 tsp minced garlic
Salt and Pepper to taste

Preheat oven to 400. Grease a large baking sheet. In a large skillet, heat olive oil on medium high heat. Add tomatoes, 1/2 tsp garlic, salt and pepper. Reduce heat to medium and cook 5 minutes. Using a potato masher, lightly crush tomatoes, and continue cooking for 10 minutes until slightly thickened. Set aside to cool slightly. In a small bowl combine butter and 1 TBS garlic. Mix until smooth. Place pizza crust on prepared pan and press into 15x10 rectangle using fingers. Spread garlic butter mixture over evenly. Bake for 7 minutes. Remove and spread tomato mixture on partial baked crust. Sprinkle with cheese and bake for 7-10 minutes until cheese is melted and crust is golden brown. Remove and sprinkle with fresh basil before serving.


Shared on Lady Behind The Curtain Feb. 27, 2013
Shared on Miz Helen's Country Cottage Feb. 28, 2013
Shared on The Country Cook Mar. 1, 2013
Pizza at Very Good Recipes
Pin It
For so many around this country Friday nights mean many things. The start to the weekend. Family time. Movie night. Date night. And one that seems to becoming more and more popular...Pizza Night! Maybe it's because by Friday night moms (and dads too) around America have cooked enough meals through the week to feed an army and are ready for a break. Maybe it's simply because it's a fun simple meal that is perfect for any of the occasions mentioned above. Whatever the reason, there is no doubt pizza delivery cars are out in droves in every neighborhood every single Friday night.

And like so many of you, we have included this tradition in our house too. But for us, it's not always delivered to our front door. In fact, most of the time it isn't. I have found different ways of incorporating pizza into our Friday meals that are still simple and fun, but made in my very own kitchen. From my Pizza Casserole to my Mini Pizzas we still feel like we're partaking in a fun trend, but not always ordering out.

This is yet another recipe to put on that list. I love margherita pizza but truly never realized just how easy it could be to make myself. I enjoy the fact it has familiar pizza flavors but without a heavy sauce, it's a little lighter and fresher to me. With simple ingredients, but intense flavor, this is sure to be a pizza that the whole family will love, even if it's served on a Tuesday instead of a Friday!

Garlic Butter Crusted Margherita Pizza Adapted from Pillsbury
1 can refrigerated pizza crust
1 10 oz. container grape tomatoes, halved
1/4 cup fresh basil, chopped
8 oz. mozzarella cheese
2 TBS olive oil
2 TBS butter, softened
1 TBS and 1/2 tsp minced garlic
Salt and Pepper to taste

Preheat oven to 400. Grease a large baking sheet. In a large skillet, heat olive oil on medium high heat. Add tomatoes, 1/2 tsp garlic, salt and pepper. Reduce heat to medium and cook 5 minutes. Using a potato masher, lightly crush tomatoes, and continue cooking for 10 minutes until slightly thickened. Set aside to cool slightly. In a small bowl combine butter and 1 TBS garlic. Mix until smooth. Place pizza crust on prepared pan and press into 15x10 rectangle using fingers. Spread garlic butter mixture over evenly. Bake for 7 minutes. Remove and spread tomato mixture on partial baked crust. Sprinkle with cheese and bake for 7-10 minutes until cheese is melted and crust is golden brown. Remove and sprinkle with fresh basil before serving.


Shared on Lady Behind The Curtain Feb. 27, 2013
Shared on Miz Helen's Country Cottage Feb. 28, 2013
Shared on The Country Cook Mar. 1, 2013
Pizza at Very Good Recipes
Pin It
reade more... Résuméabuiyad

No Sauce??

Okay first thing is first. I can't let today's post begin without taking a minute to say Happy Birthday to the very best woman I know. The most patient, loving and kind person I know. The lady who has always been in my corner, and to this day will still spoil me and tell me every chance she gets that "I am her world". My person I can talk to like a friend, but get guidance from like a parent. That's right, today is my Mom's birthday, and nobody else on this earth deserves a happy, blessed day as much as she does. So, "Happy Birthday, Mom. I love you. I strive to be more like you every day, and treasure you a little more with each passing year."

Okay, now onto the food!

Pasta and sauce. Sauce and pasta. These words go hand in hand, and are pretty dependent on one another. Or so I thought. Until I found this recipe...

When I first read the list of ingredients I was pretty psyched because of all the veggies, especially the zucchini. I can't get enough of it, and don't have nearly enough recipes with it, so that was the first thing to catch my eye. (Side note: Be sure to remember this dish come summer when all of our garden growers have zucchini coming out of our ears!) The second thing, well honestly the second and third, thing I noticed (because I re-read the list again to make sure) was that it contained no sauce per say. Or at least not the conventional way I think of pasta sauces. So to be honest, I was a little leery wondering if it would be too dry for our tastes. Not at all! The saute of veggies and the renderings of the sausage truly make a sauce like quality, coating every inch of the pasta.

While I didn't do the actual math while shopping for this recipe, I can say with almost certainty it could easily be made for less than $10, especially since a couple of the things, like the onion and garlic, you might already have on hand. So if feeding your family on a budget is a weekly struggle, this is a great one to stretch a buck.

Sauce or not, this is a delicious pasta supper that will satisfy your hungry family any night of the week.

Bowtie Pasta with Italian Sausage From Comfy in the Kitchen
16 oz. bowtie pasta, cooked and drained
5 Sweet Italian Sausage links
15 cherry tomatoes, halved
1 zucchini, sliced
1 medium onion, sliced
3 TBS olive oil
2 cloves garlic, minced

While pasta is cooking, in a large skillet cook sausages according to package directions. Mine were browned on all sides and then simmered in 1/2 c. water until cooked through. When cooked, drain on paper towels and slice into coin shapes. Add the olive oil to renderings from sausage on medium heat. Add all veggies and saute until tender, about 5-7 minutes. Add sausage back in and mix well. Mix drained pasta with sausage mixture and add Parmesan cheese if desired.


Shared on Lady Behind The Curtain Feb. 20, 2013
Shared on Miz Helen's Country Cottage Feb. 21, 2013
Shared on The Country Cook Feb. 22, 2013
Pasta at Very Good Recipes
Pin It
Okay first thing is first. I can't let today's post begin without taking a minute to say Happy Birthday to the very best woman I know. The most patient, loving and kind person I know. The lady who has always been in my corner, and to this day will still spoil me and tell me every chance she gets that "I am her world". My person I can talk to like a friend, but get guidance from like a parent. That's right, today is my Mom's birthday, and nobody else on this earth deserves a happy, blessed day as much as she does. So, "Happy Birthday, Mom. I love you. I strive to be more like you every day, and treasure you a little more with each passing year."

Okay, now onto the food!

Pasta and sauce. Sauce and pasta. These words go hand in hand, and are pretty dependent on one another. Or so I thought. Until I found this recipe...

When I first read the list of ingredients I was pretty psyched because of all the veggies, especially the zucchini. I can't get enough of it, and don't have nearly enough recipes with it, so that was the first thing to catch my eye. (Side note: Be sure to remember this dish come summer when all of our garden growers have zucchini coming out of our ears!) The second thing, well honestly the second and third, thing I noticed (because I re-read the list again to make sure) was that it contained no sauce per say. Or at least not the conventional way I think of pasta sauces. So to be honest, I was a little leery wondering if it would be too dry for our tastes. Not at all! The saute of veggies and the renderings of the sausage truly make a sauce like quality, coating every inch of the pasta.

While I didn't do the actual math while shopping for this recipe, I can say with almost certainty it could easily be made for less than $10, especially since a couple of the things, like the onion and garlic, you might already have on hand. So if feeding your family on a budget is a weekly struggle, this is a great one to stretch a buck.

Sauce or not, this is a delicious pasta supper that will satisfy your hungry family any night of the week.

Bowtie Pasta with Italian Sausage From Comfy in the Kitchen
16 oz. bowtie pasta, cooked and drained
5 Sweet Italian Sausage links
15 cherry tomatoes, halved
1 zucchini, sliced
1 medium onion, sliced
3 TBS olive oil
2 cloves garlic, minced

While pasta is cooking, in a large skillet cook sausages according to package directions. Mine were browned on all sides and then simmered in 1/2 c. water until cooked through. When cooked, drain on paper towels and slice into coin shapes. Add the olive oil to renderings from sausage on medium heat. Add all veggies and saute until tender, about 5-7 minutes. Add sausage back in and mix well. Mix drained pasta with sausage mixture and add Parmesan cheese if desired.


Shared on Lady Behind The Curtain Feb. 20, 2013
Shared on Miz Helen's Country Cottage Feb. 21, 2013
Shared on The Country Cook Feb. 22, 2013
Pasta at Very Good Recipes
Pin It
reade more... Résuméabuiyad

Snow or Sun

I don't care if there is 3 feet of snow on the ground or if there is a month long heat wave happening, it's a good time for a new pasta salad recipe. Any time. All the time! We love the stuff. I have so many varieties I make I sometimes lose track of them; and now I have yet another to add to the list.

A couple weeks ago our aunt was cleaning out her pantry and found a Greek Seasoning blend she had bought for one recipe, never used again, and since she won't be making that recipe again (let's just say it wasn't her favorite) she asked if I could use it. Sure I can! I have a bunch of recipes that call for Greek Seasoning, and even if I didn't, it's a free seasoning blend. I'll take it.

Well, I had never heard of this particular brand, so I looked them up online. Cavender's All Purpose Greek Seasoning. And while I was on their site, I found some great recipe ideas, including this pasta salad. I guess if I didn't have enough recipes to use it in, now I do! 

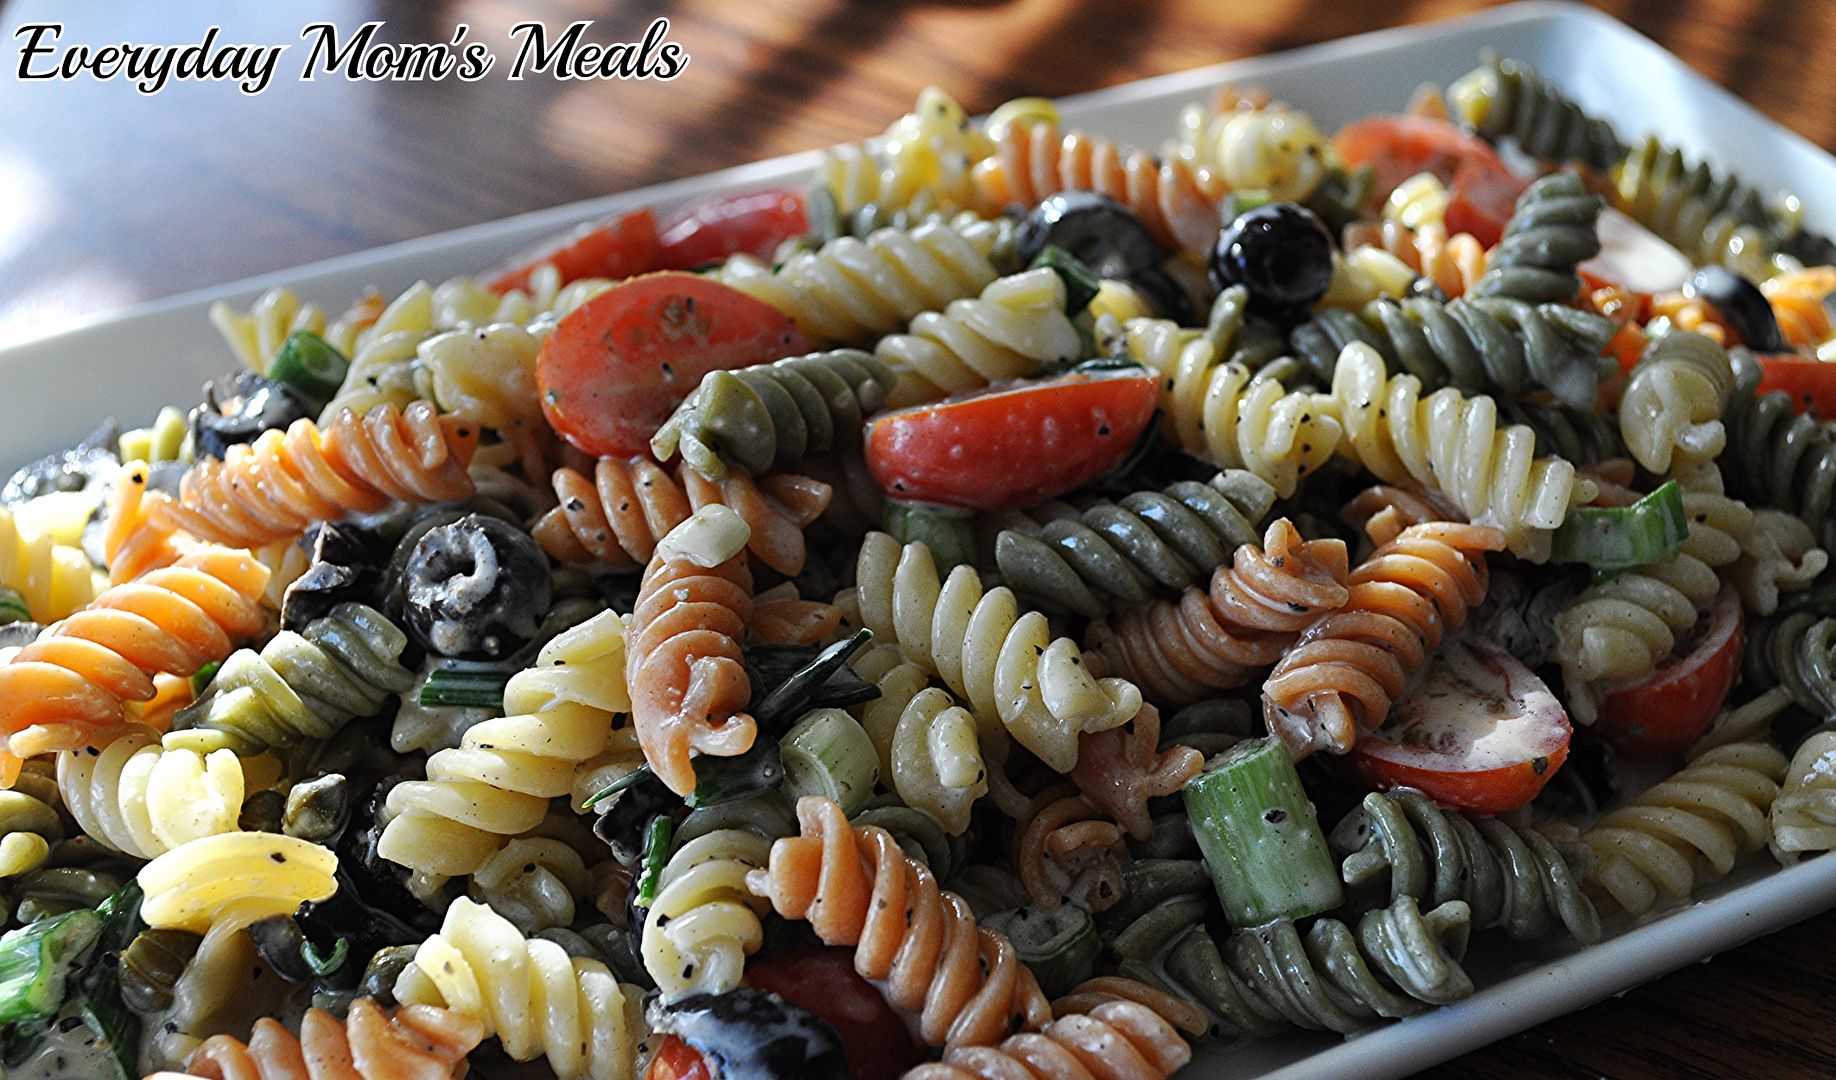
This makes a great side dish any night of the week and is bursting with an unique Mediterranean flavor. Plus, it's easily adaptable to include the veggies you love. I added some, and took a couple away from the original recipe to use what I had on hand. 

If you want to wait until warmer weather to enjoy this, that's your choice. To each their own. But me...I will be enjoying this for dinner, watching the snow flakes gather on the frozen grass!

Greek Pasta Salad Adapted from Cavender's
12 oz. garden rotini pasta
5 green onions, chopped
1 (2.5) oz. can sliced black olives
1/3 c. grape tomatoes, halved
2 TBS capers
1/2 c. mayo
4 1/4 TBS lemon juice
1/4 c. olive oil
3 TBS Greek Seasoning

Boil pasta, drain and rinse with cold water. Drain again. In a medium bowl combine olive oil, seasoning, lemon juice and mayo. Whisk well to combine. In a large bowl combine pasta, olives, capers, green onions and tomatoes. Stir well. Pour dressing over. Mix well to combine. Chill until serving, at least 2 hours. 


Shared on The Country Cook Feb. 15, 2013
Shared on Make Ahead Meals Feb. 18, 2013
Greek at Very Good Recipes
Pin It
I don't care if there is 3 feet of snow on the ground or if there is a month long heat wave happening, it's a good time for a new pasta salad recipe. Any time. All the time! We love the stuff. I have so many varieties I make I sometimes lose track of them; and now I have yet another to add to the list.

A couple weeks ago our aunt was cleaning out her pantry and found a Greek Seasoning blend she had bought for one recipe, never used again, and since she won't be making that recipe again (let's just say it wasn't her favorite) she asked if I could use it. Sure I can! I have a bunch of recipes that call for Greek Seasoning, and even if I didn't, it's a free seasoning blend. I'll take it.

Well, I had never heard of this particular brand, so I looked them up online. Cavender's All Purpose Greek Seasoning. And while I was on their site, I found some great recipe ideas, including this pasta salad. I guess if I didn't have enough recipes to use it in, now I do! 

This makes a great side dish any night of the week and is bursting with an unique Mediterranean flavor. Plus, it's easily adaptable to include the veggies you love. I added some, and took a couple away from the original recipe to use what I had on hand. 

If you want to wait until warmer weather to enjoy this, that's your choice. To each their own. But me...I will be enjoying this for dinner, watching the snow flakes gather on the frozen grass!

Greek Pasta Salad Adapted from Cavender's
12 oz. garden rotini pasta
5 green onions, chopped
1 (2.5) oz. can sliced black olives
1/3 c. grape tomatoes, halved
2 TBS capers
1/2 c. mayo
4 1/4 TBS lemon juice
1/4 c. olive oil
3 TBS Greek Seasoning

Boil pasta, drain and rinse with cold water. Drain again. In a medium bowl combine olive oil, seasoning, lemon juice and mayo. Whisk well to combine. In a large bowl combine pasta, olives, capers, green onions and tomatoes. Stir well. Pour dressing over. Mix well to combine. Chill until serving, at least 2 hours. 


Shared on The Country Cook Feb. 15, 2013
Shared on Make Ahead Meals Feb. 18, 2013
Greek at Very Good Recipes
Pin It
reade more... Résuméabuiyad

It's Not a Soup, It's a Stew

I guess I feel the need to defend myself. I know I've been bombarding you with so many slow cooker soup recipes lately, I'm almost starting to feel guilty when I find another I want to try. But then I remember it's freezing outside for many of you too, and hope that you have been enjoying this little trend as much as I have. But this time...technically....it's not a soup. Okay, I realize I'm talking semantics here, but just bare with me because this dish is absolutely worth it!

They always say if you don't enjoy the weather in Indiana, wait about 5 minutes because it will change. The last week of January demonstrated this perfectly. That Tuesday we hit a record high of 64, and yes I was wearing flip flops. That night into Wednesday we had severe storms, with tornadoes breaking out across the southern part of the state. By Wednesday night the winds were still there, and the temp had dropped into the 20's. And on Thursday and Friday we never made it out of the teens with subzero wind chills. It was COLD. No...it was FREEZING! And yes, it would be miserable anytime, but after that extreme warm up, it was even more of a jolt to the system. That Friday also happened to be a school holiday for us, so I was very thankful we didn't have to venture out into it; but my boys were still doing to Taekwondo that evening, so I wanted something to warm them up when they got home.

What better way to warm them from the inside out than a big bowl of stew! With hearty chunks of meat, veggies and a rich thick broth, this is definitely a stew that eats like a meal. Plus, since it basically cooked itself all day I was able to do fun things with my little man while he was home with me.

This new Crock Pot and I have become the best of friends. I love finding new things to cook in, and no better time of year than now to get "stuck" in the soup section of my cookbooks. But wait, remember...it's not a soup...it's a stew!

Crock Pot Irish Stew From Fix It and Forget It
2 lb. stewing beef, cubed (I used a chuck roast)
2 large potatoes, peeled and diced
2 c. diced carrots
1 envelope onion soup mix
2 (10 3/4 oz) cans tomato soup
1 soup can water
16 oz. frozen peas
Salt and Pepper to taste
Parsley, for garnish

Combine beef, potatoes, carrots, soup mix, tomato soup, can of water, salt and pepper in Crock Pot. Cook on LOW 8 hours. Add frozen peas and 1/4 c. water. Cook on LOW 1 additional hour. Garnish with parsley.


Shared on Lady Behind The Curtain Feb. 13, 2013
Shared on Miz Helen's Country Cottage Feb. 14, 2013
Shared on The Country Cook Feb. 15, 2013
Stew at Very Good Recipes
Pin It
I guess I feel the need to defend myself. I know I've been bombarding you with so many slow cooker soup recipes lately, I'm almost starting to feel guilty when I find another I want to try. But then I remember it's freezing outside for many of you too, and hope that you have been enjoying this little trend as much as I have. But this time...technically....it's not a soup. Okay, I realize I'm talking semantics here, but just bare with me because this dish is absolutely worth it!

They always say if you don't enjoy the weather in Indiana, wait about 5 minutes because it will change. The last week of January demonstrated this perfectly. That Tuesday we hit a record high of 64, and yes I was wearing flip flops. That night into Wednesday we had severe storms, with tornadoes breaking out across the southern part of the state. By Wednesday night the winds were still there, and the temp had dropped into the 20's. And on Thursday and Friday we never made it out of the teens with subzero wind chills. It was COLD. No...it was FREEZING! And yes, it would be miserable anytime, but after that extreme warm up, it was even more of a jolt to the system. That Friday also happened to be a school holiday for us, so I was very thankful we didn't have to venture out into it; but my boys were still doing to Taekwondo that evening, so I wanted something to warm them up when they got home.

What better way to warm them from the inside out than a big bowl of stew! With hearty chunks of meat, veggies and a rich thick broth, this is definitely a stew that eats like a meal. Plus, since it basically cooked itself all day I was able to do fun things with my little man while he was home with me.

This new Crock Pot and I have become the best of friends. I love finding new things to cook in, and no better time of year than now to get "stuck" in the soup section of my cookbooks. But wait, remember...it's not a soup...it's a stew!

Crock Pot Irish Stew From Fix It and Forget It
2 lb. stewing beef, cubed (I used a chuck roast)
2 large potatoes, peeled and diced
2 c. diced carrots
1 envelope onion soup mix
2 (10 3/4 oz) cans tomato soup
1 soup can water
16 oz. frozen peas
Salt and Pepper to taste
Parsley, for garnish

Combine beef, potatoes, carrots, soup mix, tomato soup, can of water, salt and pepper in Crock Pot. Cook on LOW 8 hours. Add frozen peas and 1/4 c. water. Cook on LOW 1 additional hour. Garnish with parsley.


Shared on Lady Behind The Curtain Feb. 13, 2013
Shared on Miz Helen's Country Cottage Feb. 14, 2013
Shared on The Country Cook Feb. 15, 2013
Stew at Very Good Recipes
Pin It
reade more... Résuméabuiyad

I Make No Apologies

If you are reading this thinking "Please don't let her be sharing yet another Crock Pot soup recipe"...please look away now. I am sorry to disappoint you, but yes, once again I am here to offer something yummy and warm that cooks itself!

But I also know many of you are thinking "Yay....another Crock Pot soup~ I can always use one more!" If you fall into that category, welcome to my world! I can just never get enough of them! On the day I made this, it was snowing, cold and it was such a comfort to have this on the counter simmering away all day long. It was almost picturesque! I don't know about you, but this time of the year tends to put me in a rut. The holidays are over, my birthday isn't until the end of February, and they seem to be the longest, coldest, darkest weeks of the year, which tend to affect my mood. But knowing supper is something warm, both for the body and soul, helps to cheer me up while filling me up!

So if you don't need another slow cooker soup, please come back tomorrow to see what I served with this, it will be worth it. But I will make no apologies for sharing this delicious recipe, for some days, a warm bowl of soup is the only think to look forward to!

Ham, Bean and Tomato Soup Adapted from Fix It and Forget It
2 c. 12-bean soup mix
1 lb. diced ham
2 c. chicken broth
6 c. water
1 medium onion, chopped
2 garlic cloves, minced
1 (15 oz.) can diced tomatoes, undrained
1 (10 oz.) can tomatoes with green chilies, undrained
Salt and Pepper to taste

Place beans in slow cooker, OFF, and cover with water. Soak over night. The next day, drain beans well. Place back in slow cooker. Add all other ingredients. Cook on HIGH 4 hours. Lower heat to LOW and cook 3 additional hours.
*NOTE* I like to serve this with some whole wheat Texas toast croutons. Simply butter both sides of a bread, toast in skillet. Cut into bite sized pieces.


Shared on Miz Helen's Country Cottage Jan. 31, 2013
Shared on The Country Cook Feb. 1, 2013
Soup at Very Good Recipes
Pin It
If you are reading this thinking "Please don't let her be sharing yet another Crock Pot soup recipe"...please look away now. I am sorry to disappoint you, but yes, once again I am here to offer something yummy and warm that cooks itself!

But I also know many of you are thinking "Yay....another Crock Pot soup~ I can always use one more!" If you fall into that category, welcome to my world! I can just never get enough of them! On the day I made this, it was snowing, cold and it was such a comfort to have this on the counter simmering away all day long. It was almost picturesque! I don't know about you, but this time of the year tends to put me in a rut. The holidays are over, my birthday isn't until the end of February, and they seem to be the longest, coldest, darkest weeks of the year, which tend to affect my mood. But knowing supper is something warm, both for the body and soul, helps to cheer me up while filling me up!

So if you don't need another slow cooker soup, please come back tomorrow to see what I served with this, it will be worth it. But I will make no apologies for sharing this delicious recipe, for some days, a warm bowl of soup is the only think to look forward to!

Ham, Bean and Tomato Soup Adapted from Fix It and Forget It
2 c. 12-bean soup mix
1 lb. diced ham
2 c. chicken broth
6 c. water
1 medium onion, chopped
2 garlic cloves, minced
1 (15 oz.) can diced tomatoes, undrained
1 (10 oz.) can tomatoes with green chilies, undrained
Salt and Pepper to taste

Place beans in slow cooker, OFF, and cover with water. Soak over night. The next day, drain beans well. Place back in slow cooker. Add all other ingredients. Cook on HIGH 4 hours. Lower heat to LOW and cook 3 additional hours.
*NOTE* I like to serve this with some whole wheat Texas toast croutons. Simply butter both sides of a bread, toast in skillet. Cut into bite sized pieces.


Shared on Miz Helen's Country Cottage Jan. 31, 2013
Shared on The Country Cook Feb. 1, 2013
Soup at Very Good Recipes
Pin It
reade more... Résuméabuiyad

It's Official, We Are Fiends

Pasta. Just the word makes me smile. I just can't get enough of the stuff. I'm convinced I must have been named Isabella and lived in some quaint Italian village in my past life! And I have passed this obsession onto my son. Well, to be fair, he didn't really have a fighting chance because he got the pasta gene from both parents, since Mr. Everyday loves it just as much as I do. I'm not kidding, these boys could eat spaghetti 7 nights a week and twice on Sunday and be totally happy. But as much as we love the stuff, I do try to limit it to one dinner per week. For us, yes it's a favorite, but it's also an indulgence and I don't ever want that feeling to get stale or "old".

So, when I was flipping through my latest Gooseberry Patch book, I was so excited to see an entire section dedicated to Italian! This is one of the two books released this month that I am so lucky to have recipes in! (And you can win a copy of yourself in my latest GIVEAWAY! Click here for for details!)

The minute I saw this recipe I was super excited because it had a little something for each of us. See, the boys truly prefer a red sauce while I tend to be a cream fan. But this has the best of both worlds because it's what I like to call a "blush" sauce. No, that's not a technical term, but it makes sense to me! You take the two, mix them, and it looks as if the pasta is blushing.

This was a big hit! We ate the entire pot, and loved every single bite. With the Alfredo sauce you might think it would be a little heavy, but it's truly not. It's rich, and deep in flavor, but doesn't "sit" heavy after you eat it.  Plus, it's not one of those pasta dishes that has sauce on the first two bites, but the rest is bare. This sauce is so creamy, it coats every inch of the linguine for equal distribution!

If you are a pasta fiend like we are, be sure to give this a try tonight. Super simple. Super tasty. The perfect weeknight addiction fix!

Creamy Marinara Linguine Adapted from Weeknight Dinners
1 lb. linguine, cooked and drained
1 (14.5 oz ) can petite diced tomatoes, drained well
1 (14. 5 oz) can regular diced tomatoes, undrained
1 (15 oz.) jar Alfredo sauce
1/2 c. milk
3 TBS olive oil
2 garlic cloves, grated or minced
1 tsp. Italian seasoning
1 tsp. dried parsley
Salt and Pepper to taste

While pasta is cooking, heat oil in large skillet over medium heat. Add garlic and saute' for 30 seconds. Add undrained tomatoes. Stir well. When heated add Alfredo sauce, milk and drained tomatoes. Increase heat and bring to a bubble. Reduce heat, add seasonings and simmer on low for 10 minutes until slightly thickened. When pasta is cooked, return to hot pot. Mix sauce with pasta, stirring well.


Shared on Lady Behind The Curtain Jan. 30, 2013
Shared on Miz Helen's Country Cottage Jan. 31, 2013
Shared on The Country Cook Feb. 1, 2013

Pasta at Very Good Recipes
Pin It
Pasta. Just the word makes me smile. I just can't get enough of the stuff. I'm convinced I must have been named Isabella and lived in some quaint Italian village in my past life! And I have passed this obsession onto my son. Well, to be fair, he didn't really have a fighting chance because he got the pasta gene from both parents, since Mr. Everyday loves it just as much as I do. I'm not kidding, these boys could eat spaghetti 7 nights a week and twice on Sunday and be totally happy. But as much as we love the stuff, I do try to limit it to one dinner per week. For us, yes it's a favorite, but it's also an indulgence and I don't ever want that feeling to get stale or "old".

So, when I was flipping through my latest Gooseberry Patch book, I was so excited to see an entire section dedicated to Italian! This is one of the two books released this month that I am so lucky to have recipes in! (And you can win a copy of yourself in my latest GIVEAWAY! Click here for for details!)

The minute I saw this recipe I was super excited because it had a little something for each of us. See, the boys truly prefer a red sauce while I tend to be a cream fan. But this has the best of both worlds because it's what I like to call a "blush" sauce. No, that's not a technical term, but it makes sense to me! You take the two, mix them, and it looks as if the pasta is blushing.

This was a big hit! We ate the entire pot, and loved every single bite. With the Alfredo sauce you might think it would be a little heavy, but it's truly not. It's rich, and deep in flavor, but doesn't "sit" heavy after you eat it.  Plus, it's not one of those pasta dishes that has sauce on the first two bites, but the rest is bare. This sauce is so creamy, it coats every inch of the linguine for equal distribution!

If you are a pasta fiend like we are, be sure to give this a try tonight. Super simple. Super tasty. The perfect weeknight addiction fix!

Creamy Marinara Linguine Adapted from Weeknight Dinners
1 lb. linguine, cooked and drained
1 (14.5 oz ) can petite diced tomatoes, drained well
1 (14. 5 oz) can regular diced tomatoes, undrained
1 (15 oz.) jar Alfredo sauce
1/2 c. milk
3 TBS olive oil
2 garlic cloves, grated or minced
1 tsp. Italian seasoning
1 tsp. dried parsley
Salt and Pepper to taste

While pasta is cooking, heat oil in large skillet over medium heat. Add garlic and saute' for 30 seconds. Add undrained tomatoes. Stir well. When heated add Alfredo sauce, milk and drained tomatoes. Increase heat and bring to a bubble. Reduce heat, add seasonings and simmer on low for 10 minutes until slightly thickened. When pasta is cooked, return to hot pot. Mix sauce with pasta, stirring well.


Shared on Lady Behind The Curtain Jan. 30, 2013
Shared on Miz Helen's Country Cottage Jan. 31, 2013
Shared on The Country Cook Feb. 1, 2013

Pasta at Very Good Recipes
Pin It
reade more... Résuméabuiyad

Weekend Company {Guest Blogger Bekki}

Good Morning and welcome to another weekend. Was your week a busy one? Ours sure was, so I'm very happy to have the next 3 days "off". Yep, that's right we have a 3 day weekend and it's definitely appreciated!

Today I welcome Bekki, EMM super fan and regular here on Weekend Company, back into the kitchen with me! So grab a seat, something warm to drink and join us!


I am married to my wonderful husband Josh, have a beautiful 12 year old step daughter Amy and 2 fur baby sweethearts Minnie and Shadow. I am a self taught baker/cook. I taught Wilton cake decorating for a while, worked in a grocery store bakery and have even spent time baking wedding/birthday cakes as a hobby on the side. My love for cooking has been since childhood. Spending time with my mother, aunts, and grandmothers. Aiding in their recipes or just being there for the conversation. Its always been a source of calm, peace, and ultimate fulfillment. The idea that you add your love to each recipe and share it with the people you care about is such an amazing blessing to me in more ways then I can ever put on paper. I have decided writing a cookbook was something I could do to share my love of food with family, friends, and whomever else comes my way. I hope your day is blessed with all your favorite things. 

Happy Saturday EMM family! I hope the New year is treating you all well, and finds you in great spirits! Thank you again, Mrs. EMM for inviting me back to spend some time with you. :D

With the holidays now behind us and the new years resolutions still strong in our minds. I thought this recipe would warm us all and keep our goals in sight. I have been able to lose over 60 pounds in the past 6 months and I feel I still have a way to go. So, one of my goals is to cook at home more often. Keeping good hearty recipes, and my pantry full will surely help me. What goals have you set for yourself this year? Who's up for the challenge of meeting our goals? I know I am! Blessings and good luck in all of your endeavors. 


Turkey Chili
 2 c. precooked turkey, chopped
1 green bell pepper, chopped
1 medium onion, chopped
1 tbsp. olive oil
1 40 oz. can pinto beans
1 28 oz. can baked beans
1 28 oz. can diced tomatoes
1 ½ tbsp. chili powder
1 tbsp. granulated garlic
1 tbsp. cumin
½ tbsp. red chili flakes
Salt to taste
In medium soup pot, over medium heat add olive oil, onions, and bell peppers.  Stirring occasionally, cook until onions are clear and bell pepper has softened 7-10 minutes. Add beans and seasonings. Allow to simmer about 25 minutes until beans are completely heated through and veggies have softened slightly. Add turkey and stir to combine. Check seasoning for desired taste, adjust as needed. Chili is ready when turkey has warmed through. Serve hot with your choice of toppings, shredded cheese, sour cream, over tortilla chips, Fritos or with your favorite bread. Enjoy!


Pin It
Good Morning and welcome to another weekend. Was your week a busy one? Ours sure was, so I'm very happy to have the next 3 days "off". Yep, that's right we have a 3 day weekend and it's definitely appreciated!

Today I welcome Bekki, EMM super fan and regular here on Weekend Company, back into the kitchen with me! So grab a seat, something warm to drink and join us!


I am married to my wonderful husband Josh, have a beautiful 12 year old step daughter Amy and 2 fur baby sweethearts Minnie and Shadow. I am a self taught baker/cook. I taught Wilton cake decorating for a while, worked in a grocery store bakery and have even spent time baking wedding/birthday cakes as a hobby on the side. My love for cooking has been since childhood. Spending time with my mother, aunts, and grandmothers. Aiding in their recipes or just being there for the conversation. Its always been a source of calm, peace, and ultimate fulfillment. The idea that you add your love to each recipe and share it with the people you care about is such an amazing blessing to me in more ways then I can ever put on paper. I have decided writing a cookbook was something I could do to share my love of food with family, friends, and whomever else comes my way. I hope your day is blessed with all your favorite things. 

Happy Saturday EMM family! I hope the New year is treating you all well, and finds you in great spirits! Thank you again, Mrs. EMM for inviting me back to spend some time with you. :D

With the holidays now behind us and the new years resolutions still strong in our minds. I thought this recipe would warm us all and keep our goals in sight. I have been able to lose over 60 pounds in the past 6 months and I feel I still have a way to go. So, one of my goals is to cook at home more often. Keeping good hearty recipes, and my pantry full will surely help me. What goals have you set for yourself this year? Who's up for the challenge of meeting our goals? I know I am! Blessings and good luck in all of your endeavors. 


Turkey Chili
 2 c. precooked turkey, chopped
1 green bell pepper, chopped
1 medium onion, chopped
1 tbsp. olive oil
1 40 oz. can pinto beans
1 28 oz. can baked beans
1 28 oz. can diced tomatoes
1 ½ tbsp. chili powder
1 tbsp. granulated garlic
1 tbsp. cumin
½ tbsp. red chili flakes
Salt to taste
In medium soup pot, over medium heat add olive oil, onions, and bell peppers.  Stirring occasionally, cook until onions are clear and bell pepper has softened 7-10 minutes. Add beans and seasonings. Allow to simmer about 25 minutes until beans are completely heated through and veggies have softened slightly. Add turkey and stir to combine. Check seasoning for desired taste, adjust as needed. Chili is ready when turkey has warmed through. Serve hot with your choice of toppings, shredded cheese, sour cream, over tortilla chips, Fritos or with your favorite bread. Enjoy!


Pin It
reade more... Résuméabuiyad

Weekend Company {Guest Blogger Jean}


Good morning and welcome to another weekend! This week, I'm happy to have a brand new guest in my kitchen. I love that so many EMM Fans are getting in on the blogging fun! So if you are reading this, thinking you can't do it...YOU can! If you are interested, just email me at everydaymomsmeals@gmail.com and I can send you more details.

So grab a seat, pour yourself a cup of coffee (or even a bloody Mary) and welcome Jean to EMM~

Hello, my name is Jean Hurley.  I have never blogged before but enjoy cooking for family and friends.  Thanks Krista for giving me this opportunity.
I am a nurse by profession, also a wife, mother, and now a grandmother. I am from Massachusetts, but am currently living in Georgia.
This is a recipe that I used to make for my kids when they were young. It’s quick and easy. I usually served it with either French fries or a salad and they loved it.  It is also great for parties and even school lunches.  Feel free to play with the ingredients and change them to what your family loves.  I hope you enjoy it!

Meat Pie Sliders
Ingredients:
1 green pepper, diced
1 onion, diced
1 small pkg fresh mushrooms, diced
1 teaspoon minced garlic
1 lb ground beef
1 (15 oz) can of tomato sauce
½ (14.5 oz) can of diced tomatoes
1 cup shredded mozzarella
2-3 cans pop n’ fresh biscuits, I use Pillsbury Simply Biscuits
Salt and pepper
Garlic salt
Olive oil

    Preheat oven to 375.  In a large frying pan, sauté peppers, onions, mushrooms, and garlic in a Tablespoon of olive oil until tender.  Add ground beef and cook until crumbly and brown.  Add tomato sauce and diced tomatoes, salt and pepper, stirring until mixed. Remove from heat and stir in the mozzarella.
    Lightly grease a baking sheet.  Take one biscuit and flatten it out with your fingers, keeping the round shape. Place it onto the baking sheet.  Place a spoonful of filling mixture onto the biscuit, then take another biscuit, flatten it out and cover the first one, making sure to pinch the edges tightly.  Poke a hole in the top with a sharp knife. Lightly brush the top with olive oil and sprinkle with garlic salt.  Repeat with all the biscuits.
    Bake for 18-22 minutes at 375, until golden brown.  Serve with salad or French fries.
You can change the ingredients to suit your family,sometimes I add pepperoni and black olives.  You can also make them as big or small as you choose, dividing the biscuits in two for smaller appetizers or using Grands for teens.  I have also made this with pizza dough and cut into squares for a large crowd.


Pin It


Good morning and welcome to another weekend! This week, I'm happy to have a brand new guest in my kitchen. I love that so many EMM Fans are getting in on the blogging fun! So if you are reading this, thinking you can't do it...YOU can! If you are interested, just email me at everydaymomsmeals@gmail.com and I can send you more details.

So grab a seat, pour yourself a cup of coffee (or even a bloody Mary) and welcome Jean to EMM~

Hello, my name is Jean Hurley.  I have never blogged before but enjoy cooking for family and friends.  Thanks Krista for giving me this opportunity.
I am a nurse by profession, also a wife, mother, and now a grandmother. I am from Massachusetts, but am currently living in Georgia.
This is a recipe that I used to make for my kids when they were young. It’s quick and easy. I usually served it with either French fries or a salad and they loved it.  It is also great for parties and even school lunches.  Feel free to play with the ingredients and change them to what your family loves.  I hope you enjoy it!

Meat Pie Sliders
Ingredients:
1 green pepper, diced
1 onion, diced
1 small pkg fresh mushrooms, diced
1 teaspoon minced garlic
1 lb ground beef
1 (15 oz) can of tomato sauce
½ (14.5 oz) can of diced tomatoes
1 cup shredded mozzarella
2-3 cans pop n’ fresh biscuits, I use Pillsbury Simply Biscuits
Salt and pepper
Garlic salt
Olive oil

    Preheat oven to 375.  In a large frying pan, sauté peppers, onions, mushrooms, and garlic in a Tablespoon of olive oil until tender.  Add ground beef and cook until crumbly and brown.  Add tomato sauce and diced tomatoes, salt and pepper, stirring until mixed. Remove from heat and stir in the mozzarella.
    Lightly grease a baking sheet.  Take one biscuit and flatten it out with your fingers, keeping the round shape. Place it onto the baking sheet.  Place a spoonful of filling mixture onto the biscuit, then take another biscuit, flatten it out and cover the first one, making sure to pinch the edges tightly.  Poke a hole in the top with a sharp knife. Lightly brush the top with olive oil and sprinkle with garlic salt.  Repeat with all the biscuits.
    Bake for 18-22 minutes at 375, until golden brown.  Serve with salad or French fries.
You can change the ingredients to suit your family,sometimes I add pepperoni and black olives.  You can also make them as big or small as you choose, dividing the biscuits in two for smaller appetizers or using Grands for teens.  I have also made this with pizza dough and cut into squares for a large crowd.


Pin It
reade more... Résuméabuiyad