That's right! It's finally here! The biggest weekend in sports! I love the Super Bowl! Even when it's a year like this one when my beloved Steelers aren't in the fight, I still enjoy every minute. In fact, sometimes, not having a team in the "race" makes for a more relaxed night! I can just sit back, watch the game, laugh at the commercials, and most of all...EAT the food!
Let's face it, for those of you who don't even care about the game, you will still attend the party for the food! The wings, pizza, chili...all the usual suspects! It seems every year the food aspect of the night gets bigger and bigger, almost starting to over shadow the game itself. Almost.
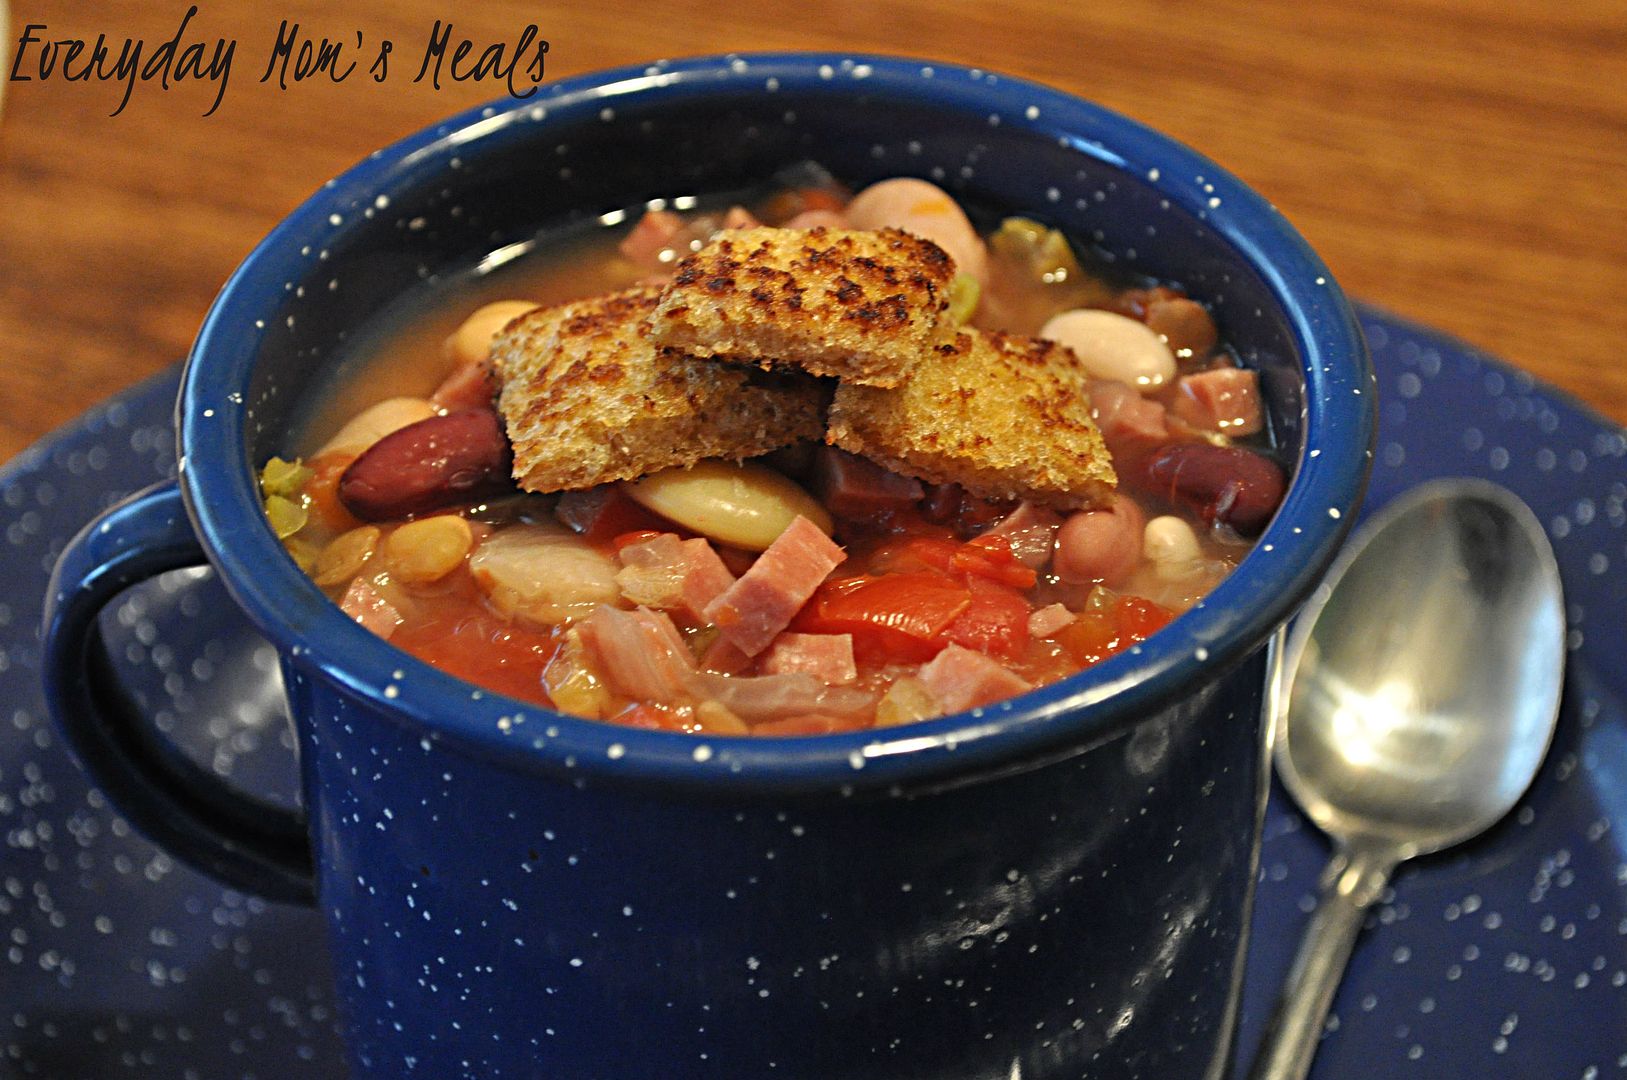
Today I've got something that would be perfect for your game day table. But they are also great for a simple dinner idea too. In fact, I served these with the soup I shared yesterday; and they made for something different and unique for dinner.
Bacon....cream cheese....crescent rolls. How bad could it be? I think your Super Bowl guests would go crazy for them! And they are nice for the host/hostess too because they can be made ahead of time, set in the fridge and baked off once guests are famished from all the screaming at the television!
Enjoy your football weekend, however you are experiencing it. Everyone from die hard fans to those who don't know a first down from a fumble can all agree on one thing...it's a great foodie party!
Bacon and Chive Pinwheels
2 cans (8 ct. each) crescent rolls
2 (2.5 oz) bags real bacon bits
1 (8 oz) tub chive cream cheese
Preheat oven to 375. Unroll each can of rolls into rectangles. You will have 4. Press perforations together, sealing. Using a butter knife, spread cream cheese over each rectangle. Evenly sprinkle bacon over each. Starting at one short end, roll each up, pressing gently to adhere each layer. Using a serrated knife, cut each roll into 5 pieces. Lay on ungreased baking sheet, cut side up. Bake 15-20 minutes until golden brown.

Appetizer at Very Good Recipes
Pin It
Let's face it, for those of you who don't even care about the game, you will still attend the party for the food! The wings, pizza, chili...all the usual suspects! It seems every year the food aspect of the night gets bigger and bigger, almost starting to over shadow the game itself. Almost.
Today I've got something that would be perfect for your game day table. But they are also great for a simple dinner idea too. In fact, I served these with the soup I shared yesterday; and they made for something different and unique for dinner.
Bacon....cream cheese....crescent rolls. How bad could it be? I think your Super Bowl guests would go crazy for them! And they are nice for the host/hostess too because they can be made ahead of time, set in the fridge and baked off once guests are famished from all the screaming at the television!
Enjoy your football weekend, however you are experiencing it. Everyone from die hard fans to those who don't know a first down from a fumble can all agree on one thing...it's a great foodie party!
Bacon and Chive Pinwheels
2 cans (8 ct. each) crescent rolls
2 (2.5 oz) bags real bacon bits
1 (8 oz) tub chive cream cheese
Preheat oven to 375. Unroll each can of rolls into rectangles. You will have 4. Press perforations together, sealing. Using a butter knife, spread cream cheese over each rectangle. Evenly sprinkle bacon over each. Starting at one short end, roll each up, pressing gently to adhere each layer. Using a serrated knife, cut each roll into 5 pieces. Lay on ungreased baking sheet, cut side up. Bake 15-20 minutes until golden brown.
Pin It
That's right! It's finally here! The biggest weekend in sports! I love the Super Bowl! Even when it's a year like this one when my beloved Steelers aren't in the fight, I still enjoy every minute. In fact, sometimes, not having a team in the "race" makes for a more relaxed night! I can just sit back, watch the game, laugh at the commercials, and most of all...EAT the food!
Let's face it, for those of you who don't even care about the game, you will still attend the party for the food! The wings, pizza, chili...all the usual suspects! It seems every year the food aspect of the night gets bigger and bigger, almost starting to over shadow the game itself. Almost.
Today I've got something that would be perfect for your game day table. But they are also great for a simple dinner idea too. In fact, I served these with the soup I shared yesterday; and they made for something different and unique for dinner.
Bacon....cream cheese....crescent rolls. How bad could it be? I think your Super Bowl guests would go crazy for them! And they are nice for the host/hostess too because they can be made ahead of time, set in the fridge and baked off once guests are famished from all the screaming at the television!
Enjoy your football weekend, however you are experiencing it. Everyone from die hard fans to those who don't know a first down from a fumble can all agree on one thing...it's a great foodie party!
Bacon and Chive Pinwheels
2 cans (8 ct. each) crescent rolls
2 (2.5 oz) bags real bacon bits
1 (8 oz) tub chive cream cheese
Preheat oven to 375. Unroll each can of rolls into rectangles. You will have 4. Press perforations together, sealing. Using a butter knife, spread cream cheese over each rectangle. Evenly sprinkle bacon over each. Starting at one short end, roll each up, pressing gently to adhere each layer. Using a serrated knife, cut each roll into 5 pieces. Lay on ungreased baking sheet, cut side up. Bake 15-20 minutes until golden brown.
Appetizer at Very Good Recipes
Pin It
reade more...
Let's face it, for those of you who don't even care about the game, you will still attend the party for the food! The wings, pizza, chili...all the usual suspects! It seems every year the food aspect of the night gets bigger and bigger, almost starting to over shadow the game itself. Almost.
Today I've got something that would be perfect for your game day table. But they are also great for a simple dinner idea too. In fact, I served these with the soup I shared yesterday; and they made for something different and unique for dinner.
Bacon....cream cheese....crescent rolls. How bad could it be? I think your Super Bowl guests would go crazy for them! And they are nice for the host/hostess too because they can be made ahead of time, set in the fridge and baked off once guests are famished from all the screaming at the television!
Enjoy your football weekend, however you are experiencing it. Everyone from die hard fans to those who don't know a first down from a fumble can all agree on one thing...it's a great foodie party!
Bacon and Chive Pinwheels
2 cans (8 ct. each) crescent rolls
2 (2.5 oz) bags real bacon bits
1 (8 oz) tub chive cream cheese
Preheat oven to 375. Unroll each can of rolls into rectangles. You will have 4. Press perforations together, sealing. Using a butter knife, spread cream cheese over each rectangle. Evenly sprinkle bacon over each. Starting at one short end, roll each up, pressing gently to adhere each layer. Using a serrated knife, cut each roll into 5 pieces. Lay on ungreased baking sheet, cut side up. Bake 15-20 minutes until golden brown.
Pin It

.JPG)