Sometimes it amazes me just how many versions of the same dish can be found. Seriously, with certain things, the possibilities are endless. To the point that I find myself seeing the same dish prepared a thousand different ways. Between cookbooks, magazines, blogs, websites....you can find certain things made so many different ways you could have a new one every night of year and never repeat! So when I come across a brand new way of preparing such a dish, it definitely makes me sit up and take notice!
This was the case when I first saw this recipe prepared on Rachael Ray's daytime talk show. I was only half listening, so when she said she was "going to make a coleslaw" I didn't even look up from my computer. But then she said the magic words that made me stop what I was doing and make sure I was listening. Pickle Juice.
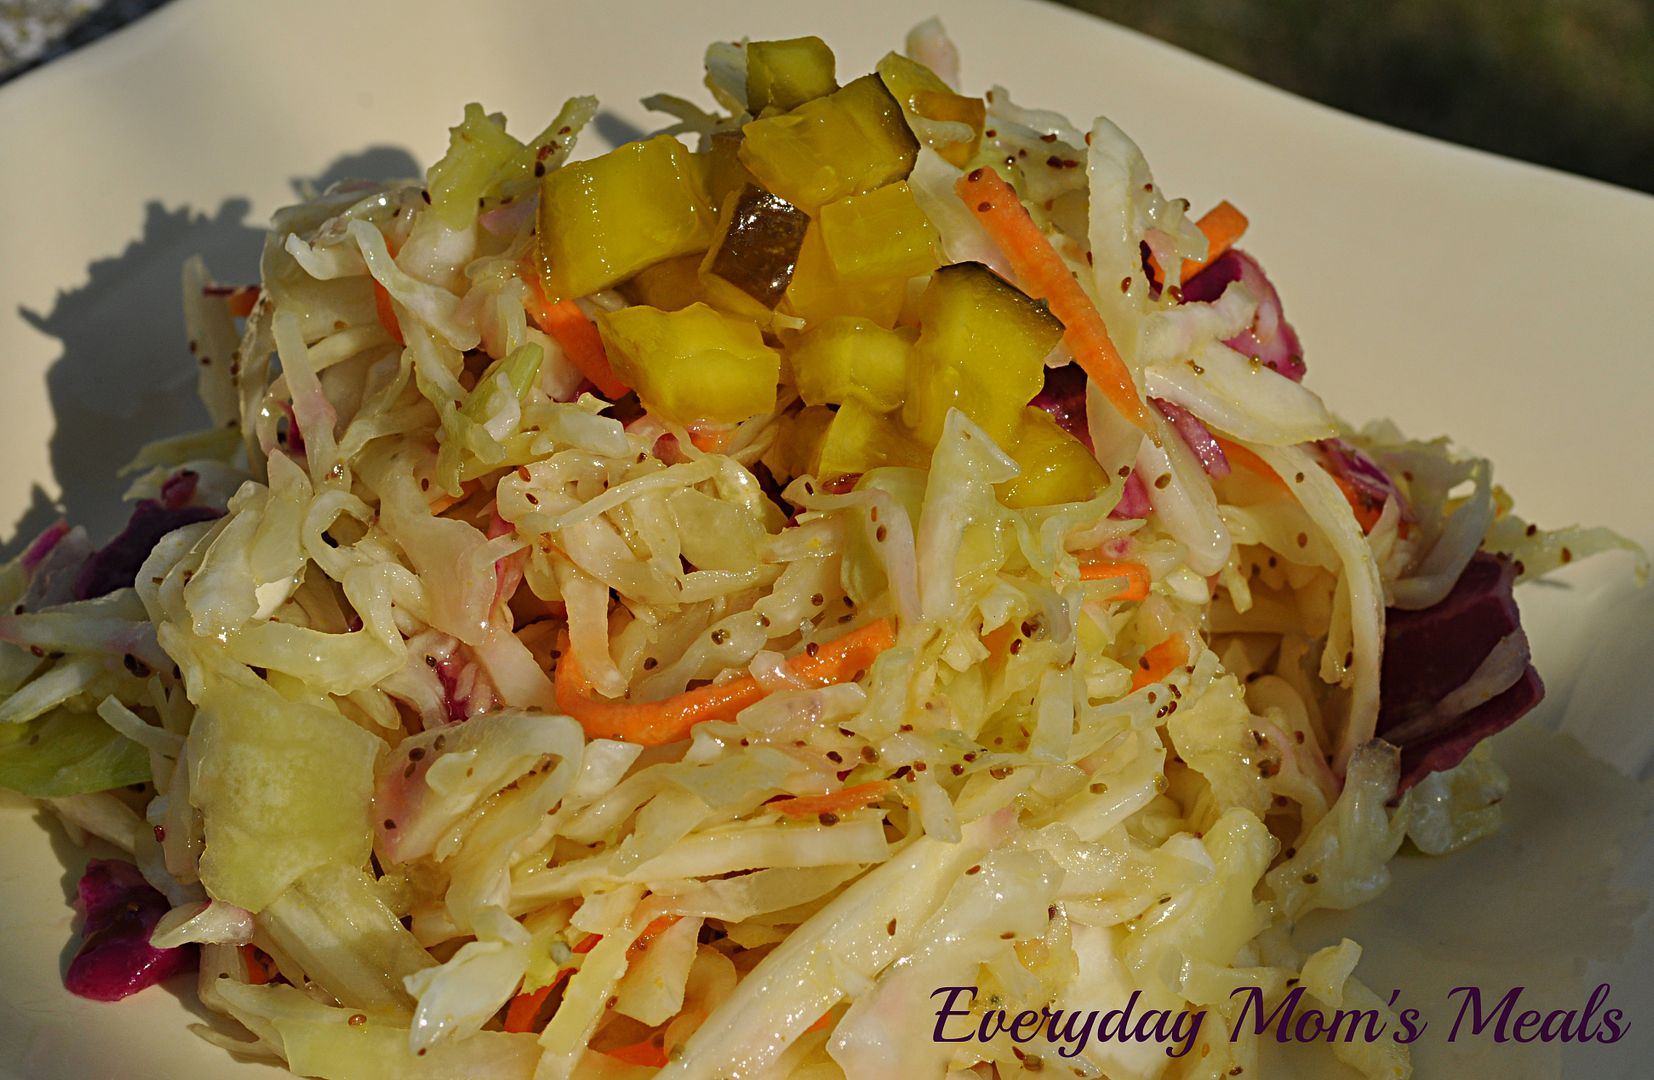
Yep, the secret ingredient in this coleslaw is just a hint of pickle juice. Now, we are pickle people. We love all kinds, all shapes and sizes. From the baby gherkins to the huge dill pickles on a stick we enjoy at a fair. So of course my ears perked right up when I heard this.
Something else that makes this a little different than other slaws I make a lot is the dressing. Not only is it not creamy, it's also cooked. So technically, this could be served as a warm slaw, but we like ours cold. It's sweet and sour, crisp and crunchy! This would be a fantastic slaw for on top of a pulled pork sandwich too!
If you are still looking for sides for your July 4th barbecue, maybe this can be added to your list. And be sure to top it with those few chopped pickles! They will be just enough to peek your guests' interest!
Oil and Vinegar Slaw Adapted from Rachael Ray
2 ( 16 oz.) packages coleslaw mix
3/4 c. cider vinegar
1/4 c. bread and butter pickle juice
2 TBS yellow mustard
1 tsp. celery seed
2 cloves garlic, minced
1/2 c. white sugar
1 TBS brown sugar
2 tsp. Kosher salt
1/2 c. vegetable oil
2 bread and butter pickles, diced for garnish
In a small pot, combine vinegar, pickle juice, mustard, celery seed, garlic, both sugars and salt. Heat on medium just until sugar and salt dissolve. Stir well. Reduce heat to low and slowly whisk in oil. Continue whisking until well combined. In a large bowl place coleslaw mix. Pour dressing over and mix well. Cover and chill until serving, up to the next day. Garnish with diced pickle.
Coleslaw at Very Good Recipes
Pin It
This was the case when I first saw this recipe prepared on Rachael Ray's daytime talk show. I was only half listening, so when she said she was "going to make a coleslaw" I didn't even look up from my computer. But then she said the magic words that made me stop what I was doing and make sure I was listening. Pickle Juice.
Yep, the secret ingredient in this coleslaw is just a hint of pickle juice. Now, we are pickle people. We love all kinds, all shapes and sizes. From the baby gherkins to the huge dill pickles on a stick we enjoy at a fair. So of course my ears perked right up when I heard this.
Something else that makes this a little different than other slaws I make a lot is the dressing. Not only is it not creamy, it's also cooked. So technically, this could be served as a warm slaw, but we like ours cold. It's sweet and sour, crisp and crunchy! This would be a fantastic slaw for on top of a pulled pork sandwich too!
If you are still looking for sides for your July 4th barbecue, maybe this can be added to your list. And be sure to top it with those few chopped pickles! They will be just enough to peek your guests' interest!
Oil and Vinegar Slaw Adapted from Rachael Ray
2 ( 16 oz.) packages coleslaw mix
3/4 c. cider vinegar
1/4 c. bread and butter pickle juice
2 TBS yellow mustard
1 tsp. celery seed
2 cloves garlic, minced
1/2 c. white sugar
1 TBS brown sugar
2 tsp. Kosher salt
1/2 c. vegetable oil
2 bread and butter pickles, diced for garnish
In a small pot, combine vinegar, pickle juice, mustard, celery seed, garlic, both sugars and salt. Heat on medium just until sugar and salt dissolve. Stir well. Reduce heat to low and slowly whisk in oil. Continue whisking until well combined. In a large bowl place coleslaw mix. Pour dressing over and mix well. Cover and chill until serving, up to the next day. Garnish with diced pickle.
Coleslaw at Very Good Recipes
Pin It
Sometimes it amazes me just how many versions of the same dish can be found. Seriously, with certain things, the possibilities are endless. To the point that I find myself seeing the same dish prepared a thousand different ways. Between cookbooks, magazines, blogs, websites....you can find certain things made so many different ways you could have a new one every night of year and never repeat! So when I come across a brand new way of preparing such a dish, it definitely makes me sit up and take notice!
This was the case when I first saw this recipe prepared on Rachael Ray's daytime talk show. I was only half listening, so when she said she was "going to make a coleslaw" I didn't even look up from my computer. But then she said the magic words that made me stop what I was doing and make sure I was listening. Pickle Juice.
Yep, the secret ingredient in this coleslaw is just a hint of pickle juice. Now, we are pickle people. We love all kinds, all shapes and sizes. From the baby gherkins to the huge dill pickles on a stick we enjoy at a fair. So of course my ears perked right up when I heard this.
Something else that makes this a little different than other slaws I make a lot is the dressing. Not only is it not creamy, it's also cooked. So technically, this could be served as a warm slaw, but we like ours cold. It's sweet and sour, crisp and crunchy! This would be a fantastic slaw for on top of a pulled pork sandwich too!
If you are still looking for sides for your July 4th barbecue, maybe this can be added to your list. And be sure to top it with those few chopped pickles! They will be just enough to peek your guests' interest!
Oil and Vinegar Slaw Adapted from Rachael Ray
2 ( 16 oz.) packages coleslaw mix
3/4 c. cider vinegar
1/4 c. bread and butter pickle juice
2 TBS yellow mustard
1 tsp. celery seed
2 cloves garlic, minced
1/2 c. white sugar
1 TBS brown sugar
2 tsp. Kosher salt
1/2 c. vegetable oil
2 bread and butter pickles, diced for garnish
In a small pot, combine vinegar, pickle juice, mustard, celery seed, garlic, both sugars and salt. Heat on medium just until sugar and salt dissolve. Stir well. Reduce heat to low and slowly whisk in oil. Continue whisking until well combined. In a large bowl place coleslaw mix. Pour dressing over and mix well. Cover and chill until serving, up to the next day. Garnish with diced pickle.
Coleslaw at Very Good Recipes
Pin It
reade more...
This was the case when I first saw this recipe prepared on Rachael Ray's daytime talk show. I was only half listening, so when she said she was "going to make a coleslaw" I didn't even look up from my computer. But then she said the magic words that made me stop what I was doing and make sure I was listening. Pickle Juice.
Yep, the secret ingredient in this coleslaw is just a hint of pickle juice. Now, we are pickle people. We love all kinds, all shapes and sizes. From the baby gherkins to the huge dill pickles on a stick we enjoy at a fair. So of course my ears perked right up when I heard this.
Something else that makes this a little different than other slaws I make a lot is the dressing. Not only is it not creamy, it's also cooked. So technically, this could be served as a warm slaw, but we like ours cold. It's sweet and sour, crisp and crunchy! This would be a fantastic slaw for on top of a pulled pork sandwich too!
If you are still looking for sides for your July 4th barbecue, maybe this can be added to your list. And be sure to top it with those few chopped pickles! They will be just enough to peek your guests' interest!
Oil and Vinegar Slaw Adapted from Rachael Ray
2 ( 16 oz.) packages coleslaw mix
3/4 c. cider vinegar
1/4 c. bread and butter pickle juice
2 TBS yellow mustard
1 tsp. celery seed
2 cloves garlic, minced
1/2 c. white sugar
1 TBS brown sugar
2 tsp. Kosher salt
1/2 c. vegetable oil
2 bread and butter pickles, diced for garnish
In a small pot, combine vinegar, pickle juice, mustard, celery seed, garlic, both sugars and salt. Heat on medium just until sugar and salt dissolve. Stir well. Reduce heat to low and slowly whisk in oil. Continue whisking until well combined. In a large bowl place coleslaw mix. Pour dressing over and mix well. Cover and chill until serving, up to the next day. Garnish with diced pickle.
Coleslaw at Very Good Recipes
Pin It