Whew....it's December 1st! Can you believe it? I am still in disbelief myself, because I'm pretty sure Labor Day was just yesterday, but alas the calendar doesn't lie. However, I will say with the hustle and bustle of the holiday season upon us, it's nice to know ALL of my Christmas shopping is not only DONE, but also WRAPPED!!! (I realize some of you are leaving now in disgust, and I apologize.)
I hope you had a great week, and are ready for something yummy for the weekend. The is perfect for a brunch, or keep it bookmarked (or pinned) for those family visits that are just around the corner! Please welcome Colleen back to EMM~
.jpg)
Pin It
I hope you had a great week, and are ready for something yummy for the weekend. The is perfect for a brunch, or keep it bookmarked (or pinned) for those family visits that are just around the corner! Please welcome Colleen back to EMM~
.jpg)
Hi Everyone! I'm Colleen and I'm so happy to be back doing a guest spot at my favorite foodie blog. The recipe I'm going to share with you was given to me fairly recently by my dear friend, Shawna. When I told her that we were going to have a wedding rehearsal brunch for my son's upcoming wedding, she said "I've got just the recipe for you!" I was so impressed with this one that I immediately took pictures knowing that I would one day want to share it. This dish got rave reviews for the rehearsal brunch. I hope you all give it a try and enjoy it as much as we all did. I think it would make a great holiday brunch item, as well. Or maybe you could just liven up your weekend and serve this to your family one morning! They'd be thanking you all day.
By the way, just in case you're wondering, the wedding rehearsal went great and was followed a couple days later by a beautiful wedding. The newlyweds have been married almost 2 months now and are doing very well. I'm happy to have them living just down the street from me and enjoy having them pop in now and then ... even though it's mostly to raid my refrigerator. LOL! The picture I'm including is of me with the happy new couple on their wedding day. :)
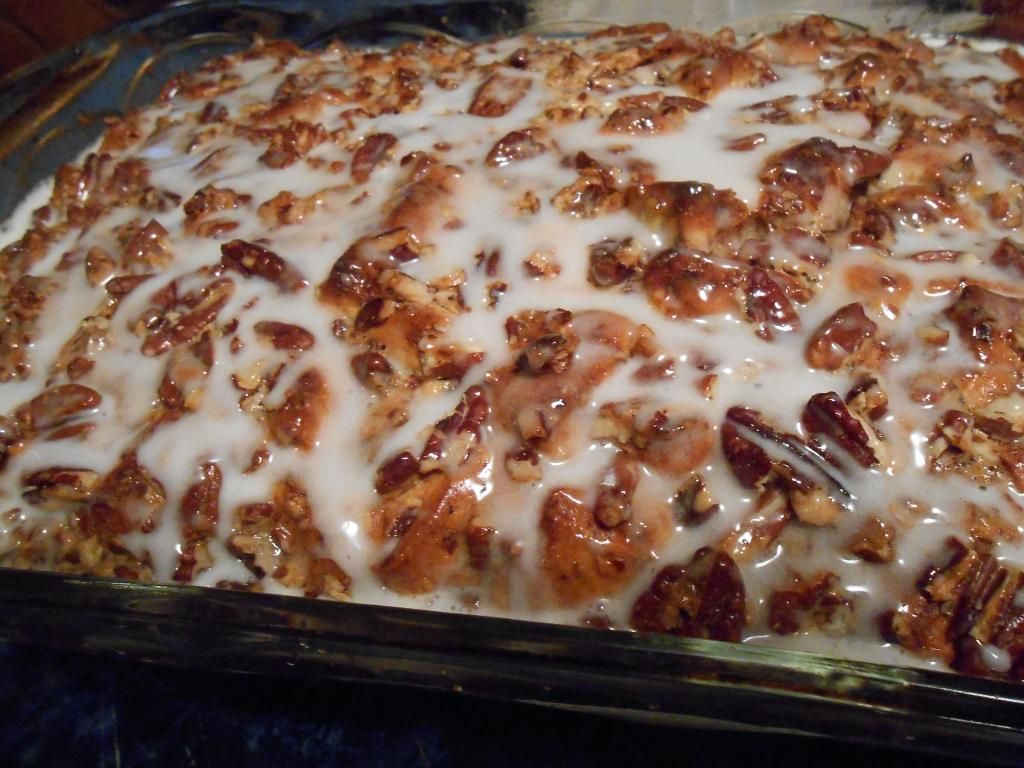
French Toast Casserole
2 tubes of refrigerated cinnamon rolls
1 cup maple syrup
6 eggs
1/2 c. heavy whipping cream
2 tsp. vanilla
1 tsp cinnamon (or to taste)
1 - 2 cups chopped nuts (optional)
Preheat oven to the temp listed on the package of cinnamon rolls (they can sometimes be different) and grease a 9 x 13 casserole dish.
Cut the cinnamon rolls into bite size pieces, reserving the icing packets for later. Place all the cut up pieces of cinnamon rolls into the buttered casserole dish. Pour the maple syrup over top of the cinnamon rolls covering as much area as you can.
In a bowl, beat the eggs and whipping cream just until it all comes together nicely. Add in the vanilla and cinnamon and mix thoroughly. Pour this mixture over the cinnamon roll mixture.
Add the chopped nuts to the top, if you are using.
Bake for about 35-40 minutes until the mixture doesn't jiggle when you shake the pan slightly. When you take it out of the oven, open the reserved packets of icing mixture and drizzle them over the casserole. Serve warm.
Notes: This is best done in a glass casserole dish but if you do bake it in a metal or foil pan, don't add the nuts to the top until halfway through the baking process to avoid burning them. You can also bake this the day before you want to eat it. Just leave off the icing and refrigerate the casserole overnight. The next morning, heat it in a moderate oven just to re-warm it and then top with the icing after warming.
Thanks to Mrs. Everyday for allowing me to come by and share with you all once again. I hope you all have a very happy weekend full of family, love and good food. :)
Pin It
Whew....it's December 1st! Can you believe it? I am still in disbelief myself, because I'm pretty sure Labor Day was just yesterday, but alas the calendar doesn't lie. However, I will say with the hustle and bustle of the holiday season upon us, it's nice to know ALL of my Christmas shopping is not only DONE, but also WRAPPED!!! (I realize some of you are leaving now in disgust, and I apologize.)
I hope you had a great week, and are ready for something yummy for the weekend. The is perfect for a brunch, or keep it bookmarked (or pinned) for those family visits that are just around the corner! Please welcome Colleen back to EMM~
Pin It
reade more...
I hope you had a great week, and are ready for something yummy for the weekend. The is perfect for a brunch, or keep it bookmarked (or pinned) for those family visits that are just around the corner! Please welcome Colleen back to EMM~
Hi Everyone! I'm Colleen and I'm so happy to be back doing a guest spot at my favorite foodie blog. The recipe I'm going to share with you was given to me fairly recently by my dear friend, Shawna. When I told her that we were going to have a wedding rehearsal brunch for my son's upcoming wedding, she said "I've got just the recipe for you!" I was so impressed with this one that I immediately took pictures knowing that I would one day want to share it. This dish got rave reviews for the rehearsal brunch. I hope you all give it a try and enjoy it as much as we all did. I think it would make a great holiday brunch item, as well. Or maybe you could just liven up your weekend and serve this to your family one morning! They'd be thanking you all day.
By the way, just in case you're wondering, the wedding rehearsal went great and was followed a couple days later by a beautiful wedding. The newlyweds have been married almost 2 months now and are doing very well. I'm happy to have them living just down the street from me and enjoy having them pop in now and then ... even though it's mostly to raid my refrigerator. LOL! The picture I'm including is of me with the happy new couple on their wedding day. :)
French Toast Casserole
2 tubes of refrigerated cinnamon rolls
1 cup maple syrup
6 eggs
1/2 c. heavy whipping cream
2 tsp. vanilla
1 tsp cinnamon (or to taste)
1 - 2 cups chopped nuts (optional)
Preheat oven to the temp listed on the package of cinnamon rolls (they can sometimes be different) and grease a 9 x 13 casserole dish.
Cut the cinnamon rolls into bite size pieces, reserving the icing packets for later. Place all the cut up pieces of cinnamon rolls into the buttered casserole dish. Pour the maple syrup over top of the cinnamon rolls covering as much area as you can.
In a bowl, beat the eggs and whipping cream just until it all comes together nicely. Add in the vanilla and cinnamon and mix thoroughly. Pour this mixture over the cinnamon roll mixture.
Add the chopped nuts to the top, if you are using.
Bake for about 35-40 minutes until the mixture doesn't jiggle when you shake the pan slightly. When you take it out of the oven, open the reserved packets of icing mixture and drizzle them over the casserole. Serve warm.
Notes: This is best done in a glass casserole dish but if you do bake it in a metal or foil pan, don't add the nuts to the top until halfway through the baking process to avoid burning them. You can also bake this the day before you want to eat it. Just leave off the icing and refrigerate the casserole overnight. The next morning, heat it in a moderate oven just to re-warm it and then top with the icing after warming.
Thanks to Mrs. Everyday for allowing me to come by and share with you all once again. I hope you all have a very happy weekend full of family, love and good food. :)
Pin It